This site is supported by our readers. We may earn a commission, at no cost to you, if you purchase through links.
First, clean and oil your machine to keep those stitches smooth and seamless.
Use a patchwork foot—it’s like magic for consistent seams!
Choose high-quality thread and the right needle; trust me, your quilt will thank you.
Slice your fabric with a steady hand and a sharp rotary cutter for precision.
Keep those stitch lengths shorter so seams hold firm, and always aim for a true ¼-inch seam allowance—it’s the gold standard!
Ready to step up your quilting game? Let’s unravel more tips on making quilting a breeze!
Table Of Contents
- Key Takeaways
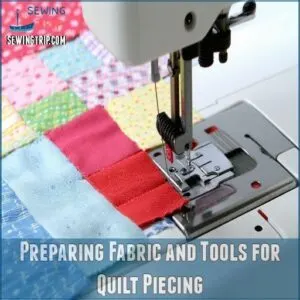
- Preparing Fabric and Tools for Quilt Piecing
- Achieving Accurate Seam Allowances
- Pressing Seams for Professional Finish
- Choosing The Right Thread and Stitch Length
- Mastering The Patchwork Foot for Quilt Piecing
- Essential Techniques for Quilt Piecing
- Setting Up Your Sewing Machine for Quilt Piecing
- Troubleshooting Common Sewing Machine Issues
- Pressing for Success in Quilt Piecing
- Joining Pieces, Blocks, and Rows With Ease
- Frequently Asked Questions (FAQs)
- Conclusion
Key Takeaways
- Clean and oil your sewing machine regularly to ensure smooth and seamless stitches.
- Use a patchwork foot for consistent ¼-inch seam allowances, crucial for accurate quilt piecing.
- Shorten the stitch length to around 1.5 mm to strengthen seams and prevent unraveling.
- Press seams properly, either open for flatness or as-sewn for durability, to enhance the professional finish of your quilt.
Preparing Fabric and Tools for Quilt Piecing
When you’re ready to start quilt piecing, a little prep work with your fabric and tools goes a long way to keep everything smooth and stress-free.
Wash and press your fabric to knock out those pesky wrinkles, and grab that trusty patchwork foot for seam accuracy that’ll have you sewing like a pro!
Washing and Pressing Fabric
Before diving into quilting, make sure your fabric is in tip-top shape.
Give it a good wash to banish creases and chemicals.
Pressing with tools like a trusty iron or a wool mat keeps those seams straight and smooth.
Think of it as setting the stage for your masterpiece—getting the basics right makes all the difference.
Importance of Starch in Quilt Piecing Fabric
When prepping fabric for quilt piecing, don’t underestimate the power of starch.
Think of it as giving your fabric a little backbone, smoothing out those wrinkles and creating a crisp canvas.
Starch types vary, but a spray bottle is your best friend.
This added stiffness helps in precision cutting and seam alignment, enhancing your sewing machine prowess.
Benefits of Using a Patchwork Foot
The patchwork foot is your secret weapon for precise piecing.
Achieving accurate seams and consistent allowances becomes a breeze with this nifty tool.
It helps maintain an easy measurement, especially with a quilting machine foot.
Its narrow base guarantees your quilting machine needle hits the mark, making efficient quilting a reality.
You’ll wonder how you ever quilted without it!
Essential Quilting Tools for Accuracy
Get started with quilting like a pro with these essential tools.
A seam gauge helps nail that scant 1/4" seam, while the Tucker Trimmer guarantees precision trimming.
Let the Quilter’s Magic Wand mark your paths, and use a metal stiletto for fabric control.
Don’t forget a fabric folding pen to keep seams flat.
These tools make quilting accuracy a breeze!
Achieving Accurate Seam Allowances
Perfecting your seam allowances can feel like coaxing a stubborn cat into its carrier, but with the right tips, it becomes much easier.
Adjust your needle position and use a seam gauge to hit that sweet scant 1/4 inch every time, and you’ll boost your quilting game considerably.
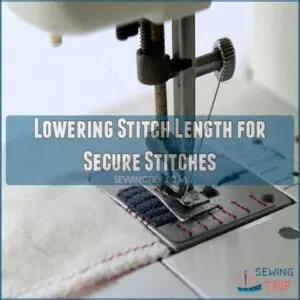
Lowering Stitch Length for Secure Stitches
Because a shorter stitch length means less seam ripping, lower your stitch length to around 1.5 mm for quilting.
This creates stronger, more secure stitches, boosting your stitch strength.
It’s a small change, but it makes a big difference in the overall strength and durability of your seams, no matter your fabric type.
Plus, you’ll be less likely to end up with those annoying loose threads!
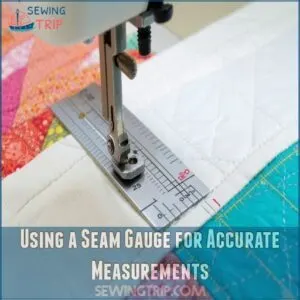
Using a Seam Gauge for Accurate Measurements
If you’ve tackled the short stitch length, think of using a seam gauge as your next step. It’s like your trusty sidekick in ensuring accuracy. Here’s why:
- Precision: Measure to the millimeter and feel like a pro.
- Ease: Avoid pesky guesswork.
- Confidence: Get those seams spot-on every single time.
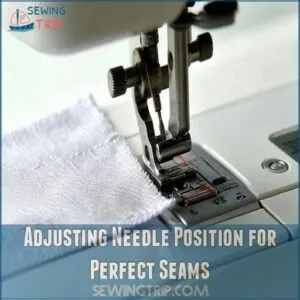
Adjusting Needle Position for Perfect Seams
Perfect seams often hinge on adjusting your needle position.
Think of it as aligning your car’s tires—without precision, you’re veering off course!
Your sewing machine might be picky; setting the needle just right ensures a proper seam allowance.
Different fabrics and thread thickness require tweaks.
So, check your machine settings, experimenting until accuracy meets your sewing dreams!
Pressing Seams for Professional Finish
Pressing seams is like the secret handshake of quilting—done right, it transforms your quilt from homemade to professional with a little extra flair.
Opening seams for a sleek look or pressing them as-sewn for durability, mastering the right technique is your hidden weapon for quilt piecing success.
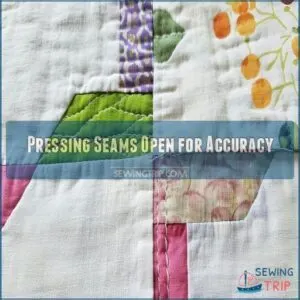
Pressing Seams Open for Accuracy
Pressing seams open might spark debates, but it’s a game-changer for quilt accuracy.
Like opening a good book, it reveals flat, precise seams that make piecing smoother.
Seams lying flat helps avoid the dreaded bulge.
Just grab your seam guide, aim for that scant 1/4 seam, and watch your quilt blocks come together perfectly.
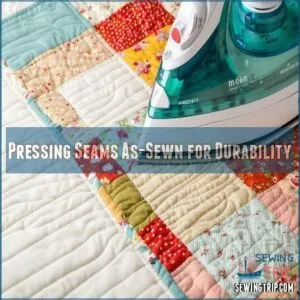
Pressing Seams As-Sewn for Durability
Lock in your stitches by pressing seams as-sewn for extra durability.
This technique helps avoid unraveling by letting stitches meld into the fabric.
Picture it like hugging your stitches into place!
The stitching stays secure and keeps its shape.
This nifty method enhances the seam allowance impact, ensuring that your quilt withstands many snuggles and washes.
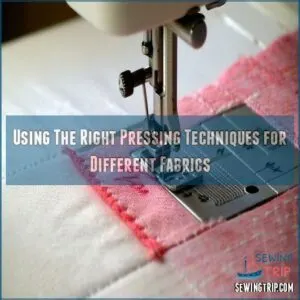
Using The Right Pressing Techniques for Different Fabrics
Now that you’ve nailed durability, let’s chat about using the right pressing techniques for various fabric types.
Different materials like cotton or linen need unique attention from your sewing machine.
Avoid pressing mistakes by choosing suitable tools and methods.
For tricky seams, control the direction and watch how it transforms fabric preparation into a smooth quilting journey.
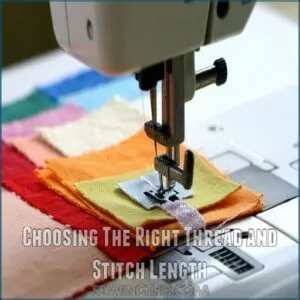
Choosing The Right Thread and Stitch Length
Choosing the right thread and stitch length is key to beautiful, durable seams.
Think of it as the secret sauce for your quilt piecing – the right thread and stitch length will make all the difference!
Benefits of Using 60-Weight Thread
While pressing is a game changer, thread choice seals the deal.
Opting for 60-weight thread dramatically cuts bulk without sacrificing seam strength.
Here’s why it’s a favorite:
- Smoother Quilt Appearance: Your stitches blend beautifully.
- Thread Choice Ease: It’s versatile for quilting.
- Sewing Machine Harmony: Keeps quilting machine tension balanced.
Your quilts will thank you!
Importance of Smaller Stitch Lengths
Shorten those stitches! A smaller stitch length makes seams stronger, melding them seamlessly into your fabric.
You get better seam appearance and durability—like magic!
When you’re zipping along at top quilting machine speed, this tweak prevents fabric from slipping.
Plus, it’s one of those sewing machine quilting tips that instantly ups your stitch quality and keeps tension issues at bay.
Recommended Thread Options for Quilt Piecing
Quilt piecing is all about picking the right thread. Consider these choices:
- 60-weight thread: Ideal for reducing bulk without sacrificing strength. Try Precensia 60-weight cotton.
- Lighter bobbin thread: Balances tension and smooth stitching.
- Color: Match your quilt design or go bold for contrast.
Experiment with these, and your quilt will shine!
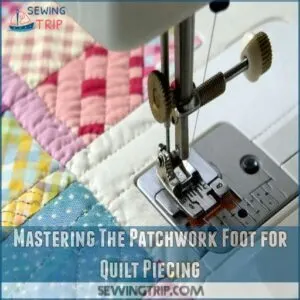
Mastering The Patchwork Foot for Quilt Piecing
You’ve probably heard the patchwork foot described as a quilter’s best friend, and it’s true—this little tool can work wonders for your seam accuracy.
By mastering its features, you’ll achieve that perfect scant 1/4-inch seam allowance and take your quilt piecing skills to a whole new level.
Features of a Patchwork Foot
Imagine a patchwork foot as your quilting buddy, designed to boost alignment and accuracy.
It has flanges for perfect seam allowances, keeping your fabric steady.
With clear markings and sometimes a tiny blade, it presses fabric like a pro.
Adjust the quilting machine foot pressure and stitch length for seamless results.
Trust your quilting machine to do the rest!
Using a Patchwork Foot for Accurate Seam Allowances
With a patchwork foot, seam allowance consistency becomes a breeze.
Check out these benefits:
- Aligned Fabric Edges: Line up your fabric perfectly every time.
- Fixed Quarter-Inch Guides: Seam allowances are precise, not guesswork.
- Optimal Thread Use: Sized for different thicknesses to reduce bulk.
- Stitch Length Impact: Keeps your seams secure, not just stitched.
These quilting machine tips help streamline your sewing machine adventures!
Tips for Working With a Patchwork Foot
Often, you’ll find that using a patchwork foot dramatically improves accuracy.
Make sure the fabric edge aligns perfectly with the foot’s markings for a consistent ¼-inch seam allowance.
Some patchwork feet have a blade; use it to keep the fabric snug against the foot, similar to how a zigzag foot for various stitches can help with different stitch patterns.
Adjusting your needle position can also help fine-tune your seam allowance, even with a patchwork foot.
Experiment to find what works best for you!
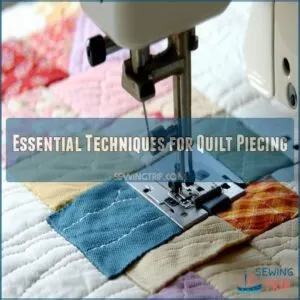
Essential Techniques for Quilt Piecing
When you’re piecing quilts, a few essential techniques can really elevate your craft, making even complex patterns come together seamlessly.
From using scrap leaders and finishers to mastering diagonal seams, these tips guarantee precision and add a fun twist to your quilting adventures.
Using Scrap Leaders and Finishers
Moving from patchwork foot techniques, let’s chat about using scrap leaders and finishers.
These handy scraps improve your sewing game by:
- Preventing nests at seam beginnings.
- Reducing bobbin thread waste.
- Boosting sewing efficiency through chain piecing.
- Enhancing quilting tutorials with concrete tips.
They’re game-changers in the quilting process, making fabric cutting and assembly a breeze!
Sewing Diagonally on Squares
Moving from scrap leaders to sewing diagonally on squares opens up a new world of quilting precision.
Bias stretching is like a wild horse; it needs taming.
Use the Quilter’s Magic Wand for triangle accuracy.
Here’s a tip: keep that seam allowance tight and manage fabric control like a pro with smart sewing machine tips.
| Tool | Purpose |
|---|---|
| Magic Wand | Marks for accuracy |
| Sewing Guides | Makes sure precision |
| Quilting Rulers | Measures consistency |
| Stitch Direction | Controls stretching |
Benefits of The Stitch and Flip Method
Embrace the Stitch and Flip Method for quilt piecing; it’s as handy as a Swiss Army knife! Here’s why you’ll love it:
- Accuracy: Guarantees precise corners and edges.
- Efficiency: Quickens the quilting process.
- Versatility: Suitable for various patterns and shapes.
- Ease: Simplifies complex designs with minimal fuss.
It’s quilting fun with a twist!
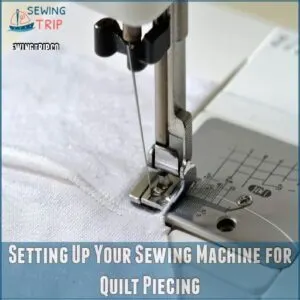
Setting Up Your Sewing Machine for Quilt Piecing
Get your sewing machine ready for quilt piecing by adjusting the needle position and swapping out the throat plate—yes, it’s time to channel your inner mechanic!
Seam guide can transform your sewing from "oops" to "awesome" with spot-on seam accuracy.
Adjusting The Needle Position
Tweaking your needle position can be a game changer in achieving that perfect seam allowance.
This adjustment is especially important when working with machines featuring an adjustable stitch width, as it allows for delicate seams and bold decorative patterns.
Imagine it as fine-tuning your guitar strings for the right note, ensuring the fabric glides through smoothly regardless of its thickness or type.
A small shift offers greater sewing machine control and boosts your sewing accuracy, letting you hit just the right stitch length.
Changing The Throat Plate
Let’s talk about changing your throat plate. It’s easier than you think. Different throat plates suit different needs.
If you’re looking to upgrade or replace your throat plate, check out a variety of options available online at quilt piecing supplies.
- Throat plate types: Open toe plates are great for free-motion quilting.
- Throat plate size: Choose the right size for your project.
- Throat plate issues: A damaged plate can cause skipped stitches.
- Throat plate replacement: Replacing it’s often a simple process.
Remember to check your sewing machine’s manual for specifics!
Using a Seam Guide for Accurate Seams
After switching the throat plate, tackle seam accuracy with a seam guide.
It’s your trusty sidekick for nailing those perfect seam allowances on your quilting machine.
Whether working with tricky fabrics or aiming for jaw-dropping precision, the right seam guide smooths the way.
Imagine it as a GPS for quilting—keeping every stitch on course for precision sewing.
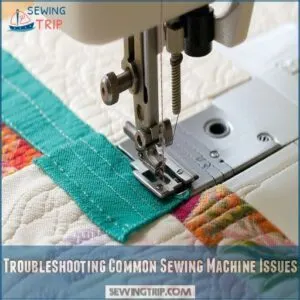
Troubleshooting Common Sewing Machine Issues
Got tangled threads or skipped stitches? Don’t let these hiccups unravel your quilting joy—let’s tackle common sewing machine glitches with ease and a little humor!
Common Problems and Solutions
When your sewing machine’s jamming or the quilting machine thread’s going rogue, it can feel like herding cats.
Thread-tension issues? They’re often the culprit.
For skipped stitches, check your needle and thread pairings.
If you’re still experiencing problems, consider checking out bobbin winding solutions to help resolve the issue.
Bobbin-winding problems or needle-breakage issues? Make sure the bobbin is snug, and use the right quilting machine accessories for smooth sewing.
Tips for Maintaining Your Sewing Machine
You’ve tackled sewing machine issues; now let’s keep your machine purring like a kitten.
Regular maintenance is your secret sauce.
For a more in-depth look, check out these sewing machine maintenance tips and tricks.
Here are the basics:
- Lubrication: Oiling keeps parts moving smoothly.
- Needle Replacement: Don’t neglect this; it saves headaches.
- Cleaning: Dust bunnies aren’t welcome here.
- Tension and Thread: Balance these for a seamless stitch.
Keep your quilting machine happy!
Pressing for Success in Quilt Piecing
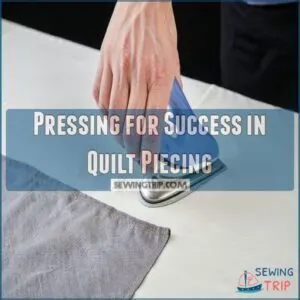
In quilt piecing, pressing is your secret weapon for success—think of it as convincing those seams to behave and lay flat.
Use tools like a wool mat to keep things smooth and precise, and you’ll notice how a bit of heat and pressure can make all the difference in the world.
Importance of Pressing in Quilt Piecing
Pressing isn’t just a "nice to-do" in quilt piecing—it’s essential for success.
Picture seams laying flat like soldiers on parade, giving your quilt that professional look.
To achieve this, it’s important to understand how to press sewn fabric.
Ever heard the pressing open debate? It’s a hot topic, but whatever you choose, the right pressing tools make all the difference.
Taming seams transforms a project from good to fabulous!
Tips for Pressing Seams for Accuracy
Many seam pressing techniques exist, but mastering a few key steps makes all the difference.
First, always press your seams as you sew to set those stitches.
Then, carefully press them open—it truly creates flatter, more accurate blocks.
Avoid those common pressing mistakes by using a light touch and a hot, clean iron.
Remember, consistent seam flatness is your secret weapon for perfectly pieced quilts!
Benefits of Using a Wool Mat
After perfecting your seam pressing, a wool mat boosts your quilting game with consistent heat reflection and even distribution.
Like magic, it improves seam flatness, ensuring a smoother quilting process.
Think of it as your secret teammate, helping to achieve a professional finish with ease.
Enjoy the freedom and control it brings to your quilt piecing adventures!
Joining Pieces, Blocks, and Rows With Ease
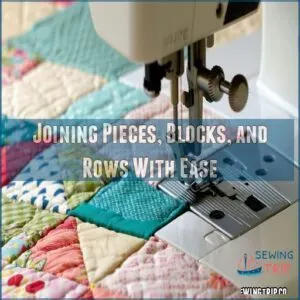
Joining quilt pieces, blocks, and rows can feel like fitting together a fabric puzzle, but with the right techniques, it’s a breeze.
Use a specialty foot for precise seams, ensuring your quilt holds together stitch by stitch with ease.
Tips for Joining Pieces Accurately
Connecting your quilt pieces accurately can feel like piecing together a puzzle with no edge pieces.
Keep those seam allowances tight and use accurate stitching to align each seam perfectly.
Also ensure you master seam construction techniques for a professional look.
Think of it like guiding a friend through a dance—steady hands and clear steps.
With the right pressing techniques, your seams will sit flat, showcasing your precise piecing methods.
Techniques for Joining Blocks and Rows
Mastering how to join blocks and rows seamlessly can feel like aligning stars.
First, keep your seam allowances scant 1/4 inch for accuracy.
Using the right Sewing Machine Needles makes a huge difference in preventing skipped stitches and breakage.
Use chain piecing to speed up the process, linking blocks like a pro.
Adjust stitch length for snug seams, and always eyeball row alignment before you commit.
A little prep guarantees unit construction with finesse!
Benefits of Using a Specialty Foot
Switching to a specialty foot on your sewing machine can be a game-changer.
You’ll gain better accuracy, increased efficiency, and unmatched control with this simple upgrade:
- Consistency in seam width every time
- Precision while tackling intricate projects
- Freedom to handle various fabrics effortlessly
These quilting tips transform your machine into a master quilter’s tool, enhancing every project.
Frequently Asked Questions (FAQs)
What size stitch should I use for quilt piecing?
For quilt piecing, use a stitch length of about 5 to 2 mm.
This tight stitch secures your seams well, reducing the risk of unraveling.
While still allowing you to rip out mistakes easily.
How do you test a sewing machine?
To test your sewing machine, sew a small piece of scrap fabric, adjusting settings like tension and stitch length.
Listen for odd noises, make sure stitching is smooth, and check the bobbin for jamming.
Trust your instincts—machines have moods too!
What are the best piecing techniques?
Master piecing by prepping fabric with washing and starching.
Invest in a patchwork foot for accuracy.
Use a scant 1/4" seam allowance and press seams open for flat quilts.
Reduce bulk with lighter threads.
Practice!
Is chain piecing a good technique?
Absolutely, chain piecing boosts efficiency by letting you sew multiple quilt pieces in a continuous sequence without cutting thread between each.
Chain piecing is a real game-changer, keeping your quilting momentum flowing smoothly and saving you time.
What kind of needle do you use for quilting?
You’ll want a 90/14 quilting needle for most quilting projects. It’s tough enough for multiple layers and batting. If you’re working with finer fabrics, consider a 75/11 needle for gentler handling.
How do you set up a sewing machine?
Setting up your sewing machine is like buckling up before a drive.
Plug it in, thread the needle, wind the bobbin, and adjust settings for stitch length.
Don’t forget to test on scrap fabric before starting.
What are the machine settings for piecing quilts?
For perfect piecing, use a short stitch length (5 mm!), a lightweight 60-weight thread, and your trusty quarter-inch patchwork foot. Remember, practice makes perfect!
What is the best stitch for piecing quilts?
Did you know that over 90% of quilters recommend using a straight stitch for piecing?
It’s reliable for creating strong seams.
Set your stitch length to about 5-0 mm for best fabric control and minimal bulk.
What is the best sewing machine needle for piecing quilts?
When piecing quilts, use a size 70/10 or 80/12 Universal needle for its versatility and sharpness.
It handles quilting fabrics well, ensuring neat seams without snagging the material.
Giving you smooth, frustration-free quilting.
What setting should my sewing machine be on for quilting?
Quilting’s a breeze when your sewing machine’s set right—lower the stitch length to 5 mm, use a 60-weight thread, and deploy a 1/4-inch patchwork foot for those perfect seams.
Keep your iron handy for flat seams!
How to prevent fabric puckering?
Keep fabric from puckering by ensuring it’s prewashed and starched.
Using a fine needle and thread, lowering stitch length to 5 mm, and pressing seams properly will also help.
Practice helps too, turning those wrinkles into smooth sailing!
Best way to chain piece?
Chain piecing transforms quilting efficiency.
It’s like creating a garland—quickens assembly and saves thread!
Line up your fabric pieces, sew them in a continuous chain without cutting the thread between each piece.
How to sew perfect points?
Did you know that 8 out of 10 quilters aim for perfect points?
Use a stiletto for fabric control, align seams precisely, and trim seams to reduce bulk.
Press carefully to lock seams in place.
Happy quilting!
Tips for sewing curves accurately?
Use small clips, easing the fabric around the curve. Slow and steady wins the race! A walking foot helps prevent slippage. Practice makes perfect curves!
How to match patterns precisely?
Align pattern edges first, pinning at key points like seams and design features.
Use a 1/4-inch patchwork foot for precision and press seams open for clarity.
Practice patience—it’s the secret sauce to perfect pattern matching!
Conclusion
Channel your inner quilting guru with these easy quilt piecing sewing machine tips, and transform your projects into masterpieces.
You’ve got the know-how: from patchwork foot magic to achieving precise seam allowances.
Think of every seam as a step on the path to perfection.
With each stitch, you’re on your way to crafting stunning quilts.
Embrace these techniques, tweak your tools, and never underestimate the power of a well-pressed seam.
Happy quilting, and may your projects always bring a smile!

