This site is supported by our readers. We may earn a commission, at no cost to you, if you purchase through links.
 To properly press sewn fabric, you’ll need a hot iron set to the correct temperature for your fabric type.
Press seams immediately after sewing to set the stitches and create professional-looking results.
Use steam when appropriate, and for exceptionally flat seams, combine your steam iron with a tailor’s clapper.
Always test your iron’s temperature on a fabric scrap first, and move the iron in a lifting motion rather than dragging it across the fabric to avoid stretching or distorting your work.
Press from the wrong side when possible to prevent shine, and use a pressing cloth for delicate fabrics.
The right pressing technique transforms amateur-looking seams into crisp, professional finishes that separate quality sewing from hurried work.
Table Of Contents
Key Takeaways
- Test your iron’s temperature on fabric scraps first – You’ll prevent scorching and damage by starting with lower heat settings and gradually increasing until you find what works for your specific fabric type.
- Use a lifting motion instead of sliding – You’ll avoid stretching or distorting your fabric by pressing the iron down firmly, holding for a few seconds, then lifting straight up rather than dragging it across the surface.
- Press seams immediately after sewing – You’ll set your stitches and create professional-looking results by pressing seams flat as they are sewn, then opening them for crisp, polished finishes.
- Protect delicate fabrics with a pressing cloth – You’ll prevent shine and heat damage by using silk organza or cotton voile as a barrier between your iron and sensitive materials like silk, velvet, or synthetics.
Why Pressing is Important
When you skip pressing your sewn fabric, you’re setting yourself up for disappointment.
Skip pressing and watch your professional dreams unravel at the seams.
Pressing creates a professional finish that separates amateur work from skilled craftsmanship.
This essential step flattens seams, eliminates puckering, and makes certain accurate fabric alignment for subsequent construction steps.
Unlike ironing’s gliding motion, pressing uses an up-and-down technique that sets stitches without distorting the fabric’s grain.
This prevents seams from pulling apart and maintains garment longevity.
Proper pressing also improves fabric appearance by removing construction marks and creating crisp edges.
Each pressed seam becomes a foundation for the next step in your project.
Without this attention to detail, seam accuracy suffers, and your finished garment looks homemade rather than professionally constructed.
The iron becomes your ally in transforming raw stitches into polished seams that enhance your sewing skills.
Pressing is a crucial step that requires attention to achieve a professional look.
Essential Tools for Pressing Fabric
Your iron temperature settings matter more than you might think. Set cotton at 204°C, linen at 230°C, and silk at 148°C. A quality steam iron with variable controls gives you the precision needed for different fabrics.
Your ironing board should provide a stable, cushioned surface. Board size affects your workflow – larger boards handle bigger projects more efficiently. A pressing cloth protects delicate materials from direct heat damage. Silk organza works well because you can see through it.
Specialized pressing tools transform your results. A tailor’s ham supports curved seams and darts with its dense filling. Ham density affects how well it holds fabric shape. A sleeve roll helps press tubular areas like sleeves and pant legs without creating unwanted creases.
Don’t overlook the clapper wood tool. This simple device absorbs moisture and sets seams flat after steam application. Consider browsing options for a reliable pressing tool to improve your ironing. Steam features on your iron help relax fibers, making pressing more effective. These pressing tools work together to create professional-looking results every time.
How to Properly Press Fabric
Once you’ve gathered your pressing tools, you’ll need to know the proper technique to get professional results.
The key is testing your iron first and following a specific sequence to avoid fabric damage.
Testing The Iron
Before properly pressing your fabric, always test your iron on a fabric scrap to verify temperature accuracy and prevent scorching.
Check the soleplate condition for scratches or residue that could damage your project. Test the steam function to verify it works correctly.
Start with lower heat settings and gradually increase until you achieve the best iron settings for your specific fabric type.
Precise ironing relies on consistent thermal output for superior results, and it’s crucial to have consistent thermal output to achieve the desired outcome.
Step-by-Step Guide to Pressing Fabric
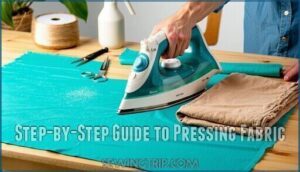
First, always press your seam allowance flat as sewn to set the stitches and eliminate puckers.
Place your iron down firmly, hold for several seconds, then lift.
Next, open the seam and press both sides of the seam allowance away from each other.
For curved seams, use a pressing ham to maintain shape.
Different fabric types require specific steam usage – test on scraps first.
A pressing cloth is essential for protecting delicate fabrics.
Press from the wrong side first, then flip to the right side for a crisp finish.
Allow cooling seams to set properly before handling.
These fabric pressing techniques guarantee professional results when you iron fabric correctly using proper pressing tools and pressing cloth protection.
The Benefits of Using a Pressing Cloth
Using a pressing cloth protects your fabric from heat damage while ensuring professional results.
**A pressing cloth shields your fabric from scorching while delivering those crisp, professional seams every sewer craves.
This protective barrier sits between your iron and project, preventing common pressing mistakes that can ruin hours of careful work.
Preventing Shine – The cloth stops direct contact between hot metal and fabric fibers, eliminating unwanted glossy marks on your finished garment.
Protecting Fabric – Delicate materials like silk, velvet, and synthetics won’t scorch or melt when you use proper heat distribution through a pressing cloth.
Heat Distribution – The cloth spreads iron temperature evenly across fabric surfaces, preventing hot spots that create uneven pressing results.
Moisture Control – Steam absorption keeps fabric from becoming waterlogged while maintaining the right dampness for crisp seams and professional-looking finishes.
Versatile materials like silk organza or cotton voile work as excellent pressing cloths.
For delicate fabrics, consider parchment paper options.
When you iron fabric correctly with this simple tool, you’ll master fabric pressing techniques that prevent scorching fabric every time.
Other Helpful Pressing Tools
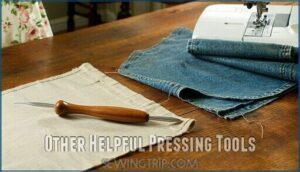
Beyond pressing cloths, specialized pressing tools can transform your sewing results. A sleeve board becomes your best friend for narrow areas like sleeves and pant legs, preventing unwanted creases that regular ironing boards create.
Point pressers tackle tight corners and collar tips with surgical precision, while seam sticks help you press open seams without leaving marks. For curved areas, a tailor’s ham molds perfectly to darts and hip curves, maintaining the fabric’s intended shape.
When you’re working with thick fabrics like denim or wool, a clapper provides the pressure needed to flatten stubborn seams. The wooden tool absorbs moisture and heat, locking in crisp results as the fabric cools.
Wool mats offer another advantage – they press from both sides simultaneously, cutting your pressing time in half. For consistent and accurate results, consider using specialized hem gauges. These specialized pressing tools might seem like luxuries, but they’re game-changers for achieving professional results at home.
Top 5 Pressing Cloths for Sewing
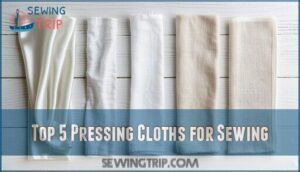
Choosing the right pressing cloth can make or break your sewing project. Here are five top-performing options that protect your fabric while delivering professional results.
Silk Organza Pressing Cloth offers the gold standard for delicate fabrics. Its transparency lets you see exactly where you’re pressing, while its heat resistance handles high temperatures without melting. Perfect for silk, wool, and synthetic blends.
Cotton Muslin Pressing Cloth provides reliable heat protection at budget-friendly prices. This plain-weave cotton handles most pressing tasks and absorbs fusible interfacing residue effectively. Choose undyed, white muslin to prevent dye transfer.
Cotton Canvas Pressing Cloth delivers maximum durability for heavy-duty pressing. Its tight weave distributes heat evenly and withstands repeated use on thick fabrics and seams requiring extra pressure.
Cotton Flannel Pressing Cloth protects textured fabrics like corduroy and bouclé from flattening. Its napped surface cushions delicate fibers while allowing gentle steam penetration.
Mesh Pressing Cloth combines visibility with versatility. These composite materials prevent shine and scorch marks while accommodating temperatures up to 400°F, making them ideal for mixed-fabric projects. Using a mesh cloth can prevent scorch marks on your fabrics.
Supporting The Site
Supporting this site helps us continue providing quality content about pressing sewn seams and fabric techniques.
Your engagement makes a real difference in maintaining these resources for the sewing community.
Here are ways you can help:
- Affiliate Links – Purchase recommended pressing tools through our links at no extra cost to you
- Donations Accepted – Small contributions help cover hosting and research costs
- Advertising Options – Local sewing shops can reach our audience through targeted ads
- Content Submissions – Share your pressing techniques and iron tips with fellow sewers
- Site Feedback – Tell us what pressing fabric topics you’d like covered next
Whether you’re mastering steam application or perfecting your pressing techniques, your support keeps this knowledge accessible.
Every click, share, and suggestion strengthens our sewing community’s foundation.
Frequently Asked Questions (FAQs)
How do you press fabric?
Press fabric by lifting and placing your iron in an up-and-down motion rather than sliding it.
Use steam and appropriate temperature settings for your fabric type.
Test heat on scraps first to prevent damage.
What is pressing in sewing?
Think of pressing as your fabric’s spa treatment—it’s the gentle, controlled application of heat and steam that transforms wrinkled, puckered seams into crisp, professional-looking results.
You’ll lift and place your iron rather than sliding it, setting stitches and shaping fabric without stretching or distorting the weave, which is a key part of achieving a professional finish with controlled application of heat.
Is pressing a sewing project easy?
Yes, you’ll find pressing straightforward once you master the basics. Use proper heat settings, test on scraps first, and remember to lift the iron rather than sliding it across fabric.
How do you press a fabric with an iron?
Set your iron to the appropriate temperature for your fabric type.
Place the iron down firmly, hold for a few seconds, then lift straight up.
Repeat this lifting motion across the fabric surface, avoiding sliding movements that can stretch or distort the material.
Is pressing half of sewing?
Here’s the suspense: what if you’re missing a pivotal step that makes or breaks your project.
Pressing isn’t half of sewing—it’s the foundation that sets every stitch, shapes every seam, and determines whether your garment looks homemade or professional-grade.
What if you don’t press before sewing?
If you don’t press fabric before sewing, you’ll cut inaccurate pieces from wrinkled material. This creates uneven seams, poor fit, and unprofessional results that can’t be fixed later.
What tool do you use to press fabric and seams?
Ironically, while countless gadgets promise perfect pressing, you’ll rely on your trusty iron—the simple tool that transforms wrinkled seams into crisp, professional-looking results with proper heat and steam settings.
How to properly press fabric?
Use an up-and-down motion, lifting the iron and pressing firmly for a few seconds.
Test temperature settings on fabric scraps first.
Press seams flat as sewn, then open them using steam for best results.
What is the number one rule of pressing in sewing?
Never press over pins – they’ll melt and damage your fabric.
Always remove pins before pressing, or you’ll create permanent marks and potentially ruin your iron’s soleplate while risking fabric burns.
Can you press fabric without using steam?
Steam isn’t always necessary—dry pressing can work fine for many fabrics. You’ll get crisp results using just heat and pressure, though adding moisture helps set stubborn creases better.
Conclusion
Ironically, many sewers spend hours perfecting their stitching but skip the final step that makes all the difference.
Mastering how to press sewn fabric isn’t just about removing wrinkles—it’s about transforming your handmade projects into professional-quality pieces.
You’ve learned the essential tools and techniques, from testing temperatures to using pressing cloths.
Now you can confidently press any fabric type without fear of damage, and proper pressing separates skilled sewers from beginners, so don’t rush this vital step that requires patience.


