This site is supported by our readers. We may earn a commission, at no cost to you, if you purchase through links.
 Mastering sewing pattern making measurements starts with taking accurate body measurements using a flexible tape measure around your bust, waist, hips, and key length points.
You’ll need these measurements to select the right pattern size or create custom-fitted patterns that actually match your body shape.
Most commercial patterns use standard sizing that rarely fits perfectly, so knowing how to adjust measurements becomes your secret weapon.
Record measurements while wearing well-fitting undergarments, and don’t pull the tape too tight—you want to breathe in your finished garments.
The real magic happens when you learn to translate these numbers into pattern adjustments that create clothes worth showing off, using your accurate body measurements to make clothes worth showing off.
Table Of Contents
Key Takeaways
- You’ll need to take five essential body measurements—bust, waist, hips, height, and center back length—using a flexible tape measure while wearing well-fitting undergarments to ensure accurate pattern fitting.
- Your measurements won’t match commercial pattern sizes, so you’ll typically need a pattern size 2-4 numbers larger than your ready-to-wear clothing size, and you should always compare your measurements to the pattern’s specific size chart.
- You’ll require basic tools including a sharp pencil, metal ruler, set square, tape measure, and translucent pattern paper to transform your measurements into professional-quality patterns that actually fit your body shape.
- You can modify existing patterns or create custom ones by applying techniques like slash-and-spread methods, adding proper seam allowances, and making fit adjustments based on your unique measurements rather than standard sizing.
Basic Sewing Measurements
Taking accurate body measurements is the foundation of creating patterns that actually fit. You’ll need five key measurements to start: height, bust, high bust, waist, and center back length.
Height Measurements
Height measurements form the backbone of sewing pattern making, determining how fabric drapes on your unique frame.
You’ll need three key measurements: total height for overall pattern length, inseam length for pants and sleeves, and torso height from shoulder to waist.
These body proportions guide pattern grading and height adjustments, ensuring your sewing pattern customization fits perfectly without awkward bunching or shortfalls, based on your unique body proportions.
Bust Measurements
The bust measurement forms the foundation of well-fitting garments, determining how fabric drapes across your chest.
You’ll wrap the tape measure around the fullest part of your bust while wearing a properly fitted bra.
- Measure horizontally around your torso at the fullest bust point
- Keep tape parallel to the floor without pulling tight or letting it sag
- Record the number where the tape meets, rounding to the nearest quarter-inch
This measurement guides bust cup sizes and bra fitting decisions for sewing pattern making.
Proper measuring techniques guarantee accurate full bust adjustments and correct bust point placement in your custom fit patterns.
High Bust Measurements
Now you’ll learn about high bust measurements for sewing pattern making measurements.
While full bust measurements capture your widest point, high bust measurements focus on the area above your bust line.
This measurement proves essential for fitting adjustments and pattern alterations, especially when your cup size affects bodice pattern drafting.
| Measurement Type | Location | Purpose |
|---|---|---|
| High Bust | Above bust, under arms | Upper bodice fit |
| Full Bust | Fullest chest point | Overall chest sizing |
| Difference | High – Full bust | Cup size calculation |
Take your high bust measurement by wrapping the tape measure around your torso just above your bust, keeping it parallel to the floor.
Common mistakes include measuring too low or allowing the tape to slip during measurement.
This accurate calculation determines your pattern size base, while the difference between high and full bust measurements guides pattern making tutorials for proper fit.
Understanding measurement impact helps you avoid fitting issues before they start.
Waist Measurements
Find your natural waistline by bending sideways – it’s where your torso creases naturally. This isn’t always your belt line! Understanding proper waist placement guarantees accurate pattern making measurements and successful alterations for different body shapes.
- Waist Definition: Locate the narrowest point of your torso, typically 1-2 inches above your navel
- Measuring Tips: Use a snug but not tight tape measure, exhale normally, and measure parallel to the floor
- Body Shapes: Different figures require specific alteration guides – apple shapes may need higher placement than pear shapes
To guarantee accuracy, remove bulky clothing before measuring.
Center Back Measurements
Your pattern’s backbone relies on center back measurements for proper fit.
Measure from the nape of neck to natural waistline, capturing spine curvature and torso length.
This measurement determines neckline depth and affects zipper placement in garments.
| Measurement Type | Purpose |
|---|---|
| Neck to Waist | Determines torso length for pattern drafting techniques |
| Shoulder Slope | Guarantees proper fit across back shoulder line |
| Back Width | Sets armhole placement and overall garment width |
| Spine Curve | Allows for natural body contours in sewing pattern adjustments |
The table outlines the different types of measurements, including their purposes, such as Back Width for setting armhole placement and overall garment width, and Spine Curve for allowing natural body contours in sewing pattern adjustments.
Essential Tools Needed
You’ll need five essential tools to create accurate sewing patterns that fit perfectly every time.
These simple tools work together to transform your body measurements into professional-quality patterns that save you time and frustration, utilizing complete concepts to achieve this goal.
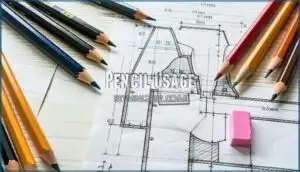
Pencil Usage
You’ll need a sharp pencil for accurate pattern drafting techniques.
Mechanical pencils with 0.5mm lead work best for precise pattern markings and thin line weight.
Different pencil grades serve specific purposes – H pencils create light construction lines, while B pencils mark darker cutting lines.
For detailed work, consider a precise lead size.
Keep erasers handy for adjustments, as pattern making tools require frequent corrections during the drafting process.
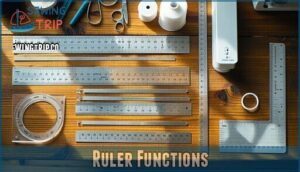
Ruler Functions
Your ruler becomes the backbone of accurate sewing pattern drafting, transforming measurements into precise lines and curves.
Unlike standard rulers, pattern making tools feature specialized markings that help you navigate complex pattern design software requirements and grading rules with confidence.
- Ruler Accuracy: Use metal or acrylic rulers with clear, etched markings that won’t fade over time
- Markings Explained: Look for rulers with both metric and imperial measurements, plus seam allowance guides
- Curve Rulers: French curves and hip curves help draft smooth armholes and necklines perfectly
- Seam Allowance: Choose rulers with built-in seam allowance markers for consistent pattern alterations
- Measuring Tools: Invest in multiple ruler lengths – 6", 18", and 24" covers most sewing pattern drafting needs
For specialized tasks, consider a sewing pattern ruler.
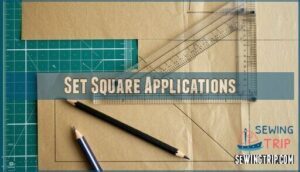
Set Square Applications
A set square’s 90-degree angles become your drafting angles ally when creating precise corners and perpendicular lines.
You’ll achieve accurate lines every time while pattern truing becomes effortless. This tool excels at establishing perfect seam allowances and design details on your flat pattern making projects.
For specialized tasks, consider exploring a set square specifically designed for sewing.
Whether you’re working with sewing pattern drafting software or traditional methods, the set square guarantees your sewing pattern alterations maintain structural integrity through clean, professional angles, ensuring perfect seam allowances.
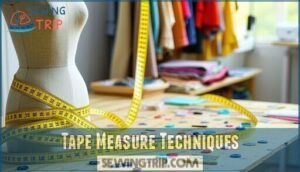
Tape Measure Techniques
Master your measuring game with these smart tape measure techniques.
Proper sewing measurements require specific methods to guarantee accurate body contouring and perfect pattern fit for all your sewing techniques.
- Tension Control: Keep consistent light pressure without stretching the tape for reliable sewing pattern measurements
- Accurate Placement: Position tape parallel to floor for horizontal measurements and perpendicular for vertical ones
- Measuring Curves: Follow body contours smoothly, especially around bust and hip areas for precise sewing measurements
- Digital Alternatives: Consider smart measuring apps as backup tools for quick reference in modern sewing for beginners
Translucent Pattern Paper Benefits
When you’re pattern drafting, translucent pattern paper becomes your best friend for tracing ease and pattern visibility.
You’ll see your original design underneath while creating modifications, making pattern making for beginners much simpler.
This lightweight handling material offers excellent reuse potential since you can trace multiple sizes without damaging originals.
The storage convenience means your sewing patterns stack flat without bulk, and pattern grading rules become easier to follow when you can see through layers during pattern design work.
Measuring for Patterns
You’re ready to turn your measurements into perfectly fitting patterns that flatter your unique shape.
Once you’ve gathered your body measurements, you’ll use specific techniques to translate those numbers into precise pattern dimensions.
Taking Accurate Measurements
Perfect measurements start with proper preparation and consistency. Use appropriate measurement tools and identify key body landmarks before you begin. Your posture affects every measurement, so stand naturally with arms relaxed.
Essential measurement practices for accurate pattern drafting:
- Maintain consistent tension on your tape measure throughout all measurements
- Mark body landmarks with removable tape for reference points
- Take measurements over fitted undergarments for accuracy
- Record measurements twice and compare for double-checking precision
- Use a mirror or helper to confirm proper tape measure placement
Understanding sewing measurements and pattern grading rules becomes second nature when you establish these fundamentals in your pattern making process.
Using Sewing Measurement Charts
Once you have your body measurements, sewing measurement charts become your roadmap to the right pattern size. These charts translate your measurements into pattern sizes, but here’s the catch – every pattern company uses different sizing standards.
| Pattern Company | Size 12 Bust | Size 12 Waist |
|---|---|---|
| Brand A | 36" | 28" |
| Brand B | 34" | 26" |
| Brand C | 38" | 30" |
| Brand D | 35" | 27" |
| Brand E | 37" | 29" |
Chart accuracy varies substantially between companies, creating size discrepancies that can frustrate even experienced sewists. Body variations mean you’ll often fall between sizes – that’s completely normal. To address this lack of uniformity, some companies are now using standardized measurement impact to improve fit consistency.
Digital charts make metric conversion simple, but always double-check measurements. When selecting sewing patterns for clothing, ignore ready-to-wear sizes and trust the chart measurements instead, as they provide a more accurate guide to achieving the desired fit and ensuring a successful sewing project with the right pattern size.
Understanding Pattern Measurements
When diving into pattern measurements, you’ll discover they’re different from your body measurements.
Pattern measurements include ease for comfort and movement.
This ease varies between pattern styles and designers.
Here are five key pattern measurement elements to understand:
- Finished garment measurements – The actual size of the completed item
- Ease allowances – Extra room built into the pattern for fit and style
- Seam allowances – Additional fabric beyond the stitching line
- Grading increments – How measurements change between sizes
- Design lines – Where pattern pieces connect and shape the garment
Pattern grading creates consistent size progression, while fit adjustments accommodate different body shapes.
Understanding these measurements helps with design interpretation and guarantees your sewing pattern making results in garments that fit properly.
Pattern shifting maintains the original shape.
Each sewing pattern design incorporates specific ease amounts that affect the final fit.
Calculating Pattern Size
Compare your body measurements to Size Charts to find your starting point. When measurements fall between sizes, choose the larger size for comfort.
Remember that sewing patterns run differently than store-bought clothes – you’ll typically need a pattern size 2-4 numbers larger. Check the finished garment measurements on the pattern envelope, then subtract your body measurements to calculate Ease Allowance for proper fit.
It’s important to understand sewing pattern sizes because they differ from ready-to-wear sizes, which is crucial for a proper fit and to ensure you select the correct size based on sewing pattern sizes.
Creating Custom Patterns
Creating custom patterns transforms your accurate measurements into perfectly fitted garments.
Start with basic blocks for skirt pattern drafting, sleeve pattern drafting, and pants pattern drafting using your personal measurements.
Digital pattern design software streamlines this process, allowing pattern alterations and design innovation.
Create muslin mockups to test fit before cutting final fabric, ensuring your personal style shines through professional-quality results.
Applying Measurements
Now you’re ready to transform those carefully taken measurements into perfectly fitted patterns.
Once you understand how to apply your measurements correctly, you’ll create custom patterns that fit your unique body shape and produce professional-looking garments every time.
Modifying Existing Patterns
You’ve got your measurements down pat—now let’s put them to work.
Modifying existing sewing patterns requires removing seam allowances first, then applying slash-and-spread techniques for pattern alterations.
Make fit customization changes by slashing at bust points or waist areas.
When combining patterns for style adjustments, align grainlines carefully.
Always redraw seams after resizing patterns to maintain construction accuracy. Accurate measurements are essential for successful pattern grading.
Creating Sleeve Patterns
Sleeve patterns require precise measurements to achieve proper fit and movement. You’ll need your bicep measurement, desired sleeve length, and cap height calculations to draft sleeves that move naturally with your body.
Here’s your sleeve pattern creation process:
- Measure your bicep at its widest point, adding 2-4 inches for sleeve ease
- Calculate cap height by dividing your armhole measurement by three
- Determine sleeve length from shoulder point to desired cuff position
- Choose cuff styles that complement your garment’s overall design
- Draft the pattern using these measurements as your foundation
Advanced pattern making techniques guarantee your sleeves fit perfectly every time.
Adding Seam Allowance
Always add seam allowance after finalizing your pattern pieces.
Standard seam allowance width ranges from 3/8" to 5/8" depending on fabric considerations and sewing techniques.
Mark curved seams with notches for accurate alignment during construction.
Add extra corner seam allowance at intersections to prevent fabric bulk.
Pattern adjustments require consistent seam allowance throughout for professional results, ensuring that the final product looks polished and well-made, with attention to accurate alignment and professional results.
Drafting Patterns From Measurements
Transform your measurements into professional patterns using proportional scaling techniques.
Start with muslin mockups to test fit before cutting your final fabric.
Add ease allowance based on garment style – fitted pieces need less than loose designs.
Digital patterning software streamlines pattern creation and grading.
Consider pattern making courses for advanced design adaptations and personalization skills.
Troubleshooting Common Issues
When measurements go wrong, you’ll face frustrating sewing pattern personalization challenges.
Poor sewing fit stems from these common culprits:
- Stitch Skipping – Wrong needle size for fabric weight
- Tension Problems – Incorrect thread adjustment causing loose seams
- Fabric Puckering – Pulling material while stitching
- Needle Breaks – Dull blade hitting pins or thick seams
Check your sewing patterns against body measurements twice before cutting.
Advanced Pattern Measurements
Once you’ve mastered basic measurements, advanced pattern components like mandarin collars and puff sleeves require precise calculations for professional results.
These specialized elements need careful attention to curve measurements, ease calculations, and fit adjustments that go beyond standard body measurements, involving complete concepts.
Mandarin Collar Measurements
Crafting a mandarin collar requires precise measurements for professional results.
You’ll measure the total neckline by combining front neck and back neck measurements, typically totaling around 7.81 inches for standard sizing.
| Measurement | Standard Size | Notes |
|---|---|---|
| Collar Height | 1-1.5 inches | Adjust for comfort preference |
| Neck Circumference | 7.81 inches | Front + back neckline total |
| Band Width | Match collar height | Creates consistent appearance |
| Stand Angle | 90 degrees | Guarantees proper collar stance |
The collar’s curve shaping determines how it sits against your neck.
Add 3/8-inch seam allowance to your pattern piece, and consider cutting on the fold for symmetrical results in sewing pattern creation.
Puff Sleeve Measurements
Puff sleeves require careful calculation to achieve that perfect billowy effect without overwhelming your garment.
Start by measuring your bicep circumference, then add 4-8 inches depending on your desired puff height.
The gathering ratio typically runs 2:1 for moderate fullness. Space sleeve cap sections at 4cm intervals when creating sewing patterns, adding 5cm ease for proper gathering.
Calculate elastic length at 75% of bicep measurement for comfortable fit.
Peter Pan Collar Measurements
Peter Pan collars bring sweet charm to children’s garments and vintage-inspired pieces.
Start by determining your collar width between 2.5-3 inches based on personal preference. Trace bodice front and back blocks, overlapping at shoulder tips by 0.75 inches for proper drafting symmetry.
Modify the neckline by extending center back neck 1/8 inch and lowering center front 1/4 inch. This adjustment guarantees the collar lays flat against the garment.
Remember to take into account grainline and drape for superior results. Mark clear intersection notches at shoulders and center points for accurate assembly during construction.
Advanced Sewing Techniques
Beyond basic pattern manipulation, you’ll master couture sewing techniques that transform ordinary garments.
Draping methods and fabric manipulation create custom fits, while tailoring techniques guarantee professional results.
- Apply sewing pattern grading to resize patterns accurately across multiple sizes
- Use advanced fabric manipulation for innovative design development and pattern originality
- Integrate precise sewing pattern measurements with draping methods for couture-level construction to achieve professional results
Tips for Accurate Measurements
Everyone makes measurement mistakes, but you can prevent them with proper technique.
Mark intersection points precisely at center front, center back, and side seams for consistent measurements.
Maintain proper body positioning while measuring over minimal clothing.
Use measurement intervals for accuracy and calibrate your tools regularly.
Keep detailed record keeping of all measurements for future sewing patterns and sewing pattern making projects.
Frequently Asked Questions (FAQs)
How do you know what size sewing pattern you should make?
Like a tailor’s measuring tape wrapping around your body, you’ll need to take your bust, waist, and hip measurements.
Then match them to the pattern’s size chart for the best fit.
How do you calculate pattern size?
You calculate pattern size by measuring your bust, waist, and hip circumference, then comparing these measurements to the pattern’s size chart to find your best fit.
How do you size up a sewing pattern?
Don’t put the cart before the horse when sizing up patterns.
Measure your body first, then add extra inches proportionally to each pattern piece.
Grade between sizes smoothly for the best fit.
What are the basic measurements for sewing?
You’ll need bust, waist, hip, shoulder width, arm length, inseam, and torso measurements.
These core dimensions guarantee proper fit and help you choose the right pattern size for your sewing projects.
What measurements do you need for pattern making?
Capture your body’s blueprint: bust, waist, hip, shoulder width, arm length, and torso measurements form pattern-making’s foundation. You’ll craft garments that fit like they’re custom-tailored just for you.
How do you calculate fabric for a pattern?
Check your pattern’s yardage requirements listed on the envelope or instructions. Add extra fabric for pattern matching, shrinkage, and mistakes—typically 10-20% more than specified.
What is the golden rule sewing pattern system?
Imagine cracking the code that transforms your measurements into perfectly fitting garments every time.
The golden rule sewing pattern system uses your body’s proportional relationships to create custom patterns, ensuring you’ll never struggle with ill-fitting clothes again.
How do you measure for a sewing pattern?
Take three key measurements: bust, waist, and hips using a flexible tape measure.
Keep the tape snug but not tight, measuring over undergarments.
Compare your measurements to the pattern’s size chart to select the correct size.
How do you measure A Treasurie sewing pattern?
Like traversing a tailor’s map, measuring A Treasurie sewing patterns requires following their specific size chart and measurement guides.
You’ll use standard body measurements—bust, waist, hips—then compare them to A Treasurie’s sizing chart for accurate pattern selection.
How do you make sewing patterns?
Creating sewing patterns starts with accurate measurements and basic drafting principles. You’ll sketch the pattern pieces on paper, add seam allowances, and create detailed instructions for construction and finishing.
Conclusion
Mastering sewing pattern making measurements transforms your wardrobe from hit-or-miss to perfectly fashioned treasures.
You’ve learned to measure accurately, select proper tools, and translate numbers into stunning garments that actually fit your unique shape.
These skills give you confidence to tackle any pattern, whether you’re adjusting commercial designs or creating custom pieces from scratch.
Remember, precision in measuring leads to professional results you’ll proudly wear everywhere.
- https://thefoldline.com/blogs/pattern-series-get-ready-to-sew/the-sewing-pattern-tutorials-9-measuring-yourself
- https://www.thecreativecurator.com/pattern-making-basics/
- https://www.reddit.com/r/sewing/comments/6cglrg/eli5_how_to_use_a_pattern_to_fit_your_measurements/
- https://blog.fabrics-store.com/2024/06/23/how-to-take-your-body-measurements/
- https://www.threadsmagazine.com/project-guides/learn-to-sew/how-to-measure-a-pattern-to-assess-its-fit

