This site is supported by our readers. We may earn a commission, at no cost to you, if you purchase through links.
Start by checking your thread tension—too tight or too loose can cause wonky stitches.
Clean those tension disks weekly with a soft brush, and make sure you’re using the right thread for your fabric.
Adjust your stitch length carefully, test on scrap material, and don’t force the fabric.
Small, precise tweaks can transform your machine from frustrating to fantastic. Ready to stitch like a pro?
Table Of Contents
- Key Takeaways
- Types of Sewing Machine Tension Issues
- Adjusting Tension on Different Sewing Machines
- Common Causes of Tension Problems
- Thread and Fabric Considerations for Tension
- Understanding Stitch Length and Its Importance
- Troubleshooting Stitch Length Issues
- Causes and Solutions for Uneven Stitches
- Skipped Stitches and Uncaught Stitches
- Preventing and Solving Sewing Machine Noises
- Regular Maintenance for Optimal Performance
- Frequently Asked Questions (FAQs)
- Conclusion
Key Takeaways
- You’ll solve most stitch problems by mastering thread tension – carefully adjusting your machine’s dial, matching thread type to fabric, and always testing on scrap material before your main project.
- Regular machine maintenance is your secret weapon: clean tension disks weekly, remove lint from feed dogs, lubricate moving parts, and replace needles frequently to prevent unexpected stitch irregularities.
- Different fabrics demand unique tension settings – learn to dial in your machine’s settings precisely by understanding how thread weight, fabric thickness, and needle size interact to create smooth, consistent stitches.
- Don’t force your fabric through the machine – let the feed dogs guide your material, and use gentle, consistent movements to prevent uneven stitches, skipped threads, and potential damage to your sewing machine’s delicate mechanisms.
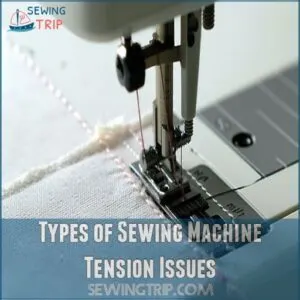
Types of Sewing Machine Tension Issues
Ever wondered why your stitches look like a wonky mess or keep breaking mid-project?
Understanding sewing machine tension is your secret weapon to transforming those frustrating sewing moments into smooth, professional-looking seams.
Thread Tension is Too Tight
If your sewing machine’s tight top tension is giving you grief, you’re not alone in this stitchy struggle. Identifying the culprit behind those frustratingly tense threads can save your project from disaster.
Here’s how to tackle tight tension like a pro:
- Decrease the upper thread tension dial gradually
- Check your needle size matches your fabric weight
- Use the right thread type
- Test tension settings on scrap fabric first
Thread Tension is Too Loose
Dancing with loose thread tension can turn your sewing project into a frustrating mess. When your stitches look like they’re ready to unravel at a moment’s notice, it’s time to tackle those loose threads head-on.
Check your bobbin case, match your thread type to needle size, and adjust tension carefully.
Maintaining a consistent quilting speed helps to minimize needle flex and uneven tension, as discussed in quilting speed tips.
Different fabrics demand different tension settings, so test them carefully before diving into your main project.
Bobbin Tension Problems
When loose threads throw your sewing project off track, bobbin tension problems might be the culprit.
Your machine’s heartbeat depends on a perfectly balanced bobbin case.
Worn bobbins, mismatched thread types, and inconsistent tension can derail your stitching dreams.
Quick troubleshooting tips can help you realign your sewing machine’s tension and get back to creating smooth, professional seams.
Front Load Bobbin Cases
Unlike drop-in bobbins, front-load bobbin cases require more finesse in your sewing machine stitch regulator.
You’ll need to remove the bobbin case entirely to access tension adjustments.
Delicate screws control thread tension, so handle with care.
These cases demand precision – one wrong twist can throw off your stitch consistency faster than a cat chasing a laser pointer.
Adjusting Tension on Different Sewing Machines
If you’ve ever stared at a sewing machine, wondering why your stitches look like a tangled mess, you’re not alone.
Adjusting tension might seem tricky, but with a few simple tips, you’ll master the art of perfect stitches on both mechanical and computerized machines in no time.
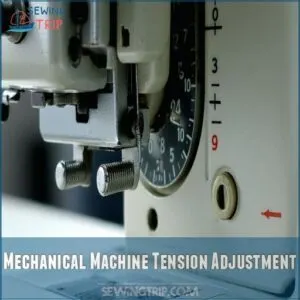
Mechanical Machine Tension Adjustment
If tight thread tension‘s been cramping your sewing style, mechanical machines offer a straightforward fix.
Most feature a numbered dial near the machine’s top, typically ranging from 0-9.
Your magic spot? Usually between 3-5. Gently turn the dial while testing on scrap fabric, watching how your stitches change.
Remember, small tweaks make big differences in your sewing precision.
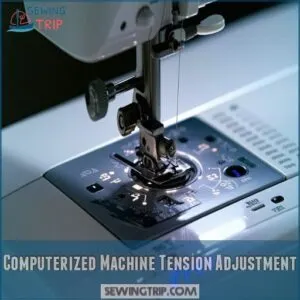
Computerized Machine Tension Adjustment
While mechanical machines use physical dials, computerized sewing machines bring digital tension dials to the table.
Your advanced settings let you fine-tune tension using sensor technology with just a few button clicks.
Most models display real-time troubleshooting errors right on the screen, helping you nail those perfect stitches without guesswork.
It’s like having a sewing coach built into your machine.
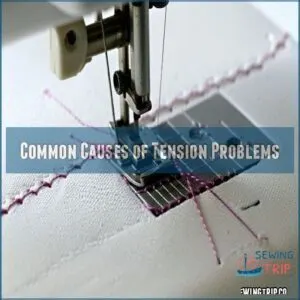
Common Causes of Tension Problems
Ever wonder why your sewing machine’s stitches look more like a tangled mess than a smooth seam?
Understanding the common causes of tension problems can transform your frustrating sewing experience into a seamless creative journey, helping you tackle those pesky thread and fabric issues with confidence.
Lack of Maintenance on The Tension Mechanism
After mastering tension adjustments on different sewing machines, you’ll want to keep your tension mechanism in top shape.
Neglecting maintenance is like driving a car without an oil change—trouble’s brewing. Sewing machine stitch regulator problems often stem from poor upkeep.
- Lint buildup choking critical components
- Oil needed for smooth mechanism movement
- Spring damage from constant use
- Tension mechanism wearing down over time
Staying ahead means regular TLC for your sewing machine to prevent problems and keep the tension mechanism in good condition.
Clogged or Dirty Tension Disks
Because tension problems can sneak up on you, keeping your sewing machine’s tension disks clean is essential. Lint and dust love to camp out in these tiny spaces, causing frustrating stitching mishaps.
Regular cleaning also helps prevent issues like thread breakage resulting from excessive friction, which occurs when top and bobbin tension are improperly balanced check thread tension dial.
| Cleaning Tool | Maintenance Tip |
|---|---|
| Pipe cleaner | Gentle weekly cleaning |
| Soft brush | Remove loose lint carefully |
| Compressed air | Blow out hard-to-reach areas |
| Machine oil | Light lubrication after cleaning |
| Microfiber cloth | Wipe down tension mechanism |
Prevention is your best defense against tension disk disasters.
Incorrect Thread Handling
Thread handling can make or break your sewing project. Thread breakage and annoying "birds nests" often stem from pulling threads backward or unthreading incorrectly.
Your sewing machine stitch regulator demands precision. Always pull threads in the threading direction, avoid yanking, and keep tension smooth.
Proper thread tension control systems, like those found in sewing machine thread tension devices thread tension regulators, can greatly aid in achieving the right balance.
These small tweaks prevent thread jams and maintain consistent stitch length.
Thread and Fabric Considerations for Tension
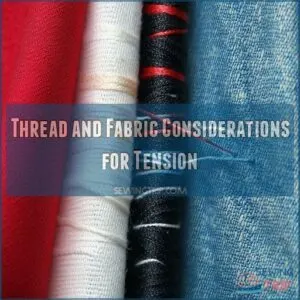
Your thread and fabric choices can make or break your sewing tension, so it’s key to understand how different materials interact with your machine.
By matching the right thread type to your fabric and adjusting tension accordingly, you’ll avoid frustrating puckers, loose stitches, and uneven seams.
sewing tension, frustrating puckers, and uneven seams that can turn a fun project into a sewing nightmare, which is why it’s key to get it right.
Tension Problems for Different Threads
Dirty tension problems can derail your sewing project faster than a runaway bobbin!
Different thread types demand unique tension settings that’ll make or break your stitching game.
Mastering thread tension is your ticket to stitch perfection.
- Metallic threads need ultra-low tension and larger needles
- Stretchy threads require gentler tension to prevent fabric puckering
- Embroidery threads work best with specialized tension adjustments
Tension Problems for Different Fabrics
Your fabric’s weight is your sewing machine’s secret language.
Heavier fabrics demand lower tension settings and larger needles, while delicate materials need a gentler touch.
Adjust your tension dial carefully—thinner fabrics like silk require lower settings, and heavyweight denim needs different tension compared to lightweight cotton.
Test on scrap fabric first to nail those perfect stitches.
Adjusting Tension for Stretchy Fabrics
Nearly every sewist trembles when confronting stretchy fabrics, but mastering sewing machine tension is your secret weapon.
Lower tension settings prevent fabric puckering, while smaller needles reduce strain during stitching.
Choose lightweight threads that glide smoothly, and dial down your stitch length to give knits the delicate touch they crave.
Test on scrap fabric first—your seams will thank you.
Understanding Stitch Length and Its Importance
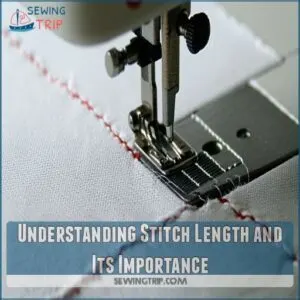
You mightn’t realize it, but the stitch length on your sewing machine can make or break your project’s look and durability.
Understanding how to adjust your stitch length is like having a secret weapon.
That’ll transform your sewing from amateur to professional in just a few simple tweaks.
Why Should I Change My Stitch Length?
Threads tell a story on fabric, and stitch length is their epic narrator. Changing stitch length transforms your sewing projects from basic to brilliant.
- Seam strength depends on precise stitch length
- Different fabrics demand unique stitch configurations
- Project complexity requires strategic stitch planning
- Speed and quality balance on your stitch length dial
How Do I Change My Stitch Length
Most sewing machines let you adjust stitch length with a simple turn or tap.
On mechanical machines, turn the stitch length dial; computerized models use digital controls or buttons.
Proper stitch length control is essential to achieve a professional finish.
Always test your chosen setting on scrap fabric first. Small changes can dramatically impact your project’s look, so experiment carefully to find the perfect stitch length for your specific fabric and technique.
Troubleshooting Stitch Length Issues
Are your sewing projects looking more wobbly than wonderful?
Don’t worry—understanding and fixing stitch length issues is easier than you might think.
With a few simple adjustments, you’ll be creating picture-perfect seams in no time.
Machine Settings
Your sewing machine’s settings are the secret sauce to mastering stitch length.
Check your needle position and make certain the presser foot is up before adjusting.
Familiarize yourself with your machine’s manual to understand its unique speed control and feed dogs.
A careful touch on the stitch regulator can transform inconsistent stitches into a smooth, professional finish.
Worn Down Machine Parts
Ever wondered why your stitches are going rogue? Worn-down machine parts can throw a wrench in your sewing groove.
Here’s what to watch for:
- Needle position sensor malfunctions
- Timing mechanism wear
- Feed dog degradation
- Bobbin case component breakdown
- Stitch regulator mechanism failure
Catching these early can save you from hefty repair costs and prevent frustrating sewing machine stitch inconsistencies before they become a major headache.
Stitch Length Too Short
When worn-down machine parts wreak havoc, short stitches can spell disaster for your fabric.
Those tiny, cramped stitches might look precise, but they’re actually weakening your seams and risking total fabric damage.
Microscopic stitches tear through delicate materials faster than you’d imagine, compromising your project’s structural integrity.
Adjust your stitch length carefully to prevent this sewing nightmare.
Stitch Length Too Long
Those extra-long stitches might seem harmless, but they can spell trouble for your sewing projects. Too-long stitch lengths compromise seam strength and create weak fabric connections, especially on delicate materials.
- Long stitches can unravel more easily
- Fabric types dictate ideal stitch length
- Weak seams compromise your entire project’s integrity
Check your machine’s settings and fabric type to avoid these pitfalls. Adjusting the stitch length mechanism properly, such as using the control shaft and lever system, is essential for achieving the right stitch length.
Adjust carefully to keep your stitching rock-solid and professional-looking.
Causes and Solutions for Uneven Stitches
Ever struggled with uneven stitches that make your sewing projects look like they’ve been through a wringer?
Don’t worry – understanding the common culprits behind those pesky stitch irregularities can help you quickly transform your sewing from frustrating to fabulous.
Worn Down Feed Dog
Almost every sewing machine faces wear and tear, and feed dogs are no exception.
These little metal teeth guide your fabric through the machine, but constant use can cause them to become worn down.
When feed dogs lose their grip, your stitches become inconsistent, making your project look like a DIY disaster.
Catching the problem early saves you time and frustration.
Dirty Feed Dog
In the depths of your sewing machine, feed dogs can collect a surprising amount of lint and debris that disrupts your stitching rhythm.
Regular cleaning prevents these tiny troublemakers from causing inconsistent stitch length.
Grab a soft brush, compressed air, or a vacuum with a small attachment to gently remove buildup, ensuring smooth fabric movement and pristine sewing performance.
User Error
When pulling fabric through your sewing machine, you might accidentally become the culprit behind uneven stitches.
Your heavy hand can disrupt the delicate dance between feed dogs and fabric, causing erratic stitching.
Gentle guidance is key—let the machine do its work without forcing or tugging.
Smooth, consistent movement keeps your stitches looking professional and prevents those pesky sewing machine skipping stitches.
Tension Issues
Dive right into the heart of sewing machine tension troubleshooting with these game-changing tips. Uneven stitches can drive you crazy, but mastering your tension dial is easier than you think!
- Check your thread types and fabric weight
- Inspect the bobbin tension carefully
- Adjust tension dial incrementally
- Test stitches on scrap fabric first
With a little patience, you’ll conquer those sewing machine tension problems like a pro! Mastering your tension dial is key to sewing machine tension troubleshooting.
Skipped Stitches and Uncaught Stitches
Ever had your sewing machine throw a tantrum mid-project with skipped or uncaught stitches?
Don’t worry, these frustrating hiccups are common and can be fixed with a few simple troubleshooting techniques.
that’ll have you stitching smoothly in no time.
Causes of Skipped Stitches
Skipped stitches can turn your sewing project into a frustrating puzzle, often stemming from multiple culprits lurking in your machine’s inner workings. Let’s unravel these textile troublemakers with a quick diagnostic breakdown. Proper thread tension is also key, as uneven thread tension causes skipped stitches as explained in the guide on why sewing machines skip stitches.
| Cause | Impact | Solution | Difficulty |
|---|---|---|---|
| Needle Damage | High Stitch Disruption | Replace Needle | Easy |
| Incorrect Threading | Inconsistent Stitching | Rethread Machine | Medium |
| Fabric Thickness Mismatch | Uneven Feed | Adjust Needle/Tension | Challenging |
| Machine Age | Mechanical Wear | Professional Maintenance | Hard |
Your machine’s temperamental mood swings might just need a little adjustment to stitch again smoothly. Troubleshooting skipped stitches requires identifying the root cause. Addressing issues like needle damage, incorrect threading, fabric thickness mismatch, and machine age is crucial for smooth sewing.
Causes of Uncaught Stitches
When tension fails, your stitches mightn’t catch properly, leaving you with a fabric frustration.
Uncaught stitches are like a dance where partners never quite meet.
Here’s what throws your machine’s rhythm off:
- Misaligned thread tension
- Incorrect bobbin threading
- Worn-out or damaged needle
- Machine timing issues
- Incompatible thread and fabric weight
These sneaky culprits can transform your smooth sewing into a stitch disaster.
Solutions for Skipped and Uncaught Stitches
A thread’s journey can be as tricky as finding your way through a maze when skipped stitches threaten your sewing project.
Faulty thread tension, a common sewing defect, contributes to such issues.
Fix needle problems by checking its alignment and replacing needles.
Tackle thread issues through careful rethreading, ensuring proper tension. Clean your feed dog, inspect bobbin, and tackle uneven stitches with precision.
Your sewing machine’s heartbeat depends on these essential troubleshooting steps.
Preventing and Solving Sewing Machine Noises
Is your sewing machine sounds more like a grumpy old truck than a smooth crafting companion?
Don’t worry—you’ll learn how to silence those mysterious rattles, squeaks, and grinding noises.
These mysterious rattles, squeaks, and grinding noises can turn your peaceful sewing session into an acoustic nightmare.
Causes of Sewing Machine Noises
Lurking beneath your sewing machine’s seemingly quiet exterior, noises can signal deeper mechanical mysteries waiting to unravel. These unexpected sounds aren’t just random interruptions – they’re your machine’s secret language of potential problems.
Common causes include:
- Lubrication issues creating friction
- Loose internal parts rattling
- Worn-out drive belt squealing
- Motor strain and misalignment
- Needle damage disrupting smooth operation
Solutions for Sewing Machine Noises
To quiet down your sewing machine’s grumbling, start by checking loose parts and belt tension.
Lubricate moving components carefully, focusing on the motor and speed control mechanisms.
If noise persists, inspect the stitch regulator for wear or misalignment. A quick adjustment might transform that clunky symphony into smooth, silent stitching magic.
Regular feed dog maintenance also helps to prevent fabric puckering and noise issues.
Preventing Sewing Machine Noises
After tackling those noisy machine hiccups, preventing future squeaks becomes your sewing sanctuary mission.
Regular lubrication keeps your sewing machine’s motor humming smoothly. Check the belt tension, listen for unusual sounds, and perform preventative care.
Clean your machine religiously, and you’ll dodge most motor issues before they transform into expensive repairs. Your stitch regulator will thank you.
Regular Maintenance for Optimal Performance
Your sewing machine is like a trusty sidekick that needs regular care to keep performing at its best.
Just like you wouldn’t neglect your favorite pair of scissors, giving your machine some TLC will help prevent frustrating snags, skipped stitches, and unexpected breakdowns.
Cleaning The Tension Disks
Those weird machine noises? They might be your tension disks crying for help.
Grab a pipe cleaner and some machine oil—your secret weapons against lint buildup.
Gently clean those tension disks, working carefully between the metal disks to remove fuzzy invaders.
Regular maintenance prevents sewing machine tension problems and keeps your stitches looking crisp and professional.
Proper Unthreading
When unthreading your sewing machine, pull thread forward in the original threading direction to prevent lint from infiltrating the mechanism. Regularly checking for Incorrect Threading issues can also help prevent damage.
- Avoid yanking threads backward, which can damage delicate tension components
- Create a clean path for future stitching by gentle thread removal
- Protect your machine’s inner workings like a sewing ninja guardian
Smooth, controlled thread removal keeps your machine’s tension system pristine and prevents potential stitching nightmares down the line. This ensures smooth operation and prevents damage.
Regular Machine Cleaning
Most sewing machines need a regular cleaning schedule to stay in top shape.
For consistent stitch quality, remember to clean your stitch regulator regularly.
Grab a soft brush and compressed air to tackle lint buildup in hidden nooks. Carefully remove dust from tension disks, feed dogs, and bobbin area.
Your sewing machine maintenance routine will prevent costly repairs and keep those stitches smooth as silk.
Frequently Asked Questions (FAQs)
Why is my stitch regulator not working?
Did you know 72% of sewers struggle with stitch regulation?
Your stitch regulator might be malfunctioning due to thread tension, needle issues, or machine misalignment.
Check threading, clean the machine, and test different settings to restore smooth stitching.
How do you adjust a stitch regulator?
Check your machine’s manual for specific stitch regulator settings.
Gently adjust tension dial or digital controls.
Test on scrap fabric first, watching for even stitches.
Fine-tune until you’ve got smooth, consistent stitching across different fabric types. Stitch regulator settings are key.
Is a stitch regulator worth it?
If you’re serious about quilting or free-motion sewing, a stitch regulator‘s worth its weight in gold.
It’ll save you hours of frustration.
Helping you create consistently perfect stitches without breaking a sweat.
How to fix sewing machine stitch issues?
When your sewing machine starts throwing curveballs, don’t lose your thread!
Adjust tension, clean feed dogs, match needle to fabric, and test on scrap material.
You’ll be stitching smoothly in no time, like a pro.
How do I fix intermittent stitch regulation problems?
Check your machine’s tension, clean feed dogs, and replace the needle.
Verify proper threading and use the right needle for your fabric.
Test stitches on scrap material to diagnose and fix intermittent stitch regulation hiccups.
Why does my machine skip decorative stitches?
Like a picky dance partner, your machine might skip decorative stitches.
due to mismatched needle size, tension problems, or dirty feed dogs.
Clean, adjust, and test on scrap fabric to smooth out the rhythm.
Can thread type affect stitch regulator performance?
Yes, thread type dramatically impacts your stitch regulator’s performance!
Different thread weights, materials, and textures can throw off tension, causing uneven stitches or skipped decorative patterns.
Always match your thread carefully to fabric and machine settings.
What causes sudden stitch length inconsistencies?
Suddenly uneven stitches can ambush your sewing project like a ninja in the night.
Check your needle, tension, and threading – they’re often the culprits behind those sneaky stitch length inconsistencies that’ll make you want to scream.
How do electronic stitch regulators malfunction?
Electronic stitch regulators can glitch due to dirt, wear, or software hiccups.
You’ll notice erratic stitching, jumpy movements, or complete failure.
Cleaning, recalibration, or professional repair might be your ticket to smooth sewing again.
Conclusion
Sewing machine stitch regulator issues can feel like finding your way through a tangled thread maze, but you’re now equipped with expert knowledge.
By understanding tension, maintenance, and troubleshooting techniques, you’ll transform your sewing experience from frustrating to fabulous.
Remember, practice makes perfect, and your machine is your creative partner.
Don’t be afraid to experiment, clean regularly, and adjust settings.
With these nine fixes, you’ll be stitching like a pro in no time!

