Skip to Content

Why Your Sewing Machine Keeps Jamming and How to Finally Fix It Full Guide of 2024

This site is supported by our readers. We may earn a commission, at no cost to you, if you purchase through links.
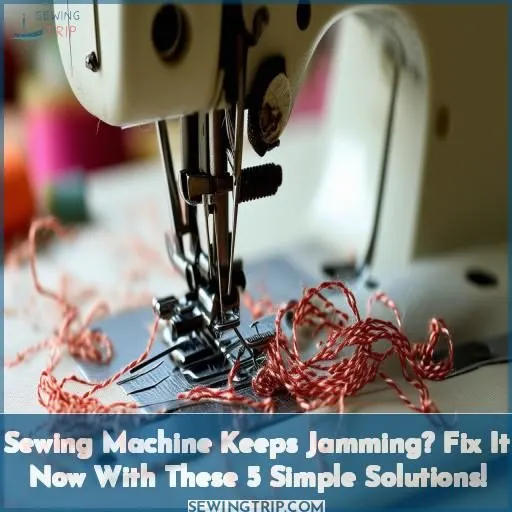
sewing machine keeps jammingYour sewing machine keeps jamming and you’ve had enough. It’s frustrating when your project gets interrupted and you can’t figure out why your machine is suddenly misbehaving. The good news is this issue is usually easy to diagnose and fix. Chances are the problem is caused by improper threading, tension problems, or lint buildup.

Don’t worry, with a few simple tips you can get your sewing machine running smoothly again. First, double check that you’ve threaded the machine properly and the presser foot is raised when doing so. Tension can go out of whack over time so inspect the tension disks for debris. Lint and dust are also common culprits that can clog mechanisms and skip stitches.

Take a few minutes to give your machine a thorough cleaning. Following some basic sewing machine maintenance will help get things moving.

Now get ready to finally solve the mystery of why your sewing machine keeps jamming!

Key Takeaways

  • Replace and rethread needles frequently to avoid shredding thread that causes snags.
  • Clean machine parts like feed dogs, tension disks, and take-up levers often to prevent lint buildup that grabs thread.
  • Carefully adjust top and bobbin tension. Improper tension causes uneven stitching and thread bunching.
  • Regularly lubricate moving parts. Follow manual recommendations for oiling points and maintenance to prevent jams.

Why Does My Sewing Machine Jam?

Why Does My Sewing Machine Jam
A dirty machine can cause fabric buildup and snagging as you sew. Thoroughly clean your machine, especially the feed dogs, tension discs, and bobbin area where lint and threads collect.

Incorrect thread tension is another common culprit behind jamming. The tension needs to be balanced so the top and bobbin threads interlock as stitches form. If too loose, the stitching loops on the underside. If too tight, the thread bunches and jams on top.

Refer to your manual and adjust the tension dials until balanced stitches are produced.

By regularly cleaning your sewing machine and properly setting the thread tension, you can stop frustrating jams in their tracks. Your machine will run smoothly, allowing you to sew without constant interruptions from jamming at the needle.

With some basic maintenance and tension adjustment, you can get your sewing back on track in no time.

Dirty Machine

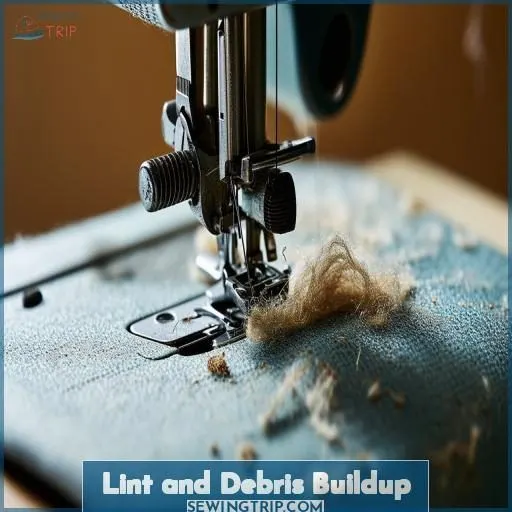
You gotta clean that sucker out, because a dirty machine’ll gum up the works. A build-up of lint and dust can clog the inner mechanisms causing skipped stitches, thread breaks, and jams.

  • Brush or vacuum hidden areas under the throat plate.
  • Use compressed air on hard to reach spots.
  • Wipe down the underside and bobbin area.
  • Remove lint around the take-up lever.
  • Keep your machine oiled and debris-free.

A thorough periodic cleaning keeps everything running smoothly. Remember – a clean machine sews happy!

Tension Issues

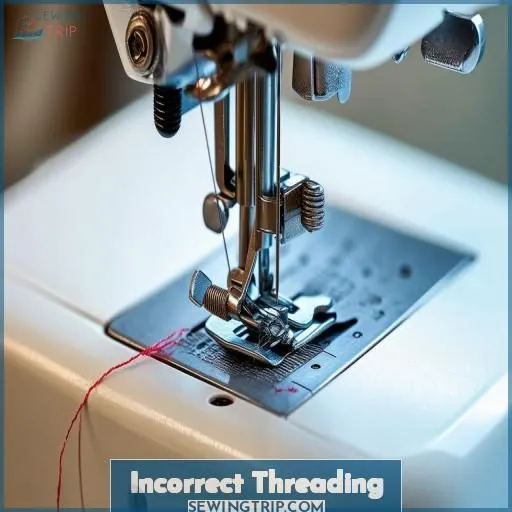
Gotta adjust them tensions if your stitcher’s all tangled up inside. Tension problems cause all kinds of skipping, looping, and jamming, so check it first. Start with rethreading completely, and make sure the presser foot’s up when threading.

Carefully follow the path from spool to needle, getting each thread guide. Tug the thread tail to test after inserting needle.

If it’s loose and loopy on bottom, tighten up top tension. Too tight causes tangling, so loosen if needed. Fabrics and threads each need the right balance. Slowly adjust the knob while testing on scrap material until you find the sweet spot.

How to Thread a Sewing Machine

How to Thread a Sewing Machine
First, wind a bobbin and insert it into the bobbin case. Next, route the top thread through the tension disks and take-up lever. Wrapping the thread around the take-up lever is crucial to prevent jamming and allow smooth stitching.

Proper threading requires winding the bobbin, securing it in place, guiding the top thread through various components, and looping it around the take-up lever. Doing this correctly sets up the stitching mechanism and prevents frustrating tangles or breaks.

With the threads set up properly, you can start sewing without issues caused by improper threading.

Wind the Bobbin

Start by winding a fresh bobbin before you sew. Set your machine to bobbin winding mode, disengaging the feed dogs. Place an empty bobbin on the spindle, thread through the guide and around the tension disk.

Hold the tail taut as you press the foot pedal. Let it spin until it’s filled up just right. Slip the wound bobbin into the bobbin case so the thread unreels clockwise. Insert the case and pull the thread through the slot.

Now the bobbin thread’s ready to go, interlocking with the needle as you sew seam after seam without a hitch.

Thread the Tension Disks

Here we go, friend. C’mon now, we’ve all been there – fighting with that dang sewing machine when the thread gets all jammed up. Just take a deep breath and remember to slide the thread through those teensy tension disks real gentle-like.

They’re finicky little boogers but show ’em some love and they’ll play nice. Loop that thread gently through each disk according to your machine’s tension chart. Too much excess thread causes problems so find the sweet spot. With the correct tension dialed in, this heavy-duty machine will be humming smooth as butter in no time.

Wrap Around Takeup Lever

Play nice as we wrap that silky thread ’round the take-up lever, darlin’—she dances to a rhythm of her own.

  1. Guide the thread through the take-up lever from right to left.
  2. Make sure the thread is sittin’ snugly in the groove.
  3. Give it a little wiggle to check for smooth travel.

The take-up lever moves up and down with each stitch to control thread tension, so it’s crucial to get that upper thread wrapped just right.

Common Causes of Jamming

Common Causes of Jamming
When your sewing machine keeps jamming, the usual suspects are skip stitching, shredded thread, and uneven stitching. These problems often stem from improper threading, damaged or incorrect needles, poor tension settings, debris buildup, low quality thread, hangups on the spool, and forcing the fabric.

Tackle these causes by completely rethreading, cleaning the machine, replacing the needle, adjusting tension, and letting the feed dogs move the material.

Skip Stitching

You would get skip stitching if your needle is bent or you force the fabric. For example, I was sewing a quilt once and got skipped stitches all over – it turned out my needle had gotten a little warped from hitting pins.

Carefully guiding the fabric prevents needle bending that causes frustrating skipped stitches. Choose the right needle for your project – lightweight fabric needs a fine needle that won’t get bent. Adjusting the tension can help, but a bent or damaged needle must be replaced. Use quality needles and let them do the work without forcing the fabric.

Shredding Thread

You’ll get shredding thread if there are burrs along the path or loose threads catching the thread as it moves.

  1. Change the needle regularly to prevent burrs.
  2. Clean under the needle plate to remove lint.
  3. Check the thread quality – cheaper thread shreds more.
  4. Hang ups on the spool can nick or notch the thread.
  5. Consider using specialty needles for delicate threads.

Sewing machine needles work hard – replace them often to avoid burrs that shred thread. Quality thread resists shredding too. Regular cleaning prevents loose threads from catching in the mechanisms.

Uneven Stitching

You’ll get uneven stitching if the tension’s off – too tight gathers the fabric, too loose loops underneath.

Tension Issue Symptom Fix
Too loose Loops/tucks underneath Tighten top tension
Too tight Puckered fabric Loosen top tension
Bobbin too loose Loops on top Tighten bobbin case

Thread tension disks and take-up lever properly when threading. Adjust top tension with test pieces until stitching looks even. Bobbin tension needs care too – tighten the case if loops appear on top. With balanced tension, your machine will sew smooth stitches.

How to Clean a Sewing Machine

How to Clean a Sewing Machine
To clean your sewing machine and prevent frustrating jams, first remove any presser feet, throat plates, or other attachments. Next, use a small brush to gently whisk away lint and debris built up in the bobbin case, feed dogs, tension disks, and other interior areas.

Then, take a soft cloth dampened with sewing machine oil to wipe down all moving parts and lubricate where needed.

Remove Attachments

Yank off those attachments first when giving your jamming sewing machine a deep clean.

  1. Remove the presser foot, throat plate, bobbin case, and needle bar.
  2. Detach the foot pedal and power cord.
  3. Completely unthread, including the take-up lever.
  4. Wipe out any threading remnants already installed.

With everything disconnected, you’ll have full access for scrubbing. This detachment primes your machine for easy reassembly once the cleaning is complete.

Brush Away Lint

Don’t let lint buildup gum things up – grab a brush and vigorously sweep out every corner. Use a stiff-bristled brush to sweep away all the fuzzy lint and thread scraps lodged inside the bobbin area, feed dogs, tension disks, and crevices.

Be thorough in clearing out this debris, which can snag delicate needles and threads, causing frustrating jams. Getting into the habit of frequent brushing reduces friction and catches problems before they arise, so your sewing machine will glide smoothly as it should.

Wipe Interior

Give a thorough wipe down of the interior to remove any built-up grime.

  • Use a lint-free cloth dampened with sewing machine oil to gently wipe the needle plate, feed dogs, bobbin case, and tension disks.
  • Wipe the crevices around the needle clamp and presser foot holder.
  • Clean the exterior body and arm for dust and fingerprints.
  • Don’t use harsh chemicals or submerge in water to prevent damage.
  • Double check no stray threads or lint remain before rethreading your machine.

Regular wipedowns prevent buildup of grime that can gum up interior parts. Proper cleaning maintains your machine’s smooth operation.

Sewing Machine Maintenance

Sewing Machine Maintenance
Regularly lubricate all moving parts, such as the needle bar, presser foot lever, and belt drive, with a light sewing machine oil. This will help everything operate smoothly. Replace your sewing machine needles often, as dull needles frequently cause skipped stitches and thread breaks that can jam the machine.

With consistent oiling and swapping out old needles, you’ll keep your sewing machine running smoothly for many years. Varying your stitch length and switching needle types for different fabrics will also help prevent jams.

And don’t forget to clean around the feed dogs and bobbin area regularly to prevent lint buildup.

Lubricate Moving Parts

You’ve got to grease those gears to keep your stitcher humming smooth as silk. Lubricating your machine’s moving parts prevents frequent issues caused by friction and wear. Common reasons for jamming – skipped stitches, shredding thread, or no fabric movement – can often be fixed by oiling.

Basic troubleshooting steps are to use sewing machine oil on key spots. Put a drop on the needle bar, take-up lever, and presser foot hinge. Rub a tiny bit on the hook race and shuttle. Getting into the habit of routine oiling keeps everything sliding smoothly for quality sewing.

Replace Needles

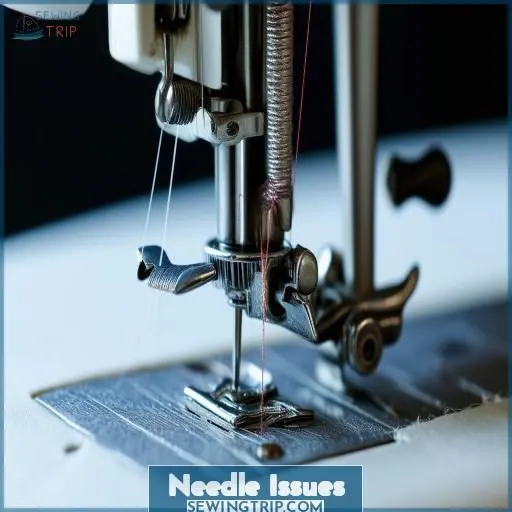
Ya gotta swap dull needles more often to stop those frustrating thread breaks. Sewing blades get microscopic nicks from puncturing fabric over and over. This frays thread as it passes through the eye. Switching needles gives a fresh sharp edge that neatly pierces layers without shredding.

This also keeps your stitches looking smooth and even. Dull points make uneven fabric feed causing bunching, puckering, and uneven tension. Check for burrs by lightly scraping nails over the needle’s length. Replace standard needles after every 2-4 projects.

Use specialty needles like denim or embroidery just once. Follow size and type recommendations for your fabric too.

Fixing Skipping Stitches

Fixing Skipping Stitches
Skipping stitches on your sewing project can be very frustrating! A bent or damaged needle is often the cause. Be sure to change your needle regularly, especially after hitting pins or thick seams. Using the wrong size needle for your fabric is another common reason. Consult your manual for the proper needle to match lightweight or heavyweight fabrics.

With a sharp, undamaged needle in the correct size, you’ll achieve smooth and uniform stitches.

Bent Needle

Your needle is bent, that’s why the stitches are skipping. To fix, carefully unthread then replace that needle right away. Selecting sharp needles suited for the fabric is key in preventing issues. Inspect each beforehand, running fingers down to feel for any deviation.

Bending during sewing happens when forcing thick layers or not raising the presser foot before moving fabric. Thread quality matters too, so use recommended diameters and trusted brands. Adjusting tension and stitch length can help a needle glide through, especially with delicate materials.

But a bent, dull, or wrong needle type leads to frustrated sewing and skipped stitches.

Wrong Needle Size

Don’t suffer skips when the wrong needle size clashes with your fabric.

  • Check your manual for the ideal needle for the fabric weight. Lightweight needs finer, heavyweight calls for thicker.
  • Make sure the needle’s shank fits your machine model correctly. Universal ones often work, but beware sizing issues.
  • Feel needle sizes by hand to visualize their dimensions before inserting. Skinny slid through chiffon, thick pierced denim barriers.

Matching the needle size to material prevents frustration. Tiny needles fray and bend on heavy fabric, while thick ones gouge delicate cloth.

Troubleshooting Thread Jamming

Troubleshooting Thread Jamming
Thread quality is important. Old or low quality threads are more prone to tangling and breakage, causing frustrating jams.

Check the thread path from spool to needle. Make sure it flows smoothly without snagging on guides or hooks.

Ensure the thread spool spins freely without catching. Place spool on a spool cap or thread holder to avoid this issue.

Clean lint and dust from bobbin area. Built up lint can cause tangling and jamming.

Insert bobbin correctly into case following manual instructions. An improperly inserted bobbin is a common cause of jamming.

Check thread tension settings. If tension is too tight it can cause threads to snag and tangle.

Try a new needle. Old needles with burred or damaged points can shred thread as it passes through.

Go slowly at first. When starting a new project, sew at a slow pace until you can identify any potential snag points before speeding up.

Check thread path from spool to needle before each project to identify any hang-ups.

Hang Ups on Spool

You’d never dream a simple spool could mangle your machine so terribly! But hang ups on the spool can nick and notch thread, causing frustrating skipped stitches or full-on jams. Check closely for snags, rough spots, or catching edges as the thread unwinds. Replace suspect spools immediately.

Newer spools directly from the manufacturer rarely have defects. Also ensure the thread unwinds freely. If binding occurs, remove the spool and place it in an alternate holder to avoid repeats of your sewing machine jam.

With quality thread feeding smoothly, you’ll prevent frustrating skipped stitches and enjoy a jam-free sewing process.

Old Thread

Old thread’ll shred up quick and stop any sewing machine in its tracks.

  • Ancient thread breaks easily.
  • Weak and dry fibers snap.
  • Knots get caught in tension disks.

Sewing with thread even a few years old invites trouble. The fibers become brittle, weak, and dusty. Old thread easily snarls into knots, then snaps under tension leading to skipped stitches. Tiny particles shed and clog tension disks causing jams. Replace thread after 18 months for best results.

Quality thread lasts longer, resisting dust and retaining elasticity. But any thread too old turns problematic. So check age if dealing with thread breaks and jams. Fresh high grade thread sews smooth and prevents most sewing machine headaches.

Troubleshooting No Fabric Feeding

Troubleshooting No Fabric Feeding
You’re likely scratching your head because the fabric isn’t moving through your sewing machine even though the needle is stitching. The most common reasons for this are that the feed dogs aren’t raised or debris has collected in the feed dogs, preventing them from gripping and advancing the fabric as they should.

Let’s go through how to check and address both of these potential issues to get your sewing machine smoothly feeding fabric again.

First, check that the feed dogs are raised. There will be a lever or button to raise and lower the feed dogs – make sure this is set to the raised position. Sometimes the feed dogs get lowered accidentally if you were doing free motion quilting or darning.

Next, examine the feed dogs themselves. Use a small brush to clean out any lint or threads that may have collected between the teeth. The feed dogs need to be able to get a good grip on the fabric in order to move it along as you sew.

If the teeth are clogged with debris, they can’t create enough friction to advance the fabric.

You can also try a fresh needle. Over time, needles can get dull or develop tiny burrs, which also reduces their ability to puncture fabric and allow the feed dogs to grip and move it.

Hopefully checking and addressing the feed dog position, clearing them out, and trying a new needle will get your fabric feeding smoothly again! Let me know if you have any other questions.

Feed Dogs Not Raised

Check your owner’s manual again, darlin’. That setting for the feed dogs might’ve slipped your mind. Grab that sewing machine’s throat plate and take a peek underneath. See those jagged metal teeth? We call those the feed dogs.

They’re what grip your fabric pieces and march them smoothly under the foot presser.

So before you stitch, always test on a scrap piece of fabric. Turn the hand wheel and check that the feed dogs rise up to grab that test swatch.

Once those champs are up and ready to tug, you’ll be sewing smooth as butter in no time.

Debris in Feed Dogs

Let’s have a peek down below, friends. If your sewing machine keeps jamming up, those feed dogs might have some debris caught in their teeth.

Carefully remove the sewing machine’s throat plate to get a clear view of the feed dogs in their highest position. Check for any visible threads, lint, or fabric scraps stuck in the mechanism. If you spot some mess, use tweezers to gently remove it.

Be sure to also brush any dust buildup from the bobbin area while you’re in there.

Keeping the inner workings debris-free ensures smooth feeding every time.

When to Take for Servicing

When to Take for Servicing
Having trouble with your sewing machine constantly jamming up on you? It may be time to take it in for professional servicing if adjusting settings, cleaning, and replacing parts doesn’t fix a defective machine or worn out belt that keeps causing frustrating jams no matter what you try.

A technician can properly assess and service a persistently problematic machine and worn parts to get your sewing running smoothly again.

Defective Machine

You’re ready to send your sewing machine for repair when it stops working after trying everything twice.

If the throat plate’s off, the tension’s perfect, the foot lever moves freely, you tried different foot pressers, and used the right type of oil, it’s likely some internal part that needs professional help.

It could be something major like the feed dogs, hook assembly, motor, or just a loose screw. Rather than frustrating yourself, find a qualified shop or the manufacturer for service. Leaving problems too long could make things worse. They’ll get your sewing machine humming happily again.

Worn Out Belt

I’d be taking my sewing machine in for servicing if the belt’s looking real worn out.

  1. Loud squeaking or chirping sounds when sewing.
  2. Loss of power when pushing fabric through.
  3. Skipping stitches and thread jams.
  4. Belt has cracks, glazing, or fraying.

The belt connects the motor to the mechanisms that move the needle and feed dogs. Over time it stretches out, gets brittle, or wears down from friction. Replacing a worn belt restores power and precision to your machine.

Take your model number to the shop so they get the exact fit. A new belt brings back smooth sailing.

Preventing Future Jams

Preventing Future Jams
The best way to stop your sewing machine from constantly jamming up is to use quality materials and proper technique. Invest in good thread and needles so they don’t cause issues, and make sure you’re threading the machine correctly every time.

Following the manual to properly clean and oil the machine will also help prevent frustrating jams in the future.

Quality Materials

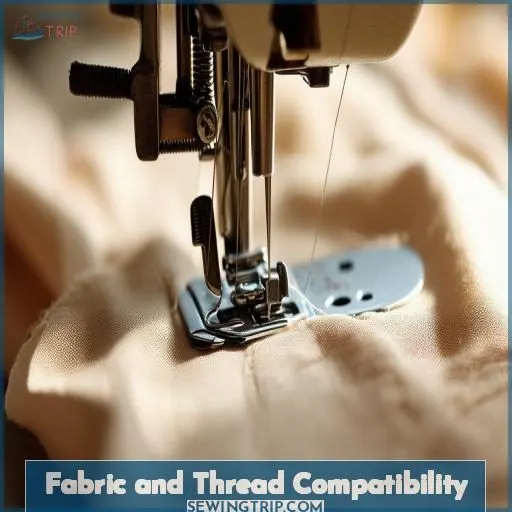
Choose thread that is durable, smooth, and well-suited for your sewing machine’s model and the fabric type you’re working with. Replace dull needles frequently and use the appropriate needle type and size for your projects.

Clean lint and stray threads from beneath the throat plate regularly. Well-oiled, quality parts will help your machine sew smoothly during use. Avoid forcing multiple thick layers through at one time. Check your manual for recommendations on the best materials and maintenance for your specific sewing machine model.

Proper Technique

Don’t force fabrics or let pins/needles get caught to prevent jams later. Follow your sewing machine’s manual for proper threading techniques. Raise the presser foot and needle when you re-thread, and make sure the take-up lever is between the tension disks.

Clean lint from the throat plate regularly. Lubricate moving parts as recommended to prevent friction and allow smooth operation. Insert fabric carefully, without forcing layers or thickness. Let the feed dogs below the throat plate pull the fabric rather than pushing it yourself.

Proper care and good operation habits reduce jamming and skipping. Your machine will have a long, frustration-free life with the right techniques.

Frequently Asked Questions (FAQs)

What are the best quality sewing machine brands to avoid jams?

Pfaff, Bernina and Janome are known for their smooth sewing capabilities thanks to quality construction that prevents frustrating jams. Carefully threading according to the guides and keeping inner mechanisms clean allows their needles to glide smoothly.

My sewing machine makes a strange noise when jammed – is this normal?

Yes, strange noises when jammed are common. Check for fabric stuck in the mechanism. Turn the handwheel slowly to find the obstruction. Don’t force it! Completely unthread, clean lint, and re-oil. Still noisy? It may need adjustment or qualified service. Let the machine rest between long sewing sessions.

I tried all the troubleshooting steps but my machine still jams – what should I do next?

Double check your threading, especially the tension discs. Re-thread completely. Swap the needle and try a new type like a ballpoint. Clean under the throat plate again. Carefully inspect the feed dogs for obstructions.

How can I tell if my sewing machine needs a new belt or just adjustments?

Check if the belt slips or feels worn/cracked. A slipping belt indicates the need for a new one, while minor adjustments may work if the belt feels tight. Always consult your manual as well to ensure a replacement belt is really required.

Is it safe to remove a jammed piece of fabric myself or should I take it to be serviced?

You can remove a light jam yourself. Use small tools to carefully pry and cut threads to free the fabric. Be gentle so you don’t damage mechanisms. Don’t force anything that seems stuck. If it’s severely tangled or you can’t access the jam, take it to a professional for servicing.

References
  • sewingmachinetalk.com
Avatar for Mutasim Sweileh

Mutasim Sweileh

Mutasim is the founder and editor-in-chief of sewingtrip.com, a site dedicated to those passionate about crafting. With years of experience and research under his belt, he sought to create a platform where he could share his knowledge and skills with others who shared his interests.