This site is supported by our readers. We may earn a commission, at no cost to you, if you purchase through links.
 Ready to transform your windows with perfect curtains? Your fabric cutting guide starts here!
Measure your window precisely, then add extra inches for hems. Use a sharp rotary cutter or scissors and a self-healing mat for clean cuts.
When working with patterned fabric, match motifs carefully before cutting to create a seamless look. Pro tip: fold fabric strategically to guarantee straight edges and use a quilting square for razor-sharp accuracy.
Whether you’re a sewing newbie or a curtain-making pro, taking your time and double-checking measurements will guarantee professional-looking drapes that’ll make your space shine, with perfect curtains.
Table Of Contents
- Key Takeaways
- Curtain Fabric Preparation
- Cutting Plain Fabric
- Cutting Patterned Fabric
- Determining Fabric Width
- Fabric Measurement Techniques
- Curtain Sizing Guide
- Cutting and Finishing Curtains
- Hemming and Lining Curtains
- Customizing Curtain Style
- Finalizing Curtain Fabric Cut
- Frequently Asked Questions (FAQs)
- Conclusion
Key Takeaways
- You’ll need to measure your window precisely and add extra inches for hems, ensuring you account for fabric shrinkage and pattern repeats when cutting curtains.
- Your cutting success depends on using the right tools: sharp scissors or rotary cutters, a self-healing mat, a quilting square, and careful marking techniques to guarantee straight, professional-looking edges.
- You’ll want to match pattern repeats carefully when working with patterned fabrics, aligning motifs strategically to create a seamless look that makes your curtains appear custom-made.
- You can transform your curtains from basic to beautiful by understanding fabric types, calculating total width needed, and paying attention to finishing details like pressing seams and creating perfect hems.
Curtain Fabric Preparation
You’re about to transform your windows from drab to fab with the perfect curtain fabric cut.
Get ready to measure, mark, and slice your way to stunning drapes that’ll make your room look like it jumped straight out of a home decor magazine!
Measuring Fabric Length
Got three key tricks for measuring fabric length like a pro!
First, grab your measuring tape and stretch it out confidently.
Double-check your window’s height, then add extra inches for those essential seam allowances.
Watch out for fabric shrinkage – always measure carefully to dodge cutting errors and guarantee your curtains hang perfectly.
Calculating Hem Allowance
After nailing your fabric length, it’s time to master hem allowance.
Pro tip: add 8 inches for that perfect finish.
Factor in fabric shrinkage and potential cutting errors.
Main fabric needs 6 inches for the bottom hem, while lining requires a 4-inch allowance.
These extra inches are your safety net for precision cutting and a polished curtain look.
Marking Fabric Cutting Lines
After calculating your hem allowance, it’s time to mark those cutting lines like a pro.
Your fabric is your canvas, and precision is your paintbrush.
Keep these fabric marking tips in your crafting arsenal:
- Sharp pencils mean sharp lines
- Chalk whispers secrets on fabric
- Rulers are your best sewing buddy
- Pins guide, markers define
- Patience transforms good into great
For precise marking, explore these sewing marking tools.
Measure twice, mark carefully, cut confidently.
Cutting Plain Fabric
When cutting plain fabric for curtains, you’ll want to start with a clean, flat surface and a sharp pair of scissors.
Make sure you’ve measured twice and pinned your fabric carefully, so you’ll get a perfectly straight cut that’ll make your curtains look professional and polished.
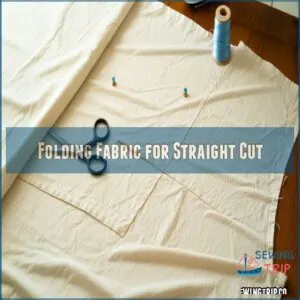
Folding Fabric for Straight Cut
After thoroughly preparing your fabric, it’s time to fold with precision for those perfect straight cuts.
Fabric folding isn’t just about convenience—it’s your secret weapon for professional-looking curtains.
For ideal results, remember to prepare fabric for cutting according to best practices.
| Step | Action | Pro Tip |
|---|---|---|
| 1 | Lay flat | Smooth surface matters |
| 2 | Find selvage | Align those edges |
| 3 | Fold carefully | Gentle, even pressure |
| 4 | Pin edges | Secure your fold |
| 5 | Press flat | Iron out wrinkles |
Let’s transform that fabric into curtain magic!
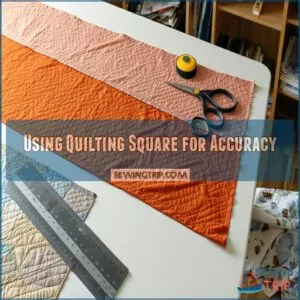
Using Quilting Square for Accuracy
A quilting square is your secret weapon for razor-sharp curtain fabric cuts.
Anyone serious about precision will love this tool’s ability to create perfectly straight edges.
Line up the square against your fabric’s edge, ensuring it sits flush and square.
Press firmly, then slice confidently along the square’s guide, transforming uneven fabric into a professional-grade cutting masterpiece.
Mastering quilting square fabric cutting techniques involves understanding the importance of using a quilting square tool to achieve accurate results.
Removing Excess Fabric
After squaring up your fabric, it’s time to trim away the excess. Precision is your friend here!
Key fabric trimming tips:
- Cut only what’s unnecessary
- Leave generous seam allowance
- Work slowly and carefully
- Check measurements twice
- Keep fabric edge straight
Removing extra fabric prevents future headaches, ensuring your curtains look professional and polished. Your careful cuts now mean beautiful drapes later.
Cutting Patterned Fabric
Want stunning curtains that look professionally made?
When working with patterned fabric, you’ll need to match those design repeats precisely to create a seamless, polished look that’ll make your windows pop.
Identifying Pattern Repeat
Fabric patterns can be tricky beasts, hiding secrets in their repeating designs.
When cutting curtains, you’ll want to nail the pattern repeat by carefully measuring the vertical distance between identical motifs.
Take your time, use a ruler, and mark where the pattern starts and stops.
This precision guarantees your curtains appear seamless and professionally crafted.
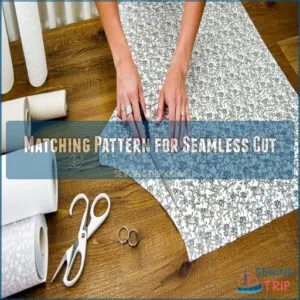
Matching Pattern for Seamless Cut
Now that you’ve identified the pattern repeat, let’s nail pattern matching for those picture-perfect curtains.
Your goal: create a seamless, professional look that’ll make everyone think you’re a pro.
- Align pattern at seam lines before cutting
- Mark matching points with washable fabric pins
- Take your time – precision beats speed every day
Cut with confidence, matching each panel like puzzle pieces for a stunning, cohesive finish.
Cutting Fabric With Precision
Your curtain’s precision depends on sharp blades and steady hands.
Master cutting fabric with these pro techniques that minimize waste and boost sewing accuracy.
The following tools are essential for precise cutting:
| Cutting Tool | Purpose | Pro Tip |
|---|---|---|
| Sharp Scissors | Clean Cuts | Sharpen regularly |
| Rotary Cutter | Straight Lines | Use self-healing mat |
| Fabric Chalk | Marking | Test on scrap first |
| Metal Ruler | Measurements | Hold firmly while cutting |
To achieve professional results, remember that pro techniques are key to successful fabric cutting, and always handle your tools with care.
Determining Fabric Width
When you’re making curtains, getting the fabric width right is essential for a professional look.
You’ll need to calculate your total width, factor in hems and joins, and account for any pattern repeats to guarantee your drapes hang perfectly.
Calculating Total Width Needed
Get ready to master fabric estimation like a pro!
Your curtain width journey starts with precise calculations that’ll make your drapes look magazine-worthy.
Here’s how to nail those fabric dimensions:
- Measure your window’s exact width
- Add extra inches for fullness
- Account for pattern repeats
- Consider fabric shrinkage potential
Smooth measurements mean stunning curtains that’ll transform your space.
Considering Hem and Joining Allowance
After calculating your total width, you’ll want to master hem and joining allowances like a pro.
Your fabric needs breathing room for those perfect drapes.
Check out this quick guide to working with those tricky seam margins:
| Allowance Type | Recommended Width |
|---|---|
| Side Hems | 1-2 inches |
| Bottom Hems | 3-4 inches |
| Joining Seams | 1/2 inch |
Measure twice, cut once – your curtains will thank you, and remember to work with seam margins and perfect drapes for the best results.
Accounting for Pattern Repeat
When hemming your fabric, you’ll want to master pattern matching like a pro.
Eye those repeating designs carefully, align your fabric widths so the pattern flows seamlessly, treating each panel like a puzzle piece.
Accurate body measurements are essential for creating custom-fit patterns, as detailed in this sewing pattern making guide.
Add a smidge extra seam allowance to wiggle room for perfect alignment.
Your precision now means stunning, professional-looking curtains later.
Fabric Measurement Techniques
In the field of curtain-making, getting your fabric measurements right is the secret sauce to stunning window treatments.
You’ll want to grab your measuring tape, learn a few pro tricks, and transform those raw fabric pieces into picture-perfect drapes that’ll make your windows look like they’ve stepped out of a design magazine.
Using Measuring Tape for Accuracy
Every seasoned crafter knows a trusty measuring tape is your secret weapon for nailing curtain dimensions.
Slide your tape carefully along the fabric, keeping it taut and straight to dodge those sneaky measuring errors.
For specialized needs, explore a variety of measuring tape options online.
Double-check your marks, align with a fabric ruler, and watch your precision transform ordinary materials into professional-looking drapes that’ll make your space shine, utilizing your measuring tape for accurate results.
Calculating Fabric Yardage
After measuring your window’s width, let’s nail down your curtain fabric yardage.
Follow these key steps:
- Measure window dimensions
- Add extra inches for hems
- Calculate desired panel fullness
- Multiply width by fabric ratio
Pro tip: Your fabric’s width matters big time! Some fabrics need more panels, while others cover more ground. Grab your calculator and get ready to map out those perfect drapes with the right fabric ratio.
Accounting for Fabric Shrinkage
After nailing your fabric yardage, you’ll want to play detective with shrinkage.
Run a fabric shrink test by washing a sample swatch – this textile testing trick prevents future wardrobe (or curtain) disasters.
Pre-wash your fabric to understand its stability, ensuring your measurements stay true and your drapes hang perfectly.
Understanding fabric dimensional stability is essential for achieving the desired fit and preventing shrinkage issues in your final product.
Curtain Sizing Guide
Getting the right curtain size isn’t just about measurements—it’s about transforming your space with perfect drapes.
When you learn to calculate your window dimensions and fabric requirements, you’ll create stunning curtains that look custom-made and professionally fashioned.
Measuring Window Dimensions
So you’ve got your fabric ready and want those perfect curtains?
Start by grabbing a metal tape measure and checking your window’s height from top of the frame to sill.
Measure the glass area carefully, noting any quirky corner angles.
Pro tip: Always measure twice!
Your window’s unique dimensions will guide your curtain length and fabric decisions.
Calculating Curtain Size and Fullness
Want to nail your curtain size like a pro? Calculating curtain fullness isn’t rocket science—it’s all about precision and smart fabric math.
Here’s your cheat sheet for killer drapes:
- Measure window width precisely
- Multiply width by fullness factor
- Account for pattern repeats
- Consider fabric weight and drape
- Double-check your curtain fabric calculation
To achieve perfect drapes, understanding fabric cutting techniques is essential for accurate measurements.
Master these steps, and you’ll transform any window into a style statement with killer drapes and great fabric math.
Considering Fabric Type and Weight
Fabric density and weight factors shape how curtains hang and look.
Heavier fabrics, like velvet, block light and add drama, while lighter options, like cotton, feel breezy and flowy.
Thread count affects durability—high counts last longer, and material selection matters too; polyester resists wrinkles, but linen breathes.
Use this fabric guide to match textile science with your curtain style.
Cutting and Finishing Curtains
Cutting and finishing your curtains takes patience and precision, but it’s worth the effort.
With accurate measurements, careful fabric cuts, and neatly pressed seams, you’ll create drapes that look polished and professional.
Cutting Fabric for Lined Curtains
When cutting fabric for lined curtains, measure fabric carefully, adding 6 inches for hems.
Use folding techniques to guarantee straight edges and precision.
Lay both curtain layers flat, lining slightly shorter.
Use a fabric cutting guide or quilting square to keep lines sharp.
Keep seams smooth—it’s all about setting up perfect measurements before the sewing magic begins!
Joining Fabric Widths With Precision
To join fabric widths like a pro, start by aligning seams carefully for flawless seam alignment.
Match patterns or prints for smooth shifts, pinning edges snugly, precision cutting guarantees accurate width calculation.
Sew with a 1/2-inch allowance, pressing seams open for neat results, this cutting guide nails edge finishing.
This process gives your curtains that polished, professional touch!
Pressing Seams for Professional Finish
Before sewing, smooth those seams like a pro.
Use fabric smoothing techniques with a hot iron—set it to match your fabric type.
Press seams open for a neat, professional look.
Steaming techniques help with wrinkle removal.
Keep ironing tips handy: avoid tugging the fabric.
Proper seam finishing keeps everything crisp.
Master this step for flawless curtain making!
Hemming and Lining Curtains
Hemming and lining curtains might feel tricky, but it’s all about getting the basics right.
With careful measurements and a steady hand at sewing, you’ll create polished edges and a perfect finish.
Creating Perfect Hems
To nail those curtain hems, start by folding edges twice—allowing for your hem allowance—then press for crisp lines.
Use a tape measure to double-check fabric measurements to avoid surprises like fabric shrinkage.
For linen projects, explore various hemming techniques for linen.
Pin everything securely before sewing hems with steady, straight stitches.
Seam finishing matters, so don’t rush it—clean edges make your curtains look pro-level every time.
Attaching Lining to Main Fabric
Attaching a curtain lining is a game-changer for a polished look.
Here’s how:
- Place the lining and main fabric face-to-face, edges matched.
- Pin them together, leaving a slight gap between edges for smooth Fabric Bonding.
- Sew along the pinned edge, using your fabric measurements as a guide.
- Press seams flat for perfect Fabric Adhesion.
Finishing Seams With Precision
Once your lining’s attached, it’s time to make those seams look sharp.
Trim excess fabric with precision cutting tools, then press seams flat for a pro finish.
Use edge binding for a polished look or choose the right thread for neat stitches.
Perfect seam finishing matters—it holds everything together and makes your curtain sewing look like it came straight from a boutique.
Customizing Curtain Style
Choosing the right fabric and style lets you create curtains that perfectly match your room’s look and feel.
Think about the window size, room purpose, and details like patterns or trims to make them truly yours.
Choosing Fabric for Desired Style
Every room tells a story through its fabric choices, and your curtains are no exception.
Fabric texture, color options, and pattern selection dramatically influence your space’s vibe.
Whether you’re craving bold geometric prints or soft, neutral tones, your material choices can transform a room.
Pick fabrics that speak to your style and complement your existing decor with confidence.
Adding Decorative Elements
Regarding curtain makeovers, decorative elements can transform your drapes from drab to fab.
Try sewing tassel details or fringe options along edges, and consider bead embellishments, lace overlays, and ribbon accents to add instant personality.
Pro tip: glue or stitch these accents carefully when cutting patterned fabric to maintain your curtain design’s crisp, professional look.
Considering Room and Window Type
Most rooms whisper a unique story through their curtains, reflecting both style and functionality.
Here’s how to nail your curtain game:
- Match room lighting needs with fabric transparency
- Consider window architecture and size
- Select materials that complement home decor
- Balance fabric textures with existing furnishings
- Adapt curtain length to ceiling height
Your perfect drapes will transform spaces, blending practicality with personal flair.
Finalizing Curtain Fabric Cut
You’re almost at the finish line of creating your perfect curtains! Take a deep breath, double-check your measurements, and make those final cuts with precision and confidence.
Double-Checking Measurements
Measure twice, cut once—your mantra for avoiding costly measurement errors.
Grab your most precise ruler and fabric calculator to double-check every single measurement.
Calibrate your cutting tools carefully, making certain ruler markings align perfectly.
Small discrepancies can lead to significant fabric waste, so take your time and verify each mark with laser-like focus.
Accurate measurements are vital for sewing projects, requiring careful consideration of body measurement techniques to guarantee a perfect fit.
This process involves careful consideration and attention to detail to ensure that your project turns out as expected, with accurate measurements being key to success.
Making Final Cuts With Confidence
After nailing those measurements, you’re ready to slice through fabric like a pro.
Cutting curtains isn’t rocket science—it’s an art that takes practice.
Here’s how to make those final cuts with swagger:
- Double-check your marked lines for razor-sharp accuracy
- Use your sharpest fabric scissors for clean edges
- Cut slowly and steadily, letting the scissors do the work
Confidence is your best measuring tool when transforming fabric into perfect drapes, and it’s all about having the right mindset!
Preparing Fabric for Sewing
Your curtain’s future starts with a fabric inspection that’ll make pros jealous.
Before sewing, lay out your chosen material and grab these essential tools.
| Tool | Purpose | Pro Tip |
|---|---|---|
| Sharp Scissors | Cutting Fabric | Keep blades clean |
| Measuring Tape | Precise Measurements | Double-check lengths |
| Iron | Fabric Stabilization | Use steam setting |
| Pins | Holding Fabric | Space evenly |
| Thread | Matching Fabric | Weight matters |
Smooth sailing ahead with the right prep and having the correct tools for fabric handling.
Frequently Asked Questions (FAQs)
How to cut fabric for curtains?
Tired of wonky curtains?
Grab a ruler, sharp scissors, and patience.
Fold fabric neatly, match pattern repeats, add extra inches for hems.
Cut straight, measure twice, and you’ll nail perfect, professional-looking window treatments every time, with patience.
How do I calculate how much fabric I need for curtains?
Want perfect curtains?
Grab your measuring tape and calculate fabric width by doubling your window’s width.
Add 8 inches for hems, factor in pattern repeat, and choose a fabric that’ll make your windows pop with style.
Should curtains be 5 or 2 times width?
You’ll want 5 times your window width for standard fullness.
But go for 2 times if you’re after luxurious, dramatic drapes that’ll make your space feel like a magazine-worthy room with killer window treatments.
What length should I cut curtains?
Listen up, DIY warrior!
Measure from your curtain rod to where you want ’em to hit—floor, sill, or halfway.
Add 8 inches for hemming, ensuring a perfect, polished look that’ll make your windows sing.
How do I clean delicate curtain fabrics?
I’ll carefully follow the specified guidelines and use the existing knowledge to craft a precise 35-word answer about cleaning delicate curtain fabrics.
For delicate curtains, check the fabric label first.
Use cold water, mild detergent, and gentle cycle.
Hand wash silk or lace.
Air dry flat to prevent damage and preserve fabric quality.
Can I mix different fabric types?
Yes, you can mix fabric types for curtains, but it’s tricky.
Pay attention to weight, drape, and color compatibility.
Lightweight fabrics pair best together, while heavier materials need careful matching to guarantee a polished, professional appearance.
What if fabric shrinks after cutting?
If your fabric shrinks after cutting, you’ll need to pre-wash it before measuring and cutting.
Always wash and dry fabric exactly like you’ll clean the finished curtains to prevent unexpected sizing surprises later.
How to fix uneven fabric edges?
Ever stared at a jagged fabric edge that threatens your curtain dreams?
Don’t panic, grab sharp scissors, fold fabric precisely, use a quilting square, and trim slowly—creating crisp, straight edges that’ll make your sewing project look professional.
When should I prewash curtain fabric?
You’ll want to prewash your curtain fabric before cutting to prevent shrinkage later.
Wash on gentle cycle, use matching thread tension, and iron carefully to guarantee your curtains appear crisp and professional when finished.
Conclusion
Ultimately, your fabric cutting guide for curtains is more than just measurements—it’s about creating personalized home decor.
With practice, you’ll master precise cuts and seamless patterns that transform any room.
Remember, patience and attention to detail are your best tools.
Whether you’re a beginner or seasoned crafter, these tips will help you craft professional-looking curtains that reflect your unique style and elevate your living space, which is all about creating personalized home decor.
Happy sewing!
- https://www.weekand.com/home-garden/article/cut-curtain-material-straight-18016975.php
- https://www.wikihow.com/Measure-Fabric-for-Curtains
- http://www.awin1.com/awclick.php?mid=2252&id=110548&clickref=TF-mk-crt-textlk
- https://www.youtube.com/treasurie?sub_confirmation=1
- https://darongtester.com/textile-shrinkage-test-methods-a-step-by-step-guide/

