This site is supported by our readers. We may earn a commission, at no cost to you, if you purchase through links.
 Got a shirt that’s swimming on you? You don’t need a needle and thread to fix a shirt that’s too big!
Transform your baggy top into a perfect fit with some clever tricks.
Grab a hair tie and bunch the excess fabric at your waist, or use fashion tape to create temporary seams.
For a trendy look, try the front-tuck technique or create a stylish side knot.
Safety pins can work magic for a quick fix, and strategic knotting can give your oversized shirt a whole new silhouette.
These no-sew solutions aren’t just quick – they’re totally reversible, letting you switch up your style whenever you want.
Table Of Contents
- Key Takeaways
- Quick Fixes Without Sewing
- Equipment Needed for Alterations
- Methods for Fixing Oversized Shirts
- Tips to Make Your Shirt Fit Better
- Altering Specific Parts of Your Shirt
- Hacks for Oversized Garments
- Styling Oversized Clothing
- Maintaining The Fit
- Troubleshooting Common Issues
- Additional Tips and Tricks
- Frequently Asked Questions (FAQs)
- Conclusion
Key Takeaways
- You can quickly transform a baggy shirt using hair ties or fashion tape to bunch excess fabric at your waist, creating temporary seams without damaging the garment.
- You can also use the same techniques for dresses, like the safety pin hack to cinch a dress at the waist how to cinch a dress. You’ll get an instant fit by using safety pins from the inside to create subtle pleats, or by trying the front-tuck technique for a trendy, balanced look.
- You can fix specific problem areas by using clear elastic bands to tighten loose sleeves, or double-sided fashion tape to close gaps between buttons.
- You’ll achieve different styles by knotting your oversized shirt – try a side twist for casual wear, a front tie for button-ups, or a back bundle for loose blouses.
Quick Fixes Without Sewing
Don’t let that oversized shirt turn you into a walking tent when you’ve got plenty of no-sew tricks up your sleeve.
You’ll love how these quick fixes can transform your baggy top into a perfectly fitted fashion statement using simple items you already have at home.
Using Safety Pins
Gather a few medium-sized safety pins.
Alternatively, you can also try the "coin at the back trick" learn more about shrinking shirts.
Turn your shirt inside out and locate the loose areas.
Pinch the excess fabric into small, even pleats.
Secure each pleat with a pin from the inside.
Space pins evenly for a balanced look.
Employing Fashion Tape
Fashion tape is your secret weapon for taming unruly shirts.
This double-sided adhesive works like magic to keep loose fabric in place without damaging your clothes.
| Fabric Type | Best Tape Placement |
|---|---|
| Silk | Along seams |
| Cotton | Near buttons |
| Polyester | Around neckline |
| Denim | At waistband |
Simply cut the tape to size, peel off the backing, press firmly, and you’re ready to rock your newly fitted shirt.
Utilizing Elastic Bands
With elastic bands from your hair tie stash, you can transform that baggy shirt into a perfect fit by first identifying the perfect fit and common issues like loose waist and hips, as explained in taking in shirt sides easily.
Simply gather loose fabric at the sides, wrap a band around each bunch, and roll the fabric over to hide the bands.
Pro tip: use clear elastic bands for lighter fabrics, and opt for thicker bands on heavier materials for extra hold.
Knotting Technique
Looking for a quick way to rock that oversized shirt?
The knotting technique is your new best friend.
Picture turning that baggy top into a style statement with just a simple knot!
Here’s how to nail it:
- Gather fabric where you want the knot (side, front, or back)
- Loop the fabric into a basic knot
- Pull tight to create your desired fit
- Adjust surrounding fabric for a balanced look
Now you’re ready to show off your perfectly fitted shirt!
The Twisting Method
While knotting works wonders, there’s another trick up your sleeve – the twisting method.
Simply gather the loose fabric at your sides, twist it into a tight coil, and secure it with a small rubber band.
You can play around with placement – try twisting at the waist, hip, or even diagonally.
It’s perfect for t-shirts, blouses, and even light sweaters.
Equipment Needed for Alterations
Getting your DIY clothing fixes just right is like preparing for a cooking adventure – you need the right tools in your kitchen!
Before you jump into transforming those oversized clothes into perfect-fitting pieces, let’s round up your essential equipment.
Think of these items as your fashion first-aid kit:
- Sharp fabric scissors for clean, precise cuts that won’t leave your edges looking like they’ve been chewed by your pet
- A trusty measuring tape to make sure you’re taking in exactly the right amount (because eyeballing it rarely works out!)
- Tailor’s chalk or fabric markers that’ll disappear later – no one needs permanent reminder lines
- An iron and ironing board to keep everything crisp and professional-looking
Don’t forget some basic supplies like safety pins, fashion tape, and rubber bands – they’re like the salt and pepper of clothing alterations!
Methods for Fixing Oversized Shirts
You’ll love these super quick tricks to transform your baggy shirts into perfectly fitted favorites without breaking out the sewing machine.
Whether you’re rocking hand-me-downs or just scored an awesome oversized find, these methods will help you nail that just-right fit in minutes.
Fixing With Thread and Needle
A sturdy needle and thread can be your secret weapon for taming that oversized shirt.
Start by turning it inside out and pinching the excess fabric where you want it snugger.
Mark your desired line with chalk, leaving room for comfort.
Connect those marks with straight pins, then hand-stitch along your pinned line.
Knot the thread securely, and you’re ready to rock your newly fitted shirt!
Fixing With Hem Tape
Transform your baggy shirt into a perfect fit with hem tape – it’s like having a mini tailor in your pocket!
Here’s your no-sew solution that’ll last through multiple washes:
- Turn your shirt inside out and pinch the loose areas
- Mark your desired fit with chalk
- Cut the excess fabric, leaving a 1-inch allowance
- Place hem tape between folded edges
- Iron on medium heat to seal the deal
Whether you’re fixing a thrifted gem or salvaging an online shopping mishap, this hack’s got your back.
Tips to Make Your Shirt Fit Better
Got a shirt that fits like a tent? You’ll love these smart tricks to make your oversized top look like it was made just for you.
Using Layers of Fabric
Layering isn’t just for cold days.
A too-big shirt can look totally intentional when you add the right pieces underneath.
Try a fitted tank top or bodysuit as your base layer – it’ll give your oversized shirt more structure and prevent it from swimming on your frame.
For a versatile option, you can also opt for various styles of mesh fashion tops.
For extra style points, mix textures like silk camisoles under cotton shirts or mesh tops under sweaters.
Tucking Your Shirts
While layers can bulk up your look, a strategic tuck can work wonders for an oversized shirt.
Try the French tuck – just pop the front in and leave the back loose for that effortless vibe.
For a sleeker silhouette, go full tuck with high-waisted bottoms.
Pro tip: Create a blouson effect by pulling the shirt out slightly after tucking – it’ll hide any bunching.
Trying Before Buying
You wouldn’t buy a car without a test drive, so why risk it with clothes?
Before clicking "buy" or heading to checkout, take time to try on that perfect shirt.
Here’s what to check:
- Roll your shoulders and stretch your arms to test movement
- Sit down to see if the shirt rides up or gaps
- Check the fit across chest, waist, and hips
- Look at yourself from all angles in good lighting
Consider Tailoring
Sometimes DIY fixes just won’t cut it, and that’s okay!
Professional tailoring might seem pricey upfront, but it’s worth considering for special pieces like dress shirts or designer tops.
Local tailors often charge $15-30 for basic shirt alterations, while department stores may offer in-house services.
Can’t swing professional costs?
Local fashion students or alterations workshops might offer budget-friendly solutions.
Choose The Right Size
Professional tailoring isn’t always the answer – prevention beats fixing every time.
Before hitting those clothing stores, grab your measuring tape and note down your body measurements, as pattern sizes aren’t standardized across brands.
Compare these numbers with size charts, and keep in mind that sewing patterns’ true sizes.
Don’t forget to check return policies.
Here’s a pro tip: try sitting, stretching, and moving around in the fitting room. Your future self will thank you!
Altering Specific Parts of Your Shirt
You don’t need a tailor’s magic wand to fix those pesky sleeve problems and loose armholes that make your favorite shirt look sloppy.
Whether you’re dealing with droopy shoulders or sleeves that swallow your arms whole, we’ve got some clever tricks that’ll transform your oversized shirt into a perfect fit in minutes.
Shortening Sleeves
Anyone can transform too-long sleeves into a perfect fit with these simple tricks.
Roll up those pesky sleeves and secure them with rubber bands for an instant fix.
Here’s what works like magic:
- Fold sleeves neatly into even cuffs for a preppy vibe
- Create a casual ruched look by scrunching sleeves with clear elastic bands
- Try the military-style roll for a structured, trendy appearance
Fixing Loose Armholes
Loose armholes can turn your favorite shirt into a wardrobe malfunction waiting to happen.
Here’s your quick guide to fixing a shirt that’s too big without breaking out the sewing machine, and if you’re looking to tackle another project, learning how to hem pants on a sewing machine can also be a useful skill.
| Method | Difficulty | Time Needed | Result |
|---|---|---|---|
| Fashion Tape | Easy | 2 minutes | Temporary fix |
| Safety Pin Dart | Medium | 5 minutes | Semi-permanent |
| Fabric Binding | Advanced | 15 minutes | Professional look |
| Double-sided Tape | Easy | 3 minutes | Quick solution |
Try fashion tape for a quick fix, or create a subtle dart using safety pins.
For a more polished look, adding fabric binding around the edge works wonders.
Hacks for Oversized Garments
You won’t believe how easy it’s to transform those baggy clothes into perfect-fitting pieces without touching a needle and thread.
From jeans to dresses and everything in between, these clever tricks will help you rock those oversized garments like a fashion pro.
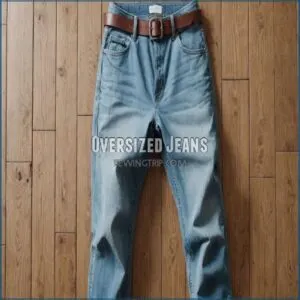
Oversized Jeans
Got oversized jeans giving you the baggy blues? Here’s your game plan:
For too-wide waists, rock the trendy paper bag look with a statement belt.
Shrink those jeans down to size by washing them in hot water – just be careful not to overdo it!
For length issues, cuff ’em up for that perfect vintage vibe.
Want something edgy? Try distressing the loose areas for a deliberately worn-in style.
Oversized Tops
When your favorite top feels more like a tent than a trendy piece, don’t panic!
Fashion tape works wonders for closing those pesky gaps, while a strategic tuck-in instantly elevates your look.
Try bundling fabric at the side for that effortlessly chic vibe, or weave a colorful scarf through loose straps.
For instant results, safety pins are your secret weapon for shortening straps and creating shape.
Oversized Dresses
Rocking an oversized dress doesn’t mean you’re stuck swimming in loose clothes, and you can even use techniques like waistband extenders to make pants bigger when needed.
Transform your loose dress into a fashion statement using safety pins to shorten straps discreetly, or weave a colorful scarf through them for added flair.
Layer a fitted shirt underneath a deep V-neck for modest style, cinch your waist with a trendy belt, or slip on heels to perfect that hemline.
Oversized Sleeves
Those oversized sleeves making you look like you’re wearing a wizard’s robe? No worries!
Grab some rubber bands to shorten them by folding over excess cloth – perfect for a casual look.
For a more polished vibe, try safety pins to create a neat tuck.
You’ll transform those billowy sleeves into something chic and fitted in seconds. Plus, both fixes are totally reversible!
Styling Oversized Clothing
You don’t need magic to turn that oversized shirt into a fashion statement – just a few clever styling tricks will do the job.
Whether you’re rocking a baggy tee or swimming in your favorite button-down, we’ll show you how to transform these pieces into Instagram-worthy looks that’ll have everyone thinking you planned it that way.
Bundle at The Side
Got an oversized shirt that’s swimming on you?
Here’s a styling trick that’s pure magic: the side bundle.
Just gather the extra fabric at your hip and twist it into a casual knot.
This bohemian-chic hack works wonders on long tees, dresses, and even skirts.
You’ll instantly transform that baggy look into a perfectly imperfect side detail that screams "I meant to do that!
Wear Heels
When wearing an oversized shirt, heels can instantly balance your proportions. You’ll look taller and more polished, plus your shirt won’t seem as overwhelming. Here’s what you need to know:
- Choose block heels for comfort during long days
- Pair platform sneakers with casual oversized tops
- Match heel height to shirt length – higher heels for longer shirts
- Opt for wedges to maintain that laid-back vibe
Use a Belt
A belt can transform your oversized shirt into a fashion statement faster than you can say "style upgrade."
Take that billowy fabric and cinch it at your natural waist – instant shape!
For a trendy paper bag effect, place the belt slightly higher than your waistline.
Mix it up with different belt styles: thin leather for a polished look, or go bold with a statement buckle for extra flair.
Add a Scarf
A long, silky scarf can transform your oversized shirt into a style statement.
To achieve the softest and most luxurious feel, look for scarves made from softest scarf materials.
Wrap it around loose straps to shorten them instantly, or weave it through belt loops to cinch in excess fabric.
You’ll find that a bright scarf adds personality while fixing fit issues.
Pro tip: silk scarves work best since they’re thin enough to layer without bulk.
Maintaining The Fit
You’ve got your shirt fitting just right, but first make sure you know how to undo sewing mistakes by gently pulling out seams with a seam ripper tool to avoid fabric damage, especially if you’re not experienced with a sewing machine, undoing sewing errors. Now you’re wondering how to keep it that way without breaking out the sewing machine.
Let’s look at some genius tricks that’ll help your DIY alterations stay put,
from using coins for a quick fix to mastering the art of strategic knots that won’t budge.
Coin at The Back
Here’s a clever trick that’s been around since your grandma’s day – the coin tuck!
Simply fold your oversized shirt at the back, roll a quarter into the fabric, and secure it with a rubber band.
This creates a gathered effect that’ll instantly slim down your silhouette.
The weight of the coin helps keep everything in place while you strut your stuff.
Shrinking
Your oversized shirt can become a perfect fit through strategic shrinking.
Pop it in the washing machine using hot water – this works like magic on cotton and similar fabrics.
For best results, run it through a high-heat dry cycle too.
Just keep an eye on the process to avoid over-shrinking.
Not all fabrics respond the same way, so check the care label first.
Tighten The Sleeves
Those baggy sleeves dragging in your soup? Let’s fix that! Tightening oversized sleeves is a breeze with these quick tricks:
- Roll up long sleeves into neat cuffs for an instant casual-chic look
- Use rubber bands under the fabric to create a gathered effect
- Twist and pin sleeves at the elbow for a bohemian vibe
- Create a stylish ruched look by threading elastic through the sleeve cuff
Hem Tape
Fabric fashionistas know that hem tape is like magic for quick fixes.
Just iron this double-sided wonder between fabric layers, and you’ll instantly create a clean, temporary hem.
It’s perfect for hemming pants, shortening sleeves, or taking in sides without permanent changes.
Choose fusible or non-fusible tape based on your fabric type, and remember to test it on a small area first.
Safety Pins
Hidden beneath your oversized shirt, safety pins are your secret weapon for a perfectly fitted look.
They’re like tiny fashion ninjas, working behind the scenes to create that just-right fit.
You can also consider using a coin at the back of the shirt for a quick fix, similar to the technique described in guides on how to tighten a loose shirt.
Here’s how to use safety pins effectively:
- Gather excess fabric at the sides and pin from inside out
- Create subtle back darts by pinching and securing small folds
- Adjust shoulder straps by folding and pinning in place
Knots
Looking to add some edge to your oversized shirt?
Knotting isn’t just a quick fix – it’s a style statement that’ll turn heads.
Unlike safety pins, knots let you play around with different looks.
For inspiration, check out some stylish oversized shirt knot accessories available online, like those at oversized shirt knot products.
Here’s your go-to guide for mastering the art of the knot:
| Knot Style | Best For |
|---|---|
| Side Twist | Casual tees |
| Front Tie | Button-ups |
| Double Knot | Long tanks |
| Crop Knot | Oversized shirts |
| Back Bundle | Loose blouses |
Remember to position your knot where it feels most comfortable – you’re in control of your style story!
Troubleshooting Common Issues
You’re not alone if those pesky gaps and super-long sleeves are turning your favorite shirt into a fashion nightmare.
Let’s tackle these common clothing mishaps with some quick fixes that’ll have your oversized shirt fitting like a charm in no time.
Loose Shirt Gaps
Those pesky gaps between buttons on your shirt can be a real confidence killer.
No worries – fashion tape is your secret weapon here.
You can easily find a suitable fashion tape on a website like fashion tape products.
Just stick a small piece between the buttonholes where the fabric tends to separate.
For a quick fix, try using a small safety pin on the inside of your shirt, or layer a cute camisole underneath for extra coverage.
Long Sleeves
Got sleeves that won’t quit? You’re not alone! Rolling up those extra-long sleeves isn’t just practical – it’s actually super trendy right now.
Here’s how to turn those lengthy sleeves into a fashion statement:
- Try the classic double-fold roll for a crisp, professional look
- Go for a messy push-up style when you’re feeling casual
- Create a structured cuff by folding three times and securing with a hidden safety pin
Additional Tips and Tricks
Styling oversized clothes is like having a fashion superpower – you just need the right tricks up your sleeve! Here’s your secret arsenal of game-changing tips that’ll transform any baggy garment into your new favorite piece:
- Roll up long sleeves into neat cuffs and secure them with clear hair elastics for an effortlessly chic look
- Layer a fitted tank top underneath billowy shirts to create shape without altering the original piece
- Transform oversized sweaters into off-shoulder tops by letting them drape naturally on one side
- Create instant waist definition by knotting a too-big shirt at your hip bone
- Use a statement belt to cinch in baggy dresses and add visual interest
Want to level up your thrift store finds? Try mixing oversized pieces with fitted ones – like pairing a slouchy sweater with skinny jeans. It’s all about creating balance while keeping your unique style intact!
Frequently Asked Questions (FAQs)
How do you fix a oversized shirt without sewing?
You can transform an oversized shirt using fashion tape, safety pins, or elastic bands.
Create a stylish knot at the waist, or try the twisting method for a chic look.
Belt it for instant shaping!
How to fix a T-shirt that is too big?
Transform that tent-like T-shirt into a perfect fit!
Cinch the waist with a belt, knot the side for a trendy look, or use fashion tape to create temporary alterations.
Rubber bands can quickly adjust loose sleeves.
Can you make a shirt bigger if you sew alterations?
Making a shirt bigger through sewing is limited – you can only add fabric panels, adjust seams, or insert gussets.
There’s no way to stretch existing fabric, so you’ll need extra material for meaningful size increases.
How to tighten a shirt without sewing?
Got a baggy shirt? Tighten it up quickly using fashion tape for gaps, rubber bands to shorten sleeves, or create a stylish side knot.
A belt can cinch the waist, while safety pins work for temporary fixes.
How do you fix a shirt that is too big fast?
You can quickly fix an oversized shirt by using fashion tape to close gaps.
You can also tuck it in for a sleek look, or tie a knot at the bottom.
Rubber bands can help cinch sleeves.
How to make an oversized t-shirt cute without cutting?
Transform your oversized tee into a chic statement piece!
Try knotting it at the waist, tucking it into high-waisted bottoms, or using a belt to cinch it.
You’ll rock that relaxed-fit look instantly.
How to tighten clothes without sewing?
Take control of loose clothes with fashion tape, safety pins, or rubber bands.
Belt oversized pieces, knot long tees, or create side bundles.
Roll sleeves and cuff pants for that perfect, customized fit.
How do you fix a shirt without sewing?
By jove, here’s a fashionista’s quick fix: Use safety pins to gather loose fabric, try fashion tape for gaps, or knot the bottom.
Belt it, tuck it in, or bundle the side for instant style.
Can I use hot water washing to shrink shirts?
You can shrink most cotton shirts in hot water, but be careful – results vary by fabric type.
Run a hot wash cycle followed by high heat drying.
Check fit periodically to avoid over-shrinking.
Will fabric softener affect the shirts natural shrinkage?
Like a shield against shrinkage, fabric softener coats fibers and reduces their ability to tighten up.
Skip it during hot washes if you’re trying to shrink your clothes down to size.
How many times should I repeat shrinking process?
Repeat the shrinking process 2-3 times max for best results.
Don’t overdo it – too many washes can damage fabric fibers.
Check the fit after each wash and stop when you’re happy with it.
Does air-drying prevent shirts from shrinking too much?
Air-drying will give you better control over shrinkage compared to machine drying.
It’s gentler on fabrics and lets you monitor the size while drying.
Just check the fit periodically until you’re satisfied.
Can ironing help tighten loose areas permanently?
While ironing can temporarily tighten fabric by removing wrinkles, it won’t create a permanent fix.
You’ll need other solutions like fashion tape or clever styling tricks for lasting results with your loose clothing.
Conclusion
Don’t let an oversized shirt dampen your style – you’ve got plenty of ways to fix a shirt that’s too big without sewing!
From quick hair tie tricks to fashion tape magic, these hacks will transform your baggy tops into fashion statements.
Whether you’re rocking a front tuck or trying out a trendy side knot, you’ve now got the tools to make any shirt work for you.
Remember, sometimes the best solutions don’t need a single stitch – just a bit of creativity!

