This site is supported by our readers. We may earn a commission, at no cost to you, if you purchase through links.
 Adjusting a princess seam pattern guarantees a bodice fits like a glove. Start by identifying fit issues—gaping at the bust, excess fabric under the bust, or tightness at the waist.
Use a muslin mock-up to test the fit, marking the bust point and any problem areas. For adjustments, try the slash-and-pivot method to fine-tune curves or a full bust adjustment (FBA) if needed.
Smooth seam lines with tracing paper for a polished finish. Don’t forget swayback or abdomen tweaks for extra comfort. Each step brings you closer to that perfect fit—because no one wants a bodice that feels like a straitjacket!
Table Of Contents
Key Takeaways
- Identify fit issues like gaping at the bust, excess fabric under the bust, or tightness at the waist by testing with a muslin mock-up.
- Use methods like the slash-and-pivot technique or full bust adjustments to fine-tune curves and ensure the princess seam aligns with your shape.
- Mark your bust point accurately and adjust seam lines directly on the muslin for precise pattern alterations.
- Address comfort by adding ease for layering, fixing swayback, or customizing for a fuller abdomen or pregnancy.
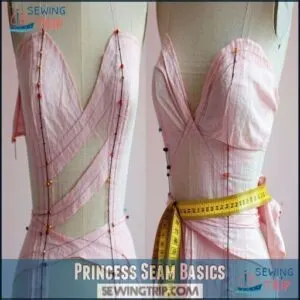
Princess Seam Basics
Princess seams are a popular choice for creating a sleek, contoured fit by shaping fabric along the bust and torso.
Creating a sleek, contoured fit, princess seams beautifully shape fabric along the bust and torso for a polished, flattering look.
Understanding how to identify and adjust common issues, like misaligned curves or excess fabric, is key to achieving a polished look, and creating a sleek fit requires careful consideration of these factors.
Identifying Princess Seam Issues
How can you tell if your princess seams need adjustment?
Look for these key signs: wrinkles radiating from the bust, seam drape that doesn’t follow your natural curves, or an apex alignment that sits too high or low.
Check if the side piece feels tight across your chest or if the bust size seems off.
Muslin wrinkles are your pattern’s way of speaking—learn to read them for perfect garment fitting.
They help you identify issues, such as a seam that doesn’t fit naturally.
Marking Bust Point for Reference
Now that you’ve spotted your princess seam issues, you’ll need to mark your bust point correctly.
This is your compass for all adjustments. Place a pin exactly at your apex while wearing your muslin.
Individual variation means your bust point location might differ from the pattern. Use tailors chalk or washable markers for accurate measurements.
This simple step prevents fitting implications down the road during your princess seam alteration journey.
Addressing Excess Fabric Under Bust
With your bust point marked, you’ll need to tackle any excess fabric pooling under your bust – a common princess seam issue.
When fitting your muslin test garment, look for these telltale signs:
- Fabric bunching below bust point
- Horizontal wrinkles under the bustline
- Seam lines not following natural body curves
- Tight or loose areas creating diagonal pull lines
- Princess seam not passing through bust apex
Pin excess fabric at princess and side seams, creating a smoother silhouette. Trace new seam lines directly on your muslin.
Muslin Fitting Techniques
You’ll learn exactly how to fit your muslin to identify tight or loose areas in your bodice, allowing you to mark new seam lines with confidence.
After pinning and adjusting problem areas directly on your body, you’ll transfer these precise changes to your pattern pieces before moving to your final fabric.
Simulating Real-World Wear Conditions
When working on a princess seam alteration, always test your muslin in real-world conditions.
Wear the undergarments you’d pair with the final garment, as their impact on fit can’t be ignored. Check how the fabric behaves during movement—sit, stand, and walk to simulate daily posture effects.
Layering considerations matter too; make certain there’s room for comfort. To get the best fit, remember to measure body proportions for accurate pattern adjustments.
This step helps you adjust the princess seam accurately, modifying it to reflect how the final piece will truly fit and move, ensuring a proper final garment and accurate pattern adjustments.
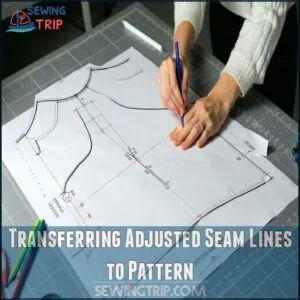
Transferring Adjusted Seam Lines to Pattern
Once you’ve adjusted the muslin, transfer the new seam lines to your pattern with precision. Use marking tools to trace directly onto the fabric, accounting for seam allowances.
For accuracy, employ copying techniques like tracing paper or digital transfer methods. Proper pattern making relies on specialized marking tools for precision.
True the pattern by smoothing curves, especially along the princess seam alteration. Always adjust princess seam lines symmetrically.
Before finalizing, double-check your modifications. This step confirms your princess seam adjustment aligns perfectly with your pattern alteration goals.
Pattern Adjustment Methods
You can use simple methods to adjust princess seams for a perfect fit.
Techniques like the slash and pivot method, tracing paper for smoothing curves, and bust apex adjustments guarantee your bodice aligns with your unique shape, using complete concepts to ensure a proper fit.
Slash and Pivot Method for Adjustments
The Slash and Pivot Method helps adjust princess seams for a custom fit.
By cutting from the bust point to the seam, you create a hinge for precise manipulation.
This technique allows:
- Bust Point Pivoting to align curves.
- Seam Line Correction for symmetry.
- Volume Redistribution for balance.
- Hinge Point Accuracy to maintain structure.
- Pattern Piece Manipulation for seamless sewing.
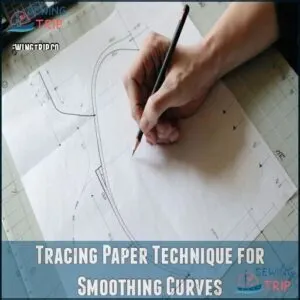
Tracing Paper Technique for Smoothing Curves
After using the slash and pivot method, smoothing curves guarantees your princess seam pattern flows naturally.
Lay tracing paper over the muslin, carefully trace seam lines, and check for line consistency.
Explore the uses of pattern paper for your project.
Use a ruler for accurate tracing and blend uneven areas for seamless curve shaping.
Trued seams and precise pattern blending will make your pattern drafting princess seam work flawless.
Bust Apex Adjustment for Better Fit
Once your curves are smooth, focus on the bust point adjustment. Start by marking the apex placement on your muslin.
Adjusting height guarantees the princess seam aligns perfectly, matching shape and correcting position. Use muslin marking to trace changes for accurate princess seam fitting.
Accurate body measurements are vital for achieving this perfect fit. This step refines your pattern making, guaranteeing the bust point suits your Full Bust Adjustment needs, ensuring a well-fitted garment with proper princess seam alignment.
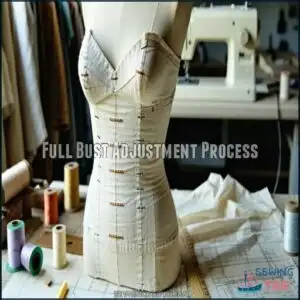
Full Bust Adjustment Process
You’ll need to adjust your pattern if the bust area feels too tight or doesn’t align with your shape.
A full bust adjustment guarantees the bodice fits comfortably while maintaining a smooth, flattering seam line.
Determining Base Size From Size Chart
Start by measuring your high bust at armpit height and compare it to the size chart.
This helps you pick a base size for your sewing pattern alteration.
For a princess seam, accuracy is key—especially when considering D-cup or B-cup usage.
Match your full bust measurement to the chart, ensuring the best fit for your pattern making process.
Calculating Adjustment Amount for FBA
When calculating the adjustment amount for a Full Bust Adjustment (FBA), accuracy is key. Measure your high bust and full bust, then compare these to the pattern’s bust size.
Subtract the pattern’s full bust measurement from yours, divide by two, and record the adjustment value. A critical step involves locating the bust apex for accurate dart placement.
To ensure accuracy, follow these steps:
- Verify bust measurement accuracy.
- Compare pattern bust size.
- Use the size chart.
- Divide adjustment amount.
- Record adjustment value.
Modifying Pattern Pieces for FBA
To modify pattern pieces for an FBA, trace the Side Front Bodice and Center Front Bodice, ensuring hinge point accuracy.
Add seam allowance adjustments, then cut along marked lines to create gaps.
Use gap measurement techniques to adjust fullness.
Explore dart creation alternatives for shaping. Some sewers also seek guidance on FBA pattern adjustment.
Transfer changes to the FBA pattern tracing, ensuring all notches align smoothly, for a successful FBA.
Advanced Alteration Techniques
You can take your bodice adjustments to the next level with advanced techniques that guarantee a perfect fit for unique body shapes.
These methods focus on refining areas like the abdomen and swayback, giving you a comfortable and polished finish every time.
Abdomen and Swayback Adjustments for Comfort
When adjusting for abdomen fullness or swayback shaping, focus on pattern balance.
For swayback alteration, pinch fabric at the lower back to remove excess, smoothing the princess seam.
Add garment ease at the waist to accommodate movement.
Use fitting techniques like slashing and overlapping to refine adjustments.
This can address issues related to spine curvature causes.
These pattern adjustments guarantee comfort and a customized fit for every body shape.
Customizing Fit for Fuller Abdomen or Pregnancy
To customize a princess seam for a fuller abdomen or pregnancy, focus on front pattern adjustments.
Add abdomen ease by cutting and spreading along lengthen/shorten lines.
This guarantees a custom fit princess seam that adapts to body shape changes.
Pregnancy adjustments may include stretchy fabrics or extra room for comfort, creating garments perfect for sewing during pregnancy and beyond.
For a more refined fit, consider a fuller abdomen adjustment.
Ensuring Comfortable Layering With Ease at Waist
To guarantee layering ease and waist comfort, add at least 3 inches of pattern ease at the waistline.
This is especially helpful for pregnancy adjustments or fuller abdomen fit. Measure waist and abdomen carefully, then adjust the princess seam for a custom fit.
These sewing pattern alterations create a smooth, flattering look while maintaining flexibility for layering.
Frequently Asked Questions (FAQs)
How to adjust princess seams for asymmetrical busts?
Pin the princess seams to fit each bust side individually.
Mark new seam lines directly on the muslin.
Adjust for symmetry by comparing both sides, then transfer changes to your pattern for a balanced fit.
What tools simplify altering princess seam patterns?
Think of altering princess seams like sculpting fabric.
Use tracing paper, a ruler, fabric scissors, and a pencil to redraw curves.
Muslin fabric, pins, and a seam ripper help test and refine adjustments easily.
How to fix gaping armholes on princess seams?
To fix gaping armholes on princess seams, pinch out excess fabric along the armhole curve, pin it evenly, and redraw the seam line.
Transfer adjustments to your pattern, ensuring symmetry on both sides.
Can princess seams be added to existing garments?
Yes, you can add princess seams to existing garments by carefully marking seam lines, cutting along them, and reshaping panels.
Use muslin for testing, ensuring the new seams align with your body’s curves, and reshaping panels is crucial for a proper fit.
How to adjust princess seams for petite sizes?
To adjust princess seams for petite sizes, shorten the torso by pinching out excess length, true the seams, and narrow the side panels if needed.
Verify the bust apex aligns correctly with your natural shape.
Conclusion
Perfecting a princess seam pattern might seem tricky, but it’s worth the effort for a flawless fit.
By addressing common issues like gaping or tightness and using tools like muslin mock-ups, you’ll master pattern alteration for princess seams.
Techniques like the slash-and-pivot method or full bust adjustments guarantee every curve fits comfortably.
Don’t skip swayback or abdomen tweaks for added ease, and with these steps, your bodices will always fit beautifully, making sewing both rewarding and enjoyable.
- https://corpmoreinfo.com/canada-pills/cheap-viagra-from-canada.html
- https://closetcorepatterns.com/pages/size-chart
- https://www.twigandtale.com/blogs/twig-and-tale-blog/fuller-abdomen-adjustment-for-a-princess-seam-garment
- https://www.americordblood.com/articles/a-complete-guide-to-second-trimester-belly-binding-and-support?srsltid=AfmBOop1M5E76xb76TLSYGMVKl1WHc_68y5uKiB_ucjY5dSk-GSkwx-z
- https://momcozy.com/blogs/momcare/how-to-wear-a-pregnancy-belly-band

