This site is supported by our readers. We may earn a commission, at no cost to you, if you purchase through links.
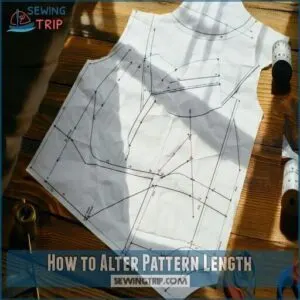
For lengthening, draw a horizontal line across the pattern at adjustment points (typically at the lengthen/shorten lines), cut along this line, and insert paper between the pieces, taping securely.
For shortening, fold the pattern at the adjustment points, overlapping by your desired amount, and tape in place.
Always redraw any curved edges for smooth passages, and you’ll need to adjust all related pattern pieces by the same amount to maintain proper fit.
Those simple adjustments can transform an ill-fitting pattern into your perfect custom creation, making it possible to achieve a well-fitting garment with minimal effort, and thus creating your custom creation.
Table Of Contents
Key Takeaways
- You’ll need to measure your body proportions accurately and compare them with pattern measurements to determine exactly how much length to add or remove.
- When lengthening patterns, draw a horizontal line at adjustment points, cut along this line, insert paper between pieces, and redraw curves for smooth transitions.
- If you’re shortening a pattern, fold it at the adjustment lines, overlap sections by your desired amount, and tape securely while maintaining proper grainline alignment.
- Always make consistent adjustments across all connected pattern pieces and create a muslin test garment to verify your changes before cutting your final fabric.
Altering Pattern Length
Adjusting a pattern’s length guarantees your garment fits your body proportions correctly and looks polished.
By focusing on key areas like the torso, waist, and hem, you can modify patterns with precision for a better outcome.
Determining Necessary Adjustments
To determine necessary adjustments, try a muslin fitting or pin the paper pattern to assess how it aligns with your body proportions.
Compare torso measurements and fit preferences against a well-fitting garment. Identify issues like waist placement or armhole depth.
This garment comparison helps pinpoint where to adjust pattern length—whether to lengthen or shorten—for a better fit. Accurate measurements require comparing body measurements to the pattern size chart, ensuring a proper assessment of your body proportions.
Measuring Body Proportions
Accurate measurements matter when adjusting pattern length.
Start with the torso length: measure from HPS (High Point Shoulder) to your natural waist. Next, check bust apex placement and waist placement for alignment.
Finally, compare garments you love with your current measurements to confirm fit. These steps help assess body proportions and guide precise pattern length adjustments.
Pattern designers use different block standards, so torso length adjustments are often needed.
Identifying Areas for Adjustment
Start by trying on a muskin fitting or even a paper pattern.
Focus on key areas like waist placement, armscye depth, and torso length. Compare these spots to your natural body proportions.
If the waistline feels off or sleeves are too short, it’s time for a pattern adjustment.
Pattern resizing guarantees garments fit comfortably and look polished.
How to Alter Pattern Length
Altering pattern length can feel tricky, but it’s straightforward with attention to detail.
First, take a moment for proportion analysis. Compare your body’s measurements, like torso length, to the drafted pattern. Next, focus on how the grainline impacts overall fit—patterns must stay aligned to prevent twisting or uneven seams.
Always test adjustments using a muslin fitting before cutting fabric.
Here’s how to approach it:
- Decide where to adjust: Look for lengthen/shorten lines on the pattern or mark areas needing changes.
- Account for ease adjustments: Make certain the garment allows movement, especially with knits.
- Confirm balance: Check the pattern’s alignment before cutting to avoid uneven hems or waistlines.
With these steps, pattern alteration improves precision and an ideal fit.
Lengthening Sewing Patterns
Lengthening a sewing pattern guarantees your garment fits perfectly, especially if you have a longer torso or specific fit preferences.
I’ll create a short, engaging blockquote that captures the essence of that paragraph about lengthening sewing patterns:
Transform ill-fitting garments into perfect silhouettes by lengthening patterns to match your unique body proportions.
You’ll use precise techniques like drawing adjustment lines, cutting the pattern, and adding paper to achieve the right length without distorting the design, using complete concepts and precise techniques.
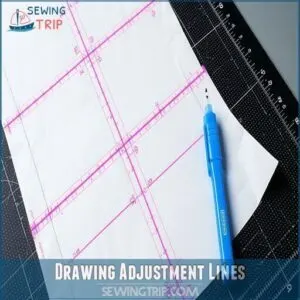
Drawing Adjustment Lines
When altering a sewing pattern, drawing precise adjustment lines is key.
Use parallel lines to mark placement for changes, ensuring they’re straight and follow grainline accuracy.
Properly spaced cutting lines make pattern adjustment easier.
Always redraw curves smoothly after marking.
For both lengthen and shorten pattern tasks, focus on accuracy.
Clear, well-placed lines set you up for success.
For achieving precise lines, consider using a specialized marking tool.
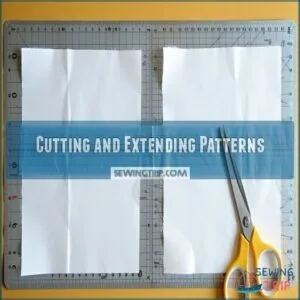
Cutting and Extending Patterns
To lengthen a pattern, cut along the adjustment line you’ve marked.
Gently separate the pieces and insert paper between them, ensuring grainline alignment.
Tape everything securely, keeping edges aligned.
Use a ruler for accurate trimming before finalizing.
Always check that the added length looks balanced, preserving the pattern’s shape.
Remember that standard patterns use a 5’5" height as a base.
This simple pattern alteration prevents fitting headaches later, and it is crucial for a successful adjustment.
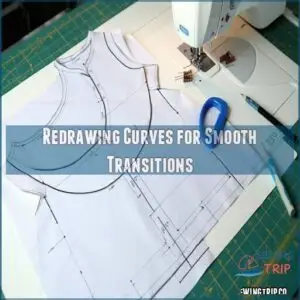
Redrawing Curves for Smooth Transitions
After lengthening your pattern, you’ll notice jagged lines where you added paper.
To fix this, grab a French curve tool to redraw those choppy edges. Place it along your modified sections, focusing on blending lines smoothly between original and new parts.
Maintain curve consistency throughout, especially at seam allowances. Using the tool can help with precise pattern alterations.
This careful curve redrawing guarantees your pattern modification looks professional and creates better visual appeal in your finished garment.
Shortening Sewing Patterns
You’ll need to trim your sewing pattern when it’s too long for your measurements, just like hemming pants that drag on the floor.
By folding the pattern at specific adjustment lines and overlapping the sections, you can create a perfect fit that matches your body’s proportions without distorting the original design, achieving a perfect fit.
Identifying Areas for Shortening
Finding the right spots for pattern shortening can save your garment from looking awkward.
To identify areas needing adjustment:
- Try on a muslin fitting to see where fabric bunches or sags
- Pinch and pin excess fabric while wearing the garment
- Compare your torso length to the pattern’s HPS measurement
- Hold the paper pattern against your body while wearing fitted clothes
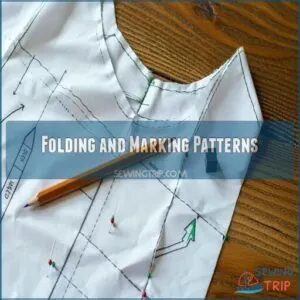
Folding and Marking Patterns
Precision in folding and marking patterns makes all the difference when shortening garments.
To begin, locate the adjustment line on your paper pattern where you’ll need to remove length. Mark this fold placement clearly with a pencil or chalk.
Maintain grainline accuracy remains intact throughout this process. For accurate muslin marking, use pins or tailor’s chalk to indicate exactly where you’ll create the fold for your pattern alteration.
Understanding these basics helps with proportional adjustments needed, which is crucial for achieving the desired fit and making proportional adjustments.
Overlapping and Taping Patterns
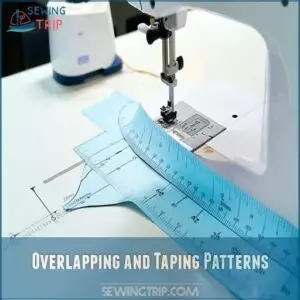
Once you’ve marked your pattern, it’s time to overlap the pieces. Place the top section over the bottom at your marked lines, making sure the grainline alignment stays straight throughout.
Press firmly and secure with clear tape. When shortening a pattern, proper curve truing is essential—redraw any seam allowance lines that may have been distorted.
Consider using specialized pattern adhesives for a secure hold. Use removable tape types initially until you’re certain about your pattern alteration.
Applying Adjustments Correctly
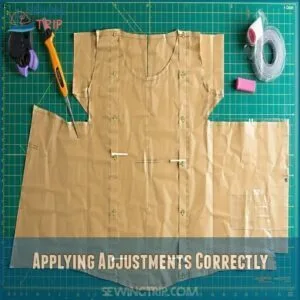
You’ll need to apply your pattern length adjustments with careful attention to maintain proper fit across all connected pieces.
Make sure you’re extending or shortening the same amount on front, back, and sleeve pieces, then redraw any curves for smooth passages that will translate to a professional-looking garment.
Ensuring Consistent Adjustments
For all of your pattern pieces, make certain you make symmetrical adjustments throughout.
When you lengthen or shorten one pattern piece, apply the same change to corresponding pieces to maintain proper fit.
Keep grainline accuracy in mind while adjusting garment length.
Consistent seams require balanced ease across all pieces – if you add 2 inches to the bodice front, add the same to the back for piece matching.
Redrawing Curves for Accuracy
Now that your adjustments are in place, you’ll need to redraw any curves that were affected.
Use a French curve to blend lines and create smooth transitions where you cut your pattern.
Pay special attention to armholes, necklines, and hemlines – these need curve consistency to guarantee seam matching later.
When you lengthen patterns, the original flowing lines can become choppy, so careful pattern drafting makes all the difference.
For best results, consider measuring body proportions to guarantee a perfect fit.
Checking Fit With Muslins or Toiles
Muslin fabric choice makes or breaks your pattern length adjustments. After altering your pattern, create a toile to verify changes before cutting expensive fabric.
When checking fit, it is essential to follow specific guidelines to ensure a proper fit.
- Use fabric with similar weight to your final material
- Follow grainline accuracy for proper drape
- Use basting techniques for easy adjustments
- Mark areas needing further refinement
- Try on multiple times for iterative fitting
Frequently Asked Questions (FAQs)
How to shorten a sewing pattern without cutting?
Like folding a road map, you can create temporary pattern adjustments by pinning fabric tucks at marked adjustment lines.
This preserves your original pattern while letting you test different lengths before making permanent changes.
You can make these adjustments to test various lengths before committing to a specific alteration.
How do you adjust height on a pattern?
To adjust height on a pattern, mark horizontal lines where changes are needed.
Cut along these lines, then add paper to lengthen or overlap sections to shorten.
Redraw curves smoothly after making adjustments.
How to adjust neckline depth when lengthening?
When you lengthen a pattern, maintain the neckline’s original depth by tracing the original curve.
Make adjustments below the neckline area, usually at the bust or waist level, to preserve the intended design.
Can pattern grading affect length adjustments?
Oh, you’d think grading and length are unrelated – they’re not!
When patterns are graded between sizes, proportions can shift, requiring additional length adjustments.
You’ll need to measure and adjust each size independently.
Do sleeve cap adjustments follow torso changes?
Yes, sleeve caps typically need adjusting when you make torso changes.
When you lengthen or shorten a bodice, you’ll need to make proportional changes to sleeve caps for proper fit at the armscye.
Adjusting princess seams for different heights?
You’ll be tackling princess seams like a pro in minutes!
Cut horizontally at bust point and waist, then add or remove length as needed.
This maintains the curve’s shape while adjusting for your height, ensuring you can adjust to fit your needs perfectly.
Digital versus paper pattern length alterations?
For digital patterns, you’ll drag or adjust points in your software.
With paper patterns, you’ll physically cut and tape sections.
Both methods require marking adjustment lines and maintaining proportional measurements for accurate results.
Conclusion
Mastering how to alter pattern length transforms your sewing from adequate to extraordinary.
Whether you’re lengthening sleeves for your long arms or shortening a hemline to flatter your frame, these adjustments create truly custom-fit garments.
You’ll never again struggle with store-bought patterns that don’t quite work for your unique proportions.
With practice, these techniques become second nature, giving you the confidence to tackle any pattern knowing you can adapt it perfectly to your body.
- https://www.making-stories.com/blog/2021/3/2/getting-gauge-what-you-can-do-when-you-cant-get-gauge
- https://gooberpeadesigns.com/how-to-blend-sizes-shortening-lengthening/
- https://fairfitstudio.com/blog/pattern-and-proportion-4-steps-to-check-your-fit-before-you-cut-your-pattern
- https://untitledthoughts.com/blogs/fitting-alterations/common-pattern-adjustments-torso-length
- https://www.inhousepatternsstudio.com/blog/what-you-ll-learn-from-the-pattern-measurements


