This site is supported by our readers. We may earn a commission, at no cost to you, if you purchase through links.
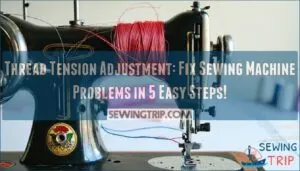
To adjust the top thread tension, use the numbered dial—higher numbers tighten, while lower numbers loosen.
For bobbin tension, access the bobbin case and turn the tiny screw clockwise to tighten or counterclockwise to loosen.
Use contrasting thread colors to spot imbalances quickly; loops on top mean loose bobbin tension, and loops underneath point to loose top tension.
Test on scrap fabric after each tweak. Mastering tension is like threading a needle—it takes patience but makes sewing a breeze!
Table Of Contents
Key Takeaways
- You’ll achieve balanced stitches by adjusting the tension dial (higher numbers tighten, lower numbers loosen) for top thread and turning the small screw on the bobbin case for bottom thread.
- You can quickly identify tension problems by using contrasting thread colors—loops on top indicate loose bobbin tension while loops underneath signal loose top thread.
- You should make small, incremental adjustments (just ¼ turn at a time) when fixing tension issues, testing on scrap fabric after each change.
- You’ll prevent most tension problems by ensuring proper threading, maintaining clean tension discs, and keeping a log of successful settings for different fabrics and threads.
Sewing Machine Tension Basics
Your sewing machine’s tension controls how tightly the upper and lower threads interact to form stitches, working like a well-choreographed dance between two partners.
A sewing machine’s tension is the elegant balance where threads unite seamlessly, creating flawless stitches like a perfectly choreographed dance.
You’ll need to understand this balance to create smooth, even stitches that don’t pucker your fabric or break your thread.
Definition of Tension
In sewing machines, tension refers to the controlled tightness of threads as they form stitches.
It’s the precise balance between your top and bobbin threads that creates strong, stable seams.
Five key tension concepts to understand:
- Thread tightness determines seam strength
- Balanced threads create invisible stitches
- Proper tension maintains stitch stability
- Thread control prevents loops and puckers
- Tension adjustment maintains sewing machine tension.
Proper threading can prevent most tension issues.
Importance of Balanced Tension
Getting your thread tension right can make or break your sewing projects.
Mastering thread tension creates flawless stitches, transforming your sewing projects into professional, durable, and visually stunning works of art.
Balanced tension guarantees professional results that both look great and last longer.
When tension is ideal, your stitches lock perfectly in the middle of your fabric layers.
| Tension Impact | Balanced | Unbalanced |
|---|---|---|
| Stitch Quality | Even, secure | Loose or too tight |
| Seam Strength | Durable | Prone to breaking |
| Fabric Appearance | Smooth, flat | Puckered or wavy |
| Project Longevity | Withstands wear | May fail quickly |
Getting the right tension is crucial for seam strength, stitch quality, and overall project longevity.
Types of Tension Devices
When you’re troubleshooting sewing problems, understanding the four main tension devices in your machine is essential.
Each device plays a unique role in creating balanced stitches.
- Tension discs that control the pressure on your top thread
- Thread guides that direct thread along the proper path
- Tension regulator (dial or computerized control) that adjusts disc pressure
- Bobbin case spring that manages lower thread tension
Thread Tension Adjustment
You’ll need to master thread tension adjustment to fix those frustrating uneven stitches that can ruin your sewing projects.
Properly balanced tension guarantees your top and bobbin threads lock seamlessly in the middle of your fabric, creating strong, professional-looking seams that won’t pucker or break.
Adjusting Top Thread Tension
Now that you understand how tension works, let’s focus on adjusting the upper thread tension. Your tension dial is your best friend for quick fixes when stitches look uneven.
| Tension Dial Range | Issue | Solution | Result |
|---|---|---|---|
| 0-3 | Loops on bottom | Increase setting | Tighter top thread |
| 4-5 | Balanced stitches | Maintain setting | Perfect seams |
| 6-9 | Loops on top | Decrease setting | Looser top thread |
Always check your thread path before adjusting thread tension. Verify proper presser foot position and clean tension discs regularly.
Adjusting Bobbin Thread Tension
While top thread tension is adjusted with a dial, bobbins tension requires a more precise approach.
To adjust bobbins tension, locate the small screw on your bobbin case. Turn it clockwise to increase tension or counterclockwise to decrease it.
You can find tools for bobbin tension solutions online. Make tiny adjustments (just 1/8 to 1/4 turn) and test after each change.
This delicate balance directly affects your stitch quality.
Using Contrasting Thread Colors
While you’ve mastered adjusting your bobbin tension, now let’s look at a clever trick for tension adjustment techniques.
Using contrasting thread colors makes error detection incredibly simple when checking your tension settings.
- Red thread on top with blue in the bobbin shows exactly where each thread sits
- Black and white combinations provide maximum visibility improvement
- Metallic with cotton helps identify specialty thread issues
- Bright yellow with dark purple enhances stitch identification
- Light blue with orange creates balanced tension visuals
This approach allows for easy identification of thread issues, making it a valuable tool for improving your sewing skills with contrasting thread colors and mastering bobbin tension.
Tension Regulator Mechanism
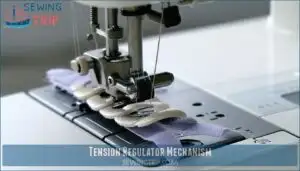
You’ll find the tension regulator mechanism at the heart of your sewing machine’s stitch quality, working alongside tension discs to control thread pressure as you sew.
This essential system lets you adjust how tightly the thread passes between the discs, directly affecting how your stitches form in the fabric, which is crucial for the overall stitch quality.
Tension Discs and Regulator
Now that you’ve adjusted your thread tension, let’s examine the heart of the tension system: the discs and regulator.
Your tension discs squeeze thread as it passes through, while the regulator controls disc pressure.
Located near the thread take-up, the tension regulator typically ranges from 0-9, with higher numbers increasing tension.
Cleaning tension disks is essential for even stitches.
| Setting | Disc Pressure | Best For |
|---|---|---|
| 0-3 | Light | Delicate fabrics |
| 4-6 | Medium | Everyday sewing |
| 7-9 | Heavy | Thick materials |
Turn the dial clockwise to increase thread flow resistance in your tension assembly. Newer machines may use +/- indicators instead of numbers, and this adjustment affects the tension assembly and thread flow with higher numbers for more tension.
Thread Guides and Resistance
Thread guides are essential gatekeepers in your sewing machine’s tension system.
They create controlled resistance as your thread travels toward the needle, ensuring tension consistency throughout your stitching process.
Each guide’s placement is strategically designed to maintain steady thread flow and prevent tangles.
When properly threaded, these metal components work harmoniously with tension discs to distribute pressure evenly, making sewing machine tension adjustment more reliable and predictable.
The proper functioning of these components is crucial for achieving a smooth sewing experience, and understanding their role can help in troubleshooting common issues, such as uneven thread flow.
Bobbin Case Spring and Screw
Inside your bobbin case, a small but mighty spring works with an adjustment screw to control your lower thread tension. Understanding this mechanism helps you achieve perfect stitches.
The bobbin brake spring prevents thread knots when the machine stops.
- C-shaped brake spring holds the bobbin securely in place
- Larger screw adjusts bobbin tension (turn clockwise to tighten)
- Smaller screw merely secures the spring (don’t adjust this one!)
- High-quality metal screws guarantee durability and precision
- Regular spring maintenance prevents tension measurement issues
Identifying Tension Issues
You’ll spot tension problems when your fabric puckers or you see loops of thread on the top or bottom of your fabric.
Uneven stitches, thread breakages, and visible bobbin thread on the fabric’s top surface are clear indicators that your machine’s tension needs adjustment.
Signs of Poor Tension
Now that you understand how the tension regulator works, let’s spot when things go wrong.
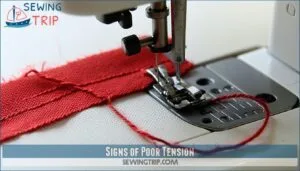
You’ll know your sewing machine has poor tension when you see puckered fabric, loose stitches that pull out easily, or thread loops on either side.
Watch for visible knots, uneven sides where stitches look different top versus bottom, or frequent thread breakage during sewing.
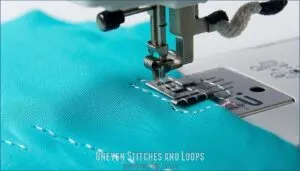
Uneven Stitches and Loops
Now that you can spot tension issues, let’s examine what your stitches are telling you.
When you notice loops on the top side, your bobbins tension is likely too loose. Conversely, loops underneath indicate your top tension needs adjusting.
Thread nesting—those ugly knots underneath fabric—often results from tension imbalance or incorrect threading.
Skipped stitches can signal tension problems too. You’ll want to check both settings before your next seam.
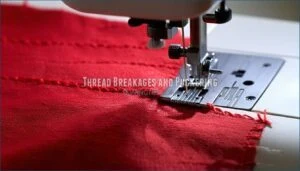
Thread Breakages and Puckering
Beyond loops, watch for constant thread breakages and fabric puckering – these are telltale signs of tension imbalance.
When tension’s too high, your thread snaps frequently. Poor thread quality issues and wrong needle size also contribute to breakages.
You’ll notice your fabric bunching up unnaturally when something’s off.
Regular machine maintenance needs attention to prevent these problems. Check your fabric feed problems too – they often work hand-in-hand with tension troubles.
Regular checks can help prevent issues like thread breakages.
Adjusting Bobbin Tension
You’ll need to find the small adjustment screw on your bobbin case to fix tension issues that cause uneven stitches or puckering.
Turn this screw clockwise in tiny increments to tighten the tension or counterclockwise to loosen it, testing your stitches after each adjustment to ensure the tension is properly adjusted.
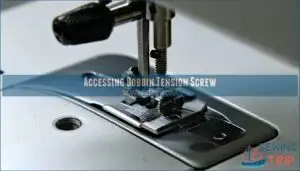
Accessing Bobbin Tension Screw
The secret to adjusting your bobbins lies in accessing that tiny screw on your bobbin case.
First, remove the bobbin case from your machine by opening the shuttle cover. Look for a small flat-head or Phillips screw on the side.
For better visibility, use good lighting or a magnifying glass. Remember that bobbin material options can impact tension. Consider marking the original screw position with a pen before making any adjustments to ensure you can return to the original setting.
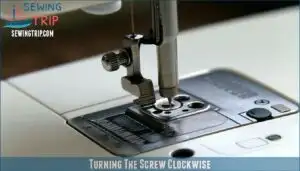
Turning The Screw Clockwise
Tightening tension on the bobbin is simple—just turn the small screw clockwise for more resistance.
Make incremental adjustments and test frequently to avoid over-tightening.
Remember, the bobbin’s spring pressure controls thread pull.
You may need a specific clockwise bobbin screw for your machine.
- Use short turns (¼ at a time) to fine-tune tension.
- Test with scrap fabric after each adjustment.
- Follow your thread tension guide for sewing machine troubleshooting to ensure the best results with proper adjustment.
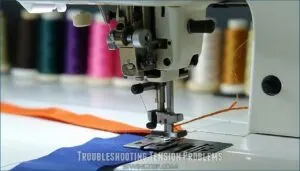
Troubleshooting Tension Problems
When tension issues arise, start by checking the thread path and guides to verify everything is correctly positioned.
Proper threading and referring to your sewing machine manual can quickly solve most common problems, as it often involves complete concepts that are easily overlooked.
Checking Thread Path and Guides
After adjusting the bobbins tension, verify the thread path is free of obstructions and the thread guides are aligned.
Misaligned guides or debris can sabotage tension consistency. Inspect for dust or lint buildup and check material compatibility with the thread type.
Regular thread guide maintenance keeps the sewing machine tension balanced, making tension adjustment smoother and stitching flawless.
Ensuring Proper Threading
Start by double-checking the threading order—missteps often cause sewing machine tension issues.
Look for thread path obstructions, ensuring the spool placement aligns properly. Incorrect tension disc alignment can mess with thread tension, so guide the thread carefully.
Poor thread quality impacts performance, too. A steady hand and patience during threading keep your stitches smooth and frustration-free.
Consulting The Sewing Machine Manual
Your sewing machine manual is like a map for tension adjustment. Check its troubleshooting index for specific guidance on stitch settings or sewing machine tension adjustment.
Use manual diagrams to pinpoint parts like the tension discs or bobbin case. Maintenance schedules often highlight tension-related care.
Proper thread tension starts with knowing your machine—identify areas needing tweaks for balanced stitching, which is crucial for achieving the right thread tension.
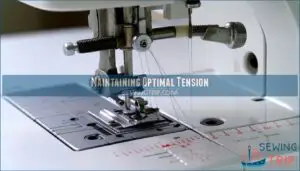
Maintaining Optimal Tension
You can keep your sewing machine running smoothly by maintaining consistent thread tension.
Small steps, like tracking adjustments in a log or using a second bobbin case, help guarantee stitches stay balanced and fabric stays flawless.
Keeping a Tension Log
Keeping a tension log simplifies troubleshooting and fine-tuning your sewing machine tension.
Record details like thread types, tension settings, and adjustment history for easy reference.
This data tracking provides a reliable guide to replicate results and identify issues, think of it as your sewing machine’s personal manual—a quick way to stay organized, save time, and perfect thread tension adjustments effortlessly.
Using a Second Bobbin Case
Using a second bobbin case simplifies sewing machine tension management, preserving tension memory while keeping original settings intact. It’s project-specific and prevents disruption caused by repeated thread tension adjustments.
Many users find it helpful to purchase a spare for specialized tasks.
- Designate one bobbin case for specific thread types.
- Avoid readjustments by keeping bobbins organized.
- Use bobbin tension adjustments minimally for precise control.
- Verify threads align with tension notches for smooth performance.
Temporary Tension Adjustments
When switching fabrics, threads, or stitch operations, temporary tension adjustments can save time and frustration.
Adjust your sewing machine tension using the top tension dial first, fine-tuning based on project specifics.
Quick fixes like small tweaks help match thread swapping needs without permanent changes, and these tension adjustment tips guarantee balanced stitches while keeping your machine ready for versatile designs.
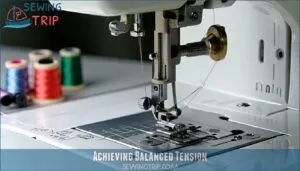
Achieving Balanced Tension
Balancing thread tension is key to producing strong, even stitches that look professional on both sides of the fabric.
Small, precise adjustments to the top and bobbin tension can correct issues and guarantee smooth sewing.
Evaluating Stitches for Balance
Perfect stitches reflect balance and don’t cause frustration. Check for stitch symmetry and avoid fabric puckering or thread loops. Look closely at knot visibility to confirm seams are stable.
Test on scraps and verify:
- Threads lock in the fabric’s middle.
- No loose or tight stitches appear.
- Seams lay flat with no pulling out easily.
- No thread visible on opposite sides.
Incorrect thread placement often leads to tension balance issues, which can affect the overall stitch quality and cause tension problems.
Making Small Incremental Changes
When adjusting thread tension, focus on gradual adjustments for precise control.
Turn the dial or screw in small increments—think a quarter-turn at a time.
Test with a few stitches after each tweak to observe changes.
Fine-tuning stitches through minimal tweaks guarantees balanced tension.
This methodical approach offers reliable tension adjustment tips, making your sewing machine tension more predictable and consistent.
Frequently Asked Questions (FAQs)
What is sewing machine tension adjustment?
Sewing machine tension adjustment balances the tightness between the top and bobbin threads, ensuring neat, even stitches.
It’s like a tug-of-war, where both sides must coordinate perfectly to avoid loops, puckers, or breaks, which is crucial for achieving even stitches.
Should you adjust your sewing machine thread tension?
Like tuning a violin, you should adjust your machine’s thread tension whenever stitches appear uneven or fabric puckers.
Proper tension adjustments prevent thread breaks and guarantee professional results with every sewing project, ensuring that you achieve proper tension.
How do you adjust a sewing machine tension regulator?
Turn the numbered dial clockwise to increase tension or counterclockwise to decrease it. Start with small adjustments, testing on scrap fabric until your stitches are balanced on both sides.
How to avoid sewing machine tension issues?
To avoid tension issues, always use matching thread quality, clean your machine regularly, thread it correctly, and use proper needles.
Test on scrap fabric first.
And make small adjustments to the tension dial when needed.
How does tension work on a sewing machine?
Your machine uses a system of discs and springs to balance top and bobbin threads.
When properly adjusted, these tensions work together to create even stitches that lock in the middle of your fabric.
How to adjust bobbin thread tension on a sewing machine?
To adjust bobbin tension, locate the small screw on your bobbin case.
Turn clockwise to tighten or counterclockwise to loosen.
Make quarter-turn adjustments, testing after each change until stitches appear balanced.
Is a higher number tighter tension?
Think of tension as tightening a handshake—higher numbers squeeze tighter.
On sewing machines, higher tension settings increase thread pressure, pulling stronger.
It guarantees firm stitches, but too high can lead to puckering or breakage.
How do you get the tension right on a sewing machine?
To get perfect tension, check both fabric sides after a test stitch.
If threads meet in the middle, you’re set.
Turn the dial higher for tighter tension, lower for looser.
Make small adjustments between tests.
How to reset sewing machine tension to default?
To reset your sewing machine tension, locate the dial (usually marked 0-9), turn it to the middle number (typically 4 or 5), and test on scrap fabric before adjusting as needed.
What causes thread tension to fluctuate during sewing?
Have you noticed your stitches changing mid-project? Thread thickness inconsistencies, dirty tension discs, improper threading, fabric variations, and bobbin issues can all cause your tension to fluctuate while you’re sewing.
Conclusion
Mastering thread tension adjustment in your sewing machine transforms frustration into satisfaction, problems into solutions, and messy stitches into professional results.
You’ll save time and fabric by quickly identifying and resolving tension issues with the techniques you’ve learned.
Remember, thread tension adjustment isn’t just a skill—it’s your secret weapon for achieving perfect stitches every time, and with practice, you’ll trust the process and tackle any sewing project with newfound confidence and precision.
- https://subscribe.threadsmagazine.com/pubs/TP/THR/default_step1.jsp?cds_page_id=211211&cds_mag_code=THR&id=1517323718009&lsid=80300848380032459&vid=1&cds_misc_1=W30488EM&ref=th-footer&cds_tracking_code=W30488EM&cds_response_key=W30001NP
- https://youtu.be/FpNciWmnY3Q
- https://handiquilter.com/know-your-bobbin-case/?srsltid=AfmBOoovR82vLg4PnSF1SwBBjgOLWoHa_sYW50CgdYu1enNocKa0kT_1
- https://gammill.com/product/screw-bobbin-case-spring/
- https://www.amazon.com/FoRapid-10PCS-Bobbin-Tension-Screw/dp/B0BLLH1K4P

