This site is supported by our readers. We may earn a commission, at no cost to you, if you purchase through links.
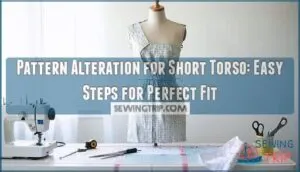
First, measure the distance between your bust and waist, comparing it to the pattern’s measurements. Then, make horizontal folds across pattern pieces, typically removing 1/2 to 1 inch at a time.
Remember to adjust all corresponding pieces (front, back, facings) by the same amount. After folding, redraw your cutting lines for a smooth shift.
This simple fix prevents that awkward fabric bunching that makes even beautiful garments look homemade. The right alterations can transform an off-the-rack look into a custom-tailored masterpiece, giving you a smooth shift and preventing awkward fabric bunching with the right simple fix.
Table Of Contents
Key Takeaways
- You’ll need to measure the distance between your bust and waist, comparing it to your pattern’s measurements, to determine how much length to remove from your pattern pieces.
- Fold pattern paper horizontally along the designated lengthen/shorten lines, typically removing 1/2 to 1 inch at a time, and ensure you adjust all corresponding pieces by the same amount.
- When adjusting for a short torso, you’ll need to reposition darts upward toward your actual bust apex (about 1-1½" from the fullest point) to match your body’s proportions.
- You can combine multiple shortening techniques, such as removing 1/4" at the shoulder and 1/2" at the waist, while preserving the original ease to maintain the designer’s intended fit.
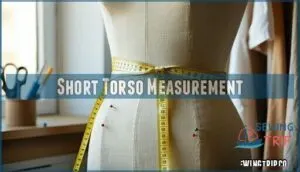
Short Torso Measurement
Measuring your torso accurately is the first step to adjusting patterns for a perfect fit.
You’ll need to find your natural waistline and record precise measurements to avoid mismatched proportions.
Taking Accurate Measurements
Wear snug undergarments to get accurate measurements.
Use elastic or thin fabric to pinpoint your natural waist for proper waist marking.
For a short torso alteration, measure front torso length from HPS to the waist, over the bust—don’t forget to note bust variations.
Proper fitting relies on precise measuring tools.
Compare with back measurements.
Precise torso length modification guarantees a custom fit!
Identifying Natural Waistline
Find your natural waist by wrapping an elastic band around it—it naturally settles into place.
Here’s an engaging blockquote that captures the essence of finding your natural waist:
The elastic never lies—wrap it around your middle and watch as it naturally finds your true waistline.
Stand tall, noting posture influence and torso landmarks. Torso length and body shape variations, like a short torso, affect waist placement.
The bra impact matters too, as different bras can shift measurements slightly. Getting accurate measurements guarantees your patterns fit perfectly, considering the natural waist placement.
Recording Body Proportions
With your natural waistline marked, it’s time to capture body proportions accurately. Focus on measurement accuracy for a proper fit.
- Measure front torso length from HPS to the waist, accounting for body variations.
- Record back torso length straight to the waist.
- Note measurements with different bras for pattern comparison.
- Assess proportions to identify adjustments for your short torso.
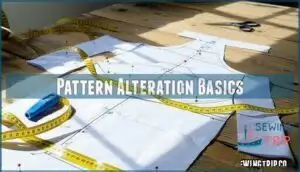
Pattern Alteration Basics
Understanding patterns starts with knowing how they compare to your body measurements. If you’ve got a short torso, you’ll want to focus on basic adjustments to get a proper fit.
A common issue is patterns creating awkward fits, like bodices hitting too low or pulling in odd places. Adjusting bodice length helps solve this, making the garment feel natural and comfortable.
Use alteration tools like fabric scissors, a measuring tape, and pattern rulers to tackle these adjustments. Basic adjustments might include shortening the bodice at marked lines or slightly higher up, depending on your proportions.
Pin the pattern to your body or a dress form for a quick fit check—no guessing is needed! To guarantee a good fit, compare your measurements to pattern size charts. Small tweaks lead to big improvements in your short torso fitting journey.
Lengthening and Shortening
When your torso length doesn’t match the pattern’s design, adjusting lengthen/shorten lines is key to a better fit. These simple alterations guarantee your clothes feel comfortable and look proportionate.
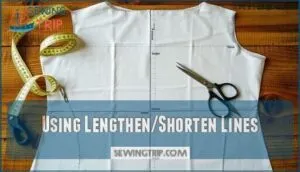
Using Lengthen/Shorten Lines
Lengthen/shorten lines are your go-to for adjusting bodice length in short torso fitting.
Follow these simple steps:
- Use multiple lines strategically to adjust pattern length evenly.
- Cut along the marked lines, pattern pivoting as needed for seam alignment.
- Blend lines smoothly to avoid jagged edges.
Consider exploring options to modify pattern pieces effectively. This pattern alteration tutorial simplifies short torso adjustments with precision and ease, making it a valuable resource for short torso fitting.
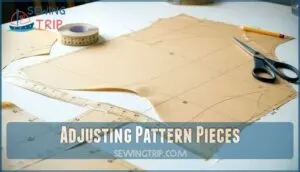
Adjusting Pattern Pieces
Once you’ve identified your pattern discrepancies, it’s time to cut and adjust your pattern pieces.
Make clean cuts along your marked shortening lines, then overlap the pieces by the amount you need to remove.
Use tape to secure them in place, being careful to true pattern edges afterward.
Don’t forget dart adjustments—they’ll need to shift upward too.
For minor fit changes, you can adjust seam lines to guarantee a smooth blend.
Repeat adjustments on all corresponding pieces for a balanced fit.
Smoothing Seam Lines
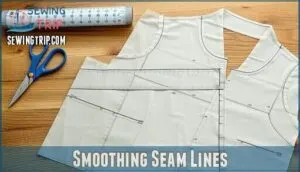
After you’ve adjusted your pattern pieces, you’ll need to smooth those seam lines.
Here’s a short, engaging blockquote in the same tone as the content:
Smooth seam lines transform wrinkled patterns into professional-quality garments that fit your unique proportions perfectly.
When folding or cutting your pattern for a short torso adjustment, edges can become jagged or uneven.
Use a ruler to true lines and create consistent width throughout.
Blending adjustments at curved seams guarantees your garment hangs properly.
Matching seams properly prevents puckering and trimming excess paper helps maintain clean pattern alteration lines.
Torso Adjustment Techniques
You’ll master pattern adjustment for your short torso with these simple techniques that prevent annoying waistlines from hitting at your hips.
You can fold pattern paper at specific points and reposition darts to create garments that finally fit your unique proportions perfectly.
Folding Pattern Paper
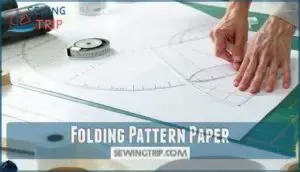
Now that you’ve measured correctly, let’s tackle pattern paper folding – your best friend for short torso adjustments.
When making horizontal changes, simply fold your pattern paper along lengthen/shorten lines. You can find specialized folding patterns for these tasks.
- Fold paper perpendicular to the grain line for consistent results
- Make multiple shortening folds for adjustments over 1 inch
- Use clear tape on PDF pattern hacks at fold lines
- Smooth curved seams after folding to maintain proper shaping
Use these techniques to achieve accurate and consistent results in your pattern adjustments, ensuring a better fit with minimal effort.
Adding or Removing Length
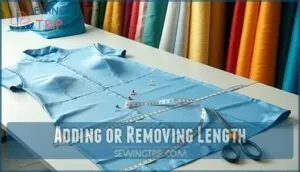
Taking control of your pattern’s measurements is key for a perfect fit. Adding or removing length depends on your unique torso proportions.
Here’s how to approach length adjustments:
| Adjustment Area | Short Torso Action | Long Torso Action |
|---|---|---|
| Above Bust | Remove 1/4-1/2" | Add 1/2-3/4" |
| Between Bust/Waist | Remove 1/2-3/4" | Add 3/4-1" |
| Rise Alterations | Reduce by 1/2-1" | Increase by 3/4-1.5" |
| Hemline Adjustments | May need rebalancing | Check overall length |
Remember, pattern balancing maintains your bodice alteration’s proper proportions after using lengthen/shorten lines. Accurate measurements are vital for custom-fitted garments. This is crucial for achieving a custom-fitted look that flatters your body type, and it requires careful consideration of your unique torso proportions.
Adjusting Dart Positions
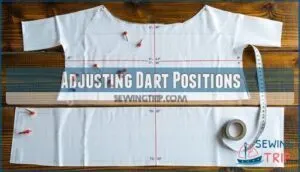
With your torso adjustments in place, you’ll need to reposition your darts to match your body.
For a short torso, darts often end up too low. Move them upward by redrawing dart legs toward your actual bust apex, about 1-1½" from the fullest point.
Adjust dart length and angle to follow your natural curves. This simple pattern alteration solves many bodice fitting issues and guarantees darts point exactly where they should, ensuring a proper fit.
Fitting and Garment Adjustments
You’ll need to try on your adjusted pattern pieces to check the fit and make final tweaks for your short torso.
With proper fitting techniques, you can transform those once-uncomfortable garments into custom pieces that look like they were made just for you.
Tissue Fitting Methods
Pin your way to a perfect fit with tissue fitting — a game-changer for short torso pattern alteration. This technique lets you see adjustments before cutting your fabric.
Here’s how to master it:
- Wear fitted clothes for accurate pinpointing issues
- Carefully pin pattern tissue to yourself
- Mark where your natural waistline falls
- Adjust ease based on fabric choice
- Make iterative fitting changes using muslin mockups to achieve a customized and accurate fit.
Combining Shortening Techniques
Now that you’ve tested your adjustments through tissue fitting, it’s time to combine multiple shortening techniques for the perfect fit.
For most short-torso adjustments, you’ll need to blend several modifications, trying shortening at multiple points—perhaps 1/4" at the shoulder and 1/2" at the waist.
When working with PDF pattern hacks, overlap taped sections and smooth side seams, remembering that advanced alterations often require adjusting hemlines after shortening the bodice.
Preserving Original Ease
While combining multiple shortening techniques works well, don’t forget about preserving original ease.
Ease is the breathing room between your body and the garment—it’s what lets you move comfortably.
When making pattern alterations for your short torso, compare your measurements to the size chart (not finished garment measurements).
Understanding wearing and design ease is essential for a comfortable fit.
This maintains the designer’s intended fit while ensuring your modifications don’t accidentally create too-tight spots or baggy sections.
Frequently Asked Questions (FAQs)
Is there a way to fix a short torso?
You can definitely fix a short torso through pattern adjustments.
Simply fold your sewing pattern at designated shorten lines between the shoulder and waist, then true up the seams for properly fitting garments that complement your proportions.
This process allows for the creation of garments that fit well and complement your proportions.
What is the best fit for short torso?
High-waisted styles, crop tops, and vertical patterns work best for your short torso.
You’ll want to avoid bulky belts and create visual length with V-necks.
Fitted pieces that hit at your natural waist flatter perfectly. Fitted pieces that hit at your natural waist flatter perfectly.
How to adjust necklines for short torsos?
For short torsos, raise necklines by drawing a new line 1/2 to 1 inch higher on your pattern.
Trace the same curve shape, blend side seams smoothly, and adjust facings accordingly to maintain proportions.
What about sleeves after torso adjustments?
Measure twice, cut once!
After shortening your bodice, you’ll need to adjust sleeve caps to match the smaller armholes.
Trim excess height while maintaining width to guarantee your sleeves fit properly without puckering, and remember to measure twice, cut once!
Underbust to waist ratio adjustments?
To adjust underbust-to-waist ratio, you’ll need to pinch excess fabric or add width where needed.
Mark your natural waistline, measure the underbust area, and alter pattern pieces accordingly for a custom, flattering fit.
Petite versus short torso pattern differences?
Did you know? Nearly 70% of women need pattern adjustments.
Petite patterns reduce height in all areas, while short torso adjustments focus only on trunk length.
You’ll need different alterations depending on your specific proportions.
Best fabrics for short torso garments?
You’ll want lightweight, draping fabrics like rayon, silk, or jersey that don’t add bulk.
Choose vertical stripes or small prints that elongate your frame.
Avoid stiff materials that create unwanted volume, and instead opt for lightweight fabrics to achieve the desired look.
Conclusion
As the old saying goes, measure twice and cut once.
With these pattern alteration for short torso techniques, you’ll transform ill-fitting garments into pieces that look custom-made for your body.
Remember to work systematically, adjust all corresponding pattern pieces, and test your alterations with a muslin first.
You’ve got this! Your sewing projects will now fit perfectly, boosting your confidence and comfort.
Pattern alteration for short torso doesn’t have to be intimidating—just take it one fold at a time.

