This site is supported by our readers. We may earn a commission, at no cost to you, if you purchase through links.
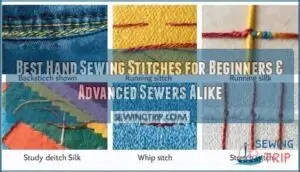
 In the context of the best hand sewing stitches, start with the essentials.
The running stitch is your go-to for basic seams and quick fixes—it’s like a straight road, simple but effective.
For stronger seams, try the backstitch; it’s a powerhouse, perfect for anything needing durability.
The whip stitch works wonders on hems or edges, its neat little loops adding both strength and style.
Need to sew stretchy fabrics? The stretch stitch keeps up with moving seams.
Once you’ve mastered these, sewing becomes second nature, and each stitch is a small step toward crafting and mending with confidence and precision.
Table Of Contents
Key Takeaways
- Practice the running stitch first—it’s easy, versatile, and great for basic seams or quick fixes.
- Use the backstitch for strong, durable seams that mimic machine stitching, perfect for repairs and heavy-duty fabrics.
- Match your thread and needle to the fabric type for smooth, clean stitches, and always keep tension even for neat results.
- Learn specialty stitches like stretch stitches for knits or whip stitches for edges to handle diverse fabrics and tasks effectively.
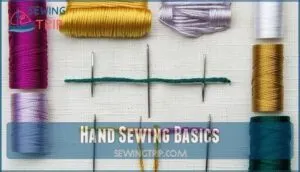
Hand Sewing Basics
Understanding the basics of hand sewing sets the foundation for crafting, mending, or creating detailed projects with precision.
Mastering hand sewing empowers you to craft, mend, and create with confidence, transforming simple fabric into lasting works of art.
By learning essential stitches, tools, and techniques, you’ll gain the confidence to tackle any fabric with ease.
Essential Stitches for Beginners
When starting with hand stitching, focus on simple stitching techniques like the running stitch, backstitch, and whip stitch.
These are perfect for beginner projects, from mending to basic sewing.
Practice good needle handling and thread tension for neat results.
Use a hand stitch guide to understand basic sewing stitches, helping you match fabric choice with the right stitch.
Using a stainless steel needle guarantees durability and smooth stitching, which is essential for a beginner.
Choosing The Right Thread and Needles
Choosing the right thread and needles makes hand sewing stitches easier and fabrics look cleaner.
Match needle size and thread material to fabric type.
Use these tips:
- Pick all-purpose thread for most fabrics.
- Match thread color closely for tidy seams.
- Use thick threads for heavy fabrics, thin for light.
- Choose specialty needles for unique tasks.
- Keep needles sharp to avoid snags.
Selecting the best sewing thread guarantees durability and helps in making hand sewing stitches easier, with tidy seams.
Threading Techniques and Knots
Threading a needle takes patience.
Pinch the thread, press the needle over it, or use a threader.
Double threads work best—cut thread lengths shorter than your arm to prevent tangles.
Secure seams with knots: wrap thread around fingers, roll, and pull tight.
Keep thread smooth and conditioned for easier hand sewing stitches and stronger knotting.
Basic Sewing Tools and Materials
A well-rounded sewing kit makes hand sewing stitches easier.
Pack it with assorted needle types, thread choices for different fabrics, small scissors, and marking tools like chalk or pencils.
Don’t skip a thimble—it saves your fingers.
A needle threader simplifies threading, while knotting thread secures seams.
A complete kit offers essential sewing supplies to turn any fabric into your next masterpiece with practical materials.
Common Hand Stitches
Hand stitches form the backbone of all hand sewing projects, offering both strength and flexibility.
Mastering a few common stitches, like the running stitch or backstitch, guarantees you can tackle anything from basic mending to detailed projects with ease.
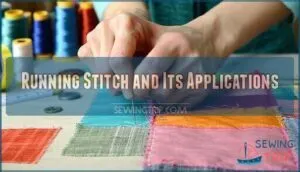
Running Stitch and Its Applications
The running stitch is a key hand sewing technique that works well for gathering fabric, basting uses, and beginner projects.
It’s simple yet versatile, making it perfect for:
- Basting temporary seams.
- Securing no-sew face masks.
- Attaching trim quickly.
- Creating ruffles by gathering fabric.
- Easy beginner practice, building sewing confidence.
This stitch is your go-to for clean, effective results, and is particularly useful for beginner projects.
Backstitch for Strong and Secure Seams
The backstitch is your go-to for durability. It mimics machine stitching but is stronger, lasting centuries with proper care.
Perfect for linen or thick fabrics, this hand sewing stitch involves overlapping stitches for a seamless look. Historical backstitch techniques offer variations for different needs, making it adaptable.
Full backstitches provide maximum strength. Among basic stitches, it’s the champion for creating strong, secure seams.
Whip Stitch for Hemming and Edges
The whip stitch is your go-to for edge finishing and hemming. It’s great for curved hems or delicate fabrics, offering both durability and elegance.
Use it for:
- Neatly hiding raw edges in different fabric types.
- Adding a decorative whipstitch detail.
- Strengthening hems for long-lasting wear.
This versatile stitch keeps your hand sewing projects polished and professional.
Stretch Stitch for Knit Fabrics
Stretch stitches work wonders on knit fabric types.
They stretch with the fabric, preventing seam breakage and ensuring flexibility.
Keep stitches even to avoid puckering.
Ballpoint needles are your best friend here.
| Feature | Benefits | Tips for Success |
|---|---|---|
| Seam Durability | Prevents breaking | Use double threading |
| Stitch Flexibility | Moves with fabric | Keep tension neutral |
| Decorative Applications | A clean look | Practice spacing evenly |
To ensure the best results, use double threading and maintain even stitch spacing, as these practices contribute significantly to the overall quality and appearance of the stitch work.
Advanced Hand Sewing
Once you’re comfortable with the basics, advanced hand sewing techniques help you create stronger, more flexible seams and professional finishes.
These stitches, like the fell stitch and catch stitch, allow for precise control and durability in projects ranging from clothing repairs to detailed appliqué work.
Combining Stitches for Durable Garments
Combining stitches creates hybrid seams that boost garment longevity and handle heavy use.
For durable hand stitching, mix stitch types to fit fabric compatibility and stress point stitching needs.
- Pair running backstitch for speed and strength.
- Use whip stitch to hide raw edges.
- Add stitch reinforcement for stress areas.
- Alternate straight and angled stitches.
- Match durable stitches to garment repair, creating a strong and lasting garment longevity through stress point stitching.
Fell Stitch for Appliqué and Securing Edges
Mastering the fell stitch is key for precise appliqué techniques and edge securing.
This versatile hand sewing stitch attaches folded fabric to a base, ideal for hemming applications or adding trims.
By adjusting the stitch angle, you control strength and flexibility, whether you’re attaching delicate lace or securing heavier fabric layers.
The fell stitch guarantees neat, lasting results in decorative stitches.
Catch Stitch for Flexible and Strong Seams
Catch stitch is a versatile hand stitching skill perfect for knit hems, full skirts, and flowing fabrics.
Its criss-crossing pattern offers flexibility and durability.
To master it:
- Fold the hem neatly.
- Begin small diagonal stitches across layers.
- Alternate directions to create the cross.
- Keep stitches loose to prevent puckering.
- Verify spacing avoids snagging.
Variations in Stitch Depth and Angle
Changing stitch depth and angle adds versatility to hand stitching.
Decrease depth for delicate fabrics or increase for sturdy seams. Adjust angles for decorative effects or flexible seams.
Use shallow stitches on slippery materials and deeper ones on thick layers.
| Use Case | Stitch Depth | Stitch Angle |
|---|---|---|
| Delicate fabrics | Shallow (1-2mm) | Straight |
| Thick materials | Deeper (3-4mm) | Slightly angled |
| Decorative effects | Variable | Creative angles |
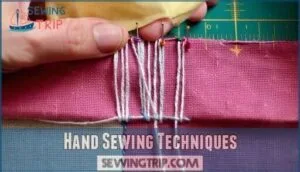
Hand Sewing Techniques
Mastering hand sewing techniques starts with understanding the essentials, like marking stitching lines, pinning, and basting for accuracy.
These methods guarantee your seams are neat, secure, and perfectly suited to any fabric or project, using techniques like pinning.
Marking Stitching Lines and Seam Allowance
Using the right marking tools helps guarantee accurate seams.
Chalk, pencils, or erasable markers work well for creating clear fabric markings.
Mark seam allowance width carefully to guide your stitches.
For hand sewing techniques, draw straight lines to follow or mark points for curves.
These hand sewing tips make stitches precise and reduce errors in seam placement, which is crucial for achieving accurate seams.
Pinning and Basting for Accurate Seams
Accurate seams begin with proper preparation.
Pin your fabric along seam lines to maintain fabric alignment.
Use 2–4-inch pin spacing for precision, especially on curved seams.
Temporarily hold layers with a basting stitch or running stitch to prevent shifting.
These hand sewing tips make tricky sewing techniques easier, especially for beginners learning how to manage fabrics and create clean seams.
They are particularly useful for beginners learning how to manage fabrics.
Tips for Working With Delicate Fabrics
Delicate fabrics demand patience and precision.
Opt for a fine needle size and lightweight thread choice to avoid snagging.
Keep stitch length small for control and neatness.
Handle fabric gently, avoiding stretching.
Reinforcement techniques like an invisible stitch can prevent weaker areas from tearing.
To maintain fabric integrity, choose pH-neutral detergents.
Test different hand stitches on scraps to perfect your technique before starting your project, ensuring you have the necessary control.
Securing Stitches With Backstitches and Knots
Securing your seams starts with mastering sturdy hand sewing stitches like backstitch and knotting techniques.
Anchor your thread with a knotless start or hidden knots to prevent bulk.
Reinforce seams with backstitch variations for extra strength.
- Use anchor stitches to secure thread tails.
- Finish seams with hidden knots.
- Reinforce seams with types of stitches like backstitch.
- Knot thread for long-lasting strength.
- Guarantee neat finishes by hiding knots inside seams.
Practical Hand Sewing Applications
Hand sewing isn’t just a skill; it’s a solution for practical tasks like mending clothes, creating decor, and teaching kids useful basics.
With the right stitches, you can handle repairs, add embellishments, and make unique DIY crafts with ease.
Mending and Repairing Clothing
Fixing torn seams or patching holes doesn’t require a machine—just a few hand sewing stitches.
Master the art of mending with simple hand sewing stitches—revive your favorite garments and extend their life effortlessly.
For mending, the backstitch provides strength, while whip stitches work great for hem repair.
Darning helps reinforce fabric wear, and button repair or replacing zippers saves favorites.
Running stitches are ideal for quick fixes, and practicing these types of stitches will help you master clothing repair and keep garments looking fresh.
Creating Decorative Items and Embellishments
Transform your projects with embroidery techniques and decorative stitching.
Explore beadwork integration to add sparkle or try fabric manipulation for unique textures.
Needlework stitches, like appliqué designs and embroidery stitches, bring personality to every piece.
Use stitch variations for depth and detail, creating stunning embellishments with hand sewing.
It’s all about letting your creativity shine through each thread and needle, with embroidery techniques.
Using Hand Sewing for DIY Projects and Crafts
Hand sewing opens up endless possibilities for memorable DIY projects and crafts.
Whether it’s adding embroidery stitches to pillows or upcycling fabric scraps into decorative pieces, there’s something for everyone.
Here are some ideas:
- Create handmade gifts like fabric bookmarks or sachets.
- Sew toys with simple needlework stitches.
- Craft DIY embellishments for clothes.
- Design unique home decor.
- Try hand sewing practical items like tote bags.
These projects allow for personalized touches and creativity, making each item special and meaningful.
Teaching Kids Basic Hand Sewing Skills
Incorporating sewing basics fosters patience required and creativity in kids.
Start with safe needles and simple projects like bookmarks or felt animals, ensuring age appropriateness.
Consider a complete sewing solution for young learners.
Keep tasks manageable and fun learning becomes intuitive.
Celebrate progress and nurture sewing skills for kids effectively.
| Age Group | Skill Focus | Project Examples |
|---|---|---|
| 3-5 | Fine Motor Skills | Lacing Cards |
| 6-7 | Basic Stitches | Felt Shapes |
| 8-9 | Knots & Independence | Simple Stuffed Animals |
| 10+ | Practical Sewing | Clothing Mends |
Frequently Asked Questions (FAQs)
What is the best stitch for hand stitching?
In the context of hand stitching, backstitch is your best bet.
It’s sturdy, versatile, and mimics machine stitching, making it perfect for seams, repair work, or anything needing strength and durability.
What is the best stitch for hand sewing patches?
The backstitch works best for sewing patches.
It creates strong, durable seams that stay secure even with frequent wear or washing.
Use small, even stitches to guarantee the patch lies flat and stays put.
What is the best hand stitch to repair a seam?
The backstitch is your best bet for repairing a seam.
It’s strong, durable, and mimics machine stitching.
Work small, tight stitches along the seam, ensuring overlap for strength.
It’s perfect for sturdy, lasting repairs.
How can hand sewing improve precision in tailoring?
You might think machines are unbeatable, but hand sewing lets you achieve unmatched precision.
It lets you control stitch placement, adjust tension, and work delicately on challenging fabrics or tight areas, ensuring custom perfection every time.
What are efficient ways to prevent hand fatigue?
Take breaks every 20-30 minutes, stretch your hands and fingers, and maintain a relaxed grip on your needle.
Use a thimble to reduce strain, and keep your stitching area comfortably lit and ergonomic.
How to repair seams in heavy-duty fabrics?
Picture unraveling threads like a zipper coming undone.
Use sturdy backstitches with thick, durable thread for strength.
A thimble helps push needles through dense fabric, and don’t forget to anchor your stitches securely.
What stitch is best for waterproof materials?
Use the backstitch for waterproof materials.
Pair it with water-resistant thread and seal the seam with specialized seam tape or a waterproof sealant.
This keeps your stitches strong and watertight for durable, effective results.
How to achieve invisibility for repair stitches?
To make repair stitches invisible, match your thread to the fabric color, take small, shallow stitches, and sew along existing seams or inside folds.
Pull stitches snug but not tight, keeping tension even for a flawless look, and ensure that you maintain even tension throughout the process to achieve the desired outcome.
Conclusion
Mastering the best hand sewing stitches is like accessing a toolkit for creativity and practicality.
Each stitch serves a purpose, from the simplicity of the running stitch to the strength of the backstitch and the versatility of the stretch stitch.
With practice, you’ll craft items with accuracy and repair garments with ease.
Remember, choosing the right tools and techniques makes all the difference, so, embrace each stitch as a step toward sewing with confidence and precision.


