This site is supported by our readers. We may earn a commission, at no cost to you, if you purchase through links.
 Quilting with a sewing machine is all about the right setup and tools.
Start by choosing a machine with a wide throat space—it’s like giving your quilt room to breathe. Use a walking foot for straight lines or a free-motion foot for creative designs.
Pair a sharp quilting needle with high-quality thread to avoid snags. Layer your quilt sandwich—backing, batting, and top—then secure it with pins or basting spray.
Adjust your stitch length to 2.5-3mm for a polished look. And don’t forget to practice! Even the best quilters started with wobbly stitches.
Ready to explore advanced techniques? Keep stitching!
Table Of Contents
Key Takeaways
- Choose a sewing machine with a wide throat space and use the right feet, like a walking foot for straight lines or a free-motion foot for creative designs.
- Match your needle size and thread type to your fabric, and adjust stitch length to 2.5-3mm for smooth, polished results.
- Secure your quilt sandwich layers with basting spray or pins, ensuring proper alignment and avoiding puckering.
- Practice quilting techniques like straight-line stitching or free-motion designs on scraps to build confidence and precision.
Machine Quilting Basics
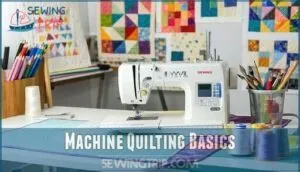
Machine quilting lets you stitch layers together quickly and accurately, making it perfect for beginners and pros alike.
Machine quilting combines speed and precision, turning fabric layers into stunning creations—perfect for beginners and seasoned quilters alike.
With the right tools and techniques, you’ll create stunning designs without the frustration of hand quilting.
Choosing Your Quilt Pattern
Start with a quilt pattern that matches your skill level—simple quilt designs like squares or strips are great for beginners.
Consider pattern complexity, quilt size, and your preferred design style. A smaller quilt layout is easier to manage, while bold quilt block layouts showcase creativity.
Choose a pattern that excites you; quilting should feel fun, not frustrating!
Step 1: Selecting Fabric
Choosing fabric for quilting is like picking the perfect outfit—it sets the tone.
The right fabric transforms your quilt, setting the stage for creativity and style to shine through.
Stick to cotton for its durability and ease, especially when quilting for beginners.
Mix fabric types cautiously; weights should match.
Pre-washing fabrics prevents surprises later.
Think about color palettes and pattern scale—bold prints can overpower small quilts, while subtle designs shine on larger projects.
Understanding Quilting Tools
Your quilting journey thrives with the right tools. A rotary cutter and quilting rulers guarantee precise cuts, while basting sprays simplify layer securing.
Use a walking foot for even stitching on your quilting sewing machine. Marking tools keep designs sharp, and quilting machine needles handle thick layers.
For supplies, consider rotary cutter options. Check your quilting machine guide for features like adjustable sewing machine feet to enhance control.
Setting Up Sewing Machine
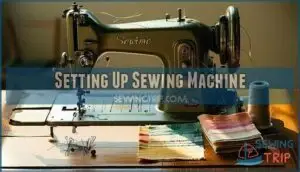
Setting up your sewing machine properly is the first step to quilting success.
From selecting the right needle to adjusting stitch length, each detail guarantees smooth stitching and prevents frustrating mishaps, which is crucial for quilting success.
Choosing The Right Needle
In the context of quilting machine needles, size matters! Use an 80/12 needle for light fabrics or a 90/14 for thicker layers.
Match needle types to your fabric—universal needles for cotton, or sharp needles for dense materials.
Check needle condition; dull ones skip stitches. Pair needles with thread weight, and let your quilting sewing machine shine!
Many options for purchasing machine needles are available online, providing a convenient way to find the right quilting machine needles.
Thread Selection Guide
After picking the right needle, let’s talk thread.
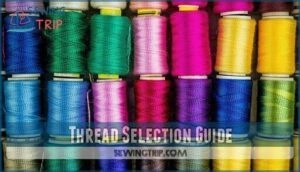
Match thread weight to your project—lighter for delicate quilts, heavier for durability. Polyester works well for most, while specialty threads add flair.
Verify that your quilting machine thread complements fabric color. For diverse options, explore different quilting thread options.
Adjust quilting machine tension to avoid skipped stitches. Quality threads prevent breakage, keeping your sewing machine humming smoothly.
Adjusting Stitch Length
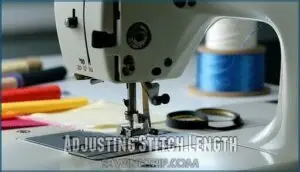
After selecting the perfect thread, it’s time to adjust your stitch length.
Match stitch density to fabric thickness—thicker fabrics need longer stitches, around 3.0.
Shorter stitches suit delicate projects or decorative stitches.
Seam appearance matters too; uneven stitches can ruin your work.
Understanding the feed dog’s function is vital for maintaining consistent stitch lengths.
Test quilting machine settings on scraps first.
Proper stitch length guarantees smooth sewing, balanced tension, and ideal results for any project type.
Preparing Quilt Sandwich
Creating a quilt sandwich is all about layering your backing, batting, and quilt top in the right order to keep everything smooth and secure.
With a few tools like pins or basting spray, you’ll guarantee the layers stay put while you quilt.
You will use these tools to ensure that the quilt top and other layers are properly aligned and secured.
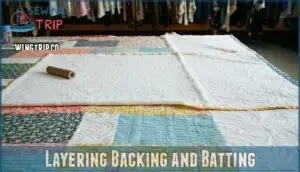
Layering Backing and Batting
Start by laying the backing fabric wrong-side up on a flat surface, taping edges to prevent shifting.
Smooth the batting on top, ensuring wrinkle prevention and proper layer alignment.
Keep everything taut but not stretched for better control, and remember that fabric orientation matters—align patterns if needed.
This quilt sandwich step sets the stage, so take your time and use a spray adhesive for efficiency.
Securing Layers With Pins
Once your quilt sandwich is layered, grab safety pins for pin basting. Space pins about a hand’s width apart to maintain layer alignment and prevent puckering.
Use curved pins—they’re easier to handle. Start pinning from the center outward, smoothing fabric as you go.
Don’t forget to remove pins as you quilt, or you’ll end up sewing them in! For best results, consider using bright colored pinheads to easily spot pins on busy prints.
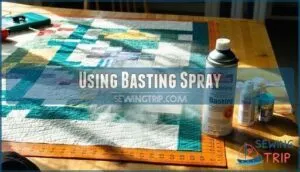
Using Basting Spray
If pinning feels like wrestling porcupines, basting spray is your best friend.
Lay your backing fabric flat, wrong side up, and spray adhesive evenly.
Work in sections, smoothing batting and top layers as you go.
Check fabric compatibility—cotton works great, polyester not so much.
Always ventilate your workspace to avoid feeling like you’re quilting in a glue factory!
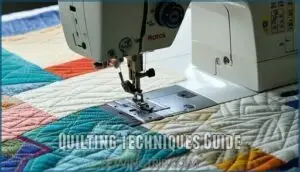
Quilting Techniques Guide
Mastering quilting techniques like straight-line stitching, free-motion designs, and stitch-in-the-ditch methods can transform your projects into polished works of art.
With the right tools, setup, and a bit of practice, you’ll achieve clean lines and creative patterns that bring your quilt to life, utilizing techniques such as free-motion designs.
Straight Line Quilting
Straight-line quilting is straightforward and perfect for beginners.
Attach a walking foot to your sewing machine for smooth fabric feeding. Use a guide bar or a taped cardstock guide to maintain consistent spacing.
Marking tools, like chalk or water-soluble pens, help you trace lines before stitching. This technique creates clean, professional designs, making it a go-to in quilting techniques.
Free Motion Quilting
When diving into free motion quilting, think of your sewing machine as a sketchpad.
With FMQ tools like a quilting foot and proper FMQ tension, you can create stunning FMQ motifs.
Practice FMQ designs on scraps first, letting your hands guide the fabric freely.
For smoother fabric control, consider using a Supreme Slider tool.
It’s an artful dance—relax, experiment, and enjoy mastering this quilting technique!
Stitch in The Ditch
If free motion quilting feels too bold, try stitch in the ditch for seamless results.
This technique uses a walking foot to follow seam lines, hiding stitches in the ditch depth.
Match your thread to fabric for near-invisible seams.
Cornering techniques are key—slow down for precision.
A good quilting machine or sewing machine guarantees smooth stitching, making this method beginner-friendly.
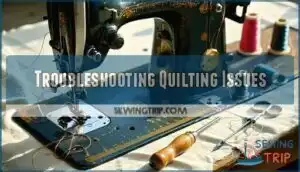
Troubleshooting Quilting Issues
When your quilting stitches skip or seams go wonky, it’s easy to feel stuck, but most issues have simple fixes.
With a few adjustments to your machine settings and techniques, you’ll be back to smooth, frustration-free quilting in no time, using simple fixes to resolve the issues.
Skipped Stitches Solution
Skipped stitches can ruin your quilting flow, but fixing them isn’t rocket science.
Check your sewing machine’s needle issues first—it might be dull or bent. Adjust thread tension for balanced stitches. Make certain proper foot pressure to keep the fabric steady. Keep an eye on fabric feed consistency.
Regular machine maintenance prevents hiccups, making for smooth quilting. A common cause is incorrect tension settings, so be sure to check those first.
Regular machine maintenance prevents hiccups, making for smooth quilting troubleshooting and happy stitches every time!
Uneven Seams Prevention
Uneven seams can throw off your quilt’s look, but it’s easy to fix with the right setup.
Use a Walking Foot for even fabric feeding and maintain consistent pressure.
Check your machine setup, verifying that tension and needle size match your fabric.
Practice pieces help perfect your seam allowance.
A Fabric Guide also guarantees straight stitches every time.
| Tool | Purpose | Tip |
|---|---|---|
| Walking Foot | Even fabric feeding | Prevents puckering |
| Fabric Guide | Straight seams | Aligns edges accurately |
| Practice Pieces | Skill-building | Test tension and stitch settings |
Reorganizing your quilt setup with these tools can significantly improve your results, ensuring a more professional finish with straight stitches and even fabric feeding, which is crucial for a perfect quilt.
Binding Attachment Guide
After mastering even seams, it’s time to tackle binding.
Binding attachments simplify securing edges, offering consistent binding fabric width.
For precise corners, try the corner miter technique.
Machine binding options save time, while hand stitching binding adds a personal touch.
Decorative binding stitches elevate your design.
Keep your sewing machine steady, and watch your quilting techniques shine with polished, professional edges!
Frequently Asked Questions (FAQs)
What setting on sewing machine for quilting?
Set your stitch length to 5-0 for quilting; it’s the sweet spot for smooth stitches.
Use a walking foot to prevent puckering, and test settings on scrap fabric to guarantee perfection.
What is a quilt guide on a sewing machine?
A quilt guide on a sewing machine helps you stitch evenly spaced lines by acting as a ruler.
It attaches near the presser foot, guiding your fabric like a steady hand, ensuring precise quilting designs.
What is the best stitch setting for quilting?
For quilting, aim for a stitch length of 5 to
It’s like finding the sweet spot—long enough for durability, yet short enough for precision.
Test settings on scrap fabric first!
Can a regular sewing machine be used for quilting?
A regular sewing machine works for quilting, especially smaller projects.
Just grab a walking foot for even stitching, adjust your tension, and practice on scraps first.
It’s like turning your machine into a quilting pro!
How do I clean my sewing machine?
Think of your sewing machine like a trusty car—it needs regular maintenance.
Remove lint with a brush, clean the bobbin area, oil per manual instructions, and wipe surfaces.
It’ll sew smoothly and avoid breakdowns.
What features should I look for in a quilting machine?
Look for a machine with a wide throat space, adjustable stitch length, and a walking foot.
Features like speed control, needle up/down positioning, and a sturdy frame make handling layers easier and more precise.
How do I store my quilted projects safely?
Ever thought about quilts as delicate artwork?
Store them flat or rolled in acid-free tissue paper, away from sunlight and moisture.
Avoid plastic bags—they trap humidity.
A cedar chest adds charm and protection!
Can I use metallic thread for quilting?
You can use metallic thread for quilting, but it’s tricky.
Use a metallic needle, reduce tension slightly, and pair it with a quality bobbin thread.
Test on scraps first to avoid frustrating breaks.
How do I maintain even tension while quilting?
Much like a symphony, you adjust stitch length and thread tension to maintain even tension while quilting, ensuring a harmonious balance of fabric and thread.
Conclusion
Rome wasn’t built in a day, and neither is quilting perfection, but with this sewing machine guide for quilting, you’re on the right track.
From picking the right tools to mastering techniques like free-motion stitching, each step builds your confidence.
Remember, practice turns wobbly stitches into straight lines.
Keep experimenting with patterns and adjusting your setup as needed.
Soon, your quilts will be both beautiful and durable, showcasing your skills with every stitch.
Happy quilting!

