This site is supported by our readers. We may earn a commission, at no cost to you, if you purchase through links.
Cut elastic 10-20% shorter than the finished measurement to guarantee proper tension.
Use a zigzag stitch or stretch needle to prevent breakage when sewing directly onto fabric.
Pin elastic in quarters to distribute evenly and avoid puckering.
For casings, fold fabric twice the elastic width plus seam allowances, leaving a small opening for threading.
Test your machine’s tension on scraps first – too tight causes fabric to pucker, too loose won’t hold.
The secret lies in understanding how different elastics behave with various fabrics and stitches to ensure a proper fit, and this knowledge is the key to successful elastic sewing.
Table Of Contents
Key Takeaways
- You’ll get the best results by choosing the right elastic type for your project – braided for casings, knit for comfort, woven for heavy-duty applications, and fold-over for clean edge finishing.
- You should cut your elastic 10-20% shorter than the finished measurement and use a zigzag stitch or stretch needle to prevent breakage while maintaining proper tension.
- You can avoid common problems like fabric puckering and elastic twisting by using a walking foot, pinning elastic in quarters for even distribution, and testing your machine’s tension settings on scraps first.
- You’ll create professional casings by folding fabric twice the elastic width plus seam allowances, leaving a small opening for threading, and using a safety pin to guide the elastic through without twisting.
Choosing Elastic Type
You’ll find four main elastic types available for your sewing projects: braided, knit, woven, and fold-over elastic.
Each type offers different characteristics that make it suitable for specific applications, from comfortable waistbands to durable swimwear construction, utilizing elastic in various ways.
Braided Elastic Uses
Braided elastic works best inside casings where it won’t lose stretch from needle punctures.
Perfect for hidden waistbands, braided elastic maintains its stretch when tucked safely inside fabric casings.
This elastic becomes narrower when stretched, making it perfect for lightweight fabrics and comfortable fits.
- Waistbands: Creates gentle gathering in pants and skirts without bulk
- Neckline applications: Provides smooth, invisible stretch in off-shoulder tops
- Swimsuit projects: Special swim varieties resist chlorine and saltwater damage
Choose braided elastic when you need reliable stretch without visible stitching lines. It’s available in widths up to 3 inches.
Knit Elastic Characteristics
Knit elastic offers superior stretch retention while maintaining its width during use.
This polyester-rubber blend provides exceptional softness factor, making it comfortable against skin.
Its ideal uses include waistbands and cuffs on lightweight fabrics.
The durability rating exceeds braided options, though cost analysis shows slightly higher prices.
These elastic stitch sewing tips guarantee your knit elastic projects deliver professional results with lasting comfort.
Woven Elastic Applications
Woven elastic stands out for heavy-duty projects where you need serious staying power.
Its superior shape retention makes it perfect for bag straps, home decor items, and waistbands that won’t give up after repeated washing.
These elastic properties shine in applications requiring firm support—think luggage straps and medical braces.
Choose woven elastic when your project demands durability over softness, especially for projects that require firm support.
Fold-Over Elastic Benefits
Fold-over elastic transforms edge finishing into a seamless process.
This versatile option excels with stretch fabrics, creating professional results in athletic apparel and undergarments. You’ll appreciate how foldover elastic eliminates bulky seams while providing superior comfort applications.
Here’s why fold-over elastic stands out:
- Smooth edge finishing – Creates clean, professional seams without raw edges showing
- Enhanced comfort – Soft against skin, perfect for elastic in lingerie and activewear
- Versatile applications – Works on necklines, armholes, and leg openings effortlessly
- Time-saving solution – Combines binding and elastic function in one step
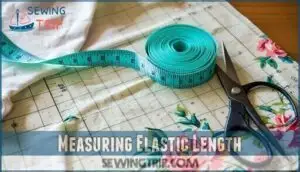
Measuring Elastic Length
Getting the right elastic length is essential for comfortable, well-fitting garments that won’t be too tight or too loose.
You’ll need to measure the body area where the elastic will sit, then subtract 2-4 inches from that measurement to create the proper snug fit.
Calculating Waistband Elastic
You’ll need precise waist measurement for a snug fit that won’t roll or dig.
Measure your natural waistline, then subtract 2-4 inches from that number to account for elastic stretching.
This calculation prevents loose waistbands while ensuring comfort.
| Waist Size | Elastic Length |
|---|---|
| 28 inches | 24-26 inches |
| 32 inches | 28-30 inches |
| 36 inches | 32-34 inches |
Consider elastic width and potential elastic shrinkage for even distribution.
Measuring Chest Elastic
Chest elastic requires precise measurement around your ribcage where you’ll need support.
Circle a measuring tape around your torso at the desired elastic placement, ensuring it’s level.
For a snug fit with adequate breathing room, subtract 2-3 inches from this measurement.
Your body area determines the support level needed—athletic wear needs less stretch than lingerie, affecting your final elastic length calculation.
When attaching elastic directly, consider pinning in quarters for even distribution, ensuring an optimal elastic length and proper elastic placement.
Determining Wrist Elastic Size
Measure your wrist snugly with measuring tools, then subtract one inch for proper snug fit.
Consider wrist movement when determining elastic length – too tight restricts circulation.
Choose appropriate elastic width for shirt cuff or bracelet projects. Test the elastic band around your wrist before cutting.
This wrist measurement guarantees comfortable elastic sewing results without binding during daily activities.
Accounting for Stretch Factor
Understanding your fabric’s stretch percentage transforms elastic stitch techniques from guesswork into precision.
Calculate stretch by measuring original length, then stretching to maximum capacity.
Use the formula: ((stretched length – original) / original) × 100.
This determines fabric compatibility with your project’s durability needs.
Proper tension consistency during sewing stretchy materials guarantees elastic recovery matches your fabric’s natural stretch characteristics.
Sewing Elastic Techniques
You’ll master elastic attachment by overlapping the ends and securing them with a zigzag stitch before pinning to your fabric.
Stretch the elastic while sewing to match your fabric length, then fold the fabric over the elastic edge for a clean, professional finish.
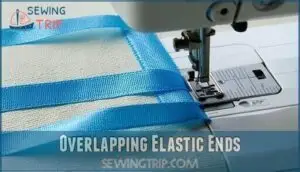
Overlapping Elastic Ends
Creating strong elastic connections requires proper overlapping techniques on your sewing machine.
Overlap elastic ends by 0.25-0.5 inches, then secure with reinforcement stitching using appropriate stitch types.
This overlap length prevents gaps while achieving bulk reduction for smoother seams.
These elastic stitch techniques guarantee durability without adding unnecessary thickness.
Master these overlapping ends methods before advancing to specific securing methods for professional results.
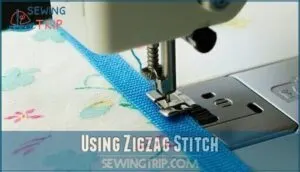
Using Zigzag Stitch
Once your elastic ends are securely overlapped, zigzag stitch becomes your best friend for elastic sewing.
Your sewing machine’s zigzag setting allows fabric to stretch naturally while maintaining strong elastic attachment.
Adjust stitch length for different zigzag stitch types – wider stitches work better with thick elastic.
Test fabric compatibility on scraps first, ensuring your zigzag stitch tension creates flexible, durable seams that won’t snap under stress.
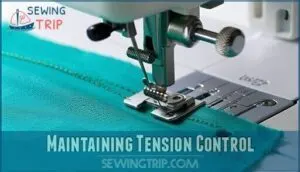
Maintaining Tension Control
Perfect thread tension transforms your elastic stitch sewing from frustrating to flawless.
Start with tension settings between 3 and 4, then fine-tune based on your fabric’s behavior.
Here’s your tension control checklist:
- Test stitch length and stitch tension on fabric scraps before starting your main project
- Adjust sewing machine settings gradually – small changes make big differences in fabric feed
- Maintain consistent pressure while guiding elastic stretch through the machine
For more help, check out sewing machine tension guides.
Folding Fabric for Elastic Attachment
When folding fabric for elastic attachment, you’ll create a clean, professional finish.
Start by measuring your casing width to accommodate the elastic plus seam allowances.
Fold the raw edge under, then fold again to create the channel.
This technique guarantees even distribution and proper elastic stitch sewing results.
| Fold Type | Purpose | Best Practice |
|---|---|---|
| Single Fold | Edge finishing | Press with iron for crisp lines |
| Double Fold | Casing creation | Leave opening for elastic insertion |
| Bias Fold | Curved seams | Stretch fabric gently while folding |
The use of these folds results in a professional finish and ensures that the elastic is securely attached, allowing for a clean finish.
Elastic Casings Creation
Creating elastic casings gives you a professional finish while keeping your elastic secure and comfortable.
You’ll learn to measure casing width, fold fabric properly, leave insertion openings, and thread elastic through without twisting, which helps achieve a comfortable result.
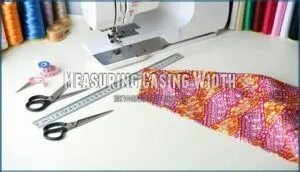
Measuring Casing Width
The secret to smooth elastic waistband creation lies in accurate casing width calculation.
You’ll need precise measurements to avoid bunching or loose fits that ruin your project’s professional appearance.
Follow these essential measuring steps:
- Measure your elastic width – Add 0.5 inches for comfortable elastic insertion space
- Account for seam allowances – Include 0.25 inches on each side for secure casing stitching
- Test with scrap fabric – Verify your casing method works before cutting main fabric
- Double-check calculations – Prevent costly mistakes in your elastic sewing project
Folding Fabric for Casing
When creating your casing, fold the fabric carefully to guarantee proper elastic width accommodation.
Start by folding the raw edge down, then create a second fold that’s wider than your elastic measurement plus casing width allowance.
Press with an iron for crisp seams.
Different fabric types require specific corner folding techniques for professional results.
| Fabric Type | Folding Method |
|---|---|
| Cotton | Double fold with pressed edges |
| Knit | Single fold to prevent bulk |
| Denim | Wide fold for thick elastic |
| Silk | Narrow fold with hand pressing |
To achieve the best outcome, ensure you follow the instructions carefully, focusing on complete concepts and using the correct folding method for your specific fabric type, which will lead to separate lines of fabric that are neatly folded and pressed.
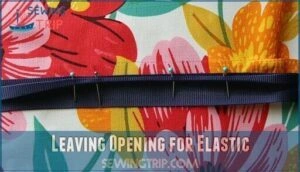
Leaving Opening for Elastic
When creating your elastic casing, strategic opening placement makes all the difference.
Leave a three-quarter to one-inch gap in your casing seam for smooth elastic insertion. This opening prevents frustration during elastic feeding while maintaining structural integrity.
Elastic can be secured by overlapping elastic ends for a durable hold.
Consider these essential opening requirements:
- Position the gap near a seam for easier casing closure later
- Measure the opening slightly wider than your elastic width
- Backstitch both ends of the opening to prevent unraveling during elastic securing
Inserting Elastic Into Casing
Start by attaching a safety pin to one elastic end, positioning it half an inch from the edge. Guide the pin through your casing opening, working it slowly along the channel. Keep a firm grip on the loose end to prevent slippage into the casing. An elastic pin alternative may also be used for this step.
| Step | Safety Pin Method | Prevention Tips |
|---|---|---|
| 1 | Attach pin 0.5" from elastic end | Hold loose end firmly |
| 2 | Insert pin through casing opening | Work slowly to avoid bunching |
| 3 | Guide pin through entire channel | Check for elastic twisting |
| 4 | Pull elastic through completely | Maintain even distribution |
| 5 | Overlap ends and secure with zigzag stitch | Close casing opening neatly |
Troubleshooting Elastic Sewing
Even experienced sewers encounter problems when working with elastic, from twisted waistbands to puckered fabric that ruins the finished look.
You’ll master these common issues by adjusting your machine tension, selecting the right needle, and using proper techniques to keep elastic flat and fabric smooth.
Avoiding Elastic Twisting
Twisted elastic turns your sewing project into a frustrating mess, but smart elastic handling prevents this common problem.
Keep your elastic flat and straight throughout the entire process with these essential techniques:
- Pin elastic at multiple points before casing insertion
- Mark elastic direction with washable chalk or pins
- Feed slowly through casing openings without rushing
- Check alignment every few inches during insertion
- Maintain consistent sewing direction for tension balance
Preventing Fabric Puckering
Fabric puckering ruins your elastic projects faster than you’d think.
Walking foot attachment guarantees even feeding while preventing wavy seams during stretch fabric sewing. Adjust stitch length to accommodate knit fabric stitching without bunching.
Fabric stabilization techniques include gentle handling and proper tension adjustment. Unbalanced thread tension often contributes to this issue.
These methods eliminate puckering in elastic sewing, creating professional-looking seams that maintain their stretch and appearance, which is crucial for a good fabric finish.
Adjusting Sewing Machine Tension
Wrong tension settings can sabotage your elastic projects faster than you’d think.
Perfect tension is the invisible foundation that makes or breaks every elastic sewing project.
Your sewing machine tension controls how much thread flows through, affecting stitch quality directly.
Start by checking your upper thread tension first, then adjust bobbin tension if needed.
- Set upper tension dial between 4-5 for balanced stitches
- Test fabric scraps before sewing your actual project
- Adjust tension discs gradually in small increments
- Check stitch balance on both fabric sides
- Lower bobbin thread tension only after upper adjustments fail
To ensure the best results, it’s crucial to follow these steps carefully and make adjustments as necessary to achieve the desired stitch balance and prevent issues like sabotage of your projects.
Using Correct Needle Type
Your sewing machine needle choice makes or breaks elastic projects.
Universal needles create visible holes in stretchy fabrics, while ball point needles slide between knit fibers without damage.
Stretch needles prevent skipped stitches on spandex and Lycra.
Needle size matters too—use 80/12 for foiled spandex.
For specialized tasks, consider a specific ball point to ensure the best results.
Match your fabric needle pairing correctly, and you’ll eliminate snagging, tearing, and tension issues instantly.
Frequently Asked Questions (FAQs)
What is the best stitch pattern for elastic?
Like a reliable friend who never lets you down, zigzag stitch is your go-to pattern for elastic.
It stretches with fabric movement, preventing broken threads.
You’ll also find three-step zigzag works beautifully for heavier materials.
What is the best sewing machine setting for stretchy fabric?
Set your machine to a zigzag or stretch stitch with reduced upper thread tension.
Use a ballpoint needle and polyester thread.
Test stitch settings on fabric scraps first to verify balanced, flexible seams.
What setting do you sew elastic on?
Threading elastic through fabric is like guiding a shy cat through a maze – patience wins.
You’ll want your machine’s zigzag stitch setting, reduced upper tension, and a ballpoint needle for smooth, stretchy results.
How do you sew elastic stitch?
Use a zigzag stitch while gently stretching the elastic to match your fabric’s length.
Pin elastic at quarters, then sew with steady tension.
A ballpoint needle prevents snags, ensuring smooth, professional results.
How to repair stretched out elastic waistbands?
Remember Cinderella’s perfect fit?
You can restore that magic to stretched waistbands.
Replace the old elastic entirely by opening the casing seam, removing worn elastic, cutting new elastic shorter, and threading it through carefully, which involves a complete process to achieve the desired perfect fit.
Can elastic be sewn directly onto fabric?
Yes, you can sew elastic directly onto fabric using a zigzag stitch.
Stretch the elastic while sewing to match the fabric’s length, then fold it inward and secure the bottom edge for a clean finish.
What causes elastic to lose its stretch?
While elastic seems indestructible, heat from dryers, repeated overstretching, and age gradually break down its fibers.
You’ll notice weakened elasticity when washing in hot water or storing garments improperly over time.
How to remove elastic without damaging fabric?
Carefully snip the elastic at one seam using small scissors.
Gently pull it out while supporting the fabric with your other hand.
Work slowly to avoid stretching or tearing the material around the casing.
Which presser foot works best for elastic?
Like Goldilocks finding the perfect porridge, you’ll want a walking foot for sewing elastic.
It feeds fabric and elastic evenly, preventing puckering.
A zigzag or overlock foot also works well for stretchy materials.
Conclusion
Mastering elastic is like learning to dance with fabric—it requires rhythm, timing, and practice.
These elastic stitch sewing tips will transform your projects from frustrating to flawless.
Remember to test your tension settings, choose the right elastic type for each application, and measure carefully before cutting.
With proper technique, you’ll create professional-looking garments that fit comfortably and last longer.
Start with simple projects and build your confidence as you perfect these essential skills.
- https://www.youtube.com/watch?v=FEbAwyrF1NM
- https://www.craftsy.com/blog/2015/10/types-of-elastic-for-sewing/
- https://pinterest.com/pin/create/button/?url=https://www.allfreesewing.com/Basics-and-Tutorials/How-to-Sew-with-Elastic
- https://www.facebook.com/sharer/sharer.php?u=https://www.allfreesewing.com/Basics-and-Tutorials/How-to-Sew-with-Elastic
- https://www.instagram.com/littletoh/

