This site is supported by our readers. We may earn a commission, at no cost to you, if you purchase through links.
Always test heat settings on fabric scraps first.
Keep your iron moving in smooth motions rather than staying in one spot.
Use steam sparingly and maintain proper iron temperature for each fabric type.
A clean ironing board cover prevents transfer marks.
For delicate fabrics, press from the wrong side or use a lower heat setting.
Professional tailors swear by the press-and-lift method instead of dragging the iron across fabric.
These foundational techniques form the backbone of flawless garment care, but there’s more to creating that perfect pressed finish, using the right techniques with a clean ironing board and proper iron temperature.
Table Of Contents
- Key Takeaways
- Pressing Tools Essentials
- Pressing Techniques Basics
- Avoiding Iron Marks
- Pressing Seams Correctly
- Curved Seams Pressing
- Pressing Darts and Sleeves
- Pressing Fabric Without Iron
- Pressing for Professional Results
- Common Pressing Mistakes
- Advanced Pressing Techniques
- Frequently Asked Questions (FAQs)
- Conclusion
Key Takeaways
- Use pressing cloths consistently – You’ll prevent shine and scorch marks by placing a protective barrier, like cotton voile or silk organza, between your iron and fabric, especially on delicate materials.
- Master the press-and-lift technique – You should lower your iron with steady pressure and lift it straight up, rather than dragging it across fabric, to avoid stretching and distortion.
- Match heat settings to fabric type – You cannot treat all fabrics the same way; test temperature settings on scraps first, and use lower heat for synthetics, while cotton handles higher temperatures.
- Keep your equipment clean and maintained – You’ll get better results when your iron’s soleplate is smooth, your ironing board cover is fresh, and you’re using distilled water to prevent mineral buildup.
Pressing Tools Essentials
You’ll need the right tools to press fabrics without leaving unwanted marks or shine.
The essential equipment includes a quality iron with adjustable heat settings, a well-padded ironing board with a clean cover, pressing cloths made from silk organza or cotton voile, and specialized tools like a tailor’s ham for curved seams and a sleeve roll for narrow areas.
The tools are necessary for achieving professional results, and using the right equipment, such as a tailor’s ham, can make a significant difference in the quality of the finish.
Iron Types
You’ll find several iron types that deliver professional results without leaving marks.
Steam irons offer adjustable temperature control and consistent steam output. Dry irons work best for delicate fabrics requiring precise heat.
Gravity feed systems provide continuous steam for heavy-duty pressing. Specialty irons like charcoal models excel at specific tasks.
Regular iron maintenance keeps your soleplate smooth and prevents fabric damage. Some irons, like those made of wrought iron, offer enhanced corrosion resistance.
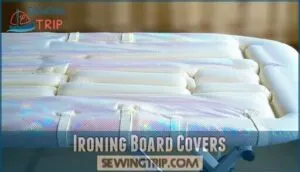
Ironing Board Covers
Your ironing board cover acts as the foundation for mark-free pressing techniques.
Extra thick padding prevents mesh patterns from transferring to fabric while providing scorching prevention.
Choose covers with reflective silicone coating for heat resistance and faster results.
Secure fit designs with elastic edges won’t shift during use. Natural cotton-linen blends offer breathability and cover longevity for consistent fabric pressing performance.
These covers often feature heat and scorch resistance for added durability.
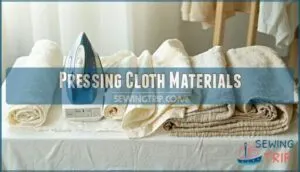
Pressing Cloth Materials
Quality covers protect your board, but the right press cloth materials shield your fabric from heat damage.
Silk organza offers superior heat resistance for delicate fabrics, while cotton voile provides excellent fabric protection for everyday pressing.
Wool gauze works well with heavy materials, and muslin options give you affordable scorching prevention.
Consider using organza cloth options for delicate fabrics, and choose your cotton cloth based on the fabric you’re pressing to ensure the best fabric protection and prevent heat damage.
Tailor’s Ham Uses
You’ll master shaping garments with curved areas when you understand your tailor’s ham’s versatility.
This essential pressing tool provides seam support while avoiding pleats on three-dimensional surfaces. Ham materials like cotton or wool create the perfect foundation for fabric shaping during presewing pressing.
Key applications include:
- Bust and hip curves – Shape darts smoothly
- Shoulder seams – Maintain natural body contours
- Armholes – Press without flattening curves
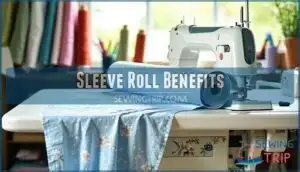
Sleeve Roll Benefits
A sleeve roll transforms your pressing game by filling out tubular areas where regular ironing boards fall short.
This specialized tool prevents creases when you’re working with sleeves, pant legs, and narrow seams.
You’ll get professional finish results while protecting delicate fabrics from unwanted marks.
| Feature | Benefit | Best For |
|---|---|---|
| Prevents Creases | Eliminates double-fold marks | Sleeves, cuffs |
| Seam Support | Maintains shape during pressing | Curved seams |
| Fabric Protection | Reduces heat damage risk | Delicate materials |
| Versatile Shapes | Adapts to different garment curves | Various garments |
| Professional Finish | Creates crisp, clean results | All sewing projects |
The key benefits of a sleeve roll include preventing creases, seam support, and fabric protection, making it an essential tool for achieving a professional finish in various sewing projects.
Pressing Techniques Basics
Perfect pressing starts with understanding the fundamental difference between pressing and ironing. You press by lowering and lifting the iron with steady pressure, while ironing involves sliding the iron across fabric. This distinction makes all the difference in achieving professional results without damaging your garments.
Master these essential pressing techniques to transform your sewing projects:
- Set the Stitch first by pressing each seam exactly as sewn before opening it
- Wrong-Side Press the seam allowances flat to eliminate bulk and create smooth lines
- Right-Side Press over the seam to guarantee no ridges or bumps remain visible
- Seam Direction follows your pattern instructions for proper garment construction
The key to crisp seams lies in patience and proper technique. Use pressing tools like a press cloth for delicate fabrics and a seam roll for curved areas. Each step builds toward that coveted professional finish that separates handmade from homemade.
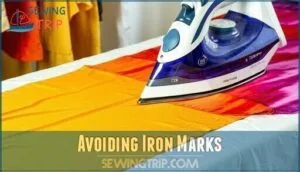
Avoiding Iron Marks
You’ll protect your fabric from unsightly shine marks and heat damage by using proper pressing techniques and protective barriers.
These methods prevent the iron from leaving permanent impressions on your garments while still achieving crisp professional results.
Using Pressing Cloth
A pressing cloth acts as your fabric’s bodyguard against heat damage.
Place this protective barrier between your iron and garment to prevent shine and scorch marks.
Cotton voile works well for lightweight fabrics, while wool gauze handles heavier materials.
| Cloth Materials | Heat Protection | Fabric Compatibility |
|---|---|---|
| Cotton voile | Light fabrics | Delicate silks |
| Wool gauze | Heavy fabrics | Woolens |
| Silk organza | Medium heat | Synthetics |
The choice of cloth material depends on the type of fabric being ironed, with cotton voile suitable for delicate silks and wool gauze for heavier woolens.
Steam Iron Settings
When you’re steam ironing, getting your heat settings right prevents fabric damage and iron marks.
Your steam iron’s temperature control dial isn’t just decoration—it’s your fabric’s best friend.
Here’s how to nail your steam iron settings:
- Match fabric temperature to your material—cotton handles high heat while silk needs low
- Adjust steam levels based on fabric weight and wrinkle severity
- Use distilled water quality to prevent mineral buildup on your soleplate
- Clean soleplate material regularly for smooth gliding and mark-free results
Ironing Board Maintenance
Your ironing board deserves better than neglect.
Regular Cover Cleaning prevents fabric transfer and maintains smooth pressing surfaces.
Check for Stability Issues by tightening loose screws and adjusting wobbly legs.
Replace worn Padding Replacement when cushioning compresses.
Proper Height Adjustment prevents back strain during extended sessions.
Smart Storage Solutions protect your investment.
| Maintenance Task | Frequency |
|---|---|
| Cover Cleaning | Weekly |
| Padding Replacement | Annually |
| Stability Issues Check | Monthly |
| Height Adjustment | As needed |
Fabric Type Considerations
Different fabric types demand unique approaches to avoid heat damage and achieve professional results.
Cotton and linen handle higher temperatures, while synthetic fabrics require lower heat settings.
Test fabric scraps first to determine heat tolerance and moisture needs.
Heavy crepes lose texture when pressed, while dark cottons need wrong-side pressing to prevent shine.
Always match your technique to fiber content to ensure the best results, considering the specific needs of each fabric type, such as professional results.
Pressing Seams Correctly
You’ll achieve crisp professional-looking seams by pressing them in the correct sequence and using proper technique.
Press the seam flat first to set the stitches, then open the seam allowances and press again on both the wrong and right sides of the fabric.
Step-by-Step Guide
Master the art of seam pressing order by following these fabric preparation steps.
First, press your newly sewn seam flat to set the stitches. Next, open the seam allowances and finger-press them apart.
Apply your iron with steady pressure, avoiding dragging motions that cause fabric damage.
This ironing technique guide prevents iron marks while ensuring professional results through proper temperature control.
Seam Allowance Tips
You’ll get better results by managing seam allowances properly before pressing.
Clip curves at intervals to prevent bunching, and grade seams by trimming one layer shorter than the other for bulk reduction.
Miter corners by cutting diagonal lines near points, and use your seam roll when pressing curved areas.
Consider seam finishes that won’t create ridges through your fabric.
Finger Pressing Methods
Your hands become powerful tools when fabric requires gentle care.
Finger pressing works wonders for delicate materials that can’t handle heat.
Follow these steps for effective hand pressing:
- Moisture control – Lightly mist fabric to help crease setting without oversaturating
- Pressure technique – Use knuckles and fingertips for targeted fabric smoothing along seams
- Drying patience – Allow complete fabric drying before handling to lock in pressed results
Curved Seams Pressing
Curved seams require special attention to avoid creating pleats or puckers that can ruin your garment’s professional appearance.
You’ll need to snip the seam allowances and use a tailor’s ham to shape these curves properly while pressing slowly to achieve smooth results.
Tailor’s Ham Techniques
Why struggle with curved seams when a tailors ham makes pressing effortless?
This essential tool provides Ham Shaping support for 3D Pressing tasks.
Place curved seams over the ham’s rounded surface for proper Seam Support and Fabric Contouring.
The firm Ham Materials mimic body curves, ensuring professional Fabric Smoothing results.
Combined with your press cloth, it’s indispensable among pressing tools.
Snipping Seam Allowances
Curved seam allowances need strategic cuts to prevent puckering and create smooth curves.
This sewing technique reduces bulk and releases tension for professional results.
- Clip perpendicular to stitching line – Make small cuts every half-inch along curved seams
- Cut close to stitching – Leave 1/8-inch seam allowance to prevent fraying
- Angle cuts on sharp curves – Create V-shaped notches for better curve conforming
- Test tension release – Gently spread seam to check flexibility before pressing
To aid in shaping, consider using a tailor’s ham for support during pressing.
Pressing Slowly
After snipping those seam allowances, you’ll want to take your time with the actual pressing.
Rushing heat application creates distortion and stretching in curved areas. Move your iron slowly across the fabric, allowing proper heat distribution and fiber relaxation.
This controlled approach prevents fabric from warping while ensuring even heat setting. Let each section cool completely before repositioning for ideal fabric cooling.
Pressing Darts and Sleeves
You’ll need specific techniques when pressing darts and sleeves to avoid marks while achieving professional results.
These areas require careful attention because they’re curved or contain multiple fabric layers that can easily show pressing mistakes, which is why professional results are crucial, and achieving them requires careful techniques.
Dart Crease Pressing
Perfect dart pressing transforms your garment’s fit and appearance. Start by pressing the dart crease to establish a clean fold line.
Master your dart pressing – it’s the secret to transforming homemade garments into professional-looking pieces.
Next, position your fabric on the tailor’s ham for proper support. One may need to weigh the options of adjusting dress bust darts for the perfect fit.
Here’s your pressing sequence:
- Fold dart to desired dart direction
- Apply steam application with calico protection
- Set crease setting by holding iron steady
This technique guarantees professional seam finishing and helps achieve a desired dart direction.
Sleeve Head Pressing
Moving from darts, you’ll tackle sleeve heads using similar shaping principles. Drape your sleeve over a tailor’s ham or sleeve roll for proper fabric support.
Apply steam gently while the garment rests on the curved surface. Let it cool completely before moving – this cooling technique sets the shape permanently.
| Tool | Purpose | Steam Application | Cooling Time |
|---|---|---|---|
| Tailor’s Ham | Sleeve shaping | Light steam bursts | 5-10 minutes |
| Sleeve Roll | Seam support | Gentle steam passes | 3-5 minutes |
The use of a tailor’s ham or sleeve roll is crucial for achieving the desired shape, as it provides the necessary support for the fabric while applying gentle steam.
Sleeve Hem Pressing
After perfecting the sleeve head, focus on the hemline shape.
Slide the hem over a sleeve board or seam roll to maintain its natural curve.
Consider fabric weight when determining hem depth – heavier materials need deeper hems.
Use a pressing cloth to protect delicate fabrics.
Press seams carefully, rotating the sleeve to access the entire hemline for professional results.
Pressing Fabric Without Iron
You can achieve professional pressing results without a traditional iron using steamers, damp cloths, or hair dryers.
These alternative methods work by relaxing fabric fibers through moisture or controlled heat to remove wrinkles effectively, which helps to achieve professional pressing results.
Steamer Methods
Handheld steamers offer gentle wrinkle removal for delicate fabrics without direct contact.
Fill your steamer with distilled water and hold it six inches from the garment. Move the steam wand vertically, letting gravity help smooth wrinkles.
This fabric steaming technique works perfectly on silk, chiffon, and sequined materials.
Regular steamer maintenance guarantees consistent results.
Damp Cloth Techniques
When you don’t have an iron handy, a damp cloth becomes your wrinkle-fighting ally.
This technique works by relaxing fabric fibers through controlled moisture and gentle pressure. A good option is to use muslin pressing cloths for this purpose.
- Cloth Dampness Level: Keep the cloth slightly moist, not soaking wet, to prevent watermarks on delicate fabrics
- Fabric Type Impact: Cotton and linen respond better than synthetics to this moisture-based approach
- Drying Time Factors: Allow complete air drying after pressing to set creases properly
Hair Dryer Uses
Transform your hair dryer into a wrinkle-busting powerhouse with proper technique refinement.
Set medium heat and hold six inches from clothing to prevent heat damage.
Target stubborn creases with gentle back-and-forth motions, and remember that this alternative uses fabric safety as priority – never touch the dryer directly to material.
Best practices include checking results frequently during wrinkle removal sessions.
Pressing for Professional Results
You’ll transform your handmade garments from homemade to polished when you master professional pressing techniques.
Proper pressing enhances your garment’s appearance and reflects your attention to detail in every seam and fold.
Enhancing Garment Appearance
When you master pressing techniques, your clothes tell a story of care and attention. Sharp creases and smooth fabric create that coveted Professional Impression while extending Garment Longevity.
Proper steam pressing gives you a Confidence Boost that shows in how you carry yourself. For collars, using a tailor’s ham can help maintain their natural curves.
- Fabric Drape improves dramatically with consistent pressing habits
- Detail Focus on collar points and cuffs makes all the difference
- Smart garment care routines save money on dry cleaning bills
- Effective wrinkle removal transforms yesterday’s outfit into today’s winner
- Quality pressing tips help fabrics maintain their original shape longer
Reflecting Personal Hygiene
Well-pressed clothing signals your commitment to clothing cleanliness and professional image.
People notice wrinkled garments and associate them with poor hygiene habits.
Proper fabric care and wrinkle prevention demonstrate attention to detail that extends beyond appearance.
When you master clothing preparation and stain removal, you’re showing respect for yourself and others in professional settings.
Saving Time and Effort
Smart solutions for busy schedules make clothing care effortless.
Quick pressing methods like steamers and damp cloths deliver wrinkle-free clothes in minutes.
These efficient methods eliminate setup time while providing professional results.
Speed techniques using hair dryers or bathroom steam offer timesaving alternatives when you’re rushing.
Minimalist ironing approaches fit seamlessly into hectic lifestyles without sacrificing appearance quality, and using quick pressing methods can make a significant difference.
Common Pressing Mistakes
You might unknowingly sabotage your pressing efforts by making simple mistakes that leave marks or damage your fabric.
Understanding these common errors helps you achieve professional results while protecting your garments from heat damage and water stains.
Over-Wetting Fabric
Too much moisture creates water stains and extends drying time unnecessarily.
You’ll damage delicate fabric if you oversaturate it with steam or a damp cloth.
Keep moisture levels moderate – lightly mist rather than soak.
Excess water penetrates fibers too deeply, causing permanent marks.
Control steam output carefully and test moisture control techniques on fabric scraps first.
Ignoring Fabric Type
Cotton can handle high heat, but silk melts under pressure.
You can’t treat every fabric the same way without risking fabric damage. Check fiber content labels before pressing.
Delicate materials need lower temperature settings to prevent scorch marks and shine issues.
Heat sensitivity varies dramatically between fabrics. Wrong heat tolerance assumptions cause texture changes and permanent heat damage.
Using Excessive Steam
Too much steam saturates your fabric, creating water stains and extending drying time unnecessarily.
Excessive moisture buildup defeats your quick pressing efforts and can cause fabric fading or heat damage. You’ll notice fiber relaxation becomes uneven when steam overwhelms the material.
Start with light steam bursts instead of continuous flow to maintain control and prevent moisture-related disasters.
Advanced Pressing Techniques
Once you’ve mastered basic pressing skills, you’ll need specialized techniques for demanding fabrics and professional results.
Advanced methods include using gravity feed irons for heavyweight materials, adjusting steam levels for delicate silks, and employing pressing blocks to handle difficult textures without leaving marks.
Using Specialty Irons
Beyond traditional steam irons, specialty options transform your pressing game.
Gravity feed irons deliver consistent steam for professional results, while cordless irons offer freedom of movement.
Travel irons pack convenience without sacrificing performance.
Craft irons handle detailed work with precision temperature control.
Each type requires specific maintenance routines and troubleshooting approaches to prevent fabric damage and guarantee superior performance.
Pressing Delicate Fabrics
When working with delicate fabrics like silk, lace, velvet, and chiffon, you’ll need gentle techniques to avoid snags and damage.
Use a steamer instead of direct heat, holding it several inches away from the fabric.
For silk pressing, place a press cloth between the iron and material.
Garment steaming works best for these fragile textiles, preserving their texture and preventing shine.
Pressing Heavyweight Fabrics
Heavyweight fabrics demand patience and strategic pressing methods to achieve professional results.
Dense materials like canvas, denim, wool, and corduroy require specific techniques that prevent damage while creating crisp seams.
- Clapper Usage: Press seams with a wooden clapper to flatten thick layers without excessive heat pressing
- Canvas Pressing: Use steam bursts and firm pressure, allowing fabric to cool completely between passes
- Denim Techniques: Press inside out with high heat, using pressing cloth to prevent shine on surface
- Wool Pressing: Apply gentle steam without direct contact, letting natural fibers relax gradually
- Corduroy Care: Press lightly along grain direction to preserve texture and prevent crushing pile
Frequently Asked Questions (FAQs)
How to heat press without leaving marks?
Like walking on eggshells, you’ll need finesse to avoid marks.
Use pressing cloths between iron and fabric, keep temperatures low, and lift—don’t drag—your iron.
Press from the wrong side whenever possible.
How do you iron without leaving marks?
Use a pressing cloth between your iron and fabric to prevent shine and scorch marks.
Press with an up-and-down motion instead of sliding.
Keep the iron moving and use appropriate heat settings for your fabric type.
How to avoid scorch marks when heat pressing?
Sarah’s silk blouse got a brown scorch mark when she pressed it on high heat.
You’ll prevent this by using lower temperatures, testing inconspicuous areas first, and keeping your iron moving constantly across the fabric.
How to avoid iron scorch marks?
Always use a pressing cloth between your iron and fabric to prevent direct heat contact.
Lower your iron’s temperature setting, test on scraps first, and keep the iron moving gently to avoid concentrated heat damage.
How to remove pressing marks from silk?
Silk fibers react like delicate flower petals to heat – they shrink permanently when damaged.
Steam the affected area lightly, then gently stretch the fabric while damp to restore its original shape and remove pressing marks.
Can you press synthetic fabrics safely?
Yes, you can press synthetic fabrics safely with the right approach.
Set your iron to low heat, use a press cloth, and test on a hidden area first.
Synthetics melt easily, so gentle pressure works best.
What temperature works best for wool pressing?
Delicate wool demands respect, unlike sturdy cotton that tolerates high heat.
You’ll want medium-low temperatures around 275-300°F with steam.
Test on hidden areas first—wool can shrink or develop that dreaded shiny appearance if you’re too aggressive.
How to press pleats without flattening?
Use a press cloth and lower your iron straight down onto pleats without sliding.
Press for just 2-3 seconds, then lift completely.
Work section by section, allowing steam to set the crease while preserving pleat volume and shape.
Should you press interfacing before or after?
Like building a house, you’ll want a solid foundation first.
Press your interfacing before attaching it to fabric.
This prevents puckering and guarantees smooth adhesion, giving you professional results every time.
Conclusion
Mastering pressing techniques without iron marks transforms your garments from wrinkled to polished perfection.
You’ve learned essential tools, proper heat settings, and professional methods that prevent fabric damage.
Remember to test temperatures, use pressing cloths consistently, and maintain clean equipment.
These proven techniques guarantee crisp seams, smooth darts, and flawless finishes every time.
With practice, you’ll achieve salon-quality results at home while protecting your favorite fabrics from unwanted shiny spots and permanent damage.
- https://www.reddit.com/r/sewing/comments/sgq8t0/how_do_you_press_nonironable_fabrics/
- https://fcs-hes.ca.uky.edu/sites/fcs-hes.ca.uky.edu/files/ct-lmh-019.pdf
- https://www.youtube.com/watch?v=_1H_Q7gXTFE
- https://www.persil.com/uk/laundry/laundry-tips/stains/how-to-remove-scorch-marks-from-clothes-its-easier-than-you-think.html
- https://pubs.nmsu.edu/_c/C309/index.html


