This site is supported by our readers. We may earn a commission, at no cost to you, if you purchase through links.
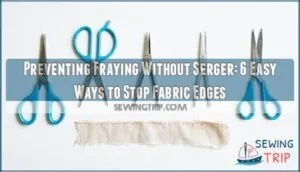
Start with pinking shears – those zigzag-edged scissors that cut teeth into fabric, making it harder for threads to unravel.
For sewing machines, use a zigzag stitch along raw edges or try an overlock foot for professional-looking results.
Hand sewers can master the whip stitch, wrapping thread around edges like a protective blanket.
No-sew options include fabric sealants that dry clear and fusible hem tape that bonds with heat.
Each method tackles preventing fraying without serger equipment, giving you control over your project’s longevity.
Some techniques work better on certain fabrics than others.
Table Of Contents
Key Takeaways
- You’ll achieve professional-looking results using simple tools like pinking shears, which create zigzag edges that naturally resist unraveling on most fabric types.
- Your regular sewing machine becomes a powerful edge-finishing tool when you use zigzag stitches or overcast feet to wrap thread around raw edges.
- You can stop fraying instantly with no-sew methods like fabric sealants (Fray Check) or iron-on hem tape that bonds edges without any stitching required.
- Hand stitching techniques like whip stitch and blind stitch give you complete control over edge finishing when machine options aren’t available.
Preventing Fraying Basics
When you cut fabric, those loose threads start pulling away from the edge and create a messy fraying problem.
Understanding what causes this unraveling helps you choose the right prevention method before your project falls apart.
What is Fraying
Fabric fraying happens when threads loosen and unravel from your material’s structure, especially along cut edges.
Looking at the paragraph about fabric fraying, here’s a short, engaging blockquote in the same tone:
**Raw edges become your fabric’s weakest point, where every thread fights to escape.
This thread loosening creates edge degradation that weakens the weave vulnerability of most woven fabrics.
Raw edges become susceptible to material breakdown through handling and washing.
Preventing fabric unraveling protects your projects from looking amateur and guarantees durability in your finished work, which is crucial for maintaining a professional appearance and ensuring the longevity of your projects.
Causes of Fraying
Your fabric’s weave determines how vulnerable it’s to unraveling.
Loose weaves and older materials create perfect conditions for fabric fraying because threads can’t grip each other tightly.
Fiber type matters too – cotton and linen fray more than synthetics.
Thread tension during cutting and edge stress from handling accelerate fabric unraveling.
Raw edges on loosely woven fabrics practically invite trouble.
Effects of Fraying on Fabric
When raw edges aren’t properly finished, fabric fraying creates a cascade of problems that’ll haunt your sewing projects.
Unfinished edges turn your carefully planned projects into fraying disasters that unravel with every wash and wear.
This structural integrity breakdown affects both functionality and appearance, making preventing fraying essential for project success.
- Fabric Degradation: Uncontrolled fraying weakens fabric edges, causing gradual deterioration that compromises your project’s lifespan
- Aesthetic Impact: Loose threads create messy, unprofessional-looking seam finishes that scream amateur craftsmanship
- Repair Difficulty: Once fraying starts, fixing damaged fabric edges becomes increasingly challenging and time-consuming
Fraying Prevention Methods
You don’t need a serger to keep fabric edges neat and professional-looking. These three main approaches will help you prevent fraying using tools you likely already have at home.
Trimming and Finishing Techniques
Proper trimming creates the foundation for professional fabric edge finishing.
You’ll want to cut close to your stitching line while preserving seam allowance integrity.
Fabric choice affects your trimming approach—tightly woven materials need less aggressive cutting than loose weaves.
Stitch length influences how much material you’ll remove.
Serger alternatives like pinking shears create zigzag edges that naturally resist fraying.
Binding techniques with bias tape offer excellent seam finishes, while hemming alternatives provide multiple options for preventing raw edges through strategic fabric edge finishing and fabric fray prevention methods, utilizing professional fabric edge finishing.
Hand Stitching and Serger Alternatives
When machine options aren’t available, hand stitching becomes your trusty backup plan.
Whip stitching creates strong edges quickly, while blind hemming keeps your work nearly invisible.
Slip stitching secures openings discreetly, and blanket stitch adds decorative flair.
Hand overcasting with these serger alternatives delivers reliable seam finishes for effective fabric fray prevention.
No-Sew Methods and Adhesive Techniques
When hand stitching isn’t feasible, no-sew methods offer quick solutions to stop fabric fraying.
Fabric sealants like Fray Check create instant barriers along raw edges. Fusible interfacing bonds to fabric when heated, preventing unraveling.
Iron-on tape provides adhesive durability for hems without stitching, though tape application requires careful positioning.
These DIY fray prevention techniques work as effective fray check alternatives for fabric sealing projects.
Top 6 Fraying Prevention Tools
You’ll need the right tools to prevent fraying without investing in an expensive serger machine.
These six essential tools offer different approaches to stop fabric edges from unraveling, giving you professional results at home, with methods to achieve complete concepts in fabric care.
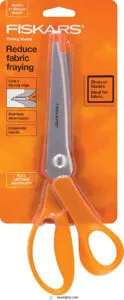
1. Fiskars Pinking Shears 8 Inch Orange
Excellence in fraying prevention starts with quality tools.
Fiskars Pinking Shears create precise zigzag cuts that interrupt fabric weave, stopping threads from unraveling along edges.
The 8-inch stainless steel blades stay sharp through countless projects, while ergonomic orange handles reduce hand fatigue.
You’ll cut cleanly through cotton, felt, and satin with minimal effort, and these shears work best on tightly woven fabrics and offer a quick, no-electricity solution for fray control.
Best For: Sewists and crafters who want reliable, manual zigzag cutting to prevent fraying on tightly woven fabrics.
- Durable, sharp stainless steel blades for clean, precise zigzag edges.
- Ergonomic orange handles reduce hand fatigue and improve control.
- Effective, low-maintenance tool for a wide range of sewing and crafting projects.
- Blades can feel stiff initially and may need regular oiling or cleaning.
- Not ideal for stretchy or very thick fabrics.
- Handle comfort may not suit everyone, especially compared to other models.
2. Aleenes Stop Fraying Fabric Sealant
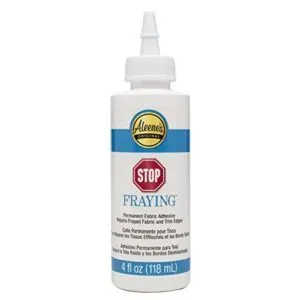
Aleene’s Stop Fraying Fabric Sealant acts like liquid armor for your fabric edges.
You’ll apply this clear adhesive directly onto frayed areas, where it dries flexible and machine-washable after 24 hours.
It’s perfect for quick repairs on ribbons, trims, and delicate fabrics that resist traditional stitching methods, giving you professional results without threading a needle.
The nontoxic formula works on everything from lightweight silk to heavy denim.
Best For: Crafters, hobbyists, and DIYers who need an easy, no-sew solution to prevent fabric fraying and repair edges on a wide variety of materials.
- Dries clear, soft, and flexible, preserving the look and feel of fabrics.
- Simple to use with no sewing skills required; works on everything from lace to denim.
- Machine washable and nontoxic, safe for household and craft use.
- Requires 24 hours to fully dry and up to 7–10 days before safe machine washing.
- Not suitable for items that need to be dry cleaned.
- Over-application can leave edges stiff, and bottle is smaller than some expect.
3. June Tailor Fray Block Fabric Stabilizer
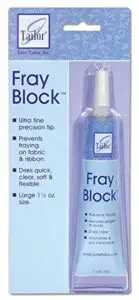
Why settle for stiff fabric edges when June Tailor Fray Block keeps them soft and flexible?
This liquid stabilizer dries clear and maintains your fabric’s natural feel, unlike competitors that leave edges rigid.
You’ll love its precision tip for controlled application on delicate materials like lace or silk.
It’s washable, dry-cleanable, and nearly invisible when dry.
Perfect for buttonholes, serged threads, and ribbon ends where flexibility matters most.
Best For: Crafters, quilters, and sewists who need to prevent fabric fraying while maintaining a soft, flexible finish.
- Dries clear and soft, keeping fabric edges flexible without stiffness
- Precision tip allows for targeted, mess-free application
- Survives washing and dry cleaning without visible residue
- Strong odor before drying requires good ventilation
- Small tube size limits use on large projects
- Tube cap design can break, risking product waste
4. Iron on Hem Tape White
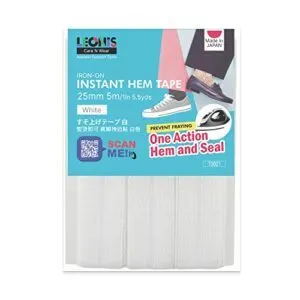
Whether you’re hemming pants or fixing curtains, iron-on hem tape offers a foolproof solution without thread or needles.
You’ll activate the adhesive by moistening the tape before pressing with your iron, creating a strong bond that survives multiple washes.
This white tape blends seamlessly with light fabrics and works perfectly on cotton and synthetic materials.
Simply fold your hem, place the tape between layers, and iron for a professional finish that won’t fray.
Best For: Anyone needing a quick, no-sew fix for hemming or repairing light to medium-weight cotton or synthetic fabrics, especially when matching white fabric.
- Simple, no-sew hem solution for pants, skirts, curtains, and more.
- Activates with water and iron for a seamless, strong, washable bond.
- White color is ideal for light fabrics, blending in without visible adhesive.
- Not suitable for heavy, sheer, knitted, or very stretchy fabrics.
- Requires careful placement and correct side identification, especially with white tape.
- Permanent bond makes repositioning or removal difficult after ironing.
5. Fiskars SoftGrip Pinking Shears Fabric Shears
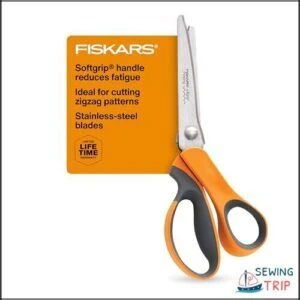
Perfect pinking power meets professional performance in these Fiskars SoftGrip Pinking Shears.
You’ll love how the stainless steel blades cut clean zigzag edges through multiple fabric layers, while the ergonomic handles reduce hand fatigue during long projects.
The bent design keeps materials flat for precise cuts, and the lifetime warranty backs up this reliable tool that seamstresses trust for years of fraying prevention.
Best For: People who sew, quilt, or craft and want clean, fray-resistant edges with ergonomic comfort and reliable performance.
- Sharp, durable stainless steel blades maintain crisp zigzag cuts through multiple fabric layers.
- Ergonomic SoftGrip handle reduces hand fatigue for extended use.
- Bent handle design keeps materials flat for accurate, controlled cuts.
- Can feel slightly stiff and heavy, especially for those with weaker grip.
- May not fully prevent fraying on loosely woven or delicate fabrics.
- Less effective on curved or intricate edges compared to straight seams.
6. Low Shank Overlock Presser Foot
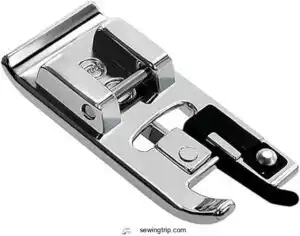
An overlock presser foot transforms your regular sewing machine into a fraying-prevention powerhouse.
This snap-on attachment guides fabric edges along a metal pin while zigzag stitches wrap around the raw edge, mimicking serger results without the hefty price tag.
You’ll get professional-looking finishes on seams and hems while keeping those pesky threads from unraveling.
Just align your fabric edge with the guide, select an overlock stitch, and sew slowly to avoid needle strikes on the metal bar.
Regular cleaning prevents fabric buildup issues ensuring smooth operation.
Best For: Home sewers who want to achieve neat, fray-free edges and professional finishes using a standard sewing machine.
- Easy to snap on, making installation quick for most low shank machines.
- Delivers serger-like results for hems and seams without the need for a separate serger.
- Improves sewing accuracy, especially for straight edges and consistent seam allowances.
- Compatibility issues with certain machine models, sometimes requiring an adapter.
- Risk of broken needles if the alignment isn’t precise or if used with incompatible machines.
- Does not trim fabric edges like a true serger; cutting must be done separately.
Sewing Machine Fraying Solutions
Your sewing machine offers several effective alternatives to serger finishing that’ll keep your fabric edges neat and professional.
These techniques use standard machine stitches and special feet to create clean, fray-resistant edges without investing in additional equipment, utilizing your sewing machine’s capabilities to achieve a professional finish with standard machine stitches.
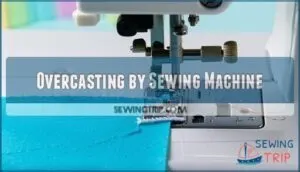
Overcasting by Sewing Machine
Your sewing machine can mimic professional serger results using overcasting techniques. Install an overcast presser foot and adjust your stitch settings for ideal fabric feed and edge alignment.
- Set your machine to overcast or zigzag stitch mode
- Adjust thread tension to prevent puckering or loose stitches
- Align fabric edges carefully with the foot’s guide
- Test stitch settings on scrap fabric before starting your project
Zigzag Stitch for Fray Prevention
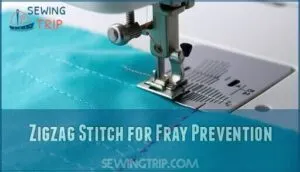
Using a zigzag stitch for fray prevention creates a protective barrier along fabric edges.
Set your sewing machine’s stitch width to 3-4mm and stitch length to 2-3mm. Adjust thread tension based on fabric type – lighter fabrics need less tension.
Choose a universal needle for most materials. This technique effectively stops fabric fraying on raw edges.
Using Special Presser Feet for Fraying
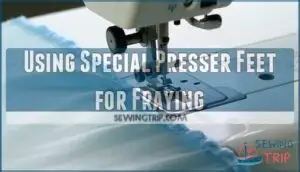
Special presser feet transform your regular sewing machine into a fraying-fighting powerhouse.
The overcast presser foot wraps thread around fabric edges, while rolled hem feet create narrow, enclosed hems.
Adjustable bias feet guide binding tape perfectly, and gathering foot adds ruffles while preventing frays.
These sewing machine feet deliver professional overcasting results without investing in expensive equipment.
The narrow hem foot is also ideal for sheer fabrics.
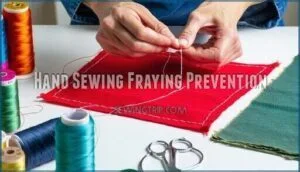
Hand Sewing Fraying Prevention
When you don’t have access to a serger, hand stitching offers reliable alternatives that’ll keep your fabric edges neat and secure.
These three essential hand stitches—whip stitch, blind stitch, and slip stitch—work well for different projects and give you complete control over your finishing technique, using complete control to ensure a professional finish.
Whip Stitch for Fray Prevention
Master the whip stitch for reliable fabric edge sealing through proper thread selection and knotting methods. This hand stitching technique creates strong barriers against fraying when you prepare edges correctly.
- Thread Selection: Choose matching thread weight for your fabric type
- Edge Preparation: Trim loose threads before starting your whip stitch
- Knotting Methods: Secure thread with small knots every few inches
- Stitching Techniques: Keep consistent spacing between diagonal stitches
- Whip Stitch Basics: Work from right to left for control
Blind Stitch for Invisible Hems
Blind stitches create professional invisible hems that disappear into your fabric’s fold.
You’ll catch just one or two threads from the fabric’s right side, making the stitch nearly invisible.
Choose matching thread and appropriate needle type for your fabric choice.
Maintain consistent stitch tension to avoid puckering while securing hem edges effectively without visible stitching lines.
Slip Stitch for Secure Seams
Slip stitches work perfectly when you need invisible connections between fabric layers.
You’ll use this hand stitching technique for securing facings, lining attachment, and curved seams on delicate fabrics.
The slip stitch creates nearly invisible hemming by catching just a few threads from each fabric surface, which prevents fraying while maintaining professional fabric edge treatment through careful thread placement, using slip stitches for invisible connections and ensuring a professional finish.
No-Sew Fraying Prevention Methods
Not every project needs a sewing machine to prevent fraying edges from unraveling.
You can use simple adhesive methods, fabric sealants, and iron-on products to stop threads from pulling apart without touching a needle.
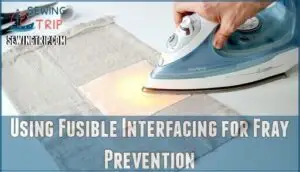
Using Fusible Interfacing for Fray Prevention
Using fusible interfacing alongside your sewing techniques creates a barrier that prevents fraying fabric edges from unraveling. You’ll iron this adhesive-backed material directly onto your fabric’s wrong side, creating lasting fabric edge treatment. A key benefit is improved fabric stability, preventing stretching and enhancing wrinkle resistance.
- Interfacing Types: Choose lightweight fusible interfacing for delicate fabrics, medium-weight for cotton
- Application Techniques: Press with dry iron for 10-15 seconds, ensuring complete adhesion
- Fabric Compatibility: Test on scraps first – some synthetics may melt or pucker
- Durability Concerns: Washing effects may reduce adhesion over time, requiring reapplication
Fabric Sealants for Fraying
Fabric sealants offer a quick fix when you can’t reach for your needle and thread.
Products like Fray Check work best on heavy fabrics, while Fray Block handles delicate materials with gentle care.
Apply these liquid solutions directly to raw edges using the precision nozzle.
For best results, consider that sealants prevent fraying by creating a protective barrier.
Test sealant fabric compatibility on scraps first to avoid surprises.
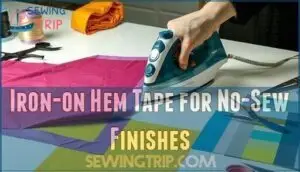
Iron-on Hem Tape for No-Sew Finishes
Iron-on hem tape offers a quick no-sew fray stop solution when you’re pressed for time.
This fabric tape bonds layers together using heat, preventing fraying without stitching.
Different hem tape types work better with specific fabrics – lightweight tapes suit delicate materials while heavy-duty versions handle thick fabrics.
Many retailers offer various hem tape options for different needs.
Application techniques matter for durability concerns and washing impact.
Finishing Seams Without Serger
You don’t need a serger to create professional-looking seams that won’t fray over time.
Your regular sewing machine and a few simple techniques can finish raw edges just as effectively, saving you money while keeping your projects looking neat and polished.
This approach allows you to achieve the desired finish without additional investment, making it a practical solution for sewing projects.
French Seams for Delicate Fabrics
French seams work perfectly for organza French seams and chiffon seam finish projects.
You’ll fold the fabric twice, creating enclosed seam benefits that hide raw edges completely.
This technique boosts delicate fabric durability by protecting sheer fabric seams from fraying and wear.
Perfect for these delicate situations:
- Lightweight silk blouses that need professional-looking seam finishes
- Sheer curtains where visible raw edges would ruin the elegant appearance
- Baby clothes requiring gentle, skin-safe enclosed seams
- Wedding dress construction demanding flawless hand stitching techniques, which is a delicate situation that requires professional-looking seam finishes and flawless techniques.
Bound Edges With Bias Tape
Bias tape wraps around raw edges like a protective shield, creating professional-looking seam finishes.
This binding technique works perfectly for curved edges and straight lines alike.
| Bias Tape Types | Best Use | Application Method |
|---|---|---|
| Single-fold | Lightweight fabrics | Fold over edge, stitch |
| Double-fold | Medium-weight materials | Sandwich edge, topstitch |
| Extra-wide | Thick fabrics/quilts | Encase completely |
| Custom-made | Matching projects | Cut on bias grain |
You’ll find bias binding invaluable for fabric edge protection on necklines and armholes.
The bias cut stretches around curves without puckering, while mitered corners create sharp, clean angles.
Consider purchasing bias tape for your next project.
Choose contrasting colors for decorative binding or matching tones for subtle finishes.
Zigzag Stitch for Raw Edge Finishing
The zigzag stitch transforms your regular sewing machine into a powerful edge-finishing tool.
You’ll control fraying by adjusting stitch width and stitch length based on your fabric type. Thread tension matters too—loose tension creates sloppy edges while tight tension puckles fabric.
Here’s your zigzag stitch setup guide:
- Stitch Width: Use 3-4mm for medium fabrics, 2-3mm for lightweight materials
- Stitch Length: Set between 1.5-2.5mm for ideal coverage without bulk
- Thread Tension: Adjust slightly lower than straight stitch settings
- Fabric Type: Test zigzag variations on scraps first—delicate fabrics need narrower stitches
- Raw Edges: Position fabric so needle catches just beyond the edge on right swing
This sewing technique works on most sewing machines and handles various fabric edges effectively. For laundered items, the zigzag stitch secures edges effectively.
Frequently Asked Questions (FAQs)
How to prevent fabric fraying without a serger?
Use pinking shears to cut zigzag edges, apply fabric glue along raw edges, or create a clean finish by folding and stitching seam allowances twice for professional results.
Can a serger prevent fraying?
Yes, sergers excel at preventing fraying by simultaneously cutting, stitching, and finishing fabric edges with multiple threads.
They create professional overlock stitches that securely bind raw edges, making them incredibly effective for fray prevention.
Do you need a serger for frayed fabric?
No, you don’t need a serger for frayed fabric. You can prevent fraying using pinking shears, zigzag stitches, fabric glue, or fusible interfacing instead.
How do you prevent fray on a sewing machine?
You can prevent fraying on a sewing machine by using a zigzag stitch along raw edges or switching to an overcast foot for serger-like results.
How to prevent cut fabric from fraying?
Looking at that silk blouse you just cut—raw edges already starting to unravel?
Zigzag stitch along cut edges, apply pinking shears for tight weaves, or use fabric sealant drops for quick fixes.
How do you stop fabric from fraying?
You can stop fabric fraying using pinking shears for zigzag edges, applying fabric sealant like Fray Check, or sewing zigzag stitches along raw edges with your regular machine.
How do I keep my delicate clothes from getting frayed when I wash them?
Wash delicate fabrics inside mesh laundry bags or pillowcases to reduce friction. Use cold water, gentle cycle, and fabric softener to minimize fiber stress and fraying.
How do you stop fabric from fraying with nail polish?
Apply clear nail polish along fabric edges, let it dry completely, then trim below the sealed area.
This creates a barrier that prevents threads from unraveling, though it may stiffen delicate fabrics slightly.
How do you stop elastic from fraying?
You’ll prevent elastic fraying by using pinking shears to cut zigzag edges.
Applying clear nail polish to seal the ends, or zigzag stitching along the raw edges with your sewing machine.
How to finish edges if you don’t have a serger?
Without serger magic, you’ll master zigzag stitches on your machine, pink edges with special shears, or apply fabric sealant for quick fixes that’ll keep those pesky threads in line.
Conclusion
Like a protective shield guarding precious treasure, preventing fraying without serger methods safeguard your fabric investments from unraveling into disappointment.
You’ve discovered six reliable techniques that transform raw edges into finished perfection. Whether you choose pinking shears, zigzag stitches, whip stitches, or fabric sealants, each method offers proven results without expensive equipment.
Your projects will maintain their professional appearance longer, saving both time and money. Master these preventing fraying without serger solutions, and you’ll confidently tackle any sewing challenge that comes your way, with a sense of confidence.

