This site is supported by our readers. We may earn a commission, at no cost to you, if you purchase through links.
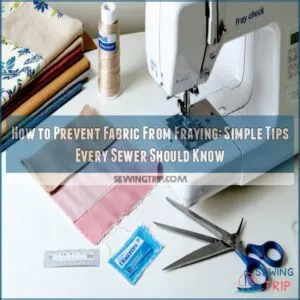 To stop fabric from fraying, start by choosing tightly woven fabrics or use pinking shears to cut zigzag edges that hold threads in place.
For a no-sew fix, apply fabric sealant like Fray Check or use fusible interfacing to reinforce edges.
If you sew, try a zigzag stitch or serger for a neat finish, even a quick hand stitch, like a whipstitch, can work wonders for delicate fabrics.
Don’t forget tools like hem tape or fabric glue for a quick, tidy edge, a little prep goes a long way in keeping your projects looking polished and durable for the long haul!
Table Of Contents
Key Takeaways
- Use pinking shears for a quick, no-sew fix to create zigzag edges that naturally resist fraying.
- Seal raw edges with fabric glue, Fray Check, or fusible interfacing to keep threads in place.
- Reinforce edges with zigzag stitches, sergers, or bias tape for a durable, professional finish.
- Protect delicate fabrics by storing them rolled in airtight containers to prevent damage and fraying.
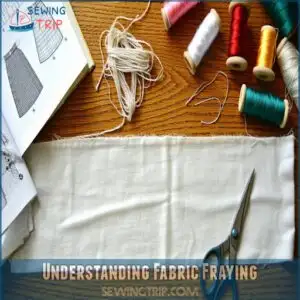
Understanding Fabric Fraying
When fabric frays, its threads unravel, leaving edges messy and hard to work with.
Understanding which fabrics are more prone to fraying and how it affects your sewing can save you time and frustration.
Susceptible Fabrics
Some fabrics are absolute troublemakers in regard to fraying.
Loosely woven materials like linen or burlap unravel faster than plans with no backup.
Susceptible fabrics often have lower thread counts or looser weave patterns, making them prone to fabric unraveling.
Stick with tightly woven options or fiber blends for stronger textile strengths in trying to prevent fabric fraying in your projects.
Understanding the causes of fabric fraying issues is essential to choosing the right fabrics and techniques for your sewing projects.
Effects on Sewing Quality
A loose thread can do more damage than you’d think! Fabric unraveling hits where it hurts most: durability, aesthetics, and seam strength.
If fraying starts, your project could lose its polished look or fall apart entirely.
Want to nail that pro finish? Focus on these sewing essentials:
- Use a proper seam allowance: Skimping on it invites fraying.
- Pick the right fabric type: High weave density fabrics fray less.
- Keep stitching consistent: Wobbly seams? Disaster.
- Choose durable threads: Thread strength matters.
- Stick to proven sewing techniques: Zigzags, sergers, or French seams prevent fabric fraying.
Control fraying, and you control the outcome.
Sewing Techniques to Prevent Fraying
You can stop fabric from fraying by using simple sewing techniques that strengthen and protect raw edges.
Whether it’s a serger, zigzag stitch, or bias tape, these methods help your projects last longer and look polished.
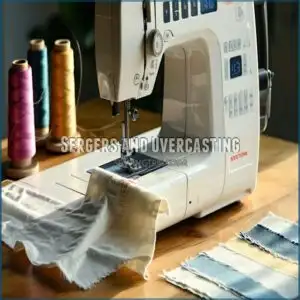
Sergers and Overcasting
Preventing fabric fraying gets way easier with a serger by your side.
These machines tackle it all—trimming, stitching, and finishing fabric edges in record time.
Play around with Overlock Settings, Stitch Length, and Thread Tension for the cleanest results.
Whether you’re stitching knits or sturdy denims, sergers keep frays at bay with their precise Fabric Feed.
Overcasting stitches add that professional edge, no pun intended.
To master the art of preventing fraying, understanding how to prevent fraying with sergers is essential for achieving professional-looking seams.
Confidence in sewing? Guaranteed.
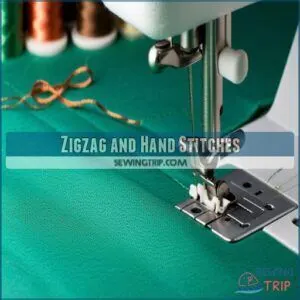
Zigzag and Hand Stitches
To keep your projects looking polished, mastering a zigzag stitch or hand stitches is a must.
Zigzag stitches are your go-to sewing stitch to minimize fray, especially for medium-weight fabrics.
Adjust the Stitch Tension on your machine for a smooth, pucker-free finish.
For hand sewing, try a whipstitch or blanket stitch—ideal for small areas or delicate fabrics.
Use shorter stitch lengths for tight weaves, giving durability to your project.
Don’t forget Thread Choice; match it with your fabric’s type and strength for lasting results.
Understanding Zigzag Stitch Sewing techniques is essential for preventing fraying and achieving professional-looking seams.
Here’s a quick checklist for tackling raw edges:
- Adjust Stitch Tension to avoid bunching.
- Choose a durable thread that matches your fabric.
- Use zigzag stitches for machine sewing.
- Try whipstitch for smaller fray-prone spots.
- Focus on clean, precise edges to stop fraying.
Bias Tape for Edges
Want to make your edges look professional while stopping fabric fraying?
Bias tape is the MVP of fabric edge finishing.
Simply wrap it around raw edges, stitch it down, and voilà—smooth, sealed seams.
Perfect for clothing linings or quilts, this sewing technique adds style and strength.
The tape’s Bias Cutting guarantees flexibility, creating seamless curves and ultimate seam reinforcement, making it a great choice for projects that require seamless curves.
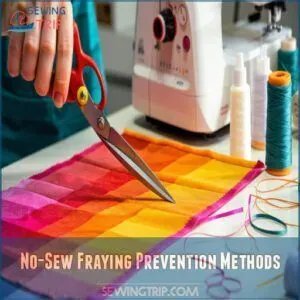
No-Sew Fraying Prevention Methods
You don’t need a sewing machine to keep fabric edges intact—no-sew methods can work wonders.
From pinking shears to fabric sealants, these simple tools help stop fraying and save time.
Pinking Shears
Pinking shears are a quick, no-fuss way to prevent fabric fraying, and these zigzag scissors protect your edges with style.
Follow these tips for success:
- Keep cuts straight—align with the last snip.
- Mind their limits on loosely woven fabrics.
- Avoid cutting multiple layers.
- Prioritize Shear Maintenance and Scissor Sharpening.
- Perfect for crisp, tightly woven fabrics like cotton.
Using the right pinking shears technique can make a significant difference in preventing fraying.
Fusible Interfacing
Think of fusible interfacing as your fabric’s armor.
By using heat to bond it, you’ll create a firm barrier that keeps threads in place.
With different fusible types and interfacing weights available, this method works wonders for fraying prevention.
Adjust your heat settings carefully to match the fabric’s needs, and watch fabric bonding transform raw edges into durable, fray-free finishes.
Fabric Sealants and Hem Tape
Raw edges driving you nuts? Fabric sealants and hem tape can rescue you from endless fraying nightmares.
Liquid sealants like Fray Check work wonders by creating an invisible shield to seal the edges of fabric. Just run a thin line along those pesky raw edges and let it dry—no threads will stray on your watch!
Hem tape steps in when you need adhesive strength with no stitching required. It’s a fast, no-sew way to lock edges neatly. Simply iron it on, and voilà—clean, polished edge finishing every time.
Understanding hemming tape techniques is vital for a professional finish.
Quick tip: Test any fray stop solution or tape on a scrap first to confirm it’s fabric-friendly.
Adhesive Solutions for Fraying
You can easily stop fabric from fraying with adhesive solutions like fabric glue and iron-on hem tape.
These methods are quick, effective, and perfect for projects where sewing isn’t an option.
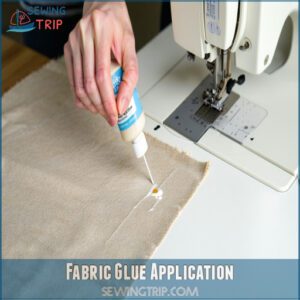
Fabric Glue Application
Fabric glue is your go-to for sealing edges and stopping threads in their tracks.
Start with a no fray fabric glue or fray stop glue for strong bonding.
For more complex projects, consider the best fabric glue for patches to guarantee the best adhesion.
Apply a thin line along the edge, spreading it evenly with a cotton swab.
Press the edge to create a clean fold.
Avoid overdoing it—too much glue may stain.
Let it dry for 15-30 minutes, and you’re good to go!
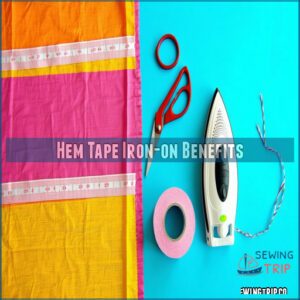
Hem Tape Iron-on Benefits
When it’s time to tackle fraying without sewing, hem tape is your secret weapon.
Just grab an iron and some iron-on fray tape like Leonis Instant Hem Tape to get started. It’s quick, fuss-free, and doesn’t require a sewing kit cluttering your table. Using a Hem Tape Iron can make the process even more efficient.
- Smooth hem folds: Heat activates the adhesive for a clean, polished finish.
- No-fray edges: Perfect for fabrics like cotton or linen that unravel easily.
- Time-saving fix: Great for on-the-go hemming techniques when speed counts.
Avoid fray frustration with this simple, reliable shortcut!
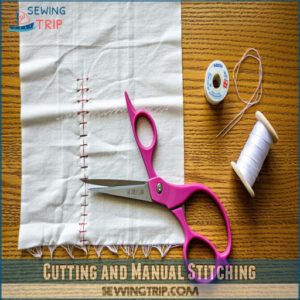
Cutting and Manual Stitching
In the case of cutting and stitching by hand, a little extra care goes a long way in stopping fraying before it starts.
Simple tools like pinking shears and basic needlework can make a big difference in keeping your edges neat and secure, utilizing basic needlework to achieve the desired outcome is essential.
Pinking Shears Cutting Technique
Pinking shears are a rockstar for fabric fraying prevention, giving you clean, zigzagged edges that help stop fabric fraying without sewing.
Keep your pinking shears sharp and aligned for seamless cuts. They’re perfect for cotton and medium-weight materials but may struggle with silk or denim. Focus on smooth, single-layer cuts, avoiding jagged edges.
Pair this method with proper fabric preparation and sharp cutting tools for better results. Using the right pinking shears tools can make a significant difference in the quality of your cuts.
| Tip | Why It Matters | Avoid |
|---|---|---|
| Use sharp blades | Cleaner cuts, better edge finishing | Dull scissors |
| Cut one layer at a time | Reduces slipping | Stacked fabric |
| Align zigzag edges | Neater edges, seam security | Misaligned cuts |
| Stick to tight weaves | Suits pinking shears | Loose, delicate fabrics |
Needle and Thread Stitching
If you’re tackling fraying edges, needle and thread stitching is a trusty go-to.
It’s straightforward and effective—just grab a sturdy thread and the right needle size for your fabric.
Start stitching 1/8 inch from the edge with a zigzag or whipstitch pattern.
- Adjust thread tension for smooth stitches.
- Match stitch length to fabric stretch.
- Secure seams for reinforcement.
- Avoid pulling stitches too tight.
- Tie off securely to stop fabric fraying.
Frequently Asked Questions (FAQs)
How do you keep fabric from fraying without sewing?
Imagine your scarf starts unraveling—grab pinking shears to create zigzag edges.
Iron-on hem tape or fabric sealant works wonders too.
Simple fixes like these stop fraying in its tracks without needing a single stitch.
How do you seal the edges of fabric?
Seal fabric edges with fray-stop liquid, fabric glue, or clear nail polish for a quick fix.
Use fusible interfacing for a stronger hold, or pinking shears to cut zigzag edges that naturally resist fraying.
How do you keep fabric trim from fraying?
Trim edges fraying? Use pinking shears for a zigzag cut, or grab fabric sealant like Fray Check.
For a polished look, stitch trims with a zigzag or overlock machine.
Keep it sharp and secure!
How to stop raw hem from fraying?
Grab some Fray Check or fabric glue to seal edges, or stitch with zigzag or overlock seams.
For no-sew fixes, pinking shears or iron-on tape work wonders.
Easy tweaks keep hems neat and durable.
What is the best way to stop fabric from fraying?
Try a zigzag stitch or use pinking shears for a quick fix.
For a professional finish, go with a serger or bias tape.
Liquid fabric sealants work too, but keep them for edges.
How to keep a raw hem from fraying?
Stopping a raw hem from fraying is a breeze if you pink the edges with shears, stitch a quick zigzag line, or slap on some Fray Check.
It’s like giving fabric an invisible shield—problem solved!
Why does my fabric fray when I cut it?
Cutting causes fraying because it loosens the threads holding the fabric together.
Straight cuts on loose weaves are more vulnerable.
Using pinking shears or sealing raw edges stops threads from escaping and unraveling the edges.
Can I prevent fraying on fabric that has already started to unravel?
Nearly 80% of fabric damage starts with fraying.
To stop unraveling, use fabric sealants like Fray Check, apply fusible interfacing, or stitch the edges.
Tackling it early saves your project and stress later!
How does fabric storage affect fraying prevention?
Storing fabric properly makes a big difference.
Roll it instead of folding to avoid stress on the edges,
keep it in airtight containers to block moisture,
and steer clear of rough surfaces that can snag fibers.
Can fabric dyeing help reduce fraying?
Dyeing fabric itself doesn’t directly stop fraying, but it can sometimes tighten the fibers slightly, especially in natural fabrics.
However, using fray-preventing methods afterward is still your best bet for lasting results.
Conclusion
Did you know that fraying can reduce the lifespan of your fabric projects by up to 50%?
By mastering techniques like using pinking shears, sergers, or even simple zigzag stitches, you can stop fabric from fraying and keep your creations looking sharp.
For quick fixes, fabric glue, hem tape, or sealants are lifesavers. Whether sewing or sticking, a little effort now saves frustration later.
Try these tips, and your fabrics will stay polished and long-lasting.
- https://www.gathered.how/needlework/cross-stitch/3-ways-to-stop-fabric-fraying
- https://www.wikihow.com/Stop-Fabric-from-Fraying
- https://www.reddit.com/r/sewing/comments/11kw9i7/how_to_keep_this_fabric_from_fraying/
- https://www.craftsy.com/post/how-to-stop-fabric-from-fraying
- https://www.quiltingboard.com/main-f1/how-do-you-keep-your-fabric-fraying-t34707.html

