This site is supported by our readers. We may earn a commission, at no cost to you, if you purchase through links.
You’ll want to identify the pattern repeat distance, check if prints run in one direction, and cut a template piece first to guide your remaining cuts.
This guarantees seamless pattern flow across seams where motifs align perfectly at joining points.
The secret lies in planning your layout strategically—positioning pieces so patterns continue naturally from one section to the next, which results in a professional continuity that makes handmade look couture-crafted rather than homemade.
With proper preparation, your finished garment will showcase that professional continuity.
Table Of Contents
Key Takeaways
- You’ll need to identify your fabric’s grain direction and measure pattern repeats before cutting to prevent costly alignment mistakes that make projects look homemade.
- Cut your first piece as a template and use it to guide all remaining cuts, ensuring consistent pattern flow across seams for professional-looking results.
- Plan your layout strategically by positioning pieces so patterns continue naturally from one section to the next, creating seamless visual continuity.
- Use proper pinning techniques and press seams carefully to maintain pattern alignment during construction, transforming amateur work into couture-quality finishes.
Fabric Preparation Basics
Before you cut that first piece, you need to understand your fabric’s foundation.
Identifying grainline, pattern repeat, and print direction will save you from costly mistakes and guarantee your finished project looks professionally made.
This understanding is crucial as it will help you achieve a professionally made finish.
Identifying Grainline and Pattern Repeat
Successful pattern matching starts with identifying your fabric’s grainline—the direction threads run parallel to the selvedge edge.
Grainline is your fabric’s compass—follow it for flawless pattern matching every time.
You’ll find the strongest orientation here, where warp threads create stability for proper pattern alignment.
Next, measure your pattern repeat by locating where designs restart horizontally and vertically.
This essential step determines your seam allowance needs and prevents mismatched motifs that’ll make your project look amateur.
Understanding the fabric pattern repeat is essential for calculating the right amount of fabric needed for your project.
Understanding Pattern Types and Repeats
Different pattern types demand specific approaches for successful textile analysis and fabric matching.
Florals feature distinct repeat measurement points like flower centers, while coastal prints require careful design elements alignment for seamless flow.
- Florals and botanicals: Look for distinctive motifs like large blooms or leaf clusters as repeat reference points
- Geometric and abstract: Identify repeating shapes or color blocks for consistent pattern alignment across seams
- Stripes and plaids: Measure both horizontal and vertical repeats to guarantee fabric grain matches perfectly
Understanding these pattern types helps you anticipate matching challenges before cutting begins.
Recognizing Directional and Non-Directional Prints
Looking at your fabric’s print orientation helps you plan your cuts correctly.
Directional prints have images pointing one way—like flowers growing upward—while non-directional prints work from any angle.
Check your textile design by folding the fabric; if the pattern flow looks odd upside down, you’ll need extra yardage for proper visual alignment and seamless pattern matching to achieve a coherent look with directional prints.
Choosing Right Tools
Success in pattern matching depends on having the right tools from the start, and your equipment choices can make or break your project’s professional appearance.
You’ll need specialized materials beyond basic sewing supplies, plus pattern-specific tools that help you achieve seamless alignment across even the most challenging fabric designs.
Selecting Conducive Patterns and Layouts
Pattern selection sets the foundation for successful matching—choose sewing patterns specifically designed for patterned fabrics or those showing similar prints in their illustrations.
Your fabric orientation matters tremendously; evaluate whether you’re working with directional or non-directional prints before planning your layout.
Measure pattern repeats carefully and prioritize grain alignment throughout your layout planning process for professional results.
Utilizing proper sewing pattern tools is essential for achieving accurate cuts and efficient sewing.
Essential Materials for Pattern Matching
Your toolkit forms the backbone of successful pattern matching adventures.
Pattern matching success starts with the right tools in your hands.
Sharp fabric scissors guarantee clean cuts through intricate motifs, while your trusty sewing machine handles precise seams.
Keep measuring tape handy for checking repeat intervals, and use pattern weights to secure templates without shifting.
Don’t forget your iron tools—they’ll flatten seams perfectly for professional-looking joins.
Having the right pattern making tools is essential for achieving accurate and efficient results in sewing projects.
Specialized Tools for Intricate Patterns
When you’re working with complex plaids or large-scale prints, specialized tools become your best friends.
Plaid rulers help align stripes perfectly, while pattern weights keep fabric flat without pins distorting your cutting lines.
Cutting mats provide stable surfaces for precision work, and sewing gauges guarantee consistent seam allowances.
Fabric markers let you mark alignment points clearly, and a walking foot prevents pattern distortion during sewing.
Using accurate plaid ruler tools is essential for achieving professional results in sewing projects, with the help of plaid rulers and by following the right techniques for precision work.
Cutting Fabric Pieces
Once you’ve prepared your fabric and gathered the right tools, it’s time to cut your fabric pieces with precision.
The cutting method you choose can make or break your pattern matching success, so let’s explore three proven techniques that’ll help you achieve professional results every time.
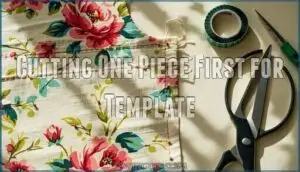
Cutting One Piece First for Template
One smart strategy transforms pattern matching from guesswork into precision—cutting your first piece as the perfect template for all others.
This Template Cutting method guarantees flawless Fabric Alignment every time you position subsequent pieces.
Here’s your step-by-step approach:
- Cut your initial piece with extra care, ensuring proper Pattern Mirroring and grain alignment
- Mark seam allowances clearly on this template for consistent Piece Preparation across all cuts
- Position the template strategically on remaining fabric to achieve perfect Seam Matching before cutting
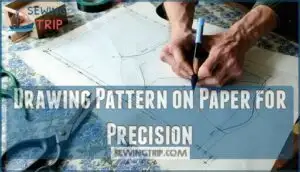
Drawing Pattern on Paper for Precision
Tracing fabric designs onto paper patterns creates foolproof templates for Pattern Tracing success.
You’ll capture every detail of your fabric’s repeat through careful Paper Templates work, ensuring Precision Cutting every time.
Mark reference points on your pattern paper using fabric marking tools, then measure repeat distances accurately.
This method guarantees perfect Fabric Alignment across all pieces, making pattern matching straightforward and reliable for complex sewing patterns.
To achieve accurate results, understanding fabric cutting methods is essential for successful project outcomes.
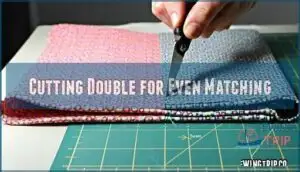
Cutting Double for Even Matching
Folded fabric cutting transforms your pattern matching game by ensuring both pieces mirror each other perfectly.
This double layer alignment technique reduces mismatched seams dramatically:
- Position fabric right sides together with patterns aligned
- Cut through both layers simultaneously for mirror image matching
- Mark seam allowance consistently across both pieces
This precision cutting method guarantees even seam technique results and is a key part of achieving mirror image matching.
Sewing and Finishing Techniques
Once you’ve cut your fabric pieces perfectly, it’s time to sew them together without losing that hard-earned pattern alignment.
The key lies in careful pinning, precise stitching, and proper pressing techniques that’ll make your finished project look like it came from a high-end boutique.
Aligning Seam Allowances for Pattern Match
Perfect seam alignment starts with matching your fabric grain and pattern repeat before you even thread your needle.
Fold each seam allowance precisely, then overlay pieces to verify motifs line up seamlessly—this extra step prevents the heartbreak of mismatched flowers or stripes.
Check alignment twice before pinning to avoid costly mistakes, ensuring that your seam alignment is perfect.
Pinning and Sewing With Matching Thread
The magic happens when thread color perfectly matches your fabric’s dominant shade.
Choose thread that disappears into the pattern, not one that fights for attention.
Select the right needle size for your fabric weight, adjust stitch length to 2.0-2.5mm, and maintain consistent sewing speed.
Pin perpendicular to seams every inch, using fine glass-head pins to prevent distortion while ensuring seamless pattern matching.
Mastering proper pin placement techniques is essential for achieving professional-looking results in sewing projects, by using the right techniques for seamless pattern matching, and ensuring consistent sewing speed, with the goal of making the thread disappear into the pattern.
Pressing Seams for Polished Appearance
Once your pattern-matched pieces are pinned and sewn, proper seam pressing transforms amateur work into professional results. Heat and pressure create sharp, defined edges that make your matched patterns pop.
- Set your iron to the correct temperature for your fabric type to prevent scorching or damage
- Press seam allowances open first, then to one side for maximum durability and clean lines
- Use a pressing cloth on delicate fabrics to protect the surface while achieving crisp edges
- Trim excess seam allowance before pressing to reduce bulk and create smoother, flatter seams
- Apply firm, downward pressure rather than sliding the iron to avoid distorting your matched patterns
Mastering Pattern Matching
Once you’ve mastered the basics of cutting and preparation, you’ll need advanced techniques to handle challenging fabric situations.
These professional strategies help you tackle directional prints, adjust for different textures, and create invisible seams that look perfectly planned.
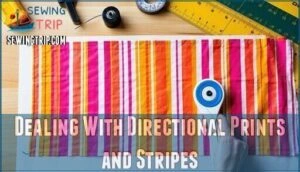
Dealing With Directional Prints and Stripes
Directional fabrics demand your pattern pieces face the same direction—think of stripes as train tracks that shouldn’t derail.
When dealing with directional prints, use "with nap" layouts to maintain consistent print orientation.
Check stripe alignment frequently during cutting, as fabric distortion can throw off your matching techniques. Pattern repeat becomes essential for seamless results.
Adjusting for Different Fabric Types and Textures
Different fabric types demand unique approaches to pattern matching. When working with knit fabrics that stretch up to 75%, you’ll need wider seam allowances since the fabric can distort during cutting.
Lightweight fabrics like chiffon require underlining for stability, while heavy denim adds bulk that affects seam alignment.
Test your fabric’s behavior with a small sample first—this simple step prevents costly mistakes and guarantees your pattern pieces align beautifully. Understanding the right sewing pattern fabric is vital for achieving professional results in garment construction.
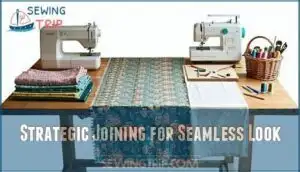
Strategic Joining for Seamless Look
You’ll achieve seamless joining by choosing natural gaps in your pattern for join points—think where leaves meet or between motifs.
This strategic approach prevents fabric shifting and maintains visual appeal.
Always fold your seam allowance under on the first piece, then align it with your second piece for perfect pattern alignment.
Pin horizontally every few inches to secure the match, keeping your grainline straight throughout the process.
Frequently Asked Questions (FAQs)
How do you pattern match fabric?
You might think pattern matching is complicated, but it’s actually straightforward once you understand the basics.
First, identify the pattern repeat by laying fabric flat and finding where the design starts over.
Then cut your first piece, mark the seam allowance, and use it as a template to align the pattern on your second piece before cutting, which involves understanding the pattern repeat to ensure accurate alignment.
How to know what fabric to use for a pattern?
Check your pattern envelope for recommended fabric types and weights. Look for suggested materials like cotton, linen, or knit, then match fabric properties to pattern requirements for best results.
How much extra fabric to match a pattern?
Purchase 1/2 to 1 yard extra fabric for pattern matching.
Large-scale prints and complex garments need more fabric than small patterns.
Measure your pattern’s repeat distance to calculate exact requirements for seamless alignment.
How to figure out how much fabric you need for a sewing pattern?
Read your pattern envelope’s fabric requirements, then add extra yardage based on pattern repeat size. For large repeats, add one full repeat length per major pattern piece.
How much extra fabric for large-scale patterns?
Like the telegraph revolutionized communication, you’ll need extra yardage for seamless pattern flow.
Buy an additional 1/2 to 1 yard beyond your pattern requirements for large-scale prints, ensuring you’ve got enough fabric to match those bold motifs perfectly.
Can pattern matching work with stretch fabrics?
Pattern matching works with stretch fabrics, but you’ll need extra care. Stabilize seams with stay tape, use ballpoint pins, and expect some flexibility in matching precision due to fabric movement.
What about matching patterns at buttonholes?
While perfect alignment seems impossible, you can strategically place buttonholes in quieter pattern areas or between dominant motifs to minimize visual disruption and maintain your garment’s professional appearance.
How to handle pattern matching costs?
Budget extra fabric—you’ll need more yardage for pattern matching. Buy an additional half to full yard depending on your design’s repeat size and complexity.
Should linings match the main fabric pattern?
No, you don’t need to match linings to your main fabric pattern. Focus on grain alignment instead—it’s what matters for proper drape and structure, not visual matching.
Conclusion
Perfect matching fabric to sewing pattern transforms amateur work into professional results, while rushed cutting creates misaligned prints that scream homemade.
You’ve learned the essential techniques—from identifying grain and repeat patterns to strategic cutting and precise seam alignment.
These skills separate novice sewers from accomplished craftspeople who create garments with seamless pattern flow. Master these fundamentals, and you’ll consistently achieve that coveted couture finish every experienced sewer recognizes and admires.


