This site is supported by our readers. We may earn a commission, at no cost to you, if you purchase through links.
You’ll want to dry it completely, then press out wrinkles while checking the grain alignment.
Square your edges with sharp scissors and identify the right side from the wrong side before cutting.
Don’t skip treating raw edges with pinking shears or a zigzag stitch to prevent fraying.
Test delicate fabrics first, and store everything in cool, dry conditions.
These foundational steps separate amateur projects from professional-looking results, but there’s more to mastering the subtle techniques that prevent common disasters, including the use of proper methods to achieve complete concepts.
Table Of Contents
Key Takeaways
- You’ll need to prewash your fabric to remove sizing chemicals and prevent shrinkage that could ruin your finished project later.
- Check grain alignment and square your edges before cutting to ensure your seams won’t twist and your garment hangs properly.
- Use sharp scissors or pinking shears to prevent fraying, and finish raw edges with zigzag stitches for professional results.
- Store prepared fabric in cool, dry places using clear bins or hanging organizers to maintain quality until you’re ready to sew.
Fabric Preparation Basics
You’ll need to prep your fabric before cutting to guarantee your hand-sewn project turns out beautifully.
Proper washing, ironing, and chemical removal create the stable foundation that prevents surprises like shrinkage or color bleeding later, ensuring a project with beautifully executed details.
Washing and Drying Fabric
Before washing your fabric, you’ll want to check the water temperature and detergent choice to prevent unwanted surprises.
Prewashing fabric removes chemicals and controls shrinkage, setting you up for sewing success.
**Smart preparation prevents costly mistakes and guarantees professional results from your first stitch.
Follow these essential fabric washing steps:
- Water Temperature – Use cold water for dark colors, warm for whites to prevent color bleeding
- Detergent Choice – Select gentle, dye-free detergent for delicate fabrics
- Drying Methods – Air dry or use low heat to maintain fabric integrity and shrinkage control
Proper fabric drying methods complete your sewing fabric preparation foundation.
Ironing and Labeling Fabric
Once you’ve washed and dried your fabric, proper ironing removes wrinkles and prepares the surface for accurate cutting.
Set iron temperatures according to fabric types—cotton handles high heat while synthetics need lower settings. Use pressing cloths for delicate materials to prevent damage.
Fabrics like cotton offer forgiving, stable qualities for easier sewing.
| Fabric Type | Iron Setting | Pressing Cloth |
|---|---|---|
| Cotton | High heat | Optional |
| Polyester | Medium heat | Recommended |
| Silk | Low heat | Required |
Label each piece with fabric care information for future reference during your sewing projects, ensuring you have the necessary details for accurate cutting and easier sewing, and always consider the iron temperatures for the specific fabric type.
Removing Chemicals and Sizing Agents
New fabrics carry chemical baggage that affects your hand sewing projects.
Fresh fabrics hide unwanted chemicals that can sabotage your beautiful handmade creations.
Pre-wash benefits include removing up to 90% of formaldehyde, sizing agents, and allergens that cause skin irritation.
- Hot water washing removes water-soluble chemicals and sizing removal agents effectively
- Vinegar soaking (1:4 ratio) neutralizes alkaline finishes for chemical sensitivities relief
- Eco-friendly detergents with enzymes lift organic sizing better than standard soaps
Skip fabric softeners—they leave residue that blocks proper fabric preparation and sewing chemicals removal.
Handling Fabric Correctly
Proper fabric handling starts with knowing your fabric inside and out before making any cuts.
You’ll need to identify the right and wrong sides, square your edges, and check grain lines to guarantee your hand-sewn project turns out beautifully.
Identifying Right and Wrong Sides
When working with fabric, you’ll notice each piece has two distinct sides.
The fabric face showcases the intended design, while the wrong side remains hidden.
Look for texture differences and shade variations to distinguish them.
Selvage clues often indicate the right side through printing or weaving patterns.
Some fabrics display clear pattern direction on one side.
Proper fabric marking during fabric preparation guarantees consistent fabric sides throughout your project, ensuring a proper finish.
Squaring and Trimming Fabric Edges
After identifying your fabric’s right and wrong sides, you’ll need proper squaring fabric techniques for accurate cutting.
This fabric preparation step guarantees your project starts with perfectly aligned edges.
Follow these steps for grain perfection:
- Fold lengthwise – Match selvage edges together carefully
- Check alignment – Verify fabric lies flat without puckering
- Trim uneven edges – Use sharp fabric scissors for clean cuts
- Square corners – Create 90-degree angles at fabric edges
- Test grain alignment – Verify straight grain runs parallel to selvage
Squaring importance can’t be overstated – uneven cutting fabric leads to twisted seams and poor fit in your finished project.
Checking Grain Lines for Stability
Once you’ve trimmed your fabric edges, check the grain lines to prevent warping and guarantee your finished piece hangs properly.
Fold fabric in half, matching selvages – if edges don’t align, your grainline needs fixing.
Pull the fabric diagonally opposite the distorted corner, then press with an iron to restore grain alignment and fabric stability.
Cutting Fabric Accurately
You’ll need sharp fabric scissors or pinking shears to make clean, accurate cuts that prevent fraying.
A rotary cutter and cutting mat give you the most precision for straight lines and complex shapes.
Using Fabric Scissors and Pinking Shears
Once your fabric has straight edges and proper grain, you’ll need the right cutting tools.
Fabric scissors offer everyday practicality for most sewing projects, while pinking shears create zigzag edges that prevent fraying. Choose sharp fabric scissors for straight cuts and curves.
Consider purchasing fabric scissors online for a wide selection. Pinking shears work best on woven fabrics but aren’t suitable for all fabric types.
Regular blade maintenance keeps both tools performing well.
Rotary Cutter and Cutting Mat Techniques
Cutting with precision becomes effortless when using a rotary cutter on a self-healing mat. Keep your blade sharp for clean cuts and replace it regularly for superior fabric cutting performance.
Always cut away from your body, maintaining steady pressure for pattern precision. The mat surface longevity depends on proper storage and avoiding excessive heat.
Straight grain alignment guarantees seam stability. Rotary cutter safety requires closing the blade after each use and practicing curve cutting techniques slowly.
Finishing Edges With Serger or Zigzag Stitch
After precise cutting, protecting your fabric edges becomes your next priority. Both serger and zigzag stitch methods prevent fraying effectively, though each offers distinct advantages for different projects.
- Serger Thread Types: Use polyester thread for strength and slight stretch, reducing breakage risk during washing
- Zigzag Stitch Width: Set 2.5mm wide/2mm long for cotton fabrics; adjust based on fabric weight
- Edge Finishing Durability: Proper finishing reduces fraying to less than 2% after ten wash cycles
- Serger vs Zigzag: Sergers work faster at 1,300-1,700 stitches per minute but zigzag offers more control
- Decorative Edge Finishes: Both methods create clean, professional-looking seams that match commercial standards
Storing Fabric Properly
You’ll want to store your prepared fabric properly to maintain its quality and prevent damage before your hand sewing project begins.
Proper storage protects your investment and guarantees your fabric stays in perfect condition until you’re ready to create something beautiful.
Keeping Fabric in Cool Dry Places
After cutting your fabric accurately, proper storage becomes your next priority.
Store your fabric in cool, dry places away from direct sunlight to maintain quality.
Humidity Control prevents mold and mildew growth, while Sunlight Protection stops color fading.
Choose Container Types that allow air circulation for Fabric Storage.
Implement Pest Prevention measures and practice Fabric Rotation for longevity.
Using Clear Bins or Hanging Organizers
Clear bins offer unmatched bin visibility, letting you spot fabrics instantly without rummaging through mystery containers.
Choose various organizer types—stackable bins for space optimization or hanging organizers for vertical storage.
Label everything for easy fabric accessibility, consider using stackable container options for ideal organization.
Store rolled fabrics upright like books, maximizing space while maintaining fabric protection.
This system transforms chaotic stashes into organized, accessible collections, providing easy fabric accessibility and allowing you to spot fabrics instantly.
Protecting Fabric From Moisture and Pests
Moisture protection begins with sealing your fabric in airtight containers or vacuum-sealed bags. Clear bins with tight-fitting lids work best for visibility and access.
For pest control, add cedar blocks, lavender sachets, or mothballs to deter insects naturally.
Store containers away from basements and attics where humidity fluctuates. Check stored fabrics quarterly, replacing natural repellents as needed to maintain protection and ensure the use of mothballs is effective.
Advanced Fabric Techniques
You’ll need more than basic washing and pressing when working with challenging fabrics or complex projects.
These advanced techniques give you the control and stability required for professional-quality hand sewing results.
Interfacing for Stability and Structure
You’ll transform your hand sewing projects by adding interfacing for fabric stabilization and structure.
This reinforcement prevents stretching and maintains shape in high-stress areas like collars and cuffs.
Choose between fusible vs sew-in options based on fabric compatibility and your interfacing weight guide.
Application techniques vary, but proper fabric structure enhancement increases garment longevity substantially.
Using Fusible or Sew-in Interfacing
With fusible interfacing, you’ll apply heat and steam to activate the adhesive backing, creating permanent bonds.
Sew-in interfacing requires stitching around edges for secure attachment. Your fabric compatibility determines which interfacing types work best.
Many options exist for purchasing interfacing material.
- Heat press fusible interfacing using a pressing cloth to prevent scorching delicate fabrics
- Baste sew-in interfacing along seam lines before permanent stitching for precise placement
- Test bond strength on fabric scraps to verify proper interfacing application and care instructions
Applying Stabilizing Spray or Basting
Beyond interfacing, you’ll want to master spray application and basting stitches for different fabric types.
Stabilizing spray prevents stretching during cutting, while basting creates temporary holds with loose stitches.
Stay stitching secures curved edges before assembly.
These fabric stabilization techniques work alongside interfacing application, giving you complete control over preventing stretch and maintaining accuracy throughout your hand sewing project.
For enhanced stability, consider using fusible knit interfacing, especially with stretchy fabrics to achieve better results with interfacing application and hand sewing project.
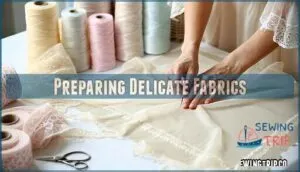
Preparing Delicate Fabrics
When working with delicate fabrics like silk, chiffon, or lace, you’ll need extra gentleness to prevent damage during preparation.
These specialty materials require specific handling techniques to maintain their integrity while ensuring they’re properly prepped for your hand sewing project, which involves extra gentleness.
Handling Specialty Fabrics With Care
Specialty fabrics demand careful fabric identification and gentle handling techniques.
Washing silks requires cool water and minimal agitation to prevent fiber damage.
Velvet handling needs muslin support underneath to protect the delicate pile from crushing during preparation.
PH-neutral detergents are ideal for maintaining fabric integrity.
- Clean hands prevent oil stains on silk and lace preparation materials
- Support beaded fabrics with tissue paper during cutting to maintain stability
- Use pattern weights instead of pins on delicate fabrics like linen and rayon
- Handle felt with minimal manipulation since these materials don’t fray easily
The importance of gentle handling techniques and proper support cannot be overstated, as they directly impact the longevity and quality of the fabrics.
Using the right tools, such as pattern weights, and following best practices for each type of fabric are crucial for successful projects.
Preventing Fraying and Edge Treatment
When delicate fabrics start fraying, you need immediate edge stabilization to protect your investment.
Edge Finishing Options include serger stitching for professional results, while zigzag stitches work perfectly for home sewers.
Bias Binding Techniques create beautiful finished edges on lightweight materials.
Fray Prevention Sprays offer quick solutions for Delicate Fabric Edges requiring gentle treatment.
Using Color Catchers for Printed Fabrics
Color catchers prevent dye transfer when washing fabric prints, protecting lighter materials from staining.
These cellulose sheets trap loose dyes during prewashing, reducing color bleeding by up to 80%.
Test colorfastness first, then add one sheet per load with printed fabrics.
Cold water washing enhances catcher effectiveness and minimizes fabric fading for better sewing results, using cold water.
Ironing and Pressing Fabric
You’ll transform wrinkled, creased fabric into a smooth, professional foundation ready for precise hand sewing.
Proper ironing and pressing techniques guarantee your fabric lies flat and maintains its intended shape throughout your project.
Removing Wrinkles and Creases
Your fabric’s wrinkles need proper removal before cutting or sewing begins. Start with clean, damp fabric for best results when using ironing techniques.
Set your iron to appropriate heat settings based on fabric type. Use pressing cloths on delicate materials to prevent shine or damage.
Apply gentle pressure while moving steadily across the surface. Wrinkle sprays help stubborn creases release more easily during fabric smoothing processes, ensuring a smooth finish with proper removal.
Using Steam or Dry Ironing Techniques
Steam benefits delicate fabrics by relaxing fibers without direct heat contact.
You’ll want lower temperature settings for synthetics and silks, while cotton handles higher heat.
Dry ironing works best for crisp finishes on sturdy fabric types.
Always check your iron settings before pressing – synthetic blends need gentle heat, while linen craves steam.
Match your ironing technique to your fabric’s personality for perfect fabric smoothing results, ensuring you use the right method for each fabric type, whether it requires gentle heat or other considerations.
Pressing Fabric to Prevent Shrinkage
Proper pressing techniques complete the fabric preparation process by setting fibers and eliminating any remaining shrinkage potential.
Understanding pressing temperatures and iron types guarantees you won’t damage your fabric while preventing future shrinkage through targeted heat application.
Here are five key factors for effective fabric pressing:
- Match pressing temperatures to your fabric type – cotton handles high heat while synthetics need lower settings
- Use steam benefits for natural fibers like linen and cotton to relax fibers completely
- Consider fabric types when selecting dry versus steam pressing methods
- Address shrinkage factors by pressing along the grain direction, not against it
- Combine prewashing with proper ironing for maximum fabric shrinkage prevention results
Final Fabric Preparation
After completing all the earlier preparation steps, you need to perform a final quality check on your fabric.
This final inspection guarantees everything is properly aligned and ready for accurate hand sewing results.
Checking Fabric for Distortion or Imperfections
Before cutting your fabric, examine it carefully for fabric flaws like holes or stains.
Check weave irregularities and print alignment to verify pattern consistency. Assess color consistency across the fabric length, paying attention to selvage assessment for quality indicators.
Inspect fabric grain alignment and smooth any remaining fabric wrinkles that could cause fabric distortion during sewing.
Making Final Adjustments Before Sewing
After spotting any flaws, you’ll need to make final adjustments for perfect sewing preparation.
Start with fit assessment by checking fabric drape and stretch. Double-check marking darts and seam allowances for accuracy.
Verify pattern matching aligns properly across pieces. Confirm grain perfection runs straight and true throughout your fabric.
These fabric preparation steps guarantee proper fabric alignment before you begin stitching.
Ensuring Fabric is Ready for Hand Sewing
Before diving into hand sewing, you’ll need to complete your fabric preparation steps and verify everything’s ready.
Check thread compatibility with your fabric weight and select appropriate needles for your project.
Plan your stitches and consider seam reinforcement needs, your fabric handling should feel confident, with grain lines straight and edges finished.
This final preparation guarantees successful hand sewing results, with a focus on feeling confident in your fabric handling.
Frequently Asked Questions (FAQs)
How do you prepare a needle and thread for hand sewing?
Cut thread 18-24 inches long, knot one end. Thread needle eye carefully, pulling about 6 inches through. You’re ready to start stitching with proper thread length and secure anchor.
What is the strongest hand stitch method?
Notably, you’ll find the backstitch creates the strongest hand-sewn seam. You’re basically doubling back on each stitch, creating overlapping threads that won’t pull apart easily under stress.
Do I have to iron fabric before sewing?
Yes, you should iron fabric before sewing.
Ironing removes wrinkles and guarantees smooth, accurate cutting and stitching.
Wrinkled fabric leads to uneven seams and poor-fitting garments, making your hand-sewing efforts less professional-looking.
How do you hand stitch perfectly?
Like threading a needle through silk, perfect hand stitching flows from steady rhythm and practiced precision.
Keep your thread arm’s length, maintain consistent tension, and let each stitch mirror the last.
How do you handle fabric with multiple pattern repeats?
Match pattern repeats by aligning fabric pieces carefully before cutting.
Measure repeat distances, mark alignment points on each piece, and cut strategically to maintain consistent patterns across seams.
This ensures professional results.
Whats the best way to prepare vintage fabrics?
Vintage fabrics require gentler handling than modern textiles, so you’ll want to test-wash a small piece first to check for bleeding or shrinkage before treating the entire yardage.
Can you hand sew directly after fabric purchase?
Don’t rush into hand sewing right after buying fabric.
You’ll need to prep it first by washing, drying, and pressing to remove chemicals and prevent shrinkage that could ruin your project later.
How do you test fabric colorfastness before sewing?
Test colorfastness by dampening a fabric scrap with cold water and pressing it against white cloth.
If color transfers, the fabric bleeds and needs special handling during washing to prevent dye migration in your finished project.
Should different fabric weights be prepared differently?
Yes, different fabric weights require customized preparation approaches. Heavyweight fabrics need gentle handling and longer drying times, while lightweight fabrics require stabilizing techniques and careful pressing to prevent distortion.
Conclusion
Professional seamstress Maria Santos once saved a wedding dress project by properly preparing silk fabric beforehand, preventing costly mistakes during construction.
Mastering hand sewing fabric preparation methods transforms your projects from amateur attempts into polished creations. You’ve learned essential steps from washing and grain alignment to proper storage and delicate fabric handling.
These techniques prevent common disasters like shrinkage, fraying, and distortion that ruin finished pieces. Apply these hand sewing fabric preparation methods consistently, and you’ll achieve professional results every time.
- https://blog.fabrics-store.com/2024/11/03/how-to-pre-wash-fabric-a-simple-guide/
- https://www.seamwork.com/fabric-guides/do-you-really-have-to-pre-wash-fabric
- https://www.reddit.com/r/sewing/comments/1cjd0lc/prepping_your_fabric/
- https://www.tillyandthebuttons.com/2013/03/pressing-your-sewing-projects.html
- https://www.instructables.com/Tools-and-Materials-for-Hand-Sewing/

