This site is supported by our readers. We may earn a commission, at no cost to you, if you purchase through links.
 Navigating the seas of stretchy fabric can feel like captaining a ship through a storm—without the right techniques, you’re in for a rough ride.
But fear not! With a few expert tips, you’ll be charting a course to smooth, stable seams in no time.
Whether you’re crafting activewear or cozy knits, mastering stabilization is key to a perfect fit.
Ready to tame those unruly textiles? Let’s set sail on a journey to transform your stretch fabric projects from frustrating to fabulous.
To stabilize stretchy fabric, use a stabilizer like fusible knit interfacing or spray starch, and sew with a polyester thread for elasticity.
Table Of Contents
Key Takeaways
- Use the appropriate needle for the fabric type: Ballpoint needle for loosely woven knits, Jersey needle for super stretchy fabrics, and Twin needle for coverstitch-like hems. The needle size should be chosen based on the fabric’s stretchiness to avoid damaging the fabric.
- Stabilize stretchy fabrics using techniques and materials such as fusible knit interfacing, knit stay tape for necklines, hems, and shoulder seams, iron-on bias tape for curved edges, and spray starch for temporary stiffening. This prevents stretching, distortion, and loss of shape, ensuring a perfect fit.
- Polyester thread is recommended for its strength, flexibility, and ability to accommodate fabric stretch. Elastic thread can be used for specific applications like jersey cotton. For durable and flexible seams, especially on stretchy fabrics, a serger stitch is ideal.
- Finishing techniques are crucial for a professional look and durability. Top-stitching with a stretch stitch or using a twin needle ensures seam flexibility. Covering elastic waistbands enhances appearance and comfort, while decorative top-stitching adds personality.
Importance of Stabilization
Sewing stretchy knit fabrics presents unique challenges not found with woven fabrics. Knits are flexible and malleable, which allows them to conform to your body for a perfect fit. However, the same properties that provide comfort and mobility also make knits prone to stretching, distorting, and losing their shape.
Proper stabilization is essential to prevent frustration and disappointment. Begin by using soap slivers or tracing wheel markings instead of pins when cutting. Pins can create permanent holes in delicate knits. Invest in specialized tools like rotary cutters and serrated shears for clean cuts that won’t snag.
Slow down and avoid pulling or stretching the fabric as you sew. Lengthen your stitch length to allow knits to stretch naturally. The right needles, threads, interfacing, and pressing methods are also key. With care and preparation, you’ll create garments with long-lasting stretch recovery and expert fit.
Stabilization allows knits’ benefits to shine.
Selecting the Right Needle
Selecting the right needle is crucial when working with stretchy fabrics to ensure your sewing project turns out perfectly.
You’ll need to choose between a ballpoint, jersey, or stretch needle based on the fabric’s stretchiness and composition.
Understanding the differences between these needles and how they interact with stretch fabrics will help you avoid common issues like skipped stitches or fabric damage, ensuring smooth and durable seams.
Needle Type Importance
When diving into the world of sewing stretch fabrics, the choice of needle isn’t just important—it’s crucial. Think of your needle as the tiny but mighty hero of your sewing saga, navigating through the stretchy terrain of fabrics like a pro.
Opting for a ballpoint needle is like choosing a gentle warrior for loosely woven knits, ensuring that the fabric’s integrity remains unscathed. For those super stretchy contenders, a stretch needle steps into the arena, armed with a medium ball point and a special eye design to handle the elasticity with grace.
Now, let’s talk about the dynamic duo: the twin needle. Imagine creating a coverstitch-like hem on your home machine—this is where the twin needle shines. It’s like having two needles holding hands, working together to produce neat, parallel lines that add a professional touch to your projects.
Whether you’re tapering waistlines or adding a decorative stretch stitch, the twin needle is your go-to for achieving that coveted store-bought look.
Stretch Fabric Challenges
When sewing with stretchy fabrics, you’re in for a wild ride if you don’t pick the right needle. Imagine trying to thread a camel through the eye of a needle—impossible, right? Well, that’s what it’s like using a straight stitch needle on super stretchy fabric.
Your needle choice is like picking the right dance partner for a tango with your fabric. You need one that can keep up with the stretch percentage without stepping on the fabric’s toes. A stretch needle is your Fred Astaire when the fabric’s got more elasticity than a rubber band at a yoga class.
So, grab your stay tape, ditch the straight stitch for a zigzag or zig zag stitch, and let’s get ready to make those stretchy seams sing!
Needle Size Selection
Choosing the right needle for your stretch fabric project is like picking the perfect dance partner—it can make or break your performance.
- Size 60/8: The featherweight champion for those gossamer-thin knits that seem to float on air.
- Size 70/10: Your go-to for lightweight jerseys that play hard to get with other needles.
- Size 80/12: The versatile middleweight that can handle most knits in the ring.
- Size 90/14: The heavyweight for those beefy French terry and fleece contenders.
Thread Considerations
When working with stretchy fabrics, choosing the right thread is crucial for achieving a perfect fit and finish. Polyester thread is highly recommended because it offers the necessary strength and flexibility, moving with the fabric without breaking.
Elastic thread, on the other hand, is thicker and more stretchable than regular thread, making it ideal for specific applications like sewing with jersey cotton or creating elastic waistbands.
For those using a serger, the flexibility of the serger stitch is essential for producing durable and flexible seams that accommodate the fabric’s stretch without causing puckering or snapping.
Polyester Thread Benefits
After choosing the right needle, let’s thread our way into the world of polyester thread.
This powerhouse doesn’t shy away from stretchy fabrics, offering the elasticity your projects crave. Imagine it as your fabric’s best friend, moving in harmony with every stretch and recovery.
Whether you’re zigzagging through seams or serging edges, polyester thread, paired with a walking foot, ensures your stitches stay put without a hitch.
Elastic Thread Applications
Continuing from the virtues of polyester thread, let’s dive into the world of elastic thread.
This stretchy marvel brings strength and resilience to your sewing projects. Imagine the elastic thread as the unsung hero, flexing and bending without a snap, perfect for those garments that need to move with you.
It’s widely available, so you won’t have to embark on a quest to find it, and it won’t break the bank either.
And for the eco-conscious stitcher, consider the sustainability of your choice. Whether you’re crafting a lightning bolt stitch for stretch, a three-step zigzag to dodge tunneling, or a twin needle hem for that professional touch, remember the walking foot is your trusty sidekick, ensuring every seam is smooth sailing.
Serger Stitch Flexibility
When you’re wielding a serger, you’re not just sewing; you’re orchestrating a symphony of threads that dance along the edges of your fabric, creating seams that stretch and rebound with every movement.
- Serger Stitch Versatility: Revel in the serger’s ability to produce a variety of stitches. From overlocking to rolled hems, each stitch has its own superpower, ready to tackle different fabric foes.
- Serger Stitch Durability: Trust in the serger’s robust seams. They’re the Hercules of hems, flexing and bending without breaking, perfect for your most dynamic designs.
- Serger Stitch Options: Explore the serger’s stitch repertoire. Whether it’s a delicate edge finish or a sturdy seam, there’s a stitch for every stretchy scenario.
- Serger Stitch Quality: Aim for the stars with serger stitch quality. Adjust your tension like a maestro, and watch as your seams lay flat and smooth, with no puckering or tunneling in sight.
Stabilization Techniques
When working with stretchy fabrics, stabilizing them is crucial to ensure a perfect fit and finish. You can achieve this by using fusible interfacing, knit stay tape, iron-on bias tape, or spray starch.
These materials help maintain the fabric’s shape during sewing, preventing unwanted stretching or distortion.
Fusible interfacing and knit stay tape are particularly effective for areas that require extra stability, such as necklines, hems, and button plackets. Iron-on bias tape works well for curved edges, while spray starch can temporarily stiffen fabric for easier handling.
By selecting the appropriate stabilizing technique for your project, you’ll enhance the durability and appearance of your finished garment.
Fusible Interfacing
Continuing from the importance of thread choice, let’s dive into fusible interfacing, a true game-changer for your sewing projects.
Think of fusible interfacing as your fabric’s secret support system, giving it the backbone it needs to hold shape and defy gravity. It’s like a good cup of coffee for your fabric—waking it up and keeping it perky where it counts.
When selecting interfacing, match the weight to your fabric to avoid a mismatched pair, like a sumo wrestler in a ballet. For placement, it’s like a stealthy undercover agent; it should lie unseen on the wrong side of the fabric, ready to leap into action.
So, whether you’re working with a single knit or aiming to stabilize knit fabrics, choose your fabric stabilizers wisely, and you’ll be on your way to a crisp, professional finish.
Knit Stay Tape
When working with knit fabrics, achieving a professional finish often hinges on the details, such as how you stabilize areas prone to stretching.
Enter knit stay tape, a game-changer for necklines, hems, and shoulder seams. This lightweight, fusible ally adheres to your fabric, providing the support needed without altering its drape or feel.
Whether you’re aiming for a neckline that lies flat without gaping or a hem that stays put without wavering, knit stay tape is your go-to. It’s available in various widths to suit different applications, ensuring your knit creations look polished and stay intact through wear and washing.
Iron-on Bias Tape
After mastering the use of knit stay tape, you’re ready to tackle iron-on bias tape, a nifty ally in your sewing arsenal.
Picture this: you’re jazzing up a neckline or giving a sleeve opening that extra oomph. Iron-on bias tape steps in with its stretch-resistant charm, ensuring your fabric doesn’t go dancing away from its intended shape.
It’s like having a secret weapon that whispers, I’ve got your back, allowing for a smidge of stretch while keeping everything snug as a bug.
When you’re dealing with stretchy fabric, think of iron-on bias tape as your trusty sidekick, ready to leap into action and save the day, one perfectly stabilized hem at a time.
Spray Starch
When working with stretchy fabrics, spray starch can be your secret weapon for achieving that crisp, wrinkle-free finish without the fuss.
- Spray starch adds fabric stiffness, making your material behave for the iron.
- It’s a champ at wrinkle prevention, keeping your seams sharp and your hems crisp.
- The temporary hold it offers is just enough to keep things in place without a long-term commitment.
- When you’re done, easy removal means a quick wash and it’s like it never happened.
- Plus, it’s a lifesaver for those moments when you need to tame wild fabrics with a mind of their own.
Sewing Machine Settings
When sewing stretchy fabrics, it’s crucial to adjust your sewing machine settings to prevent the fabric from stretching out of shape.
Firstly, selecting the right stretch stitch option, such as a zigzag or stretch stitch, allows the seam to stretch with the fabric, avoiding popped stitches.
Additionally, adjusting the presser foot pressure is essential; too much pressure can stretch and distort the fabric as it feeds through the machine. By reducing the pressure, you ensure the fabric moves smoothly without stretching, leading to better sewing results with stretch fabrics.
Stretch Stitch Options
After reinforcing your stretchy fabric with the right stabilizers, it’s time to dive into the world of stretch stitch options. Your sewing machine is likely brimming with a variety of stretch stitch types, each with its own superpower for keeping seams stretchy yet secure.
The zigzag stitch is your trusty sidekick, perfect for seams and finishing edges with a bit of zing. But don’t overlook the triple straight stretch stitch, a mighty warrior against popped seams, especially on those form-fitting garments that need to move with you.
For a stitch that’s as flexible as your yoga instructor, the three-step zigzag is a go-to, preventing the dreaded tunneling effect. And let’s not forget the lightning bolt stitch, which zaps its way through your fabric, providing a strong yet stretchy seam that’s ready for action.
Each stitch setting, from the length to the width, is a dial turn away from perfection. So, grab a scrap, test out these stretch stitch variations, and find the sweet spot that makes your fabric sing—without a single snap, crackle, or pop.
Adjusting Presser Foot Pressure
When you’ve dialed in the perfect stretch stitch, it’s time to finesse your presser foot pressure.
- Presser foot types matter. Like choosing the right dance partner, match the foot to your fabric’s groove.
- Tweak those tension settings. Too tight and your fabric’s strangled; too loose and it’s a slippery eel.
- Mind the fabric thickness. A delicate touch for gossamer-thin knits, a firmer hand for the beefy ones.
Adjusting presser foot pressure is like finding the sweet spot on a seesaw. Get it right, and your fabric glides under the needle without puckering or stretching. It’s a balancing act—too much pressure and your fabric will protest with unwanted gathers; too little, and it might wander off course. Remember, the goal is a seam that’s just right, not a tug-of-war. Keep an eye on those seam allowances and stitch length; they’re part of the team, after all.
Using a Walking Foot
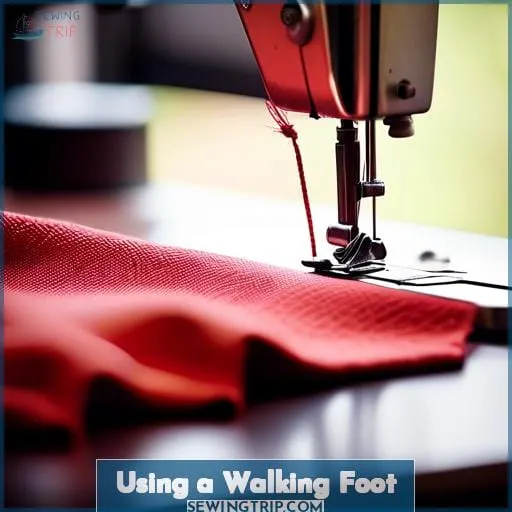
When you’re navigating the seas of stretchy fabric, think of your walking foot as the trusty captain of your sewing ship. This nifty gadget is like an extra pair of hands, ensuring that your fabric doesn’t go rogue and distort under the needle.
Imagine trying to sew a slippery fish together—without the right tools, it’s a flop! But with a walking foot, you’re the master of the fabric, guiding it through with even stitching and no funny business.
The walking foot benefits are like a backstage pass to flawless seams, especially when you’re dealing with bulky layers that could otherwise throw a wrench in your seam allowance precision. It’s like having a sewing sidekick that says, I’ve got your back, making sure every layer plays nice and stays in line.
And when you hit a bulky seam, it’s like your foot has superpowers, climbing over those fabric mountains with the grace of a gazelle.
But don’t just take my word for it—give it a whirl and watch as your walking foot works its magic, turning potential puckers into smooth sailing. It’s the unsung hero of the sewing world, turning what could be a bumpy ride into a smooth cruise down Stitch Lane.
Finishing Techniques
When working with stretchy fabrics, finishing techniques like top-stitching and handling elastic waistbands are crucial for achieving a professional look and comfortable fit.
Top-stitching with a stretch stitch ensures your seams remain flexible and move with the fabric, preventing popped stitches and maintaining the garment’s shape.
For elastic waistbands, covering the elastic snugly with fabric not only enhances the garment’s appearance but also increases wear comfort and durability.
These methods, when applied correctly, stabilize stretchy fabrics in areas prone to stretching and distortion, ensuring a perfect fit and finish.
Top-Stitching
Continuing from the wonders of a walking foot, let’s dive into top-stitching. It’s the cherry on top, the final flourish that can turn your project from homemade to haute couture.
Imagine top-stitching as the icing on a cake; it’s not just for looks; it adds structure and durability too. When you’re top-stitching stretchy fabrics, think of it as navigating a winding road. You’ll need the right tools: a stretch or ballpoint needle and a thread that can take a bit of a workout, like polyester.
Now, let’s talk top-stitching thread. It’s the strong silent type, holding everything together without stealing the show. And patterns? They’re like the rhythm in a catchy tune, giving your garment a beat to follow.
But remember, it’s not just about keeping in line. Decorative top-stitching can be the solo in your fabric symphony, adding personality and flair. So, whether you’re aiming for subtle seams or top-stitching embellishments that shout from the rooftops, practice makes perfect.
Don’t be afraid to march to the beat of your own sewing machine. After all, every stitch you make is a step towards mastering the art of the perfect fit.
Elastic Waistband Handling
Handling elastic waistbands in stretchy fabric projects requires a blend of precision and creativity.
- Measure Accurately: Before cutting, wrap the elastic snugly around the waist area. It should be comfortable, not constricting. Remember, the elastic will slightly stretch out if you plan to topstitch it.
- Secure the Elastic Ends: Overlap the ends by about 1 inch and sew them together securely. This prevents the elastic from twisting inside the casing and ensures even distribution around the waist.
- Distribute Fabric Evenly: After inserting the elastic, stretch the waistband to distribute the fabric evenly. This step is crucial for preventing bunching and ensuring a smooth fit.
- Prevent Rolling and Twisting: Topstitching the waistband close to the elastic, without sewing on it, adds stability and prevents the elastic from rolling or twisting inside the casing.
By following these steps, you’ll achieve a comfortable, professional-looking elastic waistband that enhances the fit and appearance of your garment.
Frequently Asked Questions (FAQs)
How do you handle the edges of stretchy fabrics to prevent them from curling or rolling when cut or sewn?
To keep those pesky edges from curling or rolling on stretchy fabrics, you’re gonna want to play it cool with a few tricks up your sleeve.
First off, serging those edges can add just the right amount of weight to keep things lying flat. If serging sounds like a foreign language, no worries—grab some fusible interfacing or knit stay tape to give those edges a bit of stability without sacrificing stretch.
And if you’re in a pinch, a light spritz of starch while pressing can work wonders, just like magic. Remember, it’s all about giving that fabric a little extra love and support to keep it in line.
Can you sew stretchy fabrics with a straight stitch if you don’t have a stretch stitch option on your sewing machine?
Yes, you can sew stretchy fabrics with a straight stitch. It’s like walking a tightrope without a net—tricky but doable.
Use a longer stitch length and slightly stretch the fabric as you sew to maintain flexibility.
What are the best practices for hemming stretchy fabrics to ensure the hem stays flat and doesn’t wave or pucker?
To ensure your stretchy fabric hems stay flat and don’t wave or pucker, iron lightweight fusible knit interfacing to the hem before sewing.
Use a twin needle for a professional look, mimicking a coverstitch. This combo stabilizes the fabric and allows the hem to stretch without distorting.
How do you choose the correct type of fusible interfacing or stabilizer for different types of stretchy fabrics?
To pick the right fusible interfacing or stabilizer for stretchy fabrics, match the interfacing’s weight and stretch to your fabric’s.
For knits, opt for a knit interfacing that stretches similarly, ensuring it supports without restricting the fabric’s natural movement.
Always test on a scrap first to ensure compatibility.
What adjustments should be made when sewing stretchy fabrics on older sewing machines that may not have features like differential feed or adjustable presser foot pressure?
Like threading a needle in the dark, sewing stretchy fabrics on older machines without modern features can be tricky.
Opt for a walking foot to evenly feed fabric. Lower presser foot pressure manually if possible. Choose stretch stitches like zigzag or triple straight stitch to maintain fabric integrity.
It’s like giving your old machine a new lease on life, ensuring your projects don’t fall flat.
Conclusion
Imagine you’ve just finished a yoga pants project, and they fit like a glove—no sagging or warping, just a perfect, snug fit.
With the right needle, thread, and stabilization techniques, you’ve turned potential sewing chaos into wearable art. Remember, a little stabilizer and the correct machine settings can make all the difference.
Now, you’re ready to tackle any stretch fabric with confidence and create garments that are both comfortable and flattering.

