This site is supported by our readers. We may earn a commission, at no cost to you, if you purchase through links.
Always set the temperature for your fabric type—cotton loves heat, but silk will throw a fit.
Press, don’t iron—lift and set the iron down, don’t slide it, or you’ll stretch and distort seams faster than you can say “wonky quilt block.”
Use a pressing cloth for delicate fabrics, and press every seam before moving on.
A flat seam is a happy seam, trust me.
Curious about pressing curves, sleeves, or tricky fabrics? There’s more magic up ahead.
Table Of Contents
Key Takeaways
- Press, don’t iron – You’ll get professional results by lifting and placing your iron straight down instead of sliding it across fabric, which prevents stretching and distorting your seams.
- Use the right temperature for each fabric – You’ll avoid scorching and damage by testing heat settings on scraps first, using high heat for cotton and linen, medium for wool and polyester, and low for delicates.
- Press every seam before crossing it – You’ll achieve crisp, flat seams by pressing each one immediately after sewing and before adding intersecting seams, which sets your stitches properly.
- Invest in proper pressing tools – You’ll transform your results by using a tailor’s ham for curves, a sleeve roll for tubular areas, and pressing cloths to protect delicate fabrics from shine and scorching.
Pressing Tools Essentials
You’ll need the right tools to achieve professional pressing results that make your sewing projects look polished and crisp.
The five essential pressing tools—different iron types, a quality ironing board, pressing cloths, tailor’s ham, and sleeve roll—will transform your fabric work from amateur to expert level, utilizing the right equipment for professional pressing results.
Iron Types
When choosing your iron, you’ll discover three main types that’ll transform your pressing game.
Steam irons offer versatility with adjustable iron temperature and built-in water reservoirs for steam ironing.
Steam irons bring flexibility to your pressing with adjustable heat and built-in water for perfect steam control.
Dry irons provide consistent heat without moisture, perfect for delicate fabrics requiring precise control.
Gravity feed systems deliver continuous steam through separate reservoirs, making them ideal for heavy-duty pressing equipment needs in professional settings.
Some irons are made of high-carbon alloy, offering durability.
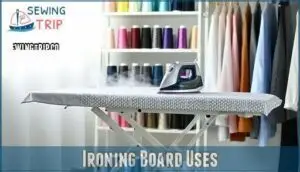
Ironing Board Uses
Your ironing board serves as the foundation for professional pressing results.
Board coverings should provide adequate cushioning and heat resistance, while surface stability prevents fabric shifting during pressing.
Height adjustment guarantees comfortable working posture and proper iron control.
Portable boards offer flexibility for small projects, though full-size boards deliver superior results.
Consider various ironing board options to find one that suits your needs.
Alternative surfaces like towel-covered tables work temporarily, but dedicated ironing boards optimize pressing techniques for consistently smooth fabric finishes, ensuring a professional look.
Pressing Cloth Benefits
After setting up your ironing board, grab a pressing cloth before starting fabric pressing.
This simple tool is a game-changer for:
- Protecting fabric from shiny spots and scorch marks, especially at high iron temperatures.
- Preventing scorching on delicate or synthetic materials.
- Distributing steam evenly, improving pressing techniques.
Choose versatile materials like cotton or muslin for heat resistance and reliable results.
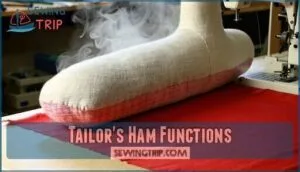
Tailor’s Ham Functions
A tailor’s ham works like your body’s curves, supporting fabric as you shape those tricky areas.
Your tailor’s ham becomes the curve whisperer—shaping fabric like magic where flat boards fail.
This densely stuffed pillow helps with shaping curved seams and dart manipulation on bust lines, hips, and armholes.
Use it for 3D pressing techniques—the cotton side handles high heat fabrics, while wool suits delicate materials.
Garment fit improves with its use.
Fabric support from the firm sawdust filling absorbs steam perfectly, delivering professional results every time.
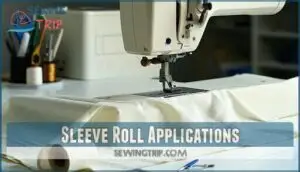
Sleeve Roll Applications
Sleeve-roll magic transforms tubular pressing challenges into smooth victories.
You’ll use this cylindrical pressing tool to fill sleeves, pant legs, and curved seams, preventing unwanted creases during fabric manipulation.
The sleeve roll provides essential inseam support and enables precise cuff pressing while maintaining fabric compatibility across different materials.
Unlike a flat pressing surface, this specialized sewing tool shapes garments naturally, ensuring professional sleeve shaping results every time, with cylindrical pressing tool being key to its success.
Pressing Fabric Basics
You’ll achieve professional results when you master the three fundamentals of pressing fabric: proper temperature settings, thorough fabric preparation, and controlled steam application.
These basics form the foundation for every successful sewing project, transforming amateur work into polished, crisp seams that’ll make your grandmother’s quilting circle jealous.
Temperature Settings
Getting iron temperature right prevents fabric scorching and guarantees perfect results.
Temperature testing on scraps saves your project from heat damage, while proper heat control protects delicate materials.
Here are three essential temperature guidelines:
- High heat (400-445°F) – Cotton and linen fabrics
- Medium heat (300-375°F) – Wool, polyester, and viscose
- Low heat (below 300°F) – Synthetic settings for delicates.
Always check fabric care labels first, then test iron settings on a hidden corner.
Steam usage varies by fabric type – some synthetics melt under high heat, so start low and adjust up.
Your pressing temperature should match the most delicate fabric in blended materials.
Fabric Preparation
Smart preparation makes all the difference between amateur and professional results.
Pre-wash benefits include preventing post-sewing surprises, while grain alignment makes certain your project hangs properly.
Always press fabric before cutting preparation begins – this stabilizing fabric step controls shrinkage and creates smooth surfaces.
Test iron temperature on scraps first, adjusting for different fabric types. Use pressing cloths for delicate materials, working systematically across the entire piece to eliminate wrinkles completely.
Steam Application
Now that your fabric’s prepped, let’s talk steam. The right steam temperature matters—a scorched seam is nobody’s friend.
Different fabric types need different steam settings, and water quality affects your iron’s performance.
Try these tips:
- Check steam temperature for your fabric.
- Use distilled water.
- Master dauber usage for precision.
- Try steam alternatives for tricky fabrics.
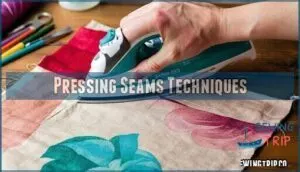
Pressing Seams Techniques
You’ll master seam pressing when you understand that different seam types need specific techniques to look professional.
Whether you’re working with straight edges, curves, or tricky corners, the right approach makes all the difference between amateur and expert results.
Flat Seams Methods
Now you’ll learn flat seams pressing techniques that build on your fabric preparation skills.
You’ll master both open seams and closed seams methods, which affects your project’s durability and appearance.
| Seam Type | Method | Result |
|---|---|---|
| Open Seams | Press seam allowances apart on wrong side | Lies flat, reduces bulk |
| Closed Seams | Press both allowances to one side | Stronger seam, quicker finish |
| Setting Stitches | Press seam flat before opening | Smooths thread, prevents puckering |
| Seam Finishing | Trim allowances if needed | Clean, professional appearance |
Start by setting stitches—press the seam flat as sewn before opening or closing it.
This simple step prevents bulk and guarantees your seam pressing creates smooth, professional results that won’t pucker later.
Curved Seams Approaches
Curved seams require special handling to prevent fabric distortion.
Start by marking your seam allowance, then sew along the curve while guiding fabric smoothly.
Clipping allowances every inch releases tension in concave curves.
When pressing curved seams, use ham techniques for shaping curves – the tailor’s ham provides the perfect curved surface for consistent curves and proper seam pressing.
A pressing cloth prevents shine on delicate fabrics, utilizing special handling to avoid damage, and ensuring a professional finish with proper seam pressing.
Pressing Seam Allowances
Proper seam allowance management transforms amateur work into professional results.
You’ll control whether seams lie open or closed based on your fabric’s weight and project requirements.
Here’s your angle pressing strategy:
- Open seams: Press allowances away from each other for flat, smooth finishes
- Closed seams: Press both allowances toward darker fabric to prevent show-through
- Bulk reduction: Trim, grade, or notch thick layered seams before pressing
- Directional pressing: Use 45-degree angles to prevent fabric distortion and maintain grain
Pressing Curved Areas
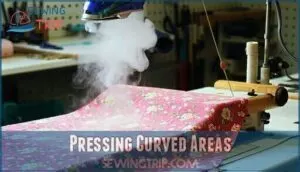
Curved areas like darts, princess seams, and armholes need special attention to maintain their shape during pressing.
You’ll get professional results by using a tailor’s ham to support these curves and prevent flattening or distortion.
Using Tailor’s Ham
Your tailor’s ham becomes indispensable when working curved seams that flat surfaces can’t properly support.
Position the curved area over the ham’s rounded end, then press gently with steam to shape the fabric naturally.
This pressing tool prevents flattening and maintains the garment’s intended contours.
Use it for armholes, necklines, and hip curves for professional results.
Pressing Darts Techniques
When pressing darts, you’ll create professional curves that transform flat fabric into three-dimensional shapes.
Position each dart over your tailor’s ham, pressing from the wide end toward the point to avoid creating unwanted bulk.
- Dart Shaping: Press darts flat on both sides first, then drape over the tailors ham to shape the curve
- Calico Usage: Place a strip of calico under thick dart seams to prevent ridges showing through
- Steam Application: Use controlled steam bursts while pressing to set the fabric’s new curved shape
The key is working gradually—rushing dart pressing often leads to puckered seams that’ll haunt your finished garment.
To prevent shine, consider using a protective pressing cloth.
Curved Seams Tips
A little patience goes a long way when you’re pressing seams on sewing curves.
Grab your ham for ham shaping, clip seam allowances to ease tension, and use seam grading for smooth results. Under pressing helps set curves, so don’t skip it!
Here’s a quick guide:
| Tip | Why It Matters |
|---|---|
| Clipping Allowances | Prevents puckers |
| Ham Shaping | Keeps curves smooth |
| Seam Grading | Reduces bulk |
| Tension Control | Avoids distortion |
The table outlines key tips for sewing curves, including clipping allowances, ham shaping, seam grading, and tension control.
Pressing Sleeves Methods
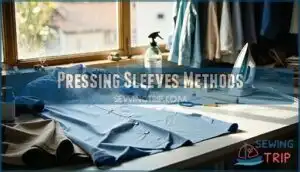
Sleeve pressing requires specific techniques to maintain the garment’s shape and prevent unwanted creases.
You’ll need to approach sleeve heads, hems, and inseams differently to achieve professional results that won’t flatten or distort the fabric’s natural drape.
Pressing Sleeve Heads
You’ll find that sleeve heads require gentle handling to achieve that signature professional fullness.
Set your iron to medium heat, then slip a sleeve board or tailor’s ham inside the armhole area.
This support prevents unwanted creases while you press the sleeve head’s curved shape.
Work in small sections, lifting and placing your iron rather than dragging.
The key to achieving fullness lies in easing the fabric over your pressing tools, creating that rounded shoulder shape that makes garments look expertly crafted.
Pressing Sleeve Hems
Perfect hemming depends on steady support from your sleeve board.
Lay the sleeve flat, wrong side up, and position the hem fold carefully.
Preventing Creases starts with accurate measuring – use your hem gauge for consistent width.
Press lightly with steam, lifting the iron straight up and down rather than sliding.
This technique creates Professional Results by avoiding stretch marks.
For Sleeve Hem Finishes, work methodically around the curve, adjusting fabric tension as needed, to achieve Perfect hemming results.
Pressing Sleeve Inseams
Why struggle with twisted sleeve inseams when proper technique guarantees perfect results? Use a sleeve board or sleeve roll to maintain inseam alignment while pressing. This prevents fabric distortion and creates smooth, professional-looking seams that won’t twist during wear.
- Support the sleeve structure – Insert a sleeve roll or use a sleeve board to fill the sleeve’s tubular shape completely
- Press from the wrong side – Work on the inside of the sleeve to prevent shine and protect delicate fabrics
- Use steam strategically – Apply gentle steam to relax fibers, then press dry to set the seam permanently
- Focus on understitching sleeves – Press seam allowances toward the sleeve body to prevent rolling at the seamline
- Perfect cuffed sleeves last – Complete inseam pressing before attaching cuffs to maintain achieving smoothness throughout the entire sleeve
Pressing Fabric Types
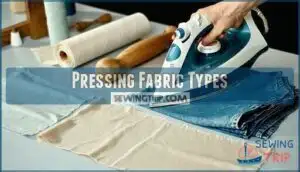
Each fabric type needs its own pressing approach to avoid damage and achieve professional results.
You’ll get better outcomes when you match your iron’s temperature and technique to your fabric’s specific needs.
Linen Pressing Tips
Why press linen differently than other fabrics? Linen requires high heat at 230°C/445°F with plenty of steam to release stubborn wrinkles.
You’ll need moisture control and pressing aids like spray bottles for best results. Press while slightly damp on the wrong side, using smooth motions to prevent shine.
| Linen Pressing Challenge | Your Solution |
|---|---|
| Stubborn wrinkles won’t budge | Use maximum steam and spray bottle |
| Fabric develops unwanted shine | Press on wrong side with pressing cloth |
| Creases return after storage | Hang immediately, avoid folding |
| Uneven heat distribution | Move iron steadily, don’t linger |
| Fabric feels stiff after pressing | Use light starch or fabric softener |
Store pressed linen pieces hanging or rolled to maintain your hard work.
Cotton Pressing Methods
Cotton responds beautifully to heat and moisture when you use the right approach.
Set your iron to 204°C (400°F) for ideal results.
Steam generously while pressing, as cotton fibers love moisture levels that help remove stubborn wrinkles.
Use pressing cloths on darker cotton to prevent shine, especially with synthetic blends.
Test iron settings on scraps first—cotton’s forgiving nature makes it perfect for practicing your fabric pressing tips and steam techniques.
Delicate Fabric Pressing
When working with delicate fabrics like silk, chiffon, lace, and velvet, you’ll need extra caution. Use the lowest heat settings and always test on fabric scraps first.
Place a pressing cloth between your iron and heat-sensitive fabrics to prevent damage. For silk pressing, work inside-out with minimal pressure.
Chiffon care requires gentle, single-direction motions. Velvet steaming works best from a distance—never let the iron touch the pile directly.
Lace handling demands the lightest touch possible. To maintain these fabrics, consider pH neutral detergents when cleaning.
Pressing Vs Ironing
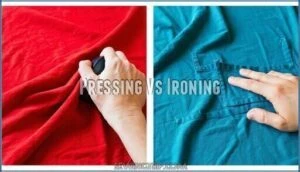
You’ll discover the key difference between pressing and ironing lies in how you move your iron across fabric.
While ironing uses a back-and-forth sliding motion, pressing involves lifting the iron straight up and down to avoid stretching or distorting your carefully sewn seams, which is a crucial aspect of pressing.
Ironing Board Differences
Your ironing board’s design impacts pressing results substantially.
Standard boards offer basic functionality, while specialized versions enhance precision and comfort during fabric work.
| Feature | Basic Board | Professional Board | Portable Board |
|---|---|---|---|
| Board Size | 48" x 15" | 54" x 18" | 32" x 12" |
| Cover Material | Cotton blend | Heat-resistant mesh | Basic cotton |
| Height Adjustment | 3 positions | Continuous adjust | Fixed height |
| Stability Features | Basic legs | Wide stance, locks | Lightweight frame |
| Portability Options | Fold flat | Heavy, stationary | Ultra-compact |
Professional boards provide superior stability and larger surfaces for handling bigger fabric pieces.
Their continuous height adjustment lets you customize comfort levels, reducing back strain during extended sewing sessions.
Heat-resistant mesh covers distribute steam evenly, preventing moisture buildup that can damage delicate fabrics.
Pressing Cloth Uses
You’ll frequently protect delicate materials from direct heat damage using a pressing cloth as your fabric’s shield.
This thin barrier prevents scorching, distributes steam evenly, and stops fabric glazing that ruins your sewing project’s appearance.
| Fabric Type | Pressing Cloth Needed |
|---|---|
| Silk blouses | Always use thin cotton |
| Wool garments | Use damp muslin cloth |
| Synthetic fabrics | Light cotton prevents melting |
| Dark fabrics | Prevents iron shine marks |
| Textured materials | Maintains surface texture |
Place the cloth between your iron and fabric, then press normally.
The cloth absorbs excess moisture while allowing heat to penetrate safely.
Steam Ironing Techniques
Mastering steam ironing means using the right steam pressure, water type, and technique.
For stubborn wrinkles, try steam bursts or vertical steaming—just hang the fabric and let the iron work its magic.
Always keep your soleplate clean for smooth pressing.
Here’s a quick guide:
| Steam Pressure | Water Type | Soleplate Cleaning |
|---|---|---|
| Medium | Distilled | Wipe after use |
| High | Tap (if safe) | Use vinegar |
| Burst | Filtered | Polish monthly |
| Low | Distilled | Avoid scratches |
| Vertical | Distilled | Cool before clean |
Pressing Before Sewing
You’ll save yourself hours of frustration by pressing fabric before you cut and sew, since wrinkled material leads to uneven cuts and wonky seams.
Pre-pressing removes creases, shrinks fibers that might otherwise surprise you later, and gives you that smooth, professional foundation every great project deserves, with complete concepts in mind.
Fabric Preparation Benefits
Pressing fabric before cutting and sewing isn’t just busy work—it’s your secret weapon for professional results.
Pre-pressed fabric lies flat, cuts accurately, and prevents unwanted surprises like fabric shrinkage during your project.
This simple step transforms mediocre sewing into polished craftsmanship.
- Wrinkle Prevention: Eliminates creases that could transfer into your finished garment, ensuring smooth fabric surfaces
- Cutting Accuracy: Creates precise pattern layouts and straight cuts, preventing fabric distortion during cutting
- Seam Quality: Allows seams to lie flat and stitch evenly, reducing puckering and uneven tension
- Professional Finish: Sets the foundation for crisp, refined results that look store-bought rather than homemade
- Fabric Shrinkage: Removes residual shrinkage before construction, preventing size changes after completion
Preventing Wrinkles
Why risk ruining your project with stubborn wrinkles?
Proper handling and fabric storage prevent most issues before they start. Store fabric flat or loosely rolled, avoiding tight folds that create permanent creases.
Control tension when handling delicate materials, and test iron temperature on scraps first.
Using a pressing cloth protects sensitive fabrics while steam benefits help relax fibers naturally, and proper handling is crucial to prevent issues, including using the right techniques to handle delicate materials.
Smooth Fabric Tips
Before you even thread your needle, make sure your fabric is smooth as a pancake.
Use the right pressing tools, like a steam iron and pressing cloth, to master Fabric Smoothing and Wrinkle Prevention. Control your iron’s temperature, work from the wrong side, and press seams flat.
Steam Benefits and careful Crease Removal make fabric care a breeze. Regular cleaning helps avoid sewing machine issues.
Pressing During Sewing
You’ll press each seam as you sew to lock in professional results and prevent your hard work from looking homemade.
This step-by-step pressing keeps your fabric flat, sets those stitches properly, and stops annoying puckers from ruining your project’s smooth finish.
Pressing Each Seam
Success starts with proper pressing order during sewing construction.
Press each seam immediately after stitching to set threads and achieve flatness before adding intersecting seams.
- Check seam direction – Press seam allowances toward darker fabric weight when possible
- Set stitches first – Press seam flat before opening or directing allowances
- Follow construction sequence – Press individual seams before joining units together
This methodical approach prevents distortion and creates professional results using basic pressing tools.
Avoiding Puckers
Puckers happen when fabric bunches up during pressing, creating unsightly wrinkles that ruin your seam finish.
Check your tension adjustment and stitch length first—loose stitches often cause bunching.
When pressing, work with the fabric grain, not against it. Let your feed dogs guide the fabric naturally.
Move your iron slowly, allowing steam to relax fibers before applying pressure to seams, ensuring a smooth finish with proper seam management.
Setting Stitches Techniques
Setting stitches properly transforms your sewing from amateur to professional.
After completing each seam, press it flat on both sides to lock threads into fabric fibers. This Set Stitches Definition creates Fabric Relaxation and helps Prevent Distortion while Securing Seams for a Professional Finish.
- Press seam flat immediately after stitching to set threads
- Apply gentle heat and steam without dragging the iron
- Allow fabric to cool before handling to maintain shape
- Check stitch tension remains consistent throughout pressing
Advanced Pressing Tips
When you want crisp points, sharp edges, and perfectly shaped seams, advanced pressing tools like templates, point pressers, and seam rollers make all the difference.
You’ll find these techniques save time and help your projects look like they came straight from a tailor’s shop, even if your ironing board wobbles a little.
Using Pressing Templates
You’ll create pressing templates by folding seam allowances on pattern pieces, ensuring pocket consistency and shape precision.
Pin fabric and template materials to your ironing board, then fold the paper template along created lines to simultaneously fold fabric.
This technique guarantees pattern matching and professional results. Store templates for future projects – they’re reusable pressing tools that eliminate guesswork in sewing.
Point Presser Techniques
If you’ve ever battled bulky corners or stubborn collars, a point presser is your secret weapon.
Use it for Point Presser Uses like Corner Shaping, Collar Perfection, and Edge Finishing.
Slip fabric over the narrow edge, press seams open, and you’ll be Achieving Sharpness in no time.
This pressing tool brings sewing techniques to a professional level—without breaking a sweat.
Seam Roller Applications
When your point presser can’t reach tight spots, grab your seam roller. This compact tool excels at Small Area Pressing without dragging out the full iron setup.
Perfect as an Iron Alternative for Quick Fixes, it’s your go-to for Portable Pressing needs.
Your seam roller shines for Seam Setting in these situations:
- Pressing narrow seam allowances – Works great on bias tape edges
- Setting topstitching lines – Keeps decorative stitches crisp and flat
- Smoothing patch pockets – Eliminates bulk without overheating delicate fabrics
- Quick touch-ups – Handles small wrinkles during construction phases
Frequently Asked Questions (FAQs)
What is the number one rule of pressing in sewing?
Always press each seam before another seam crosses it.
This fundamental rule guarantees your stitches are set properly, seams lie flat, and you’ll achieve that crisp, professional finish that separates amateur work from expert craftsmanship. Seams lie flat, and you’ll achieve that crisp, professional finish that separates amateur work from expert craftsmanship.
How to properly press fabric?
Test your iron’s heat on fabric scraps first.
Press with the wrong side up, using appropriate temperature settings.
Lift and place the iron instead of sliding it across fabric to prevent stretching and distortion.
What is the most important thing to remember when pressing?
Most importantly, you’ll want to press each seam before crossing it with another seam. This sets your stitches properly and prevents puckering that’ll haunt your finished project later.
What is the rule for pressing?
Like a compass guiding your needle, pressing follows one cardinal rule: lift and place your iron down, never slide it across fabric.
This prevents stretching and distortion, keeping your seams crisp and professional-looking every time, by following the basic principle of lifting.
How do you press fabric without electricity?
Use a seam roller, wooden spoon handle, or bone folder to press seams flat.
Place fabric on a hard surface, then firmly roll or rub the tool along seams to flatten and set them without heat, using a seam roller.
Can you press wet or damp fabrics?
Like trying to iron a soggy towel, pressing wet fabric won’t work well.
You’ll need damp, not soaking fabric for effective pressing.
Excess moisture prevents proper heat transfer and can damage your iron.
What causes shiny marks when pressing fabric?
Shiny marks show up when you press fabric with too much heat or pressure, especially on synthetics or dark colors.
Forgetting a pressing cloth turns your iron into a spotlight—highlighting every mistake like a disco ball.
How do you remove pressing marks permanently?
Removing permanent pressing marks requires re-dampening the area, pressing with a cloth barrier at correct temperature, or using white vinegar solution. For stubborn marks, professional cleaning may be necessary.
Should you press fabric grain direction differently?
Yes, you should press along the grain direction to prevent fabric distortion.
Press lengthwise grain straight up and down, crosswise grain side to side.
This maintains fabric stability and prevents stretching or warping during construction.
Conclusion
Picture the steam rising as you press, seams flattening under your careful touch.
With these sewing tips for pressing fabric, you’ll keep your projects crisp, smooth, and professional.
Remember, pressing isn’t just an extra step—it’s the secret to garments and quilts that look sharp, not sloppy.
Don’t rush, use the right tools, and treat your iron like a trusty sidekick.
Every seam you press brings you closer to sewing success, minus the dreaded “wonky quilt block.”
- https://www.allpeoplequilt.com/how-to-quilt/quilting-basics/top-tips-pressing-fabric-pro
- https://www.threadsmagazine.com/2021/05/14/pressing-tips-from-an-alterations-professional
- https://www.asg.org/press-perfect/
- https://www.lovenotions.com/pressing-matters-get-pro-results-with-your-iron
- https://threadsmonthly.com/pressing/


