This site is supported by our readers. We may earn a commission, at no cost to you, if you purchase through links.

Check your bobbin tension too, but adjust it sparingly with a small screwdriver. Always test adjustments on fabric scraps first, making small increments.
Clean lint from tension discs regularly, and verify you’re threading correctly through all guides.
Different fabrics need different settings: lightweight materials require lower tension, while heavy fabrics need higher settings.
Remember, balanced tension creates stitches where top and bottom threads meet perfectly in the fabric’s center, not on either surface, which is key to achieving perfect thread tension with the right tension dial settings and proper bobbin tension for a great sewing experience with tighter stitches.
Table Of Contents
Key Takeaways
- Test your adjustments on fabric scraps first – You’ll save time and prevent project disasters by making small incremental changes and checking results before sewing your actual garment.
- Clean lint from tension discs weekly – You’ll prevent 80% of tension problems by removing debris buildup that acts like roadblocks, causing thread breakage and uneven stitches.
- Match tension settings to your fabric weight – You’ll get professional results by using 2-3 for lightweight materials, 4-5 for medium fabrics, and 5-6 for heavy materials like denim or canvas.
- Thread your machine with the presser foot up – You’ll ensure proper tension disc release and avoid the most common cause of threading problems that leads to frustrating sewing sessions.
Thread Tension Basics
Thread tension controls how tightly your machine pulls the upper and lower threads, creating balanced stitches on both sides of the fabric.
If you set the tension correctly, you’ll prevent puckering, loose loops, and weak seams for strong, professional results.
Importance of Balanced Tension
When your thread tension is balanced perfectly, you’ll see identical stitches on both fabric sides, creating professional seam integrity.
Proper tension balance prevents puckering, eliminates thread breakage, and protects against fabric damage.
Without balanced tension, your stitch quality suffers, causing weak seams that won’t hold up over time, which undermines the foundation of successful sewing projects, relying on perfect stitch balance.
Causes of Tension Imbalance
Looking at balanced tension, several factors can throw your machine’s delicate balance off track.
Poor threading habits top the list of culprits that’ll have you pulling your hair out.
Common causes include:
- Incorrect Threading – Missing thread guides or threading with the presser foot down disrupts proper tension flow
- Lint Buildup – Accumulated debris in tension discs acts like tiny roadblocks, causing thread breakage causes you didn’t expect
- Dull Needles – Worn needles create friction that leads to bobbin problems and tension imbalance identification issues
Mismatched thread weights also create havoc with your tension troubleshooting efforts, requiring bobbin tension adjustment to restore harmony.
Effects of Incorrect Tension
Poor tension wreaks havoc on your sewing projects, creating a cascade of problems that’ll make you want to throw your machine out the window.
Thread breakage happens when tension’s too tight, while loose tension causes looping thread issues and skipped stitches.
Puckered seams destroy seam integrity, and uneven stitches create stitch imperfections that scream amateur work.
Fabric damage occurs when incorrect settings stress delicate materials, causing problems that can be summarized as thread breakage and puckered seams.
Tension Control Devices
Your sewing machine’s tension control devices work together like a precision team to manage thread flow and create perfect stitches.
Understanding how tension discs, the take-up lever, tension regulator, and bobbin-case spring function will help you troubleshoot problems quickly and achieve professional results every time.
Tension Discs and Thread Guides
Tension discs act as precision brakes that control thread flow through your sewing machine.
These metal plates squeeze together when you adjust the tension dial, creating the perfect amount of resistance for balanced stitches.
You can find replacement tension discs online if needed.
- Disc Cleaning: Remove lint buildup weekly using a small brush between the discs
- Guide Alignment: Check that thread guides direct thread smoothly without sharp bends
- Thread Flow: Make certain of consistent movement through all tension components during stitching
- Component Wear: Replace worn tension discs when they no longer grip thread effectively
Take-Up Lever and Tension Regulator
Your machine’s take-up lever works with the tension regulator to create consistent thread control throughout each stitch cycle.
The lever function pulls thread through fabric while the regulator calibration guarantees proper disc pressure. Together, they maintain tension consistency by controlling thread flow precisely.
Component wear affects adjustment precision, so check both parts regularly. When your sewing machine tension feels inconsistent, examine the takeup lever’s movement and verify your tension regulator settings for perfect thread tension during tension troubleshooting sessions.
Bobbin-Case Spring and Tension Adjustment
Your bobbin case spring acts as the lower thread’s guardian, controlling tension through a tiny but mighty tension screw.
This spring-loaded mechanism guarantees your bobbin tension matches your upper thread perfectly.
- Adjust the tension screw clockwise to tighten bobbin tension for thick fabrics
- Turn counterclockwise to loosen tension for delicate materials
- Test bobbin winding quality regularly to prevent uneven thread distribution
Incorrect tension often leads to skipped and broken stitches.
Troubleshooting Tension Issues
When your sewing machine starts acting up with broken threads, puckered seams, or loopy stitches, you’re likely dealing with tension problems that need quick fixes.
Most tension issues stem from simple causes like incorrect threading or lint buildup, which means you can solve them faster than you think.
Common Causes of Tension Problems
Eighty percent of thread tension problems stem from incorrect threading, making this the culprit behind most frustrating sewing sessions.
Most sewing headaches start with one simple mistake: threading your machine wrong.
Lint buildup clogs tension discs, while dull needles cause thread breakage and skipped stitches.
Bobbin issues create looping problems, and mismatched thread weights throw off your machine’s delicate balance completely, often due to thread tension problems.
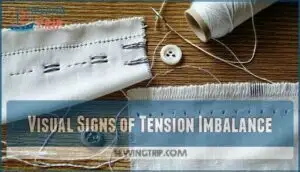
Visual Signs of Tension Imbalance
Spotting thread tension problems starts with watching your stitches closely.
Loopy stitches on the fabric’s bottom signal loose upper tension, while puckered seams mean it’s too tight.
Thread breakage during sewing indicates excessive tension or threading issues.
Rippled fabric and uneven stitches reveal imbalanced tension between upper and lower threads, requiring immediate adjustment.
You can find resources for addressing loopy stitch problems.
Rethreading and Cleaning Solutions
Once you’ve spotted those telltale signs, you’ll want to start fresh with proper threading.
Always lift your presser foot first—this releases the tension discs completely. Rethread your entire machine carefully, following each thread guide precisely.
Next, tackle lint removal from your tension assembly and bobbin area. A small brush works wonders for sewing machine cleaning.
Check your needle condition too—dull needles cause major tension headaches. Identifying and fixing thread guide issues is essential for smooth thread flow.
Fabric-Specific Tension Settings
Different fabrics need different tension settings to create perfect stitches without problems. You’ll save time and frustration by matching your machine’s tension dial to your fabric weight and thread combination.
Lightweight Fabric Tension Requirements
When adjusting thread tension for delicate fabric projects, you’ll need lighter settings to prevent damage.
Lightweight fabrics respond beautifully to gentle tension between 2-3, paired with proper needle choice and thread weight selection.
To avoid fabric jamming, consider using a presser foot with a small needle hole.
- Set sewing machine tension dial between 2-3 for perfect stitch formation
- Choose 70/10 or 80/12 needles to minimize fabric puncture holes
- Use fine cotton or polyester thread weight for smooth seam creation
- Maintain 1.5-2.5mm stitch length for puckering prevention and fabric integrity
Always test your tension settings on fabric scraps before starting your project to guarantee perfect results.
Thick Fabric Tension Settings
Heavy fabrics demand higher tension settings to achieve balanced stitches. Start at setting 4-5 for denim, increasing incrementally as needed.
Canvas and upholstery materials often require settings 5-6, while leather needs careful needle selection alongside proper tension adjustments.
Selecting the right needle is essential, so be sure to test on scraps before starting.
| Fabric Type | Tension Setting | Needle Size |
|---|---|---|
| Denim | 4-5 | 90/14-100/16 |
| Canvas/Upholstery | 5-6 | 100/16-110/18 |
| Leather | 4-6 | 100/16-110/18 |
Stretchy Fabric Tension Needs
Mastering stretchy fabrics requires finding the sweet spot between flexibility and control. When working with knit fabric, you’ll need precise tension adjustments to prevent wavy seams and maintain stretch.
Follow these essential steps:
- Set thread tension between 2-3 for ideal stretch thread performance
- Use differential feed on your serger tension settings to prevent stretching
- Choose polyester or stretch thread for elastic application projects
- Test sewing machine tension on scraps before starting your main project
These tension settings guarantee your stretchy fabrics maintain their bounce while creating professional seams.
Advanced Tension Techniques
Once you’ve mastered basic tension settings, it’s time to tackle the trickier situations that separate beginners from pros.
Advanced techniques help you handle decorative stitches, specialty threads, and maintain your machine for consistent results every time you sew, utilizing advanced techniques to ensure quality outcomes.
Decorative Stitches and Tension Adjustment
Decorative stitching demands careful tension adjustment because these patterns consume more thread than straight stitches. You’ll need to reduce your tension setting by 0.5-1.0 from your normal baseline to accommodate the extra thread flow required for zigzag, satin, and embroidery stitches.
| Decorative Stitch Types | Recommended Tension | Thread Considerations |
|---|---|---|
| Zigzag/Satin Stitch | 2.5-3.5 | Standard cotton/polyester |
| Buttonhole Stitch | 3.0-4.0 | Match thread to fabric weight |
| Embroidery Patterns | 2.0-3.0 | Use embroidery-weight thread |
| Appliqué Stitches | 2.5-3.5 | Consider fabric thickness |
Test your decorative stitch settings on fabric scraps before starting your project. Dense decorative patterns may require even looser tension settings to prevent thread breaks and maintain proper stitch formation.
Specialty Threads and Tension Considerations
Specialty threads demand unique tension approaches compared to standard cotton or polyester.
Each thread type has its own personality—treat them accordingly for flawless results.
Metallic Thread requires looser settings to prevent shredding, while Monofilament Tension needs gentle handling to avoid snapping. Elastic Thread stretches during sewing, requiring careful calibration.
When Blending Fibers, match your strongest thread’s requirements. Thread Lubrication helps specialty threads glide smoothly through tension discs.
Understanding balanced tension importance is essential for achieving professional results with these materials.
- Metallic threads snap like heartstrings when tension’s too tight
- Your perfect project hangs in the balance of proper tension settings
- Thread breakage feels like watching your hard work unravel
- Specialty threads are temperamental divas requiring patient coaxing
- Wrong tension turns dream projects into frustrating disasters
Maintenance and Regular Tension Checks
Keep your sewing machine tension running smoothly with regular maintenance. Clean lint removal from tension discs weekly prevents most problems.
Monthly parts inspection catches wear before it affects your stitches. Oil your machine following manufacturer guidelines.
Regular use of a sewing machine cleaner can also extend its lifespan. Create a tension log documenting successful thread-fabric combinations for future projects.
Always sew test seams on scraps before starting new work to ensure your sewing machine is properly adjusted.
Frequently Asked Questions (FAQs)
How to get perfect thread tension?
Thread tension’s secret lies in achieving that delicate dance between upper and lower threads.
Start with threading properly, test on fabric scraps, then adjust incrementally until stitches appear identical on both sides.
What number should my thread tension be?
Your tension dial should typically be set between 4-5 for medium-weight fabrics.
Lightweight fabrics need 2-3, while thick materials like denim require 4-
Always test on fabric scraps first to find your perfect setting.
Can I adjust tension while machine is running?
You shouldn’t adjust tension while your machine’s running.
Stop stitching, raise the presser foot, then make your adjustments.
This prevents thread tangling and guarantees the tension discs release properly for accurate settings.
Why does tension change between different thread brands?
Different brands manufacture thread with varying fiber compositions, twist patterns, and thickness tolerances.
You’ll notice brand variations affect how smoothly thread flows through tension discs, requiring dial adjustments to maintain balanced stitches across different manufacturers, which can be influenced by the thickness tolerances.
Should bobbin and top thread tensions match exactly?
No, bobbin and top thread tensions don’t need to match exactly.
They work together like a balanced scale – your top tension typically runs higher (4-5) while bobbin tension stays constant.
Perfect stitches form when threads meet midway through fabric layers.
How does room temperature affect my thread tension?
Climate changes challenge your thread’s consistency.
Warmer rooms make threads expand and loosen, while cooler temperatures cause contraction and tightening.
This requires you to adjust tension settings seasonally for ideal stitching results.
Conclusion
Mastering thread tension tips transforms tangled frustration into seamless artistry, like tuning a violin string to perfect pitch.
You’ve learned to read your machine’s signals, adjust settings methodically, and troubleshoot common problems.
Remember that proper tension creates invisible connections between fabric layers.
Test adjustments on scraps, clean your machine regularly, and match settings to fabric weight.
With these thread tension tips mastered, you’ll achieve professional-quality stitches consistently, turning every sewing project into a rewarding success.
- https://www.thesewingdirectory.co.uk/thread-tension/
- https://sabrinawhartonbrown.wordpress.com/2011/05/23/how-to-get-your-sewing-machine-thread-tension-and-stitch-quality-right/
- https://www.reddit.com/r/sewhelp/comments/nd5vxp/something_is_wrong_with_my_machines_tension_no/
- https://www.youtube.com/watch?v=zh4PyWBKvwk
- https://www.tillyandthebuttons.com/2020/03/thread-tension-troubleshooting.html


