This site is supported by our readers. We may earn a commission, at no cost to you, if you purchase through links.
 When your thread keeps breaking on your sewing machine, don’t let it needle you – the fix is usually simple.
Start by checking your thread tension; if it’s too tight, your thread will snap faster than a rubber band.
Make sure you’ve installed the right needle size for your fabric and that it isn’t bent or dull. Quality matters too – bargain-bin threads often lead to more headaches than savings.
Keep your machine’s throat plate clean and lint-free, and double-check that both top and bobbin threads are properly threaded.
These basics often solve the problem, but there’s a whole world of specialized solutions for tricky fabrics and threads.
Table Of Contents
- Key Takeaways
- Why Does My Thread Keep Breaking?
- How to Stop Sewing Machine Thread Breaking
- Troubleshooting Embroidery Machine Thread Breaking or Shredding
- Why Does My Metallic Thread Keep Breaking?
- Why Does My Thread Keep Breaking When Sewing Fleece?
- Why Does My Needle Thread Keep Breaking in Thick Material?
- Why Does My Upper Thread Keep Breaking When Using Stretch Thread?
- Why Does My Thread Keep Breaking When Free-motion Quilting?
- Your Top Thread Isn’t Threaded Correctly
- Your Top Thread Tension is Wrong
- Frequently Asked Questions (FAQs)
- Conclusion
Key Takeaways
- You’ll need to match your thread quality and type to your project – cheap thread frays quickly and breaks under pressure, so invest in trusted brands like Gutermann or Coats & Clark for reliable results.
- Your thread tension settings are crucial – if they’re too tight, your thread will snap, so start with a setting of 4 and adjust gradually until your top and bottom stitches look identical.
- You should check your needle regularly – ensure it’s the right size for your fabric, isn’t bent or dull, and replace it if you notice any damage or after 8-10 hours of sewing time.
- You must keep your machine clean – lint buildup in the bobbin case and throat plate can cause thread breaks, so clean these areas regularly with a brush or unwaxed dental floss.
Why Does My Thread Keep Breaking?
When your sewing machine thread keeps breaking, it’s enough to make anyone pull their hair out. The thread material is often the sneaky culprit—low-quality threads fray quickly and snap under pressure. But don’t stop there—machine calibration might also need a second look. Incorrect thread tension is a major troublemaker, pulling too tightly and causing breakage, especially with fabrics that vary in thickness. Understanding thread quality issues can also help identify the root cause of the problem.
Thicker materials, like fleece, demand adjusted tension and a needle strong enough to pierce through. Stretch threads? They’re tricky, needing just the right balance of tension to avoid unnecessary tugging. Oh, and don’t forget sewing speed—going too fast can send your thread on strike, giving you more snapping than stitching.
Always check the thread condition too. Old, brittle thread is a recipe for disaster. Address these issues one by one, and your thread breakage sewing days will be behind you!
How to Stop Sewing Machine Thread Breaking
If your sewing machine thread keeps snapping, don’t worry—it’s a fixable problem.
By checking your needle, bobbin, thread quality, and cleaning the machine, you can stop the breaks and get back to smooth stitching.
Needle Tips
Struggling with thread snapping mid-project? Needle problems could be to blame.
First, pick the right needle size and type—smaller needles for fine fabrics, larger for heavy materials.
Look out for needle damage like dull points or bends, and swap it out regularly for breakage prevention during sewing.
Verify it’s installed properly, flat side facing the back, and firmly secured.
Needle materials matter too—specialty threads like metallics or stretch often call for specific options.
To troubleshoot further, check the thread tension issues that may be causing the breakage.
Pairing your needle thread correctly guarantees smooth stitching.
And don’t forget: a sharp needle makes all the difference in mastering those sewing techniques!
Bobbin Tips
If your thread keeps breaking, chances are the bobbin is part of the issue. Bobbin care can save you from plenty of sewing frustrations. Let’s talk specifics:
- Thread Winding Matters: Wind your bobbin evenly. Uneven winding creates loose spots that can tangle or snap the thread mid-stitch. Always use the same thread type as your spool for smooth operation.
- Check Sizes: Your machine isn’t a one-size-fits-all deal. Stick with bobbin sizes that are made for your model to avoid feeding issues.
- Tension Control: The bobbin thread tension should complement the upper thread. Adjust it carefully and test on scrap fabric to prevent thread breakage.
- Tackle Bobbin Issues: If you suspect trouble, re-thread the bobbin following your machine’s manual precisely.
- Bobbin Case Care: Lint buildup in the bobbin case can jam things up—clean it regularly for trouble-free sewing.
Thread Quality Tips
Cheap thread might save you a buck, but it’s often the first culprit behind thread breaking issues. Stick to trusted brands like Gutermann or Coats & Clark for reliable results. Polyester threads excel at adding strength and flexibility, making them ideal for most fabrics.
Got a specific task? Match thread materials to your project—linen for historical costumes, cotton for quilting, and silk for lightweight fabrics. To find the best thread options, consider the type of fabric and sewing task at hand.
| Thread Type | Best Use | Strength | Durability |
|---|---|---|---|
| Polyester | All-purpose sewing | High | Long-lasting |
| Mulberry Silk | Delicate, decorative work | Medium | Sensitive to heat |
Store your thread in a cool, dry space, away from sunlight. Before stitching, test its unwinding and inspect for knots. Quality thread avoids sewing thread problems, making every stitch smooth.
Thread Snag Tips
Thread snagging can ruin your flow and lead to sewing machine thread breaks. Inspect your thread before sewing—it shouldn’t have knots, frays, or uneven spots. Smooth thread management can be the difference between smooth stitching and constant interruptions.
Try these snag prevention tips:
- Pick high-quality thread: Cheap thread frays faster than good coffee disappears, so invest in quality brands.
- Match your thread and fabric: Fabric selection affects tension. Adjust tension control for the perfect blend.
- Untangle like a pro: Double-check your thread guides and spool placement to avoid tangles.
Stop thread breaking issues before they start with these smart fixes!
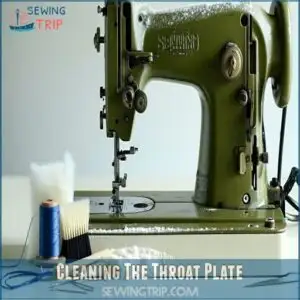
Cleaning The Throat Plate
Dust loves to hide under the throat plate, causing sewing machine thread breaks.
Pop off the plate, clean the thread path obstructions with a brush or unwaxed dental floss, and check for lint near the bobbin case.
Regular throat plate maintenance is key. A quick cleanup can stop thread breakage fast, keeping your sewing machine humming smoothly.
Troubleshooting Embroidery Machine Thread Breaking or Shredding
Thread shredding or breaking during embroidery can ruin your project and test your patience. With the right steps, you can pinpoint the issue quickly and get back to stitching smoothly.
Changing Needles
Ever feel like your thread’s constantly snapping? It could be your needle. A damaged or dull needle messes with stitching and increases thread friction, leading to frustration.
Keep things smooth by following these steps: Regular thread maintenance checks can help identify issues before they become major problems.
- Upgrade materials: Use titanium-coated needles to minimize wear and extend their lifespan.
- Match the job: Choose the correct needle type for your fabric—denim needs strength, stretch fabric requires specialized sizes.
- Inspect for damage: Replace bent or old needles to prevent thread breaks.
- Install correctly: Insert with the flat side back and tight.
- Check sizes: Using improper needle sizes compromises breakage prevention.
Little tweaks, big results!
Changing Thread and Checking Feeding
If thread keeps breaking, it’s time to assess your thread and how it’s being fed. A poorly fed thread or mismatched types can lead to frustrating stops.
Start by checking that your top spool and bobbin use the same thread type. Before loading, inspect the bobbin for tangles or lint.
Watch out for fabric friction or feed issues that could add stress to your thread. Slow your sewing speed if needed—machines don’t always love a race.
- Match thread types for top and bobbin.
- Clear lint from the bobbin.
- Avoid pulling thread tight after cutting.
- Monitor thread guides for smooth feeding.
Checking The Top Thread Path
Sometimes, the thread keeps breaking because the top thread path isn’t smooth.
Start by checking your thread guides and tension discs for lint or damage. Verify the take-up lever is threaded correctly and not skipped. Also, confirm the spool alignment matches the thread type.
| Issue | What to Check | Solution |
|---|---|---|
| Thread Fray | Thread Guides | Clean and re-thread |
| Tension Issues | Tension Discs | Adjust tension settings |
| Uneven Feeding | Take-Up Lever | Verify proper threading |
Checking Needle Plate for Burrs or Nicks
When thread keeps breaking on your sewing machine, don’t overlook the needle plate. A scratched or nicked plate can snag the thread faster than you realize.
Here’s how to handle needle plate issues like a pro:
- Spot Those Burrs: With good lighting, take a close look at the plate. Any scratches, dents, or burrs are troublemakers.
- Feel for Flaws: Gently run your fingers across it. Does it feel rough? That’s a problem that needs fixing.
- Fix It Up: Use fine-grit sandpaper to smooth out the burrs. Polish the area afterward to keep it thread-friendly. Ensuring proper needle maintenance is also essential for preventing thread breakage.
Stay ahead of thread breaking by ensuring burr removal and keeping your plate smooth and clean.
Checking The Bobbin Area
If your sewing machine thread keeps breaking, it’s worth checking the bobbins area. Tangled bobbin thread or poor thread winding can cause breakage.
Remove the bobbin case, clean out lint, and inspect for damage. Adjust the bobbins tension if needed.
Regular sewing machine maintenance guarantees smooth stitching and keeps those pesky bobbin area issues from ruining your projects.
Why Does My Metallic Thread Keep Breaking?
Metallic thread is stunning but can be a real headache when it keeps breaking mid-project. The delicate fibers and shiny coating make it trickier to work with. Start by using high-quality metallic threads—cheap ones fray easily. Pick a needle with a larger eye, like a metallic or topstitch needle, to minimize friction.
Understanding thread issues is key to resolving the problem. Thread breakage often ties back to tension issues, so loosen your sewing machine’s tension settings.
Sewing at full throttle? Slow down! Managing your sewing speed can reduce stress on the thread, preventing those annoying snags. Thread fraying causes also include improper spool setup—position it horizontally to stop it from twisting.
If your thread keeps breaking despite these fixes, it could be time to check for burrs or debris in the thread path. By handling metallic thread gently and tweaking settings, you’ll master smooth, shimmer-filled stitching!
Why Does My Thread Keep Breaking When Sewing Fleece?
Sewing fleece can make you want to scream when your thread keeps breaking. The fabric’s thickness and stretchiness don’t help, but these fleece sewing tips will.
- Choose the right needle: A ballpoint or stretch needle reduces fleece fabric issues and thread breakage.
- Lower thread tension: Fleece grips thread tightly, so ease up on the tension.
- Clean your machine: Fleece fibers cause chaos—stop thread breaking with regular upkeep.
- Pick good thread: Quality matters for fleece thread selection.
- Check for burrs: Scrutinize the needle plate and bobbin area.
Why Does My Needle Thread Keep Breaking in Thick Material?
Thick fabrics can make sewing feel like wrestling with an alligator—don’t let thread breakage win. Here’s how to stay ahead:
- Needle Sharpness: Switch to heavy-duty needles (denim or leather types) to handle fabric density.
- Thread Friction: Choose strong, high-quality threads that hold up to the material thickness.
- Sewing Speed: Slow and steady reduces strain on thread.
- Tension Adjustments: Experiment with tension settings to accommodate bulk.
- Maintenance: Clean lint buildup and check for nicks on your machine’s needle plate.
To prevent further issues, checking the thread breaking causes is essential for smooth operation.
These quick fixes tame even the thickest materials!
Why Does My Upper Thread Keep Breaking When Using Stretch Thread?
Stretch thread issues can feel like an uphill battle, but it’s fixable.
Start by lowering your tension settings — elastic threads need gentler settings.
Pair this with a stretch needle for better results.
Check for lint buildup; it causes thread fraying.
Match your thread with your fabric’s stretch level to avoid thread breaking while sewing.
Here’s a quick guide:
| Problem | Possible Cause | Fix | Tools Needed |
|---|---|---|---|
| Upper thread keeps snapping | Tension too tight | Adjust tension settings | Sewing machine dial |
| Thread fraying causes | Lint in thread path | Clean machine interior | Brush/Unwaxed floss |
| Thread breaking sewing stretch | Mismatched thread | Use quality stretch thread/type | Matching thread spool |
| Stitch issues in elastic fabric | Wrong needle | Switch to sharp/stretch needle | Stretch needle pack |
Why Does My Thread Keep Breaking When Free-motion Quilting?
Free-motion quilting can feel like wrestling with an octopus when your thread keeps breaking. Here’s how to tame those frustrating thread breakage issues:
- Pick the right needle – use a quilting or embroidery needle with a larger eye to reduce friction
- Choose quality thread specifically designed for quilting to prevent fraying and snapping
- Balance your machine’s tension settings based on your fabric thickness
- Clean your bobbin area and tension discs regularly to prevent lint buildup
To prevent thread breaks, understanding thread quality is essential for smooth sewing.
Quick tip: Start with a test piece to dial in your settings before tackling your main project. This saves both thread and sanity!
Your Top Thread Isn’t Threaded Correctly
If your sewing thread keeps breaking, improper threading is often the culprit, even after free-motion work. Most thread breakage happens because of simple threading path mistakes.
Start by raising the take-up lever position to its highest point before threading. Check thread guides one by one, making sure the thread sits properly in each groove. Verify spool placement – it should spin freely without catching.
Understanding thread take-up lever problems can also help in identifying the root cause of thread breakage. If problems persist, try the full rethreading procedure: remove your thread completely and start fresh through the upper thread path.
Your Top Thread Tension is Wrong
Now that you’ve got your machine threaded correctly, let’s tackle thread tension – often the sneaky culprit behind those frustrating thread breaks. Think of tension adjustment like tuning a guitar string: too tight and it snaps, too loose and it won’t play right.
Your sewing machine’s thread tension sweet spot usually falls between 3 and 5, with 4 being the magic number for most projects. Before you begin your main project, grab a scrap of matching fabric and test these signs of proper tension:
- Both top and bottom threads meet in the middle of your fabric
- Stitches look identical on both sides
- No loops or puckers appear in your seam
If your upper thread tension is too tight, gradually dial it down. Watch your sewing speed – racing through thick fabric layers is asking for trouble. Remember, different fabrics need different tensions, so take time to calibrate your machine for each new project. For more information on common thread issues, understanding the causes of thread breakage can help you prevent future problems.
Frequently Asked Questions (FAQs)
Why does my sewing machine thread keep breaking?
Did you know 75% of thread breaks are due to simple setup issues? These often include incorrect threading, wrong tension settings, a damaged needle, or dusty machine parts.
Regular maintenance and proper threading usually fix this.
What should I do if my thread keeps breaking?
Start by rethreading your machine completely, check needle condition, adjust tension settings, and clean any debris. If problems persist, try switching to higher quality thread or consulting your machine’s manual.
What can cause a sewing machine to break?
Your sewing machine can break from neglecting maintenance, using incorrect needles, poor threading, dirty parts, worn gears, or electrical issues. Regular cleaning and professional servicing help prevent major mechanical problems.
What does it mean if a thread keeps breaking?
If thread consistently breaks, it’s likely due to incorrect tension settings, a damaged needle, or improper threading.
It might also mean there’s debris in the tension discs or you’re using poor-quality thread.
How do you fix a thread break on a sewing machine?
A million issues could cause breaks!
Start by re-threading your machine with the presser foot up.
Check needle condition, adjust tension settings, and make certain you’re using quality thread that matches your fabric type.
Why does my bobbin thread keep breaking?
Bobbin thread breakage often happens from incorrect tension settings, a dirty bobbin case, or improper threading.
Check these areas first, then make certain you’re using quality thread and the right needle size for your fabric.
What tension should my sewing machine be on?
Like finding your perfect balance, start at 4 and adjust gradually.
You’ll want to test on scrap fabric, making minor tweaks until your top and bottom stitches look identical and balanced.
How can we prevent thread from breaking?
Check your needle size, use quality thread, and maintain proper tension.
Keep your machine clean, thread with the presser foot up, and don’t forget to slow down when sewing through thick fabrics.
Why do I have to keep re threading my sewing machine?
Your sewing machine needs frequent rethreading when tension‘s off, the needle’s damaged, or debris’s built up in the thread path.
Regular cleaning and proper tension settings will reduce how often you rethread.
Can old thread cause constant breaks during sewing?
Absolutely – old thread deteriorates over time, becoming brittle and prone to breaking.
It’s best to replace thread that’s been sitting around for years, especially if it’s been exposed to sunlight or humidity.
Conclusion
Nowadays, a thread that keeps breaking on your sewing machine doesn’t have to make you as mad as a wet hen.
With regular maintenance, proper thread selection, and correct tension settings, you’ll spend more time creating and less time fixing.
Remember to check your needle condition, keep your machine clean, and use quality materials suited to your project.
By following these troubleshooting tips, you’ll be back to smooth sewing in no time, turning those frustrating thread breaks into a thing of the past.
- https://weallsew.com/thread-spool-tip/
- https://www.thecreativefolk.com/thread-breaks-sewing-thick-fabric/
- https://www.seamwork.com/issues/2017/06/the-ultimate-guide-to-thread-tension
- https://sewingmachinetalk.com/sewing-machine-thread-breaks/
- https://www.sewingmachinefun.com/thread-keeps-breaking-on-sewing-machine/

