This site is supported by our readers. We may earn a commission, at no cost to you, if you purchase through links.
 To adjust sewing pattern for smaller waist, start by measuring your actual waist and comparing it to the pattern’s measurements.
Mark the difference on your pattern pieces.
For minor adjustments under two inches, pinch out excess fabric equally on both side seams of front and back pieces.
For larger reductions, use the slash-and-spread method in reverse – cut vertical lines through the waist area and overlap sections to remove width.
Remember to taper your adjustments smoothly into the hip and bust areas to maintain the garment’s shape.
Always redraw seam lines and check that darts still align properly after making changes.
The secret lies in understanding how these basic techniques work together seamlessly.
Table Of Contents
Key Takeaways
- Measure accurately first – Wrap your tape measure around your natural waistline, where your body bends, keeping gentle tension with room for one finger underneath to ensure proper fit calculations.
- Choose the right adjustment method – Use simple side seam pinching for reductions under 2 inches, or the slash-and-spread technique in reverse for larger waist reductions.
- Maintain smooth transitions – Always taper your waist adjustments gradually into the bust and hip areas, then redraw seam lines to preserve the garment’s original silhouette.
- Test before committing – Create a muslin test garment to verify that your adjustments work properly before cutting into your final fabric, preventing costly mistakes.
Adjusting Sewing Patterns
Finding the perfect fit starts with understanding your body’s unique proportions and knowing which adjustment techniques will work best for your specific needs.
You’ll discover that making a sewing pattern work for a smaller waist requires precise measuring and the right alteration methods to guarantee your finished garment fits beautifully.
Measuring Waistline Accurately
Wrap your tape measure around your natural waistline, positioning it at the smallest part of your torso where your body naturally bends. Keep consistent tension without pulling too tight—you should slip one finger underneath.
Find your natural waist where your body bends—measure with gentle tension, leaving room for one finger underneath.
Stand with good posture and breathe normally. Your body shape determines exact tape placement, so locate anatomical landmarks like your lower ribs.
This waist measurement guides your smaller waist tutorial adjustments for perfect body measurements sewing results. To guarantee accuracy, use a flexible tape measure, one of the essential tools for pattern making.
Identifying Pattern Alteration Needs
Compare your measurements against the pattern’s finished garment dimensions to spot discrepancies.
Body Shape Analysis reveals where your proportions differ from standard sizing.
Check Measurement Accuracy by examining bust, waist, and hip ratios.
Assess Ease Requirements for your desired fit.
Consider Style Considerations like fabric drape.
This sewing pattern alteration evaluation determines if you need waist size adjustment through pattern alteration guide techniques for reduce waist measurement goals, including assessing your Body Shape Analysis.
Choosing Right Adjustment Techniques
Your sewing pattern alteration success depends on selecting the right technique for your specific waist size adjustment needs.
Body measurements and proportion identification guide your choice between simple grading or complex reshaping methods.
- Slash and spread technique – Best for minor adjustments under 1 inch per side
- Grading method – Ideal for tapering between different pattern sizes smoothly
- Dart manipulation – Perfect when you need alteration precision for curvy figures
- Muslin testing approach – Smart choice for significant pattern ease modifications before cutting final fabric
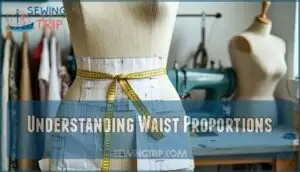
Understanding Waist Proportions
Your body’s unique proportions determine how a pattern will fit your waist.
Understanding your body’s unique proportions is the foundation of perfect pattern fitting.
The standard rib-hip gap measures about three inches, but short-waisted individuals often have little to no space between these points.
This creates atypical measurements where your waist might exceed chest and hip sizes.
Understanding your individual proportions helps identify when standard techniques won’t work.
Short-waisted challenges require specialized waist shaping techniques since there’s limited room for your waist to curve in naturally.
This is because short-waisted individuals have a distinct body type that requires unique approaches to achieve a proper fit, and understanding your individual proportions is key to addressing these challenges.
Customizing Pattern Pieces
When your waist measurement is smaller than the pattern’s intended fit, you’ll need to customize the pattern pieces to create a flattering silhouette that doesn’t pool fabric at your natural waistline.
Start by removing excess length from the waistline area, then redraw the curved seams to maintain smooth passages from bust to hip while reshaping any darts or pleats to accommodate your specific proportions.
This process involves careful adjustment to ensure that the final result is both aesthetically pleasing and well-fitted, allowing for smooth passages from bust to hip.
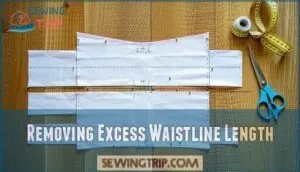
Removing Excess Waistline Length
When your waist measurement is smaller than the pattern indicates, you’ll need to remove excess waistline length through strategic cutting and overlapping. This waist adjustment prevents baggy fabric around your midsection and creates the customized fit you’re after.
Remember to evaluate pattern alteration products that can make the process easier.
- Mark horizontal slash lines at the waistline and create clean cuts for precise pattern overlap
- Remove equal amounts from front and back pattern pieces to maintain garment balance
- Test with muslin fitting before making final alterations to confirm proper waistline reduction
- Measure twice, cut once – alteration precision prevents costly fabric mistakes during construction
- Overlap pattern pieces by half your total reduction amount to achieve the smaller waist dimension
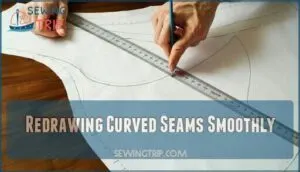
Redrawing Curved Seams Smoothly
After you’ve removed excess waistline length from your sewing pattern alteration, smooth passages become vital for professional results.
Use a French curve or hip curve to redraw the waistline, blending it seamlessly into the side seams. This curve blending eliminates sharp angles that create awkward fitting issues.
For achieving these smooth redrawns, it can be helpful to purchase pattern-making tools.
Focus on seam uniformity by maintaining consistent curves from bust to hip. Proper angle elimination confirms your smaller waist adjustment flows naturally, creating the perfect curve in waist silhouette you’re seeking.
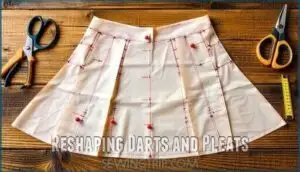
Reshaping Darts and Pleats
Once you’ve smoothed your curved seams, focus on dart placement and pleat volume adjustments.
Deepen pleats by overlapping them further at the waist, removing equal amounts from front and back pieces for even distribution. Redraw dart points 2.5cm short of body apex, ensuring proper angle adjustments.
Understanding dart manipulation techniques is essential for achieving a custom fit. Mark new notches and fold lines after dart manipulation to guide accurate construction during your sewing pattern alteration process, ensuring a proper sewing pattern.
Applying Grading Methods
When you need to make your pattern smaller, grading methods provide precise ways to redistribute measurements across multiple seam lines.
You’ll choose between grading out at the waistline for minor adjustments or using slash and spread techniques for more significant changes that maintain the garment’s proportional balance.
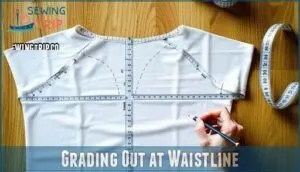
Grading Out at Waistline
Grading out at the waistline becomes your go-to move when atypical proportions mean your waist exceeds chest and hip measurements.
Short-waisted figures often need this pattern alteration technique since standard sewing pattern adjustment methods fall short.
You’ll add fabric strategically at side seams, creating room where your body needs it most, with a focus on precision measurement and careful pattern resizing to avoid distorting the garment’s shape while achieving that smaller waist tutorial goal.
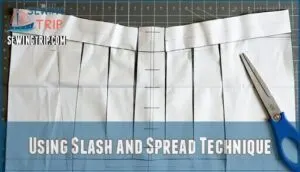
Using Slash and Spread Technique
Transforming your pattern for a smaller waist becomes manageable with the slashandspread technique. This sewing pattern adjustment method requires precise execution for successful fitting adjustments. One can use the slashing and spreading patternmaking technique to modify the pattern.
For your smaller waist tutorial, focus on these key elements:
- Slash Placement: Cut vertical lines from hem toward waist, stopping just short of waistline
- Spread Amount: Overlap sections rather than spreading to reduce circumference
- Grainline Impact: Maintain original grainlines during pattern alteration
After overlapping, prioritize Curve Redrawing to smooth waistline shifts. Always complete Muslin Testing before cutting final fabric.
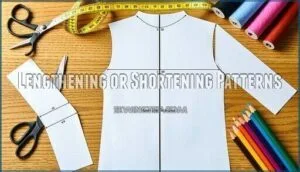
Lengthening or Shortening Patterns
Pattern adjustment becomes straightforward when you master horizontal cuts for length changes.
Make precise cuts across your pattern pieces, then add paper between sections to lengthen or create overlapping pieces to shorten.
The key lies in distributing difference evenly while respecting grainline impact.
Accurate measurements are vital for maintaining proper fit.
This sewing pattern alteration method guarantees your adjust pattern size efforts maintain proper proportions throughout your garment.
Fitting Diagrams and Adjustments
Fitting diagrams serve as your roadmap for identifying exactly where adjustments need to happen on your pattern pieces.
You’ll use these visual guides to pinpoint problem areas, measure the changes needed, and guarantee your seam allowances remain consistent throughout the alteration process, which is crucial for a successful seam.
Using Fitting Diagrams Effectively
Fitting diagrams serve as your roadmap for sewing pattern adjustments, revealing exactly where your waist measurement deviates from standard proportions.
These visual guides help you plan targeted alterations before cutting fabric.
Follow this diagram interpretation process:
- Check balance lines – Verify they’re parallel to floor for proper fit assessment
- Mark adjustment points – Identify where waist curves need modification using body measurements
- Plan proportional analysis – Compare your measurements to pattern’s standard sizing
- Apply to muslin – Test diagram-guided changes on practice fabric first
To guarantee proper drape, understanding pattern grainline importance is also key.
Making Necessary Pattern Adjustments
Once you’ve analyzed fitting diagrams and identified problem areas, tackle pattern alteration systematically.
Start with body measurements sewing comparison against pattern ease requirements.
Focus on dart manipulation first—reshaping waist darts redistributes fabric naturally.
Use muslin fitting results to guide grainline control adjustments.
Apply seam blending techniques where waist measurement changes meet existing pattern lines for smooth shifts.
Checking Seam Allowances Uniformly
After making pattern alterations for body measurements sewing, you’ll need to verify seam allowance consistency across all modified pieces. Uniform seam width prevents assembly issues and guarantees matching seams perfectly during construction.
- Check that all seam allowances measure exactly 5/8 inch using accurate seam measurement techniques
- Redraw any uneven edges where sewing pattern adjustment affected the original seam lines
- Mark pivot points clearly to maintain consistent seam allowances through curves and corners
Common Fit Problems Solved
You’ll encounter three main fit problems when adjusting patterns for a smaller waist: bust adjustments, hip modifications, and length changes.
These targeted fixes address the most common issues that arise when your waist measurement differs substantially from standard pattern sizing, focusing on complete concepts to improve the overall fit.
Full Bust Adjustment Techniques
When your bust measurement exceeds pattern standards, you’ll need FBA Dart Manipulation or Princess Seam FBA techniques.
Calculate your FBA Volume Distribution by subtracting high bust from full bust, then divide by two.
For Underbust Adjustment, slash from bust point to side seam and spread the pattern.
High Bust Adjustment requires precise bust point adjustment—mark your apex and redirect dart legs accordingly for proper sewing pattern adjustment.
Hip Adjustment for Better Fit
Hip adjustment guarantees adequate room through your widest point without creating baggy fabric elsewhere.
When body measurements exceed pattern hip measurements, blend sizes smoothly using a hip curve ruler. Start your pattern alteration by measuring the difference between your hips and the pattern’s hip line.
Fitting challenges arise when you need more room through the hips but want to maintain the waist fit. Make adjustments gradually through pattern alterations, spreading the additional width evenly across side seams.
Always create a muslin fitting to test your hip adjustment before cutting your final fabric choice, ensuring a proper pattern alteration.
Length Adjustments for Tall or Short Individuals
Perfect proportions aren’t one-size-fits-all when you’re working with torso length differences.
You’ll need specific pattern adjustments for your body proportions.
Lengthen bodice length by cutting horizontally across the pattern and adding paper between pieces.
For sleeve length adjustments, measure from shoulder to desired cuff position.
Shorten skirt length or pant length by overlapping pattern pieces after cutting.
These sewing pattern alterations guarantee your garments fit your unique frame perfectly.
Refining Pattern Adjustments
After making your initial pattern adjustments, you’ll need to test and refine them to achieve the perfect fit.
Creating a muslin test garment lets you identify any remaining issues before cutting into your precious fabric, saving both time and materials.
Creating Muslin Test Garments
Before cutting into your good fabric, you’ll want to create a test version using inexpensive muslin fabric choice. This practice garment reveals exactly how your adjusted pattern fits your body.
Cut your muslin with the same muslin seam allowance as your final project. Pay attention to evaluating muslin fit around the waist, checking if adjusting muslin darts need refinement.
For those seeking affordable options, consider where to buy muslin. This iterative muslin fitting process saves expensive fabric and guarantees your pattern alteration works perfectly before you commit to your final garment.
Assessing Fit and Making Tweaks
Try on your muslin fabric choice and move around naturally. Check how the garment sits when you sit, reach, and walk.
Look for pulling, gapping, or bunching around the waist area. Mark any spots that need adjustment with pins or chalk.
Take notes about comfort assessment and appearance evaluation issues. Understanding the pattern’s grainline ensures drape and fit.
Make iterative fitting changes to your pattern alteration based on these observations before cutting your final fabric, and verify that the pattern’s grainline guarantees a smooth drape.
Transferring Adjustments to Final Pattern
Once you’ve perfected your adjustments through pattern manipulation, transfer them to fresh pattern paper.
Reinforce pattern lines with clear markings and maintain uniform seam allowances throughout.
Carefully reshape darts/pleats to match your new waistline, ensuring smooth shifts, this creates final pattern durability for repeated use.
Your practice garment fitting revealed exactly what works—now make those sewing pattern adjustments permanent through precise pattern tracing and sewing pattern alterations.
Frequently Asked Questions (FAQs)
How to make waistband smaller by sewing?
Narrow your waistband by removing fabric from the side seams.
Mark your desired measurement, pin the excess, then sew a new seam line inward.
Trim extra fabric and press seams flat, ensuring a complete and professional finish is achieved.
How to reduce the size of a sewing pattern?
Shrinking patterns isn’t rocket science! Simply adjust seam allowances by taking in sides, or choose a smaller size if you’re between measurements. Create a muslin first to test fit perfectly.
Can waist adjustments affect sleeve attachment points?
Waist adjustments can shift bodice proportions, potentially affecting sleeve attachment angles. You’ll need to check armhole curves and may require minor sleeve cap adjustments to maintain proper fit and drape.
How do fabric stretch properties impact waist alterations?
Stretch fabrics require less waist reduction since they’ll naturally conform to your body.
You’ll need smaller adjustments—typically half what you’d remove from woven fabrics—to prevent over-fitting that creates uncomfortable pulling, especially to avoid uncomfortable sensations.
Should princess seams be adjusted differently than side seams?
Princess seams distribute adjustments across multiple lines, requiring smaller incremental changes than side seams.
You’ll need to adjust each princess panel proportionally, maintaining curves while removing equal amounts from both front and back sections.
How do you maintain proper garment proportions after adjustments?
Redraw curved seams smoothly to blend waist adjustments with hip and bust lines. Reshape darts proportionally and reposition notches to maintain the garment’s original design balance and silhouette.
Conclusion
Before smartphones made measuring a breeze, seamstresses relied on tape measures and careful calculations to adjust sewing pattern for smaller waist modifications.
You’ve learned the essential techniques to customize any pattern for your unique measurements. Whether you’re using the slash-and-spread method for major reductions or simple side seam adjustments for minor tweaks, these skills will serve you well.
Remember to test your changes with muslin first, maintain smooth shifts between waist and hip areas, and always redraw seam lines carefully. With practice, you’ll confidently adjust sewing pattern for smaller waist measurements every time.
- https://www.sewalongs.com/clover/clover-large-or-small-waist-adjustment/
- https://inthefolds.com/q-a-series/2022/how-to-lower-waist-on-pants-pattern
- https://www.youtube.com/watch?v=2QXlOsXFUok
- https://www.coletterie.com/tutorials-tips-tricks/the-colette-patterns-pants-fitting-cheatsheet
- http://www.flickr.com/groups/colettepatterns/

