This site is supported by our readers. We may earn a commission, at no cost to you, if you purchase through links.
 The pre-sewing stage is your foundation for successful garment construction, where you’ll prepare patterns and fabrics before any actual stitching begins.
You’ll select appropriate patterns, choose suitable fabrics, and prepare materials through washing, pressing, and careful layout.
This vital phase includes placing pattern pieces correctly, marking essential details, and handling facings properly.
Think of it as setting up your workspace before cooking a complex meal – rushing through these steps often leads to frustration later.
Proper preparation during this stage guarantees your fabric behaves predictably and your finished garment fits well, making even challenging projects into manageable, enjoyable sewing experiences, and will transform your approach to garment construction.
Table Of Contents
- Key Takeaways
- Step 1: Selecting Your Pattern and Fabric
- Step 2: Preparing Your Pattern
- Step 3: Preparing and Cutting Your Fabric
- Step 4: Marking and Sewing Darts
- Step 5: Sewing The Back Zipper
- Step 6: Sewing The Shoulder Seams
- Step 7: Preparing The Neckline Facing
- Step 8: Attaching Neck Facings
- Step 9: Pressing and Understitching Neck Facing
- Frequently Asked Questions (FAQs)
- Conclusion
Key Takeaways
- You’ll save time and money by properly preparing patterns and fabrics before cutting – preshrinking fabric, pressing patterns flat, and straightening grain lines prevent costly mistakes and ensure your finished garment fits correctly.
- Your pattern selection determines project success – choose patterns that match your skill level and take accurate body measurements since sewing pattern sizes differ significantly from ready-to-wear clothing sizes.
- Fabric preparation is non-negotiable for professional results – wash and dry your fabric as you’ll care for the finished garment, then press it properly to prevent shrinkage and distortion during construction.
- Strategic pattern placement and careful marking create the foundation for quality construction – follow grain alignment instructions, use pattern weights for accuracy, and mark all essential details before cutting to ensure your garment pieces fit together perfectly.
Step 1: Selecting Your Pattern and Fabric
Before you start cutting or sewing, you need to select a pattern that matches your skill level and choose fabric that complements your design vision.
This foundation step determines whether your finished garment will look professional or fall short of your expectations.
Choosing The Right Pattern
Your pattern selection determines your project’s success, so choose wisely based on your skill level and body measurements.
Looking at the paragraph and tone, here’s a short, engaging blockquote:
Choose your pattern like your success depends on it—because it does.
Match pattern complexity to your abilities while considering style preferences and fabric compatibility needs. Understanding sewing pattern sizing is key because it differs substantially from ready-to-wear sizes.
- Assess your current sewing skills – beginners need fewer pieces and simpler construction
- Take accurate body measurements – compare against pattern size charts, not retail sizes
- Consider alteration needs – multi-size patterns offer blending flexibility between sizes
- Review pattern complexity indicators – detailed line drawings suggest advanced techniques
- Check fabric compatibility requirements – patterns specify recommended materials for ideal results
Selecting Suitable Fabric
In the context of fabric selection, you’ll want to match your textile properties with your pattern’s requirements.
Check the fiber content, weave type, and fabric weight against your pattern’s suggested fabrics list.
Quality fabric sourcing guarantees colorfastness and proper drape quality.
Consider using a sewing fabric guide for selecting the right materials.
Your fabric choice impacts everything from sewing ease to garment longevity, so don’t rush this vital fabric preparation step, as it ensures a good drape quality.
Importance of Proper Preparation
Proper preparation during the presewing stage acts as your foundation for success.
Quality assurance begins with thorough fabric preparation and pattern handling, which delivers time savings and cost reduction throughout your project.
This preparation and planning phase guarantees professional finish and garment longevity, preventing costly mistakes that could derail your sewing journey, ensuring quality assurance from the start.
Step 2: Preparing Your Pattern
Your pattern-preparation journey begins with tissue pressing, a vital step that guarantees cutting accuracy throughout your project. Wrinkled patterns create measurement errors and uneven seams, so take time to smooth each piece with a low-heat iron before proceeding.
A key step involves adding seam allowances to guarantee accurate construction.
- Handle delicate tissue carefully – Use pressing cloths to prevent scorching or tearing
- Check for pattern adjustments – Mark any size modifications or alterations needed
- Organize pieces logically – Group related components for efficient sewing preparation
- Review cutting layout instructions – Study the guide for ideal pattern placement strategies
- Prepare workspace adequately – Clear large surfaces for proper pattern layout and grain alignment
Step 3: Preparing and Cutting Your Fabric
Now you’re ready to transform your pattern into a beautiful garment by preparing your fabric properly.
This essential step guarantees your finished dress will fit perfectly and maintain its shape through years of wear.
Preparing The Fabric
Before cutting begins, your fabric needs thorough preparation to guarantee professional results.
Start with preshrinking methods like washing and drying fabric as you’ll care for the finished garment.
Next, focus on grain straightening by aligning selvages and pulling fabric on the bias to correct any distortion.
Fabric preparation can minimize these issues.
Apply proper ironing techniques using appropriate heat settings for your fabric type.
This fabric preparation process prevents shrinkage and guarantees accurate cutting for your sewing project.
Placing The Pattern Pieces
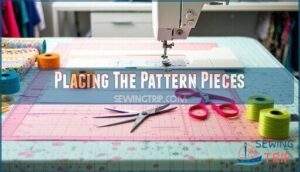
Like a puzzle waiting to be solved, your pattern pieces need strategic placement on your prepared fabric.
Follow the layout guide’s grain alignment instructions, positioning each piece to minimize fabric wastage while maintaining proper cutting order.
Use pattern weights to secure pieces, ensuring layout efficiency through careful spacing, and creating your ideal form layout.
This systematic approach to pattern making and fabric spreading prevents costly mistakes during marking and fabric cutting.
Handling Facings
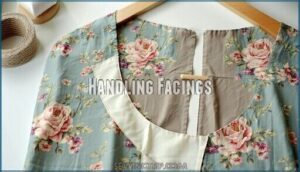
Three critical facing shapes demand your attention: shaped facings that mirror garment edges, extended facings that fold from the main piece, and bias facings for curved areas.
Apply interfacing usage to the wrong side before cutting, ensuring clean finishing.
Secure neckline facing with proper understitching benefits after attachment, preventing rolling.
Press neck facings using a tailor’s ham for smooth curves, then grade seam allowances to reduce bulk and achieve professional edge securing through careful facing handling.
Step 4: Marking and Sewing Darts
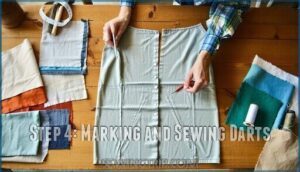
Transform your dress into a perfect fit by mastering dart placement and stitching techniques. Darts create shape and structure, turning flat fabric into a three-dimensional garment that flatters your figure.
Here’s your dart-sewing roadmap:
- Mark dart placement using tailor’s chalk or disappearing ink pen for precise positioning
- Stitch with small backstitches or running stitches, maintaining consistent tension throughout
- Press darts from both sides to set them neatly and create professional-looking results
Focus on fabric handling during this vital step—smooth, even stitches prevent puckering and guarantee dart variations work harmoniously with your garment’s design. These sewing techniques form the foundation for proper fit adjustments later.
Step 5: Sewing The Back Zipper
With your darts perfectly shaped and pressed, you’re ready to tackle the back zipper installation. This step transforms your garment from a flat piece into something you can actually wear, but it requires steady hands and the right technique.
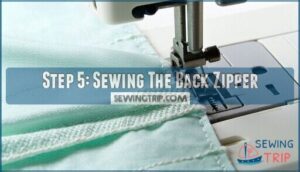
Start by selecting the appropriate zipper length for your dress pattern. Position your zipper foot attachment on your sewing machine, as this specialized foot allows you to stitch close to the zipper teeth without catching them. For beginners, a centered zipper application works best, though you’ll also encounter lapped zipper and invisible zippers in advanced patterns.
Mark your zipper placement carefully along the back seam allowance. Pin the zipper tape to the fabric, making certain the teeth align perfectly with your marked line. Using your zipper foot, stitch slowly and deliberately, maintaining consistent seam allowances throughout the zipper installation process. This methodical approach prevents puckering and guarantees smooth zipper operation in your finished garment.
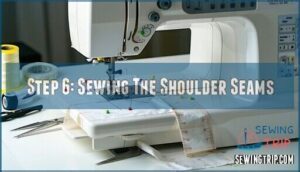
Step 6: Sewing The Shoulder Seams
With your back zipper now securely in place, you’re ready to bring the front and back of your garment together.
Shoulder seams form the foundation of your garment’s structure, and getting them right makes all the difference in how your finished piece looks and fits.
Here’s how to sew perfect shoulder seams:
- Pin matching seams carefully, aligning notches and ensuring the shoulder slope follows your pattern’s curve for proper fit.
- Use seam reinforcement techniques like stay tape or interfacing to prevent stretching, especially important during pre production phases of garment construction.
- Apply proper pressing techniques immediately after sewing, pressing seams toward the back to maintain the natural shoulder slope.
- Choose appropriate seam types based on your fabric weight—French seams work well for lightweight fabrics, while serged seams suit knits perfectly.
Consider using a full backstitch method for a versatile and strong seam. Remember that stabilizing shoulders during the sewing process prevents sagging and maintains your garment’s shape over time.
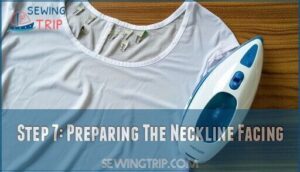
Step 7: Preparing The Neckline Facing
Precision transforms your sewing project when you properly prepare neckline facings before attachment.
Start by applying facing interfacing to the wrong side of your neck facings, following the manufacturer’s instructions for heat and pressure settings.
This vital step provides structure and prevents stretching during the sewing process.
Next, finish the outer edges of your facings using a serger, zigzag stitch, or pinking shears to prevent fraying.
For curved necklines, you’ll need to clip curves at regular intervals, cutting perpendicular to the seam line without cutting through it.
Facings are key to finishing raw edges, giving garments a professional and durable finish.
Pay attention to notch placement, matching them precisely with your garment’s corresponding notches.
These sewing tips guarantee clean finishes and professional results.
Press your prepared facings flat, creating crisp edges that’ll make the attachment process smoother.
These sewing essentials set the foundation for beautifully finished necklines that’ll look polished and professional in your completed garment.
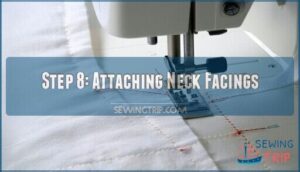
Step 8: Attaching Neck Facings
Everyone knows that properly attaching neck facings can make or break your sewing project’s professional appearance.
Start by pinning your interfaced neck facing to the garment with right sides together, carefully matching notches and shoulder seams for perfect Facing Alignment.
Sew using a 5⁄8 inch seam allowance, then apply Understitching Techniques by stitching the seam allowance toward the facing only.
This prevents rolling and guarantees a Clean Finish that maintains the Neckline Shape beautifully.
Choose appropriate Interfacing Options for your fabric weight, then clip corners and turn right side out for polished sewing essentials.
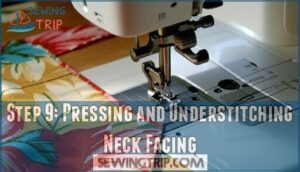
Step 9: Pressing and Understitching Neck Facing
After attaching your neck facings, proper pressing and understitching transform your neckline into a professional-looking finish. This final step prevents the facing from rolling outward and creates that crisp, clean appearance you’ll find in store-bought garments.
Here’s how to master Facing Understitching for a perfect Neckline Finish:
- Press facings flat – Use gentle pressure with your iron’s tip, avoiding harsh creases on the outer fabric
- Understitch the seam – Sew facing to seam allowance 1⁄8" from the original seam line
- Keep facing side up – This Pressing Technique guarantees you’re sewing as close to the seam as possible
- Tack for extra stability – Add small hand stitches to secure Facing Stability if needed
This Clean Finish technique separates amateur from professional-looking results in your sewing preparation steps.
Frequently Asked Questions (FAQs)
What is the pre-production stage?
Despite seeming overwhelming, pre-production isn’t just planning—it’s your roadmap to success.
You’ll handle fabric development, costing, pattern making, and sample creation before cutting begins.
This stage determines whether your garment succeeds or fails.
What is pre production process?
Pre-production prepares your garment for manufacturing success. You’ll develop fabrics, create cost sheets, make fit samples, and receive buyer approval before cutting begins.
What are pre-production and post-production processes?
You’ll tackle fabric preparation, pattern making, and sizing before production starts, then handle finishing touches, quality checks, and final pressing afterward.
What are the stages of garment production?
Garment production flows through distinct stages: pre-production handles fabric sourcing, pattern development, and costing; production encompasses cutting, sewing, and assembly; post-production includes finishing, quality control, and packaging for distribution.
What is post production process?
Like the final polish on a diamond, post-production transforms completed garments through thread trimming, pressing, quality checking, folding, and packing before shipment.
You’ll find these finishing touches guarantee your garments look professional and flawless.
What happens after the sewing process?
After you complete the sewing, your garment moves into finishing and quality control.
You’ll press seams, add final details like buttons or embellishments, conduct quality checks, and prepare for final packaging or delivery.
What are the stages of sewing?
You’ll navigate three main stages: pre-sewing preparation (selecting fabric, choosing patterns, cutting pieces), construction (stitching seams, adding details like zippers, darts), and finishing (pressing, hemming, final touches for professional results).
What do you do before you start sewing?
Think of a carpenter who never measures twice before cutting – you’ll waste expensive fabric just like wasted wood.
Before sewing, you must pre-wash fabric to prevent shrinkage, straighten the grain, iron out wrinkles, and carefully lay out your pattern pieces.
What is meant by sewing process?
The sewing process transforms cut fabric pieces into finished garments through systematic construction steps. You’ll stitch seams, attach closures, add facings, and complete finishing touches to create wearable clothing items.
What is the preparation of fabric before sewing?
You’ll need to pre-wash fabric to prevent shrinkage, iron out wrinkles for smooth cutting, and straighten the grain for accurate pattern alignment and professional results.
Conclusion
Mastering the pre sewing stage is like building a solid foundation for your dream home.
You’ve learned that understanding what’s pre sewing stage involves careful pattern selection, fabric preparation, and precise cutting techniques.
These preparatory steps aren’t just busy work—they’re your insurance policy against crooked seams and ill-fitting garments.
By investing time in proper preparation, you’ll discover that complex projects become surprisingly manageable, and your finished pieces will reflect the care you’ve put into every detail from the very beginning, making each project a true reflection of your dream.
- https://www.leverstyle.com/what-is-garment-processing-and-how-does-it-work/
- https://textilenotes.com/pre-production-processes-in-garments-manufacturing/
- https://successfulfashiondesigner.com/garment-production-process/
- https://makersrow.com/blog/7-stages-of-apparel-samples/
- https://www.seamwork.com/sewing-tutorials/how-to-sew-clothes-first-garment


