This site is supported by our readers. We may earn a commission, at no cost to you, if you purchase through links.

Start by lengthening or shortening patterns along designated adjustment lines—it’s like moving puzzle pieces without breaking the design. Next, blend between sizes when your measurements span different pattern sizes; trace one size for shoulders and smoothly shift to another for hips.
Finally, use the slash-and-spread technique to add width or the overlap method to remove it.
These basics handle everything from too-tight sleeves to short torsos without advanced pattern-making skills. The real game-changer isn’t learning complex alterations—it’s understanding which simple technique matches your specific fitting challenge and how fabric responds to these strategic cuts and adjustments, which can be a complex process, but with the right approach, it becomes more manageable and allows for precise control over the final product.
Table Of Contents
Key Takeaways
- Master three core techniques – Use lengthening/shortening along adjustment lines, blend between pattern sizes, and apply slash-and-spread or overlap methods to solve most fitting issues without advanced skills.
- Start with accurate measurements and proper size selection – Take precise body measurements over fitted undergarments and choose your pattern size based on your largest measurement area, not your ready-to-wear clothing size.
- Focus on key adjustment areas – Target bust adjustments (FBA/small bust), shoulder modifications, and hip/seat alterations since these foundational changes affect how your entire garment fits and hangs.
- Follow the correct alteration sequence – Make center adjustments first, then shoulders, armholes, bust, waist, and hips last to maintain proper garment proportions and avoid costly mistakes.
Fitting Principles Basics
You’ll achieve better-fitting garments by mastering three fundamental principles that form the foundation of successful pattern adjustments.
Start with accurate body measurements, choose the right pattern size using proper guidelines, and understand how ease affects your finished garment’s comfort and appearance.
Measuring Body Accurately
Measuring body measurements accurately lays the foundation for perfect pattern fit. You’ll need five key measurements: Height Measurement, Bust Measurement, Waist Measurement, Hip Measurement, and Back Width. These sewing measurements determine your correct pattern size.
- Take measurements over fitted undergarments without adding extra ease
- Use a flexible tape measure that lies flat against your body
- Record measurements on sewing size charts for future reference
Using a quality measuring tool guarantees accuracy. Precise measuring reduces fitting errors by up to 40%, making your clothing fit like it was custom-made.
Choosing Correct Pattern Size
With over 40% of fitting errors stemming from wrong pattern size selection, you’ll want to master this essential first step.
Compare your body measurements against the pattern’s size charts rather than your ready-to-wear clothing size.
| Measurement Area | Your Size | Pattern Size | Notes |
|---|---|---|---|
| Bust/Chest | ___ inches | Size ___ | Primary fitting point |
| Waist | ___ inches | Size ___ | Secondary consideration |
| Hips | ___ inches | Size ___ | Check for ease needs |
| Height | ___ inches | Petite/Regular/Tall | Affects proportions |
Choose your pattern size based on your largest measurement area, then blend between sizes if needed to ensure a proper fit, considering factors like ease needs and proportions.
Understanding Ease in Patterns
Through the lens of proper fitting, ease represents the breathing room between your body and the finished garment.
You’ll discover three types: fitting ease for comfort, design ease for style, and negative ease for stretch fabrics.
Standard ease measurements include 2.5 inches for bust, 1-2 inches for hips, and 0.5 inches for waist, though personal preference guides your final adjustments.
Understanding finished garment measurements helps determine total ease allowance.
- Too little ease transforms your favorite dress into an uncomfortable straightjacket
- Perfect ease lets you move freely while maintaining the garment’s intended silhouette
- Excessive ease creates unflattering baggy areas that swallow your figure
- Negative ease in knits hugs your curves without restricting movement
- Design ease adds intentional volume for dramatic sleeves or flowing skirts
Simple Pattern Adjustments
You’ll master simple pattern adjustments that transform any sewing pattern into a custom fit without complex alterations.
These three essential techniques—lengthening, shortening, blending sizes, and Nancy’s pivot-and-slide method—solve most fitting issues quickly and accurately.
They are designed to help you achieve a custom fit by making adjustments to existing patterns.
Lengthening and Shortening Patterns
Transform your patterns effortlessly by adjusting length where it matters most. Look for designated lengthening and shortening lines on multi-size patterns—these marks show exactly where to make height adjustments.
Simply cut along these lines, then overlap for shortening or spread apart for lengthening. Always maintain grainline adjustments to preserve fabric drape.
These style modifications guarantee proper proportion balance while keeping hemline variations looking natural and professional. Creating a test muslin helps to evaluate the fit before cutting the final fabric, ensuring proper adjustments are made, and accurate body measurements are vital for precise fit, which is crucial for achieving a professional look with proper proportion balance and natural hemline variations.
Blending Between Sizes
Your body’s unique dimensions rarely match one standard pattern size perfectly.
Your measurements rarely match standard pattern sizes – it’s time to embrace custom adjustments.
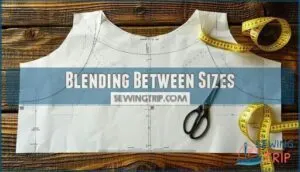
When you’re between sizes, pattern blending** creates smooth shifts across different measurements.
You’ll grade from one size to another gradually along seamlines, avoiding awkward jumps in fit.
Start by marking where each size change occurs, then draw curved lines connecting the different cutting lines.
This customized approach guarantees your garment hugs your curves naturally without pulling or gapping, giving you that made-to-measure look, with a result that is both smooth and flattering.
Nancy’s Pivot and Slide Methods
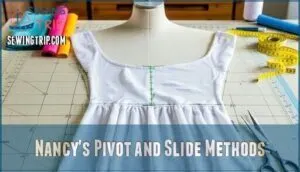
Why settle for time-consuming slash-and-spread when Nancy Zieman’s pivot and slide methods offer elegant pattern alterations? You’ll preserve your original pattern while making proportional adjustments through strategic pivot points.
Simply pivot outward to add width or inward to reduce it, then slide for length changes. This technique maintains seam alignment and prevents distorted bodice modifications.
Nancy’s approach reduces fitting errors by keeping grainlines intact during pattern adjustment. Discover resources for pivot and slide techniques online.
This technique maintains seam alignment and prevents distorted bodice modifications. Nancy’s approach reduces fitting errors by keeping grainlines intact during pattern adjustment.
Special Fitting Needs
When your body changes, your patterns need to change too.
Whether you’re expecting a baby, dealing with different bust sizes, or adjusting for unique shoulder shapes, these techniques help you create clothes that actually fit your real body instead of fighting against it. Unique shoulder shapes, these techniques help you create clothes that actually fit your real body instead of fighting against it.
Maternity Sewing Adjustments
Pattern adjustments for maternity sewing require strategic changes to accommodate belly growth and bust changes.
You’ll need comfortable fabrics with stretch and adjustable closures for postpartum fit.
Focus these key belly adjustments:
- Add 4-5 inches length to center front bodice using slash-and-spread technique
- Increase front width by 2-3.5 inches at waistline for growing bump
- Lower front hemline 2-5 inches to prevent visible lift as pregnancy progresses
Choose knits with 40% stretch for ideal ease and comfort throughout your journey.
Love Notions patterns offer customizable maternity options for expecting mothers.
Full Bust Adjustments
When you’re bigger up top, a Full Bust Adjustment FBA transforms any bodice pattern into a custom fit.
You’ll create more room through strategic pattern spread techniques while maintaining proper apex placement for natural volume distribution.
| FBA Method | Best For | Key Steps | Result |
|---|---|---|---|
| Dart Rotation | Princess seams | Pivot from original dart | Smooth curves |
| French Dart | Side bust fullness | Angle from side seam | Flattering silhouette |
| Two-Dart System | Large adjustments | Split bust dart | Better distribution |
| Armhole Method | Fitted sleeves | Expand at armhole | Comfortable movement |
These fitting techniques guarantee your bodice adjustments create the perfect foundation for any garment, ensuring a custom fit and natural volume distribution with proper apex placement.
Small Bust Adjustments
When dealing with smaller cup sizes, you’ll often face neckline gaping and loose armholes.
Small bust adjustments tackle these issues through strategic dart manipulation and pattern overlap techniques. Instead of traditional apex alterations, you’ll reduce fabric at the bust point by overlapping pattern pieces.
A key step involves calculating bust decrease for accurate adjustments. This creates better-fitting bodice adjustments without sacrificing style.
These sewing adjustments prevent that "borrowed from big sister" look while maintaining proper proportions throughout your garment, ensuring a more flattering fit.
Shoulder and Bicep Adjustments
Your shoulder line sets the stage for everything else—get it wrong, and your garment becomes a baggy mess.
Square shoulders need extended back shoulder lines, while forward shoulders require angled front adjustments. Bicep ease prevents that dreaded armhole gape when you reach for something.
- Narrow shoulder adjustment: Move shoulder seam inward up to 1.5cm for better fit
- Broad shoulder adjustment: Spread pattern at shoulder point using 1cm increments
- Forward shoulder fix: Angle down front shoulder line and lower neckline slightly
- Square shoulders solution: Extend back shoulder line and blend curves smoothly
- Bicep ease addition: Slash sleeve lengthwise and spread 1-2cm for comfortable movement
Pants and Skirt Fitting
Pants and skirts can be the trickiest garments to fit, but they don’t have to frustrate you anymore.
With the right adjustment techniques, you’ll transform ill-fitting patterns into clothes that flatter your unique shape and feel comfortable all day long, which is a complete solution to common fitting issues.
Crotch Depth and Leg Length
Getting your pants fitting right starts with measuring crotch depth accurately.
Sit on a flat surface and measure from your waistline down to the chair – that’s your personal rise measurement.
For inseam length, measure from your inner thigh to where you want the hemline.
When making rise adjustments, add or subtract length at the crotch curve area. Remember, proper leg shape depends on getting these foundational measurements spot-on before moving to hemming techniques.
Thigh and Seat Adjustments
After getting your crotch depth and leg length sorted, you’ll tackle areas that often cause the most fitting headaches.
Bulging thighs need extra room through slash and spread techniques at the thigh area.
For flat derriere adjustments, overlap the pattern at the hip section to remove excess fabric.
Knock knees require adding width at the inside leg seam, while seat depth modifications involve adjusting the back crotch curve for comfort.
Wide or Narrow Hip Adjustments
Your hips might be wider or narrower than the pattern’s standard measurements, creating pulling or excess fabric at the sides.
Hip Shape Analysis starts with measuring your fullest hip point, then comparing it to the pattern’s finished measurements.
For wide hips, you’ll need Side Seam Adjustments by slashing the pattern vertically through the hipline and spreading it evenly.
Narrow hips require overlapping the same area. These Pattern Drafting Hips techniques work for both pants and Skirt Pattern Adjustments, ensuring your garments hang properly without strain.
Protruding Derriere Adjustments
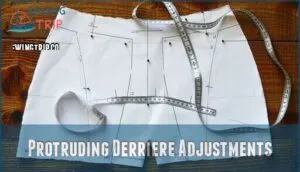
When dealing with protruding derriere fitting challenges, you’ll need specific alteration techniques to achieve proper hip adjustments.
Pattern spreading becomes your go-to method for creating the derriere contour your body requires. Common issues can include horizontal wrinkles indicating excess fabric.
- Add 1.5-3cm to the back crotch curve using slash-and-spread
- Extend back rise by 2-4cm for moderate cases
- Redraw curves smoothly after pants pattern modifications
Mastering Pattern Alteration
You’ve got the basic techniques down, but now it’s time to master the art of pattern alteration that’ll save you hours of frustration and countless fitting disasters.
These proven methods will transform how you approach any sewing pattern, giving you the confidence to tackle adjustments like a pro.
Slash and Spread Technique
Through careful slash and spread pattern adjustments, you’ll master complex alterations while maintaining design preservation.
This technique involves cutting along the grainline alignment and spreading sections for fullness adjustment or overlapping for reductions.
Perfect for sewing pattern modifications requiring significant changes, slash and spread guarantees pattern integrity remains intact.
These pattern alteration techniques work exceptionally well for bust, waist, and hip adjustments exceeding two inches.
You can find resources for purchasing pattern tools online.
Grading Up or Down Sizes
Through careful grading, you’ll transform base patterns into multiple sizes using proportional increases at strategic grade points.
This technique maintains design elements while achieving size scalability.
Start with your middle size as the foundation, then apply specific measurements to bust, waist, and hip areas.
Digital tools reduce errors, but manual pattern adjustments work too.
Remember: successful pattern customization requires consistent increments across all pieces.
Using software driven algorithms helps guarantee precise measurement and proportionality across sizes, achieving size scalability with precise measurement and maintaining design elements through proportional increases.
Maintaining Garment Proportions
When you’re changing pattern sizes, proportional grading keeps your garment looking like the original design.
Nancy’s pivot and slide methods maintain proper body proportions better than manual grading alone.
Digital grading processes preserve style details automatically, while pattern adjustment techniques require careful attention to design elements.
Keep bust, waist, and hip ratios consistent during clothing adjustments for professional results.
Reducing Risk of Misaligned Darts
When you’re adjusting patterns, misaligned darts can ruin your hard work.
Pivot-slide order prevents these disasters better than traditional grading accuracy methods.
Proper dart placement during pattern adjustment techniques saves hours of frustration.
- Mark bust points before moving any pattern pieces
- Follow pivot-slide order: center, shoulder, armhole, bust, waist
- Check seam alignment after each dart manipulation step
- True all pattern lines before cutting fabric
- Test dart creation on practice fabric first
Pattern truing after adjustments catches fit issues before they become costly mistakes, ensuring a better pattern adjustment and dart manipulation process.
Frequently Asked Questions (FAQs)
What are the two basic pattern manipulation techniques?
You’ll master pattern fitting using two key techniques: slash and spread and pivot and slide.
Slash and spread involves cutting patterns and spreading or overlapping pieces for size changes.
Pivot and slide maintains proportions by sliding patterns parallel for length adjustments and pivoting from fixed points for width changes.
How to downsize a pattern for beginners?
While downsizing seems tricky, it’s actually straightforward.
Use the fold-and-overlap method: fold out excess fullness along pattern lines, then overlap sections to reduce dimensions.
Always adjust all related pattern pieces together for proper fit.
What is the order of pattern alterations?
You’ll want to follow this specific sequence: center adjustments first, then shoulder modifications, followed by armhole changes, bust alterations, waist adjustments, and finally hip modifications for the best results.
How do I adjust patterns for asymmetrical figures?
Like a tailor working with fabric that drapes differently on each side, you’ll measure and adjust each pattern half separately.
Create individual adjustments for your larger side, then blend the differences at center seams for balanced fit.
What tools are essential for pattern alterations?
You’ll need a ruler, pencils, tracing paper, scissors, and tape for pattern adjustments.
A French curve helps redraw smooth lines after changes.
These basic tools let you tackle most fitting modifications confidently.
How do I fix twisted side seams?
Twisted side seams usually signal fitting issues at the bust, waist, or hip.
Check if you need bust adjustments, waist grading, or hip modifications.
Re-examine your measurements and pattern size selection first.
Can I combine different pattern sizes effectively?
Commercial pattern companies grade up and down from middle-sized base patterns to cover XS through XL sizes effectively.
You can blend between sizes using pivot and slide techniques, which maintain garment proportions better than manual grading for up to two size differences.
How do I adjust necklines for comfort?
Adjust necklines by lowering the front slightly for comfort, especially if you have square shoulders.
Test changes on muslin first, then gradually trim the actual pattern. Small adjustments make big differences.
Conclusion
Perfecting your wardrobe fits like solving a puzzle—you need the right pieces in the right places.
These easy pattern adjustment techniques transform challenging alterations into manageable tasks.
You’ve learned to lengthen patterns along adjustment lines, blend between sizes smoothly, and master slash-and-spread methods.
Whether you’re adjusting sleeves, torsos, or complex curves, you now have practical tools for any fitting challenge.
Practice these fundamentals consistently, and you’ll achieve professional-quality results every time.
- https://www.youtube.com/watch?v=AvCXMmPPlEI
- https://uark.pressbooks.pub/teachingappareldesign/chapter/altering-patterns-teaching-apparel-production/
- https://mellysews.com/make-sewing-pattern-bigger-smaller/
- https://inthefolds.com/q-a-series/2024/pattern-grading-slash-and-spread-method
- https://so-sew-easy.com/how-to-make-a-full-bust-adjustment/


