This site is supported by our readers. We may earn a commission, at no cost to you, if you purchase through links.
You’ll conquer four key methods: invisible zippers for seamless finishes, centered zippers for classic looks, exposed zippers for edgy designs, and lapped zippers for custom garments.
Start with the right zipper foot—it’s your secret weapon for straight, even stitching. Don’t skip the basting step; it prevents wonky alignment that’ll haunt your finished piece.
Practice on scraps first because even pros mess up their first attempts. Each technique has its own personality and purpose, making zipper installation an art rather than a chore.
The tricks that separate beginners from experts lie in the details.
Table Of Contents
Key Takeaways
- Master your zipper foot first – You’ll get straight, even stitching close to zipper teeth without catching them, which separates amateur work from professional results.
- Always baste before final stitching – You’ll prevent wonky alignment and puckering that will ruin your finished piece, since this temporary step saves you from costly mistakes.
- Practice on fabric scraps initially – You’ll build muscle memory and confidence with each zipper type’s unique personality before tackling your actual project.
- Match zipper type to project needs – You’ll choose invisible zippers for seamless formal wear, centered for classic looks, exposed for edgy designs, and lapped for custom garments based on your specific requirements.
Zipper Types Explained
Understanding which zipper type to use can transform your sewing from amateur to professional-looking in no time.
You’ll discover that invisible, centered, exposed, and lapped zippers each serve specific purposes, and choosing the right one makes installation surprisingly straightforward.
This approach will help you achieve a professional-looking result.
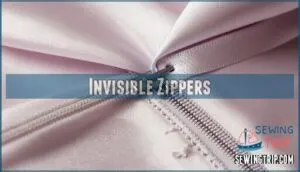
Invisible Zippers
You’ll discover invisible zipper installation creates seamless, professional finishes in formal garments and luxe decor.
These sneaky fasteners hide completely within seams, requiring specialized invisible zipper sewing techniques and precise zipper alignment.
Master invisibility with precise alignment—your secret to professional seams.
Choose lightweight fabrics for easier handling. Practice zipper sewing tips on scraps first—your fabric choice dramatically affects success.
Master this sewing technique for polished results.
Centered Zippers
Centered zippers offer the perfect stepping stone from invisible techniques.
You’ll love their straightforward approach – the zipper sits right in the middle of your seam, creating clean, symmetrical lines.
These beginner-friendly fasteners shine in cushions, bags, and casual garments.
Focus on zipper alignment and fabric choice for professional results.
Your stitch control determines success, so practice makes perfect, and mastering this skill is key to achieving professional results.
Exposed Zippers
Exposed zippers break free from traditional hiding spots, making bold fashion statements in your projects.
These zipper styles showcase vibrant color options and unique texture choices, turning functional elements into design features.
Smart zipper placement transforms ordinary garments into conversation pieces.
Choose contrasting fabric selection to make your exposed zippers pop, or match them for subtle sophistication.
This zipper installation guide makes installing zippers easier than you’d expect, proving that sewing zipper tutorials don’t need intimidating techniques, and by following these zipper sewing tips, you can achieve stunning results, and master them for a great outcome.
Lapped Zippers
Professional tailoring meets your fingertips with lapped zipper installation.
You’ll need a minimum 5/8″ seam allowance for proper zipper alignment.
Press one seam allowance outward, keeping the other flat against your fabric.
Stitch the zipper tape using a basting stitch for secure attachment.
This professional finish elevates handmade garments beyond basic sewing techniques.
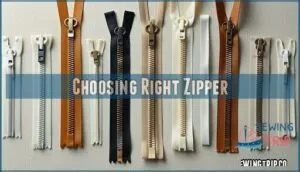
Choosing Right Zipper
Selecting the right zipper for your project can make or break your sewing success—it’s like choosing the perfect partner for a dance.
You’ll want to match your zipper type to your fabric weight and project needs, considering factors like flexibility, durability, and whether you need the zipper to blend in or stand out as a design feature, which can greatly impact your overall success.
Nylon Coil Zippers
You’ll love nylon coil zippers for their game-changing flexibility and durability.
**Nylon coil zippers bend beautifully around curves without breaking—your projects deserve this flexible upgrade.
These spiral-constructed champions bend around curves without puckering, making them your go-to choice for pillows, bags, and garments that need smooth operation.
When selecting zippers, consider the nylon coil options for the best results.
- Flexible Zippers bend easily – Coil teeth curve around corners without breaking or jamming
- Self-healing design – Misaligned teeth zip back together without permanent damage
- Zipper Care is simple – Withstands frequent washing and dry cleaning cycles
- Smooth installation – Thin tape allows close topstitching for professional finishes
- Zipper Maintenance requires minimal effort – Just occasional wax application keeps them running smoothly
Metal Teeth Zippers
Metal teeth zippers are your go-to choice when you need serious zipper durability. These sturdy workhorses feature interlocking metal teeth that can handle heavy-duty use without breaking a sweat.
Perfect for jeans, jackets, and bags, metal zippers resist wear better than plastic alternatives.
Check teeth alignment before zipper installation – crooked teeth spell trouble. Apply rust prevention treatments to maintain smooth operation and extend lifespan, ensuring your metal zippers remain in good condition with heavy-duty use and proper metal teeth maintenance.
Plastic Molded Zippers
Button-like plastic teeth make molded zippers perfect for children’s clothing and casual projects.
These sturdy fasteners won’t snag delicate fabrics and handle frequent washing cycles without losing their grip.
These zippers are easy to install by hand, and a prick stitch works well for invisible stitches.
- Beginner-friendly: Forgiving installation process with visible stitching lines
- Durable construction: Plastic teeth resist breaking under normal use and washing
- Versatile applications: Ideal for kids’ clothes, sportswear, and lightweight bags
Sewing Zipper Techniques
You’ll master zipper installation once you understand these three core techniques that form the foundation of professional sewing.
These methods work for nearly every zipper project, from simple pouches to complex garments.
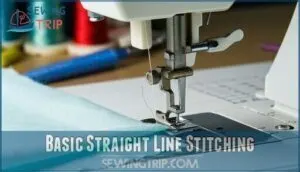
Basic Straight Line Stitching
Now that you’ve selected your zipper, it’s time to master the foundation of all sewing tutorials for zipper installation: basic straight line stitching.
Your sewing machine becomes your best friend here. Set your stitch length to 2.5-3mm and adjust thread tension to medium.
Use your fabric guide to maintain consistent seams with proper seam allowance. Practice stitching parallel lines on scrap fabric first—this builds confidence before tackling actual zipper sewing projects, which is essential for mastering the technique and achieving proper seam allowance.
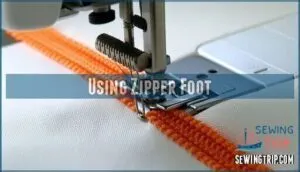
Using Zipper Foot
Switch to your zipper foot and you’ll gain precision that makes installation feel effortless.
Position your needle to match the zipper placement—left or right side—while adjusting tension settings for smooth fabric feeding.
This specialized sewing machine foot lets you stitch impossibly close to zipper teeth without catching them, perfect for curved zippers and tricky spots where regular feet fail miserably.
These feet are essential for professional zipper sewing, making them a crucial tool for achieving professional results with smooth fabric feeding and tricky spots.
Sewing Clips and Double Sided Tape
Beyond the zipper foot, you’ll discover that sewing clips vs pins offer superior control for zipper installation.
Clips won’t create holes in delicate fabrics, while double-sided tape alternatives provide temporary adhesion without shifting.
These tools transform tricky curved applications into manageable tasks.
- Clip placement: Position clips every 2-3 inches along zipper tape for securing layers without fabric damage
- Tape selection: Choose removable double-sided tape that won’t leave residue on your fabric compatibility
- Application technique: Apply tape to zipper tape, not fabric, for easier removal after stitching
- Removal timing: Remove clips and tape immediately after completing your zipper installation seam
Installing Invisible Zippers
Invisible zippers might seem tricky, but they’re actually easier to install than you think once you know the secret.
You’ll create professional-looking seams that hide the zipper completely, making your garments look store-bought instead of homemade.
Specialized Techniques
Installing invisible zippers requires mastering specialized sewing techniques for zipper installation that differ from standard methods.
You’ll use an invisible zipper foot or create precise stitching lines close to the coil.
Practice zipper installation tips like pressing seams flat before positioning, these zipper sewing techniques demand patience—think of it as threading a needle in the dark until muscle memory kicks in.
Tools and Supplies Needed
Now you’ll gather the right gear to tackle invisible zippers like a pro.
Smart fabric choice and thread type matching your project weight prevents headaches later.
- Zipper foot – Essential for stitching close to zipper teeth without hitting them
- Sewing clips – Hold slippery fabrics better than pins, won’t snag delicate materials
- Seam ripper – Your safety net for fixing mistakes without damaging fabric
- Sharp sewing scissors – Clean cuts prevent fraying and guarantee precise zipper placement
- Quality thread – Match your fabric weight for strong, invisible seams on your sewing machine
For specialized projects, consider exploring options for continuous zipper chain to meet specific length requirements.
Step by Step Instructions
Patience is your best friend when tackling invisible zippers.
Start by pressing seam allowances open, then position your zipper face-down along the seamline.
Use basting stitches to temporarily secure the zipper tape before switching to your zipper foot.
Keep fabric preparation neat—proper zipper length prevents bunching.
These sewing tutorials for zipper installation make zipper sewing manageable with step-by-step guidance.
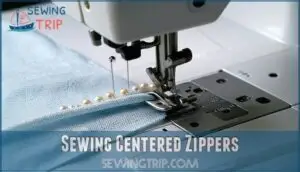
Sewing Centered Zippers
Centered zippers are the perfect starting point for beginners because they’re forgiving and create a clean, professional look down the center of your garment or project.
You’ll master this technique quickly with our two proven methods that work for everything from dresses to cushion covers, and create a professional look.
Method 1 – Simple Centered Zipper
Here’s Method 1 for sewing a simple centered zipper—perfect for beginners who want control without complexity.
Place your zipper face-down on the fabric, ensuring perfect zipper alignment with your seam allowance.
Use a medium stitch length and your zipper foot for precise stitching. Choose stable, medium-weight fabric for best results.
Press the seam flat after stitching—proper pressing techniques make all the difference in professional-looking centered zippers.
Method 2 – Advanced Centered Zipper
Now you’ve mastered the basics, let’s tackle advanced centered zipper techniques that’ll make your work look professionally finished.
This method involves precise stitching along marked guidelines and using interfacing for fabric stability.
You’ll create perfectly aligned seams by measuring your zipper length carefully and marking exact placement points.
The key difference? You’re creating professional finishes through advanced alignment techniques that prevent puckering and guarantee smooth zipper operation every single time.
Tips and Tricks
Now that you’ve mastered the advanced method, let’s talk zipper hacks that’ll save your sanity.
Start with accurate measuring – a zipper that’s too short creates heartache, while too long wastes money on bulk buying.
Use fabric stabilizing techniques like interfacing to prevent wavy disasters.
Apply zipper lubrication (beeswax works wonders) for smooth operation.
These sewing tutorials for zipper installation emphasize pattern adjustments and proper preparation – your future self will thank you for following these zipper sewing tips religiously.
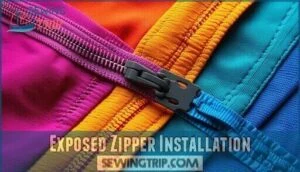
Exposed Zipper Installation
You’ll love how exposed zippers turn your projects into style statements while being surprisingly easy to install.
Choose bold colors and textures that complement your fabric, then sew them just like centered zippers with the decorative side facing up.
Creative Uses of Exposed Zippers
Beyond basic centered techniques, exposed zippers reveal creative possibilities.
Transform your projects with these design approaches:
- Color Accents – Use neon or metallic zippers as focal points on neutral fabrics
- Texture Contrast – Pair smooth coil zippers with textured materials for visual interest
- Zipper Jewelry – Create bracelets and accessories using exposed zipper teeth
- Functional Art – Arrange multiple zippers in geometric patterns on bags
- Unique Closures – Install diagonal or curved exposed zippers for asymmetrical designs
These decorative zippers add personality while maintaining functionality in your zipper projects.
Color and Texture Options
Now you can play with exciting zipper color matching and fabric texture pairing combinations that’ll make your projects pop!
Choose decorative zipper tape in bold hues or metallic finishes. Contrasting zipper teeth create stunning focal points against neutral fabrics.
Unique zipper pulls add personality to your sewing fabric creations.
| Color Choice | Emotional Impact |
|---|---|
| Bright Red | Creates energy and excitement |
| Deep Navy | Conveys sophistication and trust |
| Metallic Gold | Adds luxury and glamour |
| Forest Green | Brings calm and natural vibes |
| Hot Pink | Sparks joy and playfulness |
Sewing Exposed Zippers
Now that you’ve chosen your colors and textures, it’s time to actually sew these showstoppers. Installing exposed zippers is as easy as centered zippers, but you’ll use visible stitching to your advantage. Position your zipper face-up on your fabric and stitch slowly with your zipper foot for perfect results.
- Use contractive thread colors – Match or boldly contrast with your decorative zippers for intentional design impact
- Topstitch both sides evenly – Keep stitching lines parallel and consistent distance from zipper teeth for professional finish
- Press before stitching – Iron fabric flat to prevent puckering when sewing exposed zipper installations
- Practice zipper foot positioning – Test stitch placement on scraps before committing to your final beginner projects
- Consider texture combinations – Pair smooth zippers with textured fabrics or vice versa for visual interest in zipper sewing
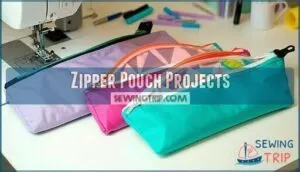
Zipper Pouch Projects
You’ll love creating these versatile zipper pouches that let you practice your new zipper skills while making something useful.
These three projects—curved, triangle, and clear vinyl pouches—start simple and build your confidence with each design.
Curved Zipper Pouch
Now that you’ve tackled exposed zippers, it’s time to create something functional and beautiful. Curved zipper pouches offer endless possibilities with sizing variations from small coin purses to large makeup bags.
You’ll love how lining options and hardware choices let you customize each project perfectly. Achieving smooth results often requires clipping concave curves for a flat seam.
| Feature | Small Pouch | Medium Pouch | Large Pouch |
|---|---|---|---|
| Size | 4" x 3" | 6" x 4" | 8" x 5" |
| Best Use | Coins, pills | Makeup basics | Travel toiletries |
| Zipper Length | 6 inches | 8 inches | 10 inches |
| Lining Options | Cotton, silk | Canvas, vinyl | Waterproof fabric |
| Closure Styles | Standard pull | Decorative charm | Heavy-duty slider |
Triangle Zipper Pouch
Triangle zipper pouches offer incredible versatility in three convenient pouch sizes – small, medium, and large – making them perfect for any project.
Your fabric choices can range from cotton to canvas, while gifting ideas include makeup bags or travel organizers. These sewing tutorials for zipper installation make accessory organization simple with your zipper foot.
- Choose your pouch size based on intended use – small for coins, medium for cosmetics, large for tablets
- Select coordinating fabrics that complement your zipper pouch design and match the recipient’s style preferences
- Plan pattern customization by adjusting dimensions or adding pockets to create unique zipper pouch tutorials
- Master zipper sewing techniques using your zipper foot for professional-looking seams and perfect zipper installation every time
Clear Vinyl Zipper Pouch
Clear vinyl pouches shine at sporting events where transparent bags are mandatory.
You’ll love how these waterproof wonders protect your essentials while meeting venue requirements.
When vinyl sourcing, choose heavy-duty material for durability.
Custom sizes work perfectly for phones, tickets, and snacks.
For fun projects, try confetti filling before sealing.
These versatile zipper pouches master both function and style effortlessly.
Troubleshooting Zipper Issues
Even experienced sewers run into zipper hiccups that can make you want to throw your project across the room.
Don’t worry—most zipper problems have simple fixes that’ll get you back to sewing smoothly in no time.
Misaligned Teeth
Three key zipper troubleshooting techniques will save your project when teeth won’t align.
First, try re-insertion methods by completely opening the zipper and slowly working the problematic side through the slider.
Check tape alignment by matching edges to seam lines—uneven lengths cause persistent issues.
If problems persist, unpicking stitches around zipper anatomy allows proper repositioning during zipper repair sewing tutorials.
Puckering and Stiff Zippers
When puckering mars your zipper installation, loosen your needle tension and practice slow stitching for smoother results.
Stiff zippers benefit from a gentle beeswax lubricant application along the teeth.
Use fabric stabilizers on lightweight materials to prevent distortion during sewing, and after installation, proper zipper pressing with a press cloth eliminates wrinkles and guarantees professional-looking results in your sewing tutorials.
Solutions and Fixes
When you’re facing sticking zippers, wavy zippers, or other common problems, don’t panic—you’ve got this! These zipper troubleshooting issues happen to everyone, but smart zipper sewing solutions can save your project.
- Sticking Zippers & Misaligned Teeth: Apply beeswax lubricant to nylon coil teeth, then gently work the zipper up and down until it moves smoothly.
- Wavy Zippers: Use interfacing between zipper and fabric, or try wax paper as a stabilizer during sewing.
- Zipper Replacement & Shorten Zippers: Cut excess tape after measuring, secure ends with fabric tabs, and follow zipper sewing best practices for professional results.
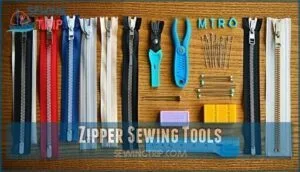
Zipper Sewing Tools
You’ll need the right tools to make zipper installation smooth and professional-looking.
While you can sew zippers with basic supplies, having the proper equipment saves time and prevents frustrating mistakes that’ll have you muttering under your breath, which is why using the right tools is crucial for a professional-looking finish.
Essential Supplies
Now that you’ve fixed common problems, you’ll need the right zipper sewing supplies to tackle any project.
Smart fabric choice and proper thread matching set you up for success from the start.
| Tool | Purpose | Pro Tip |
|---|---|---|
| Zipper foot | Stitches close to teeth | Adjustable for left/right positioning |
| Sharp needles | Penetrates fabric cleanly | Size 11-14 works for most projects |
| Quality thread | Matches zipper tape color | Polyester thread won’t break easily |
| Interfacing types | Stabilizes stretchy fabrics | Fusible works best for beginners |
| Fabric scissors | Cuts zipper tape precisely | Keep separate from paper scissors |
These sewing machine accessories transform tricky installations into smooth sailing.
A specialized foot allows for precise seam placement.
Optional Tools and Accessories
While basic supplies get you started, specialized sewing accessories can make your zipper projects shine.
Seam rippers help fix mistakes quickly, while beeswax lubricant smooths stubborn zippers.
Zipper guides keep everything aligned perfectly, and a point turner creates crisp corners.
Awls mark precise placement points.
These zipper sewing tools aren’t mandatory, but they’ll elevate your sewing game substantially.
For ideal results, consider using adjustable zipper feet for various projects to achieve professional-looking results.
Tips for Choosing Right Tools
When choosing sewing tools for zipper installation, prioritize a quality zipper foot over fancy gadgets.
Match your needle size to fabric weight—size 14 works for most projects. Select polyester thread for durability and choose fabric stabilizer when working with stretchy materials.
A reliable measuring tape guarantees accurate zipper placement, making your sewing tutorials for zipper installation successful.
Advanced Zipper Techniques
You’ve mastered the basics—now it’s time to tackle advanced zipper techniques that’ll make your projects look store-bought.
These professional methods include creating inset panels, adding welt pockets, and replacing worn-out pulls to give your garments that polished finish.
Sewing Inset Zipper Panel
Once you’ve mastered the tools, creating an inset zipper panel elevates your sewing techniques for zipper installation.
This zipper application transforms ordinary projects into professional-looking pieces. Start with fabric choice – medium-weight cotton or canvas provides ideal panel stabilization.
Cut your fabric pieces with extra seam allowances for design variations. Focus on inset shaping by marking precise placement lines before stitching.
Proper seam finishing techniques, such as a serger finish, prevent fraying and add durability. Apply proper seam finishing techniques to prevent fraying, ensuring your inset zipper panel maintains clean edges throughout the construction process.
Making Welt Zipper Pocket
Welt zipper pockets elevate your sewing game with professional results.
Start with nylon coil zippers for flexibility. Mark pocket dimensions 1 inch longer than zipper teeth. Apply interfacing to prevent stretching.
Cut precise rectangular opening through garment fabric. Position zipper face-down behind opening, securing with double-sided tape.
Stitch around opening using zipper foot. Attach pocket bag rectangles to upper and lower seams, creating secure interior storage for finished welt construction.
Replacing Zipper Pulls and Sliders
Broken zipper pulls don’t mean tossing your favorite jacket.
You’ll find countless pull types online – from basic plastic to fancy metal designs.
Slider removal takes gentle pliers and patience; wiggle the old slider off carefully.
Installation reverses this process, ensuring matching sliders fit your zipper teeth perfectly.
Keep repair kits handy for quick zipper pull replacement emergencies.
Frequently Asked Questions (FAQs)
How to sew a zipper step by step for beginners?
According to sewing tutorials, 80% of beginners find success with centered zippers. Start by pinning your zipper face-down on fabric, then stitch using a zipper foot for clean, professional results.
What’s the best stitch for sewing zippers?
You’ll want to use a straight stitch for zipper installation.
Set your machine to a standard straight stitch with medium tension.
This gives you clean, secure seams that won’t pucker or distort your zipper tape.
What are common zipper sewing mistakes?
You’ll hit snags when you don’t practice first—misaligned teeth, puckering fabric, and stiff pulls plague beginners. Use interfacing, sew slowly, and match your zipper size perfectly.
How to assemble a zipper?
Install your zipper by aligning tape edges with seam lines, pinning securely, and stitching close to teeth using a zipper foot. Test-fit before final stitching to guarantee smooth operation.
How much zipper tape allowance needed for seams?
You’ll need a minimum 5/8″ seam allowance for lapped zippers, though standard seam allowances work for centered and invisible installations. Always check your pattern’s specific requirements first.
Can you shorten metal tooth zippers safely?
Yes, you can shorten metal tooth zippers, but it’s trickier than nylon coil zippers.
Cut the excess tape below your desired length, then secure the cut end with heavy-duty thread or small metal stops to prevent the slider from falling off.
What thread weight works best for zipper installation?
Like finding the sweet spot on a guitar string, you’ll want all-purpose polyester thread in weight 40-50 for most zippers.
It’s strong enough to handle stress while gliding smoothly through fabric layers.
How to prevent zipper tape from fraying edges?
Apply clear nail polish or fray check solution to cut zipper tape edges. You can also fold raw edges under before sewing, or use pinking shears to minimize fraying naturally.
Should you backstitch when sewing zipper ends?
Picture those final zipper stitches like anchoring a boat—you’ll want that security.
Absolutely backstitch at zipper ends to lock your stitches in place.
Those stress points take the most abuse when you’re zipping and unzipping constantly.
Conclusion
Perfect zippers aren’t born—they’re crafted through practice and patience.
You’ve now discovered the treasure chest of professional zipper installation techniques that’ll transform your sewing projects from homemade to haute couture.
These sewing tutorials for zipper installation will become your trusty roadmap whether you’re tackling invisible zippers on formal dresses or exposed zippers on trendy jackets.
Remember, every expert started as a beginner who refused to quit.
Grab your zipper foot and start stitching your way to mastery.

