This site is supported by our readers. We may earn a commission, at no cost to you, if you purchase through links.
 Master the art of zipper installation with ease and precision.
Whether you’re a seasoned sewer or just starting out, you’ll discover that you don’t necessarily need a zipper foot to sew a zipper.
This guide will equip you with essential tips and alternative techniques to achieve flawless zipper insertion, giving you the control and confidence to tackle any project.
Embrace the challenge and elevate your sewing skills to new heights.
Table Of Contents
- Key Takeaways
- Zipper Foot Overview
- Types of Zipper Feet
- Zipper Foot Options
- Invisible Zipper Insertion With Regular Zipper Foot
- Invisible Zipper Insertion With Invisible Zipper Foot
- Laying the Second Half of the Zipper
- Troubleshooting and Tips
- Can It Be Done?
- Concerns
- Advantages
- Frequently Asked Questions (FAQs)
- Conclusion
Key Takeaways
- A zipper foot is essential for sewing close to the zipper teeth, ensuring a neat finish.
- While a zipper foot is recommended, alternatives like a narrow foot or hand sewing can be used for zipper installation.
- Hand basting before sewing can help maintain control and keep the zipper in place.
- Adjusting thread tension and avoiding sewing over zipper teeth are important to prevent puckering and ensure the zipper functions properly.
Zipper Foot Overview
Alright, let’s dive into the world of zippers and the trusty zipper foot. Think of your zipper foot as the unsung hero of your sewing kit. It’s the secret agent that sneaks up right next to those zipper teeth, giving you that crisp, clean finish that screams I know what I’m doing! Whether you’re tackling a nylon coil or an invisible zipper, the right zipper foot can make or break your project.
Now, you might be wondering if you can wing it with a regular foot. Sure, you could, but why settle for good enough when you can have greatness? The regular foot has its limitations, like not letting you get cozy enough with the zipper teeth, which can lead to a less-than-professional look.
On the flip side, the invisible zipper foot is like having a VIP pass to the perfect zipper installation. It lets you stitch so close to those teeth, they’re practically invisible, giving your garment that sleek, store-bought finish.
So, when you’re standing in front of that selection of zipper feet, scratching your head, remember this guide. You want to consider the zipper foot width analysis, the benefits of an invisible zipper foot, and the alternatives available.
Choose wisely, and you’ll be zipping through your projects with confidence and style.
Types of Zipper Feet
When you’re gearing up to tackle a zipper installation, knowing your zipper foot options can make a world of difference.
- Regular zipper foot: This buddy often comes standard with your sewing machine. It’s a trusty sidekick for sewing close to the zipper teeth, but it can be a bit finicky since you need to iron and pin the zipper teeth to get things just right.
- Invisible zipper foot: If you’re aiming for that sleek, where’s the zipper? look, this is your go-to. It lets you stitch super close to the zipper teeth without any special prep work.
- Blind stitch foot: Not specifically for zippers, but it’s a champ at giving you that top-notch, precise topstitching that can elevate your project.
Zipper Foot Options
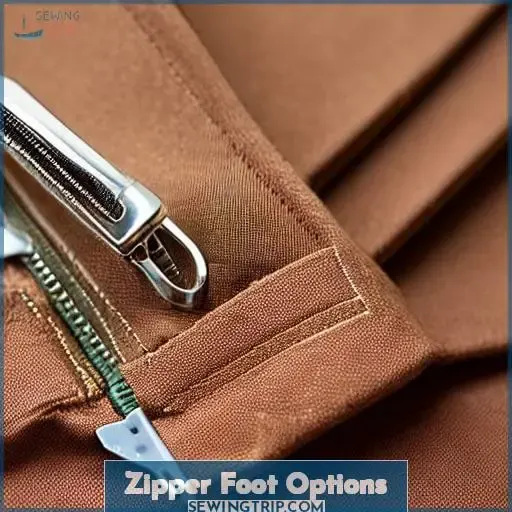
When it comes to sewing zippers, you’ve got options even if you don’t have a zipper foot. Sure, a zipper foot can make the job easier, allowing you to stitch close to the teeth with precision, but don’t let its absence stop you.
You can use a narrow foot to achieve a similar result, although you might end up with a wider seam allowance. If you’re feeling adventurous, hand sewing your zipper is a tried-and-true method that offers control and a personal touch to your project.
Just remember, safety first—keep those fingers clear of the needle, especially when using a regular foot. And if you’re not up for the challenge, there’s no shame in seeking out zipper foot alternatives or even a different machine that comes with one.
Whether you’re a seasoned pro or just starting out, these zipper tips can help you install your zipper with confidence and maybe even a bit of flair.
Invisible Zipper Insertion With Regular Zipper Foot
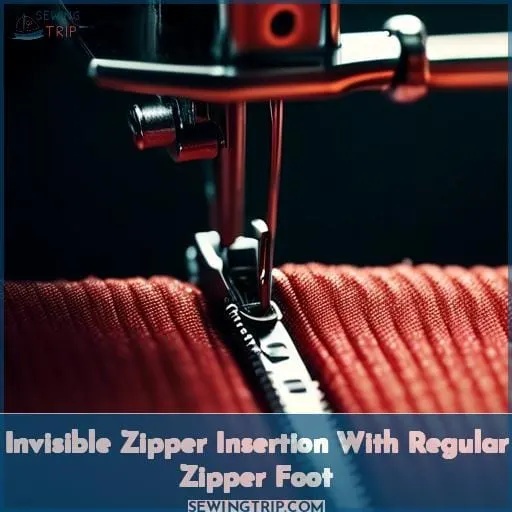
When inserting an invisible zipper using a regular zipper foot, you’re in for a bit of a challenge, but it’s nothing you can’t handle with a bit of know-how and some elbow grease.
- Iron the Zipper Teeth Open: Before you start, press the zipper teeth flat. This will make it easier to sew close to the teeth without catching them with your stitches.
- Align and Pin: Place the zipper tape edge right along the fabric edge, with the teeth facing the fabric. Pin it down, ensuring the teeth stay flat and out of the way.
- Sew with Precision: Adjust your needle position so that it’s as close to the zipper teeth as possible without actually sewing over them. Use the edge of the zipper foot as a guide to keep your stitching straight.
And if you’re feeling like the regular foot is just too bulky, consider hand basting the fabric to the zipper tape first. It’s like giving your fabric a little pep talk before the main event. This way, you maintain good thread tension and avoid any safety issues that might come from wrestling with the zipper teeth.
So, while you mightn’t have the narrowest foot designed for this job, with a bit of care and some creative maneuvering, you’ll have that invisible zipper looking as sly as a secret agent in no time.
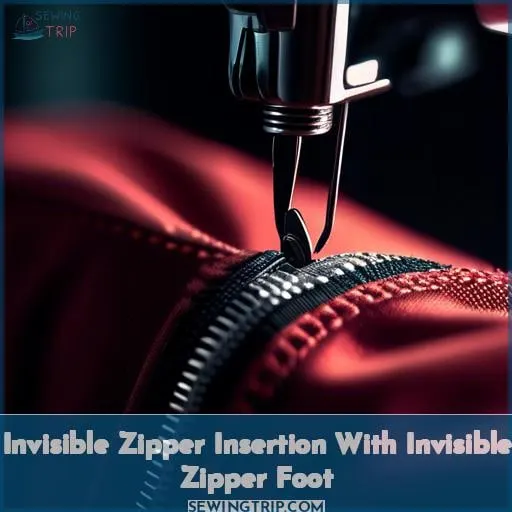
Invisible Zipper Insertion With Invisible Zipper Foot
When installing an invisible zipper, using an invisible zipper foot can make the process smoother and give you that professional touch. Here’s how to nail it: First, align the zipper with the fabric’s edge, ensuring the right sides are together.
The invisible zipper foot’s grooves are your best friends here—they’ll cradle the zipper teeth, keeping them out of the way so you can stitch close to the edge without a hitch. Remember to adjust your tension settings and foot pressure to suit your fabric selection, as these can impact the final look.
Start at the bottom of the zipper and work your way up, letting the foot guide you. It’s like having a co-pilot—you focus on the driving, and it handles the navigation. If you hit a snag near the zipper pull, don’t panic. Just lift the foot, slide the pull down, and carry on.
It’s a bit like a pit stop in a race—quick, necessary, and gets you back on track fast.
Keep an eye on the zipper length too. If it’s too long, you can always shorten it before you start. And don’t forget, even without a zipper foot, you can still install a zipper; it just takes a bit more finesse.
So, whether you’re a seasoned pro or a first-timer, with these tips, you’ll install a zipper like a boss.
Laying the Second Half of the Zipper
After mastering the insertion of the first half of your invisible zipper using either a regular or invisible zipper foot, it’s time to tackle the second half. This is where your attention to detail will make or break the professional look of your project.
Whether you’re crafting a chic clutch or a practical zipper pouch, the key is in the zipper alignment. Ensure the zipper tape without teeth is flush with the raw edge of your fabric, creating the perfect zipper sandwich.
Now, take a deep breath and slow down. Rushing can lead to a wonky zipper that screams homemade in all the wrong ways. If you’re feeling unsure, baste the zipper in place first. It’s like having a safety net, giving you the freedom to stitch without the fear of a misstep.
Remember, the zipper head should cozy up to the right side of the fabric, like two best friends whispering secrets.
Adjust your needle position and machine settings to accommodate the zipper’s placement. Your stitching technique here is crucial; you want to sew with confidence but also with the precision of a surgeon.
And if you’re using a nylon coil zipper, be gentle with those zipper pulls; they’re not as tough as they look.
In the end, if you’ve done everything right, you’ll have a zipper installation that not only looks great but functions smoothly, giving you that satisfying zip every time. And isn’t that what we’re all after? That perfect zip, the sound of success, the final flourish on your sewing masterpiece.
Troubleshooting and Tips
When sewing a zipper, it’s not mandatory to use a zipper foot, although it can make the process easier. If you don’t have one, you can still achieve a professional finish with a few adjustments and precautions.
- Thread Tension: Adjust the thread tension on your sewing machine to prevent puckering and ensure smooth stitches along the zipper tape.
- Safety Issues: Be extra cautious to avoid sewing over the zipper teeth or catching your finger, as the regular foot doesn’t offer the same clearance as a zipper foot.
- Fabric Basting: Hand basting the fabric to the zipper before sewing can help keep everything in place, especially for tricky fabrics or when precision is key.
- Hand Stitching: If machine sewing seems too risky, consider hand stitching the zipper for more control, especially for delicate fabrics or when attaching zipper tabs for a polished look.
Can It Be Done?
You might be wondering if you can sew a zipper without a zipper foot, and the answer is a resounding yes! It’s like going off-road without a 4×4 – a bit bumpy, but totally doable. You’ll need to remove the foot completely or use the narrowest one you have. Think of it as sewing commando-style.
Now, hand sewing zippers is another trick up your sleeve. It’s like the slow dance of the sewing world – more control, less rush, and a chance to really get up close and personal with your fabric. Plus, it’s a lifesaver when tension issues and safety concerns rear their ugly heads.
But let’s not kid ourselves, sewing without a zipper foot has its quirks. You mightn’t get as cozy with the zipper teeth as you’d like, leading to a seam that’s more of a casual acquaintance than a best friend.
And floppiness in the zipper teeth? That’s the last thing you want when you’re aiming for a crisp finish.
So, if you’re feeling adventurous, or if your sewing machine is as basic as a toaster, you can still iron that zipper, align it with the right side of your fabric, and sew it on with confidence. Just remember to hand baste first to avoid any slip-ups. It’s like giving your zipper a map before it goes on a journey through your fabric.
In the end, whether you’re using a narrow foot or going old school with hand sewing, you’re in control. You’re the captain of your craft, steering through the sea of stitches with or without a zipper foot.
And when you’re done, you’ll have a zipper that’s not just attached, but a part of the fabric’s very soul.
Concerns
When venturing into the world of zippers without a zipper foot, you might feel like you’re walking a tightrope without a net. But fear not! With a bit of savvy and some clever tricks, you can still achieve a professional finish.
- Seam Distance: Without a zipper foot, your seam may end up further from the zipper teeth, potentially affecting the zipper’s functionality.
- Floppy Teeth: The floppiness of zipper teeth can be a real headache, making it tricky to sew a straight line.
- Thread Tension: Without the right foot, maintaining consistent thread tension can be as elusive as a cat in a yarn shop.
- Safety First: Remember, using the narrowest foot possible is like choosing the right-sized wrench – it just works better.
- Basting is Your Buddy: Hand basting fabric to the zipper can be a lifesaver, like having a map when you’re lost in the city.
While these concerns might make you think twice, they’re not showstoppers. With a dash of patience and a sprinkle of creativity, you can conquer zipper installation without a zipper foot. And if all else fails, hand sewing zippers is a timeless technique that’s as reliable as an old friend.
So, whether you’re tackling zipper foot troubleshooting or exploring zipper hacks for your next zipper projects, remember that every stitch is a step towards mastery.
Advantages
When you’re in the driver’s seat of your sewing machine, ready to tackle a zipper without a zipper foot, you might feel like you’re about to perform a high-wire act without a net. But here’s the scoop: you can absolutely sew a zipper without a zipper foot, and there are some nifty perks to doing so.
You’re not limited to the narrow confines of a zipper foot, which means you can get as snug as a bug to those zipper teeth, creating a professional-looking finish with slightly larger flaps over the zipper.
Sure, you might encounter some floppiness in the zipper teeth or have to be extra vigilant about thread tension and safety issues, but using the narrowest foot you’ve got or hand basting the fabric to the zipper before sewing can help you sidestep these potential pitfalls.
If you’re feeling adventurous or your machine is being a diva and refusing to accommodate a zipper foot, hand sewing zippers is a time-honored tradition that puts you in complete control, stitch by meticulous stitch.
And if you’re working with a lapped zipper or dealing with zipper bulk, fusible fleece can be your best friend, lending stability and reducing bulk.
Frequently Asked Questions (FAQs)
How do you adjust thread tension for zipper sewing?
To adjust thread tension for zipper sewing, start with the top tension.
If stitches are loose on the bottom, tighten the top tension. If the top thread pulls through, loosen it.
Always test on scraps first.
Can you sew a zipper on stretchy fabrics without puckering?
Imagine you’re a magician, and your stretchy fabric is the elusive rabbit you’re trying to pull out of a hat without causing a scene.
Yes, you can sew a zipper onto stretchy fabrics without puckering. Picture your sewing machine as your wand, gently gliding through the fabric, leaving a smooth, flat seam in its wake.
Use a walking foot, stabilize with tissue paper, and press the seam with steam. Voilà! You’ve mastered the trick, turning a potential sewing nightmare into a dream.
What’s the best way to align zippers on uneven fabric surfaces?
To align zippers on uneven fabric, hold the fabric and zipper taut about 6 inches ahead of the needle, slightly stretching both.
How do you fix a zipper that keeps splitting after sewing?
To conquer the vexing beast of a zipper that keeps splitting after sewing, think of yourself as a zipper whisperer, coaxing the teeth back into harmony.
First, examine the slider; often, it’s the culprit, having lost its grip on the teeth. A simple, yet effective, knight in shining armor for this dilemma is the humble pair of pliers. Gently squeeze the slider to reduce its width, restoring its ability to marry the teeth with the precision of a matchmaker.
This maneuver requires a delicate touch, as overzealous squeezing could lead to a slider that’s too tight, thwarting its movement entirely.
If the teeth themselves are misaligned, a careful realignment using the pliers can bring them back in line, ready to zip smoothly once more. Remember, this fix is akin to first aid for zippers; it may not hold forever, but it can extend the life of your beloved garment or bag until a more permanent solution can be found.
Are there any tricks to sewing zippers on heavy-duty materials like denim?
When tackling heavy-duty materials like denim, swap to a denim needle for its strength and sharpness.
Use a strong polyester thread for durability, especially on thicker seams.
Consider hand basting the zipper in place for precision.
A touch of humor: think of your sewing machine as a denim-taming beast, ready to conquer with the right gear!
Conclusion
Navigating the seas of sewing, you’ve learned that a zipper foot isn’t the only way to achieve a seamless zipper installation. You’ve been armed with the knowledge of various zipper feet and techniques, including how to insert an invisible zipper with both a regular and an invisible zipper foot.
Now, you understand that while a zipper foot can make the process smoother, it’s not a necessity. With practice and patience, you can sew a zipper with confidence, using the tools at hand. Remember, sewing is an art, and with each stitch, you’re crafting your masterpiece.
Keep these tips in your sewing kit, and you’ll find that you don’t need a zipper foot to sew a zipper with finesse.

