This site is supported by our readers. We may earn a commission, at no cost to you, if you purchase through links.
Always test your pattern adjustments on scraps first. Use hairspray to thread needles faster, and clear nail polish to stop thread ends from fraying.
Mark your seam allowances with washable markers, and invest in a good rotary cutter for clean lines. Remember the 5/8-inch seam allowance rule for most commercial patterns.
Keep a conversion chart handy for switching between metric and imperial measurements. These shortcuts transform tedious tasks into quick wins, turning pattern puzzles into smooth sailing.
Master these basics, and you’ll discover even more time-saving tricks.
Table Of Contents
Key Takeaways
- Master grainlines as your fabric compass—they’re the foundation that prevents twisted seams and wonky fits in your finished garments.
- Use the 5/8-inch seam allowance rule for most commercial patterns and always test adjustments on fabric scraps before cutting your main pieces.
- Speed up threading with hairspray to stiffen thread ends, and use clear nail polish on knots to prevent unraveling in high-wear areas.
- Keep measurement conversion charts handy to switch between metric and imperial systems without losing momentum during construction.
Sewing Pattern Basics
You’ll master sewing patterns faster when you understand the five basic symbols that appear on every pattern piece.
These simple markings are your roadmap to professional-looking results, so let’s decode what each one means and how to use them correctly.
Grainlines
Every grainline symbol looks like a double-ended arrow pointing toward your fabric’s selvedge edge.
This critical pattern symbol shows you exactly how to align pieces with the warp threads, ensuring your garment drapes correctly.
When you ignore grainline markings on sewing patterns, you’ll end up with twisted seams and wonky fits that’ll drive you crazy, which is why understanding grainline is essential.
Fold Lines
Pattern makers use bent arrows to show where you’ll fold your fabric for symmetrical pieces.
These fold techniques create perfect mirror images when you unfold your pattern. Smart sewers know that alignment symbols save time and prevent wonky results.
- Look for double-ended bent arrows – these folding methods mark where fabric meets the fold
- Match symmetry marks precisely to avoid lopsided garments that’ll drive you crazy
- Place pattern pieces along the fabric fold exactly where those bent arrows indicate
Cutting Lines
Solid lines define where you’ll cut your fabric pieces, acting as your roadmap through the pattern jungle.
These cutting lines show exactly where your cutting tools should slice through fabric, distinct from fold lines and seam guides.
When laying out pattern pieces, these lines guarantee accuracy tips work perfectly. Always cut outside the line slightly, giving yourself wiggle room for adjustments while maintaining proper seam allowance spacing.
Stitching Lines
Those dotted lines on your pattern aren’t decoration—they’re your stitching roadmap.
Stitching lines show exactly where your needle should travel, typically running parallel to cutting lines.
These sewing symbols guide perfect fabric alignment and consistent seam allowance placement.
Following these pattern marking guides prevents wonky seams and guarantees your pieces connect smoothly, giving you the control every sewist craves.
Seam Allowance
Seam allowance is the buffer zone between your cutting and stitching lines, typically 5/8 inch on most sewing patterns.
Think of it as your safety net—this extra fabric prevents fraying and gives you wiggle room for adjustments.
When working with delicate fabrics prone to fabric shrinkage, you’ll want consistent sewing margins for professional edge finishing and proper garment construction throughout your pattern making process.
Understanding clean finish seams is essential for achieving a polished look in your garments, and it requires a good understanding of garment construction.
Mastering Pattern Techniques
You’ll discover powerful shortcuts that transform tricky pattern adjustments into simple fixes. These techniques help you customize any pattern to fit perfectly without starting from scratch.
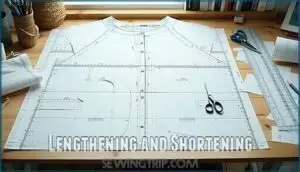
Lengthening and Shortening
You’ve mastered the pattern basics, now it’s time to make those patterns fit your body perfectly. Pattern alterations don’t have to be scary – you’ll nail garment fitting with these simple length adjustments.
Here’s your game plan for lengthening and shortening:
- Find the lengthen and shorten lines – Those double parallel lines on your pattern aren’t decoration. They’re your adjustment sweet spots that keep proportions intact.
- Cut and spread for lengthening – Slice horizontally at the marked zone, then add paper strips. This shortening technique maintains proper grainlines and prevents wonky side seams.
- Fold and overlap for shortening – Create neat folds along designated lines, keeping everything parallel to avoid pattern making disasters.
These hemming methods beat guessing at the hem every time. Understanding pattern alteration techniques is essential for achieving a perfect fit.
Adjusting Waistbands
When your waistband feels more like a medieval torture device than comfortable clothing, pattern adjustments can save the day.
You’ll transform ill-fitting waistbands into custom-fitted perfection through strategic modifications.
| Adjustment Method | Best For | Difficulty Level |
|---|---|---|
| Waistband Elastic | Loose-fitting garments | Beginner |
| Panel Inserts | Tight waistbands | Intermediate |
| Dart Modifications | Waist Shaping | Advanced |
| Belt Loops Addition | Style enhancement | Beginner |
| Seam Line Alterations | Major Fit Adjustments | Advanced |
Dressmaking skills improve when you master waistband adjustment techniques.
Sewing patterns often need tweaking for your unique body shape.
Understanding sewing pattern basics is essential for achieving a perfect fit.
Pattern adjustments become second nature once you understand how sewing pattern alterations work together with proper fit adjustments.
Using Elastic or Fabric Panels
When your waistband fights back, elastic waistbands and fabric panels become your secret weapons.
These flexible solutions transform tight-fitting garments into comfortable favorites without compromising style.
Here’s your adjustment arsenal:
- Elastic Waistbands – Replace rigid waistbands with stretchy alternatives for instant comfort
- Fabric Inserts – Add coordinating fabric panels at side seams for extra room
- Panel Adjustment – Insert triangular fabric pieces for targeted expansion
- Stretchy Seams – Use stretch stitches when working with elastic materials
Cutting on The Lengthwise Grain
Precision matters when you’re cutting fabric pieces.
Getting your fabric grainline right prevents wonky garments that twist and pull in weird directions.
| Grainline Direction | Fabric Behavior | Best For |
|---|---|---|
| Lengthwise grain | Minimal stretch, stable | Structured garments, pants |
| Crosswise grain | Slight stretch | Fitted tops, sleeves |
| Bias grain | Maximum stretch | Flowing skirts, binding |
| Off-grain | Unpredictable draping | Never recommended |
| Selvedge parallel | Perfect alignment | All pattern pieces |
The grainline direction is crucial for the behavior of the fabric, and understanding it helps in choosing the right type of garment to make, such as structured garments or flowing skirts.
Sewing Cheat Sheets
You’ll save countless hours by keeping essential sewing measurements at your fingertips instead of constantly pausing to search for conversions.
These printable cheat sheets bridge the gap between metric and imperial systems, giving you needle types, fabric widths, and seam allowances in one handy reference.
They provide a quick way to access information, making your sewing projects more efficient and enjoyable, with essential sewing measurements readily available.
Measurement Conversions
Converting between imperial and metric systems doesn’t have to derail your project momentum.
Keep conversion charts handy—you’ll reference them constantly when switching between patterns and tools.
Standard sewing math becomes second nature: quarter-inch equals 6mm, five-eighths inch converts to 16mm.
These fabric metrics save precious time during construction phases.
Utilizing a metric conversion tool helps to streamline the sewing process with metric conversion.
Fabric Widths and Needle Types
Smart fabric selection starts with knowing standard widths and matching needle types to your project.
Most quilting cottons come in 44-45 inches, while apparel fabrics offer 58-60 inch options for efficient layouts.
- Universal needles (70/10-90/14) work for most wovens and knits
- Ballpoint needles prevent snags in jersey and stretchy fabrics
- Sharp needles handle fine cottons and tightly woven materials
- Denim needles (100/16+) power through heavy canvas and multiple layers
- Leather needles cut clean holes in vinyl and hide materials
Understanding the right sewing needle types is essential for a successful sewing project.
Seam Allowances and Hemming
After choosing the right needles, your seam allowances and hemming skills will make or break your project. Getting these measurements right saves you from the dreaded "oops, too short" moment that haunts every sewer.
| Seam Type | Standard Allowance |
|---|---|
| Garment seams | 5/8 inch |
| Curved edges | 1/4 inch |
| Delicate fabrics | 3/8 inch |
| Heavy materials | 3/4 inch |
Mastering Hemming Techniques for professional results is crucial. Edge Stitching creates crisp Fabric Folds, while Folded Hems give clean finishes. Different Seam Finishes work for various fabrics—serged edges prevent fraying, while French seams enclose raw edges completely. Understanding quick dress hemming is essential for achieving polished and professional-looking results in garment construction.
Imperial and Metric Systems
You’ll encounter both imperial and metric systems in sewing projects.
Most patterns use imperial measurements, but your tools might display metric units.
This creates conversion headaches mid-project.
Keep a conversion chart handy with common fabric calculations like seam allowances and yardage.
Master both measurement systems to avoid costly mistakes and time-consuming pauses during construction.
Advanced Sewing Hacks
You’ve learned the basics, but now it’s time for the real game-changers that separate weekend sewers from seasoned pros.
These advanced hacks will transform frustrating moments into smooth sailing, turning your sewing room into an efficiency powerhouse.
Threading Needles With Hairspray
When your thread won’t cooperate, give it a quick spritz of hairspray.
A quick hairspray spritz turns stubborn thread into a threading dream.
This sewing hack stiffens the thread end, making needle threading 40% faster and reducing fraying.
Just mist the tip, wait ten seconds for it to dry, then thread away.
Your sewing efficiency will thank you for this simple trick.
Securing Threads With Nail Polish
Clear nail polish acts like superglue for your sewing projects, locking threads in place permanently.
This simple sewing hack transforms loose ends into rock-solid connections that’ll outlast countless wash cycles.
- Dab clear polish on knot ends to prevent unraveling
- Brush over button threads for ultimate button reinforcement
- Seal fabric edges to stop fraying before it starts
- Apply to zipper stops for smoother operation
Perfect for baby clothes and high-wear items where thread security matters most.
Organizing Pins With Soap and Steel Wool
Pin management gets a game-changing upgrade with these sewing shortcuts.
Stick your pins in a bar of soap to create a soap lubricant that makes them glide through fabric effortlessly.
For pin cushion tips that boost sewing efficiency, stuff your cushion with steel wool.
Steel wool benefits include keeping pins razor-sharp while the soap prevents snags.
These sewing hacks transform frustrating pinning into smooth sailing.
Mastering sewing efficiency tips can substantially improve overall sewing performance.
Using Rubber Bands on Sewing Machines
Your sewing machine paddle can become slippery during long projects, causing frustrating interruptions.
A simple rubber band wrapped around the paddle creates instant machine grip and prevents slip prevention issues. This rubber band hack transforms your sewing speed and fabric control.
Proper sewing machine grip is essential for efficient sewing, which involves understanding the ideal machine grip systems.
- Wrap the band tightly around your machine’s foot pedal for maximum tension adjustment
- Choose thick rubber bands that won’t snap under pressure during intensive sewing sessions
- Replace bands monthly to maintain consistent grip and avoid unexpected slipping during delicate work
Frequently Asked Questions (FAQs)
How to use a sewing pattern?
Start by choosing your size using the pattern’s measurement chart.
Then lay out pieces on fabric following grainlines.
Cut carefully along solid lines, transfer markings, and sew following the numbered instruction sequence.
How do you read a sewing pattern?
Reading a sewing pattern is like deciphering a roadmap to your perfect garment.
You’ll identify symbols, grainlines, notches, and cutting lines that guide assembly.
Match pattern pieces, follow numbered instructions, and transfer markings to fabric for success.
What are sewing pattern symbols?
Pattern symbols are your secret decoder ring for successful sewing projects.
You’ll find arrows showing grainlines, triangles marking notches for alignment, dotted lines indicating stitching paths, and solid lines marking where to cut your fabric pieces.
What is a quilting pattern?
A quilting pattern provides detailed instructions for creating decorative stitched designs on layered fabric.
It includes templates, measurements, cutting guides, and assembly steps for piecing together colorful blocks into beautiful quilts you’ll treasure.
How do I learn sewing patterns?
Begin with simple projects like tote bags or skirts to build confidence.
Study pattern symbols using cheat sheets, practice marking techniques, and start with beginner-friendly patterns before advancing to complex designs, focusing on complete concepts to ensure a solid foundation.
What is sewing pattern tutorials?
Sewing pattern tutorials are step-by-step guides that walk you through reading symbols, cutting fabric pieces, and assembling garments.
They’ll teach you essential skills like interpreting grainlines, notches, and dart markings for successful sewing projects.
What does CF mean on a sewing pattern?
Ironically, something so simple stumps many sewers!
CF stands for "Centre Front" on your pattern.
It’s a reference line that helps you align pattern pieces correctly along the front center of your garment for perfect symmetry.
How do you match plaids and stripes accurately?
You’ll need to match pattern lines at seamlines, not cutting edges. Mark notches precisely, pin perpendicular to stripes, and use basting stitches to check alignment before final stitching.
Whats the best way to transfer markings?
You’d think marking fabric would be straightforward, but it’s where most sewers mess up!
Use a tracing wheel with transfer paper for precise lines, or try tailor’s chalk for temporary marks that brush away easily.
How do you adjust patterns for different heights?
Look for adjustment lines on your pattern – they’re parallel lines that say "lengthen or shorten here."
Cut along these lines and add or remove paper strips to match your height needs perfectly.
Conclusion
Amazingly, you’ve discovered the same sewing pattern cheat codes professional seamstresses use daily.
These shortcuts aren’t secrets—they’re proven techniques that transform complex projects into manageable tasks.
You’ll cut your sewing time in half while improving accuracy and results.
From grainline mastery to threading tricks, these sewing pattern cheat codes become second nature with practice.
Your newfound efficiency means more time creating beautiful garments and less time struggling with basic techniques.
Start implementing these hacks today.
- https://peekaboopatternshop.com/our-blog/9-printable-sewing-cheat-sheets
- https://www.youtube.com/watch?v=w42xj0ur2zI
- https://www.mabeyshemadeit.com/cutting-patterns-tips/
- https://www.sewdiy.com/blog/category/Blog+Posts+2025
- https://www.seamwork.com/creativity-and-mindset/what-are-some-of-the-best-sewing-shortcuts-to-save-time

