This site is supported by our readers. We may earn a commission, at no cost to you, if you purchase through links.
Wedding’s in two hours, and your dress hits mid-calf when it should hit your ankle. Sound familiar? Every seamstress has a story like this, and the good news is, you don’t need years of training to fix it.
Quick dress hemming techniques range from no-sew tape tricks that set in minutes to hand stitches so clean nobody will spot them. Some fabrics forgive mistakes; others (looking at you, chiffon) punish every wobbly line. Grab your tools, and let’s get that hem sitting right, fast.
Table Of Contents
Key Takeaways
- No-sew options like fusible hem tape, fashion tape, and fabric glue let you fix a hem fast without a needle, with each suited to different fabrics and durability needs.
- Matching your tools and stitch (blind hem, slip stitch, catch stitch, twin needle) to your fabric type and weight is key to getting a clean, lasting hem.
- Curved hems and full skirts need special techniques like false hems, bias tape, and clip-and-turn methods, plus time to hang and settle before cutting.
- Fixing common problems like puckering, rolling, or bulky seams comes down to proper tension, understitching, grading seams, and steam pressing for a professional finish.
Essential Tools for Quick Dress Hemming
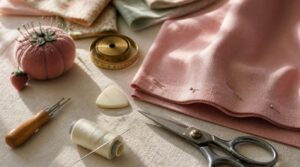
Before you hem a single stitch, let’s talk gear. You don’t need a fancy studio to get pro results, just a handful of trusty tools. Here’s exactly what to grab before you start cutting.
If you’re just getting started, this beginner-friendly guide to sewing a button is a great way to test your gear before tackling bigger projects.
Fabric Scissors and Pinking Shears
Excellent accuracy starts here: your fabric scissors and pinking shears are the true workhorses of any hemming kit.
Fabric scissors give you clean, straight lines for precise seam allowances, while pinking shears leave a zigzag edge that fights fraying on woven fabrics. Blade material matters—chrome vanadium or stainless steel holds an edge longer. You should avoid using fabric cutting tools on paper to prevent dulling the blades.
- Sharpen pinking blades carefully; that zigzag pattern needs special attention
- Tighten pivot screws regularly to stop blade wobble
- Test fabric samples before committing to a cut
- Store blades closed for safety and longevity
Measuring Tape and Tailor’s Chalk
Once your scissors are sharp and ready, grab a measuring tape you can trust. Look for fiberglass or sturdy plastic (it won’t stretch over time), with gradations every ⅛ inch for pinpoint accuracy.
Tailor’s chalk comes in wax or dusting form—always test removal on scraps first, since some marks need a damp cloth to disappear.
Store both somewhere cool and dry. That simple habit keeps your quick dress hemming techniques sharp, your hemline adjustment precise, and every garment alteration ready to roll!
Pins, Wonder Clips, and Matching Thread
Now, hold that hem in place. Straight pins work great on sturdy fabrics—space them 1 to 2 inches apart, perpendicular to the edge. Got something slippery or delicate? Wonder Clips grip without leaving holes.
Pick thread that matches your fabric’s weight (fine 60wt for lightweight, 40-50wt for heavier pieces). Pull pins before they hit the presser foot—your needle (and your sewing precision) will thank you!
Iron, Ironing Board, and Pressing Cloth
Pins are set, thread’s ready—now grab that iron! A pressing cloth protects delicate or dark fabrics from scorch marks, while steady steam pressing smooths every crease.
Your setup matters too:
- Stable board for wobble-free pressing
- Distilled water prevents mineral buildup
- Cotton or muslin pressing cloths
- Sleeve board for tricky curves
Good stabilization now means sharper sewing precision later!
Sewing Machine Vs Hand-sewing Needles
Ever wonder why a hand needle jams your machine? Eye placement is the culprit—hand needles thread near the top, machine needles near the tip, feeding thread straight into the machine’s path.
Shaft flexibility differs too: hand needles bend gently through fabric, machine needles stay rigid for speed. Sizing systems don’t match either.
For machine-stitched hems or a clean blind hem stitch, use machine needles. Delicate hand stitching still wins for silk hems.
Fastest No-sew Dress Hemming Solutions
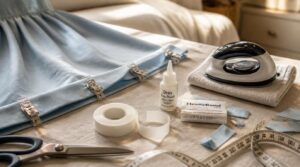
No needle, no thread, no problem. Sometimes you just need a hem to stay put right now, and sewing isn’t in the cards. Here are your fastest no-sew fixes, ranked from "permanent and pro" to "quick save before you walk out the door.
If you’d rather thread a needle than reach for tape, this guide to choosing the right hand stitch for pant hems will help you pick the neatest option for your fabric.
Fusible Hem Tape for Permanent Bonds
Fusible hem tape (also called fusible web) creates a bond that actually outlasts your washing machine. Pick the right tape width for your hem, test fabric compatibility on a scrap first, and use correct heat settings to avoid scorching. Keep tape narrower than your fold to prevent adhesive seepage. Press firmly, let it cool completely, and you’ve got a real no-sew fix with lasting fabric adhesion.
Double-sided Fashion Tape for Quick Fixes
Running late? Double-sided fashion tape saves the day—no iron, no needle. Peel, press, done. It’s a true no-sew solution for emergency garment repairs and DIY fashion fixes.
- Skin-friendly, often hypoallergenic
- Resists moisture up to 8 hours
- Loses tack in high humidity
- Best on lightweight-to-medium fabrics
Patch-test first for skin safety, and skip heavy fabrics.
Fabric Glue for Heat-sensitive Fabrics
Silk won’t survive an iron, but glue still gets the job done. Fabric glue is your no-sew solution for heat-sensitive pieces, chiffon, silk organza, light georgette. It’s water-based, so no scorching, and stays flexible after curing for natural drape.
Apply a thin layer, let it grip fully, then wash gentle cycle. Quick, easy, done!
Applying Iron-on Tape Correctly
Heat and pressure make or break your bond. Clean and dry your fabric first, then position the tape between layers, adhesive facing in.
- Match iron heat to fabric type
- Press evenly, 8-10 seconds max
- Don’t scorch delicate materials
- Cool completely before handling
- Tug-test for a secure hold
That’s your no-sew fix locked in tight.
Temporary Tacking With Pins and Stitches
Not ready to commit? Tack it first. Use basting stitches (long, loose running stitches) to hold your hem before final sewing.
Space pins perpendicular to the edge, every 2-3 inches. Pick contrasting thread for easy spotting, or matching if it’ll show. Check alignment from all angles, then snip and pull tacks once you’re stitched for good—tension controlled, hem locked in.
Machine and Hand-sewn Hemming Techniques
Ready to bring out the sewing machine or needle and thread? This is where you get real control over how your hem looks and holds up. Here are the go-to stitches every dress deserves.
Single and Double Fold Machine Hems
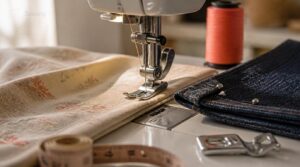
Grab your machine and let’s talk folds. A single fold hem tucks the raw edge once—great for lightweight fabrics, ¼" to ⅜" deep. A double fold hem folds twice, hiding the edge for durability.
- Light fabric? Single fold.
- Heavy or activewear? Double fold.
- Either way, a hemming foot keeps things even.
Adjust tension so stitches lie flat, not puckered.
Blind Hem Stitch for Invisible Finish
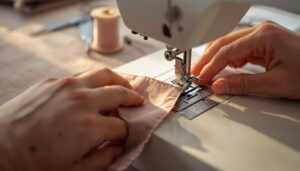
Want a hem that basically disappears? That’s the blind hem stitch, and it’s a favorite trick in dressmaking basics. Fold your fabric so a small edge peeks out, then let your machine’s blind hem foot catch just that fold. Stitch bite precision matters here: too wide, and stitches show; too narrow, and the hem won’t hold.
Thread color matching seals the deal, since even great stitching stands out with the wrong shade.
| Fabric Type | Best Approach | Watch For |
|---|---|---|
| Medium woven | Machine blind hem | Peeking on thin spots |
| Stretch knits | Stabilize edge first | Tunneling or loops |
| Delicate/curved | Hand blind stitch | Slower, more control |
Always test on scrap fabric first. Hand vs machine both work for handsewn hemming techniques and clothing alterations, but hand stitching wins on curves.
Twin Needle Hemming for Knit Fabrics
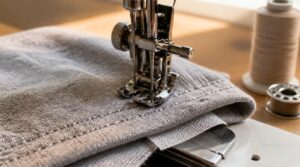
Knits need stretch, not fight. Twin needle hemming gives two parallel stitch rows that flex with the fabric, preventing fabric tunneling that ruins a good stretch hem.
Use ball-point needles, loosen top thread tension slightly, and try a walking foot for stubborn, slippery knits. Stabilizing knit edges with wash-away tape first keeps everything smooth—quick, easy, and total garment construction win!
Slip Stitch and Catch Stitch by Hand
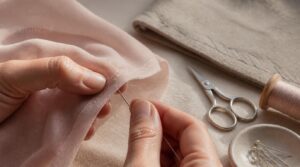
Sometimes a needle and thread beat any machine. Slip stitch hides inside the fold for a truly invisible hem—perfect for silk or chiffon.
Catch stitch zigzags for flexibility, giving heavier fabrics fabric movement tolerance without puckering.
Match your thread color, keep hand stitching consistency tight, and you’ll nail that pro-level handhem stitch finish every time!
Choosing Stitches by Fabric Weight
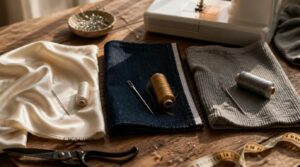
Not every fabric plays by the same rules! For sheer stuff like silk charmeuse, go with fine thread and a small needle, shorter stitch length.
Denim needs the opposite: heavier thread, bigger needle, longer stitches for durability.
Knit fabrics? Grab a stretch needle and narrow zigzag. Match your thread weight selection and tension to the fabric, and your hems will hang right every time.
Hemming Curved Hems and Full Skirts
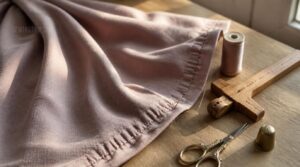
Curved hems and full skirts play by their own rules, and straight-hem tricks just won’t cut it here. Extra fabric needs somewhere to go, or you’ll end up with puckers and waves instead of a smooth swing.
Here are five go-to methods that’ll get you a curve so clean, it’ll look like the dress was born that way.
False Hem Technique for Circular Skirts
Circle skirts got you spinning in circles? A false hem is your fix. Instead of trimming the outer edge, you add a curved panel inside, cut on the same grain as your skirt for matching drape.
Keep panel cutting precise, 1 to 3 inches wide, mirroring the hem’s curve exactly. This keeps skirt symmetry intact and avoids gaps.
For interior panel attachment, slip stitch or narrow topstitch it to the wrong side, leaving the outer edge free. This trick grips fabric weight beautifully, no bulk, no puckers.
A bias cut panel adds flexibility for tighter curves. Master this, and your hemming techniques (plus your dressmaking skills) just leveled up!
Bias Tape for Smooth Curved Edges
Wrangling a curved neckline or hem? Bias tape is your best friend. Cut at 45 degrees, it’s got natural stretch for hugging curves without puckering.
- Choose ½", ¾", or 1" widths
- Ease tape gently, never pull
- Stitch close to the fold
- Topstitch for a crisp, biasbound hem
Pin every few inches, press flat first, and watch your dressmaking skills shine!
Clip-and-turn Method for Tight Curves
Tight curves got you nervous? The clip-and-turn method is your fix. Snip small notches into the seam allowance, stopping just short of your stitching line — this eases fabric distortion and keeps clipping precision on point.
Turn slowly, easing each section for smooth curve alignment without bunching. Watch your stitching tension so nothing pulls tight.
A final press seals the deal, managing bulk for that pro-level finish every time.
Letting Skirts Hang Before Cutting
Gravity doesn’t care about your deadline, but it will settle a bias cut hem true.
Bias stretches under its own weight, so hang the skirt overnight to 48 hours — heavier wools need longer, silks less.
Skip wire hangers; they crease and lie to you.
Humidity speeds things along naturally.
This one step saves your hem from sagging later, protecting your garment’s longevity.
Easing Fullness on Wide Hemlines
More fabric, more fuss — wide hemlines need extra love to lie flat.
Try these distributing hem fullness tricks:
- Ease-stitch the edge before folding
- Use bias tape for smoother fabric drape
- Steam-shrink excess bulk with your iron
- Pin generously to control fabric bulk
- Adjust seam allowance slightly wider on curves
These quick dress hemming techniques keep your double fold hem puckerfree, giving you real controlling skirt volume mastery through skilled textile manipulation.
Troubleshooting and Professional Hem Finishes
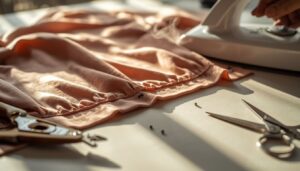
So your hem is sewn, but something’s still off? That’s totally normal, even pros hit these snags. Let’s fix those wrinkles and turn your hem into something runway-ready.
Fixing Puckered or Wavy Hems
Puckers usually mean your thread tension is off or the fabric wasn’t stabilized. Try lightweight interfacing underneath, shorten your stitch length to 2.0-2.4mm, and match needle size to your fabric weight.
Knits? Use a walking foot with balanced differential feed. Always test on scrap fabric first, tension issues love to hide until it’s too late!
Understitching to Prevent Hem Rolling
Got that wave under control? Good, because rolling facings are the next troublemaker on our list, and understitching is the fix.
Press the facing inside first, then stitch 1-2mm from the seam, catching just the seam allowance. Use moderate thread tension and matching thread so nothing peeks through on knits, silk, or stable wovens.
- Pin or baste facing flat first
- Backstitch at both ends
- Keep stitches short and even
- Trim bulky seam allowance beforehand
- Press from the garment side after
That’s professional hemming, no rolling, no drama, just a flat edge that behaves itself all day long.
Grading Seams to Reduce Bulk
Bulky seams under a hem? Time to grade them down. Trim each seam allowance layer to a different width, closest to your body stays widest, so they nest like little stairs instead of stacking up.
On curves, cut the inner layer to about ⅛", the next to ¼". At intersections, taper to a point so four layers never collide. Heavier fabrics need bigger cuts.
Steam Pressing for Crisp Edges
Once your seams sit flat, grab the iron. Steam hydrates fibers so they relax and lie flat—crisp edges, less creasing.
Use a pressing cloth to protect delicate synthetics from shine or scorching. For curves, a tailor’s ham keeps shape while you press.
Finish with a clapper to lock in that edge before it cools.
Adding Weights for Better Drape
Ever notice how some dresses just float when you walk? That’s weighted hems at work. Sew small weights into the corners and edges, and gravity does the rest, pulling fabric into a smooth, even fall.
Sew small weights into a hem’s corners and let gravity pull the fabric into a smooth, even fall
- Lead sausage weights for drapery-style hangs
- Fabric-covered weights that won’t snag
- Microweights for delicate silks
- Coin weights for balanced distribution
Match weight to textile weight, test first, and check stitches regularly for lasting drape.
Frequently Asked Questions (FAQs)
How to hem a dress quickly?
Like a quick pit stop before a race, fast fixes just need the right tools. Grab fusible hem tape or fashion tape for no-sew jobs, or whip up a quick blind hem stitch on your machine for durable, nearly invisible results.
How to shorten a dress quickly?
Grab hemming tape or fusible web for a no-sew fix, iron it in fast. For sturdier results, whip up a quick blind hem stitch. Match your method to fabric weight, and you’ve got instant clothing repair magic!
How to hem dress pants quickly?
Time is of the essence, so cut to the chase: mark with tailor’s chalk, fold and pin, then use a blind hem stitch or fusible tape for a fast, nearly invisible finish on dress pants.
How to quickly hem a dress without sewing?
Skip the needle entirely! Fusible hem tape (fusible web) gives an invisible, permanent bond when ironed. For heat-sensitive fabrics, fabric glue works too.
Need an emergency fix? Double-sided fashion tape secures hems instantly, no-sew, no heat required.
How to HEMM a dress fast?
Fold your hem, bond it with hemming tape, then press firmly. For knits, skip adhesives near stretch seams to avoid seepage. Speed wins here, but a quick blind hem stitch adds backup durability when precision matters more than pure speed.
How to hem a dress?
Measure your dress length twice, then pin and press your fold. Use a blind hem stitch or hemming tape for speed, matching thread color to your fabric. Finish by steam pressing—your hem looks pro, fast!
What are the different Hemming techniques?
Think of hemming like choosing shoes for a hike, wrong pick and you’re stuck.
Machine stitching (double-fold, blind hem, rolled hem) suits speed and durability by fabric weight.
Hand stitches give invisible finishes for delicate pieces.
Tape and glue save the day when time’s tight!
How do you Hem a fabric?
Mark your hem length with tailor’s chalk, trim excess, then fold twice and press flat. Pin or tape it snug, match needle type to fabric weight, stitch on your sewing machine, adjust tension, and press again—done!
How do you Hem a dress with a hem tape?
A genie granting wishes without needles or thread? That’s hemming tape. Press the fold over adhesive, apply heat, done. Test fabric compatibility first, protect heat-sensitive silks, and you’ve got a flat, seepage-free, no-sew fix in minutes!
How long does it take to hem a dress?
A basic straight hem runs 20 minutes to an hour. Hemming tape or fusible web wins for speed, machine stitching’s faster than hand-sewing, and heavier fabrics, curves, or linings always add extra handling time.
Conclusion
Ready to trust yourself with a needle and a little chalk? That hem hanging two inches too long isn’t a crisis, it’s just a quick project waiting for the right technique.
Master these quick dress hemming techniques and you’ll never panic over a mismatched length again, whether it’s satin, chiffon, or your favorite knit dress.
Pin it, press it, stitch it. Your hem, your rules, your perfect fit.
- https://blog.moodfabrics.com/no-sew-alternatives-to-sewing
- https://fearlesstape.com/blogs/news/how-to-hem-a-dress-with-fashion-tape
- https://www.doinaalexei.com/using-fusible-hem-tape-and-webbing.html
- https://www.nationalsewingcircle.com/video/fusible-hem-tape-stitching-016592
- https://lindehobby.com/no-sew-hemming-hacks-how-to-hem-pants-without-a-sewing-machine-2111