This site is supported by our readers. We may earn a commission, at no cost to you, if you purchase through links.
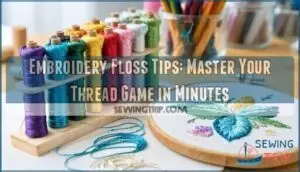
Store floss on bobbins or in organized containers, labeled by color number. When threading, dampen the end slightly for easier needle insertion.
Keep specialty threads like metallics in their original packaging until use. Organize by project or color family to prevent duplicate purchases.
These foundational techniques prevent the common pitfalls that frustrate beginners and experienced stitchers alike, setting the stage for more advanced floss management strategies, which are essential for a better stitching experience and to master embroidery floss tips, and to transform your stitching with specialty threads.
Table Of Contents
Key Takeaways
- Separate strands gently – Pull one strand at a time from six-strand floss to prevent tangling and achieve smoother stitches
- Cut to 18-inch lengths – Longer pieces tangle easily, while this forearm-length measurement prevents fraying during stitching
- Store floss on bobbins with labels – Wind snugly without stretching and include color numbers for quick identification and organization
- Handle specialty threads differently – Use shorter lengths for metallics, thread conditioner for smooth pulls, and larger needles for ribbons and wool
Choosing Embroidery Floss
Selecting the right embroidery floss sets the foundation for any successful stitching project.
You’ll find that understanding floss types and characteristics helps you make informed choices that match your skill level and project requirements.
embroidery-floss-intro
text/markdown
Embroidery Floss Introduction
Selecting the right embroidery floss sets the foundation for any successful stitching project.
You’ll find that understanding floss types and characteristics helps you make informed choices that match your skill level and project requirements.
Types of Embroidery Floss
Embroidery’s thread landscape offers endless creative possibilities. Cotton Floss dominates beginners’ toolkits with six separable strands and 500+ thread colors. Rayon Threads deliver brilliant shine for dramatic effects. Silk Yarns provide luxurious sheen for heirloom projects. Metallic Floss adds sparkle to embroidery designs. Wool Fibers create textured dimension.
Understanding types of embroidery is essential for mastering embroidery techniques.
- Cotton remains the workhorse – affordable, versatile, and perfect for learning stitching techniques
- Rayon demands respect – tangles easily but rewards careful handling with stunning results
- Silk elevates everything – higher cost pays off in elegant, luminous finished pieces
- Metallics require patience – use shorter lengths to prevent frustrating knots and breaks
Characteristics of Cotton Floss
Six-stranded cotton floss dominates embroidery because it delivers exceptional floss durability and versatility.
Cotton floss wins because it’s tough, flexible, and works for everything.
You’ll find hundreds of thread colors in most Cotton Types, from DMC’s 500+ shade range to budget-friendly alternatives.
The fiber content creates smooth thread texture that separates easily into individual strands, making cotton your go-to choice for consistent results across diverse projects, and this adaptability lets you control thickness for delicate details or bold coverage, utilizing cotton for the best outcomes.
Specialty Floss Options
Beyond cotton’s comfort zone, specialty threads reveal creative possibilities you never knew existed.
Metallic threads and silk floss deliver premium shimmer and luxurious texture, while rayon blends offer vibrant colors with exceptional durability.
Wool yarns and ribbon floss add dimensional texture that transforms ordinary designs.
These embroidery floss tips require proper floss storage and thread conditioner for superior results.
Cross stitch threads benefit from careful floss organization to prevent tangling and maintain their unique properties.
For the best results, consider using silk embroidery threads that provide a smooth and enjoyable needlework experience with superior results and proper floss storage.
Preparing Floss for Use
Before you start stitching, you’ll need to prepare your floss properly to avoid tangles and achieve smooth, even stitches.
Most embroidery projects require separating the six-strand floss and cutting it to the right length for ideal handling.
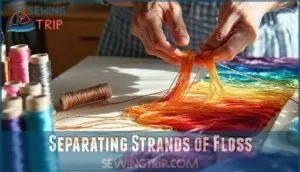
Separating Strands of Floss
Now you’ll break apart your chosen floss to get the perfect strand count for your project.
Six-stranded cotton floss requires strand separation for ideal stitching results.
Start by untwisting a one-inch section at one end of your cut thread.
Hold the opposite end firmly, then pull one strand straight up vertically to separate it from the bundle.
This fiber preparation technique prevents tangling and creates smoother, fuller stitches when you recombine the separated strands for threading your needle.
Understanding embroidery floss types is vital for achieving professional-looking results with ideal stitching and using the right embroidery floss.
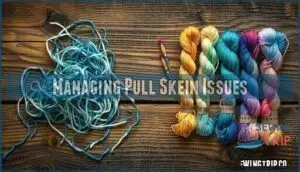
Managing Pull Skein Issues
Pull skein management becomes straightforward once you master the correct technique. Most floss tangles stem from pulling thread from the wrong end—always use the end with the longer label.
When tangles occur, stop immediately and work them out gently with a needle.
- Pull slowly from the numbered tab end
- Maintain light tension near the entry point
- Keep thread lengths under 20 inches
- Store skeins away from humidity
These skein management practices prevent floss tangles and thread breakage while preserving your needlework supplies for superior embroidery techniques.
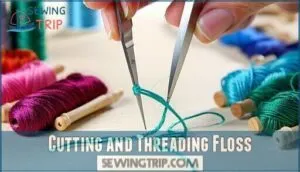
Cutting and Threading Floss
Cut your floss to forearm length—roughly 18 inches—to prevent fraying and tangling during stitching.
Sharp scissors angled at 45 degrees create clean cuts that thread easily through embroidery needles.
For floss threading, use one to two strands typically, matching your pattern’s requirements.
This thread management approach with proper needle handling keeps your needlework supplies organized, and mastering these stitching tools basics will improve your embroidery techniques dramatically through better strand separation control.
Floss Storage and Organization
Once you’ve prepared your floss, proper storage becomes essential for maintaining organization and preventing tangles.
Effective storage systems save time, reduce frustration, and help you quickly locate the exact colors needed for your projects, which is crucial for maintaining organization.
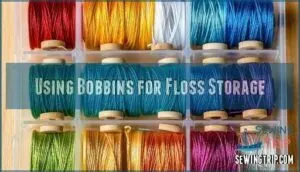
Using Bobbins for Floss Storage
After removing labels from skeins, you’ll need proper storage to maintain your floss investment.
Bobbins transform chaos into organized bliss through systematic winding techniques.
- Bobbin Materials: Choose paper, plastic, or wooden options based on durability needs
- Winding Techniques: Wrap floss snugly without stretching to prevent fiber damage
- Labeling Methods: Write color numbers clearly on each bobbin for quick identification
- Storage Containers: Use specialty boxes, drawers, or repurposed containers for protection
- Bobbin Alternatives: Consider thread cards or magnetic organizers for portable projects.
Some crafters prefer using plastic versions for their added durability.
Alternative Storage Solutions
Your embroidery arsenal expands beyond bobbins with creative DIY Organizers and Repurposed Containers.
Mason jars, pill organizers, and tackle boxes transform into efficient craft supplies storage. For Travel Storage, use zippered pouches or small tins.
Space Saving solutions include stackable containers and drawer dividers.
Hanging Solutions like pegboards display threads beautifully while keeping sewing notions accessible. One can also use pegboard thread storage for a versatile solution.
These alternatives accommodate various fabric types and embroidery hoops perfectly, making them ideal for embroidery hoops.
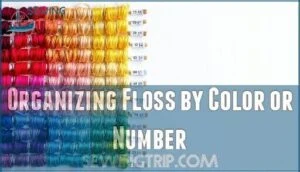
Organizing Floss by Color or Number
Choose your organization method based on your workflow.
Color Coordination works best for rainbow-loving stitchers who think visually—group blues, greens, and reds together for quick Visual Appeal.
Number Systems suit detail-oriented crafters who track inventory like pros.
Project Prioritization keeps current embroidery hoops and sewing kits front and center.
Smart Inventory Management prevents duplicate purchases while organizing sewing notions by fabric types and stitch patterns you’ll actually use, which is key to Smart Inventory.
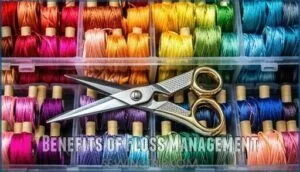
Benefits of Floss Management
You’ll transform your embroidery experience once you master proper floss management techniques.
Smart organization systems prevent common frustrations like tangled threads, wasted time searching for colors, and accidentally buying duplicate skeins.
Reducing Tangles and Frustration
Proper thread management transforms your embroidery workspace from chaos to control.
When you maintain ideal thread condition through careful handling, your stitching tension stays consistent across projects.
Match needle sizes to your thread weight for smooth pulls that won’t snag or fray.
Your workspace setup directly impacts thread behavior—keep spools organized and within easy reach.
Practice ergonomic techniques when handling multiple needle sizes to prevent hand fatigue.
Quality stitching demands attention to detail in thread preparation, ensuring customer satisfaction through professional results.
Using thread conditioners can act as an anti-tangle shield to improve your embroidery experience, providing a smooth and consistent stitching process, and resulting in high-quality embroidery with ideal thread condition.
Preventing Duplicate Floss Purchases
Smart inventory methods prevent wasteful duplicate purchases that drain your crafting budget.
Digital catalogs and wishlists track your current collection, eliminating guesswork during shopping trips.
Project planning with color charts guarantees you buy only necessary shades.
Organize floss by number or color family for quick reference.
Your attention to detail in tracking saves money and storage space.
Enhancing Crafting Experience
You’ll discover that organized floss management transforms your embroidery from frustrating struggle to pure Creative Flow.
When threads cooperate instead of conspire against you, Project Enjoyment skyrockets and your Personal Expression shines through every stitch.
- Embroidery Comfort: No more wrestling with tangled yarn weights or searching for the right vibrant colors
- Skill Development: Focus energy on perfecting stitching quality rather than fighting messy supplies
- Enhanced Results: Create intricate patterns with highquality stitching when materials stay organized
Advanced Floss Techniques
Once you master basic floss handling, specialty threads like silk, rayon, and metallics require different techniques to prevent slipping and breaking.
Understanding how to calm kinky threads and manage large hanks transforms challenging materials into workable strands for professional results.
Handling Specialty Threads
Since metallic tangles and rayon slippage plague many stitchers, mastering specialty threads requires specific techniques.
Work with shorter lengths to prevent fraying. Use thread conditioner for smoother metallic threading. Choose larger needles for ribbon stitching and wool care.
Test silk threading tension on scraps first. For vibrant and eye-catching designs, consider rayon threads offer shine.
Adjust your approach based on yarn weights – different materials demand different handling methods for high-quality stitching and superior textile decoration results.
Calming and Straightening Threads
Kinky threads from twisted put-ups can wreak havoc on your embroidery projects.
Test ironing threads on low heat settings first – synthetic threads especially need careful temperature control. Thread untangling becomes simple when you hold twisted sections taut and gently work through kinks.
For stubborn thread tension issues, hang problematic strands overnight to naturally relax fibers. Quality assurance matters here, and it is crucial for the success of your embroidery projects, ensuring that you achieve the desired outcome with careful temperature control.
Taming Large Hanks of Floss
Large hanks of floche or specialty threads require careful hank unraveling techniques to prevent chaos. These twisted loops contain yards of thread that’ll knot instantly if handled wrong.
Handle hanks with respect—they’re wound tight and ready to rebel at the first wrong move.
Here’s your twist management strategy:
- Locate the cut ends – Find where the hank was severed and gently separate the twisted bundle
- Unwind gradually – Work in 12-inch sections, rotating the hank to maintain fiber alignment
- Cut into workable lengths – Divide into 18-inch pieces for standard embroidery or 14-inch sections for delicate threads
Thread straightening becomes necessary when loops create kinks. Ironing threads on low heat settings removes stubborn waves. Test small portions first – some specialty fibers can’t handle heat.
Floche handling demands patience since these large loops tangle easily once cut. Custom embroidery design services often recommend pre-organizing hanks before starting projects. Professional embroidery solutions include magnetic organizers that hold divided sections securely.
These embroidery floss tips prevent frustration during complex stitching sessions. For the best results, understanding embroidery floss is essential to manage threads effectively.
Frequently Asked Questions (FAQs)
Can I mix different brands of floss together?
Over 500 colors exist across major floss brands, yet you can absolutely mix different brands together.
Combining DMC, Anchor, and other brands works perfectly fine—just match strand counts and handle each brand’s unique characteristics for consistent stitching results.
How do I fix broken floss mid-stitch?
Stop stitching immediately and secure your current thread with a small knot on the fabric’s back.
Cut fresh floss, thread your needle, and continue from where you left off, matching your stitch direction.
What causes floss colors to fade over time?
Time is the thief here – UV light, washing, and heat break down dye molecules in your floss. Poor-quality threads fade faster than premium brands like DMC.
Can embroidery floss be machine washed safely?
Machine washing embroidery floss isn’t recommended—heat and agitation can cause bleeding, shrinking, and tangling. Hand wash finished projects gently in cool water with mild detergent for best results.
How long does embroidery floss typically last?
Quality embroidery floss can last decades when stored properly.
You’ll get years of vibrant stitching from DMC’s double-mercerized cotton, which resists fading and maintains strength through countless projects and proper handling.
Conclusion
Surprisingly, many embroiderers overlook the importance of proper floss management until they’re drowning in tangled mess.
These embroidery floss tips will transform your crafting sessions from chaotic struggles into smooth, enjoyable experiences.
You’ll save time, reduce waste, and create better projects when you implement proper strand separation, storage systems, and threading techniques.
Remember that quality floss handling isn’t just about convenience—it directly impacts your finished work’s appearance and your overall satisfaction with the craft, which is why it’s essential for a smooth experience.
- https://www.dmc.com/US/en/technique-embroidery-use-stranded-thread
- https://www.youtube.com/watch?v=SioyZmVne1E
- https://www.reddit.com/r/Embroidery/comments/19921a4/tips_for_keeping_floss_threads_from_unraveling/
- https://studio-koekoek.com/learn-all-about-the-different-types-of-dmc-embroidery-floss/
- https://www.chloesavageembroidery.com/guide-to-embroidery-thread/

