This site is supported by our readers. We may earn a commission, at no cost to you, if you purchase through links.
The wrong scissors can ruin a project before you’ve sewn a single stitch. Ask anyone who’s tried cutting silk with kitchen shears—you get frayed edges, uneven lines, and a frustration level that makes you question the whole hobby.
Good sewing doesn’t start at the machine. It starts with what’s in your kit. The difference between a clean seam and a mangled one often comes down to having the right tool for the job—and knowing how to use it.
These are the essential sewing kit items that actually earn their spot on your worktable.
Table Of Contents
Key Takeaways
- cutting tools set the tone for everything — dressmaker shears with a bent handle, a 45mm rotary cutter, and pinking shears cover the full range of fabric and edge work without overlap.
- The right needle for the right fabric isn’t optional: ball-point for knits, microtex for silk, denim needles for heavy canvas — using the wrong one quietly wrecks your fabric before you notice.
- Measuring and marking tools like a flexible 60-inch tape, a sliding sewing gauge, and water-soluble markers are what keep your cuts and seams accurate instead of "close enough."
- Pressing is where a homemade piece starts looking intentional — a steam iron with variable output, a tailor’s ham for curves, and a liquid fray preventer on raw edges finish the job your stitches started.
Essential Cutting Tools for Fabric
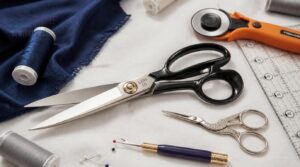
Your cutting tools are the foundation of every project — get them right, and everything else falls into place. The good news is you don’t need a drawer full of gadgets, just a few well-chosen ones that each earn their spot. Here’s what actually belongs in your kit.
If you want to sharpen your technique alongside your tools, these sewing project cutting tips break down exactly how to get clean, precise results every time.
Dressmaker Shears
A sharp pair of dressmaker shears is the single most important cutting tool you’ll own.
The bent lower handle keeps fabric flat on your table — no lifting, no shifting.
Blades run 8 to 9 inches, ground from high-carbon stainless steel for clean, snag‑free cuts.
Check for right- or left‑handed models. Your hand will thank you.
For even greater durability, consider shears with German stainless steel construction.
Rotary Cutter and Mat
Shears handle curves and detail work beautifully — but for straight cuts through multiple layers, a rotary cutter and self-healing cutting mat are in a league of their own.
A 45 mm blade slices through up to eight layers of cotton cleanly. The mat’s vinyl surface reseals after each pass, protecting your table and keeping your blade sharper, longer.
Pinking Shears
The rotary cutter wins on layers — pinking shears win on edges. That zigzag serrated edge does something a straight blade can’t: it shortens the exposed threads along a seam allowance, slowing fraying before it starts. On tightly woven cottons and linens, one pass is enough. No serger needed.
Pinking shears do what no straight blade can: one zigzag pass shortens exposed threads and stops fraying before it starts
Look for high carbon steel blades and ergonomic grips. Your hands will thank you.
Thread Snips
Pinking shears handle the edge. Thread snips handle everything after the needle stops. These small spring-loaded cutting tools sit beside your machine for one job — trimming loose thread ends fast, without lifting fabric or straining your hand. The spring reopens the blade automatically, so each snip is a single squeeze. No fumbling, no fatigue.
Hold snips near the tip for control. Angle the blades slightly toward the fabric surface and let the sharpness do the work. Forcing them dulls the edge quickly. Store them with the protective cap on — those fine tips damage easily.
Seam Ripper
Every mistake in sewing has a fix — and the seam ripper is it. This small forked tool slides under a stitch, the blade cuts clean, and the fabric stays intact.
- Pointed tip for tight seams
- Protective ball guards delicate fabric
- Replaceable blades extend the tool’s life
Wipe the blade after each use. Replace it when threads start resisting.
Measuring and Layout Tools
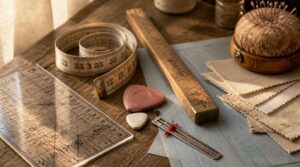
Cutting is only half the battle — before your shears ever touch the fabric, you need to know exactly where to cut. The right measuring and layout tools are what separate a garment that fits from one that sits in a drawer. Here’s what belongs in your kit.
Flexible Tape Measure
A flexible tape measure is the backbone of accurate sewing. The standard 60-inch (150 cm) length covers most body measurements, while fiberglass blades resist stretching — critical when you’re fitting curves that demand precision.
Look for dual imperial and metric markings; switching between the two mid-project is seamless. Store it loosely coiled to prevent kinks.
Sewing Gauge
Think of a sewing gauge as your ruler with memory. Set the sliding marker once — say, ⅝ inch — and it holds that measurement while you pin or chalk along the entire seam. No re-measuring. No drift. The Clover Sliding Gauge is a popular pick for its clear markings and smooth glide.
Hemming pants or curved sleeves? Lock the marker to your target hem depth and walk it along the edge. Consistent allowances, every time.
Quilting Rulers
Quilting rulers are a step up from basic measuring tools. Made from clear acrylic, they let you see exactly what’s underneath — seam lines, fabric patterns, grain — without guesswork.
Most run 1/8 to 1/4 inch thick, stable enough to guide a rotary blade without flexing. That non-slip grip backing keeps the ruler planted while you cut.
Seam Allowance Measuring
Seam allowance is the gap between your cut edge and your stitch line — get it wrong, and nothing fits.
- 5/8 inch (1.5 cm): standard for most garments
- 1/4 inch (0.6 cm): quilting and lightweight fabrics
- 1/2 inch (1.3 cm): outdoor or moderate-weight seams
- Wide allowances (over 5/8 inch): thick fabrics or bound edges
A sewing gauge locks in those measurements precisely.
Grainline Accuracy
The grainline is what makes or breaks a garment’s hang. Align it wrong and your seams skew, your hem dips unevenly, and nothing looks intentional.
To get it right, measure from the selvage to both ends of the grainline arrow — both distances must match. A long transparent ruler makes this fast and exact.
Fabric Marking Tools and Methods
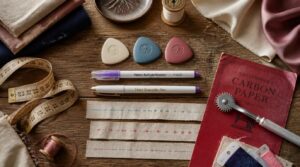
Marking your fabric accurately is what separates a finished piece that fits from one that frustrates. The wrong tool on the wrong fabric can leave permanent stains — or marks that vanish before you’re done cutting. Here’s what actually works, and when to reach for each one.
Tailor’s Chalk
Tailor’s chalk is one of those fabric marking tools that earns its place fast. It’s a wax-chalk composite — firm enough to draw crisp lines, forgiving enough to brush away cleanly.
Four reasons it belongs in your kit:
- Marks both light and dark fabrics
- No heat needed to remove it
- Triangular shapes give you three usable edges
- Fine-grind formulas leave precise lines
Water-Soluble Markers
If chalk is too chunky for fine detail work, water-soluble markers are your next step up. They draw clean, precise lines — fine nibs for tight curves, chisel tips for broader marks.
The ink disappears with a damp cloth. Just test on a scrap first; some fabrics soak up the ink differently.
Store caps on, horizontally, away from heat.
Tracing Wheel
For fabric marking across multiple layers, a tracing wheel paired with dressmakers tracing paper does the job markers can’t.
- Serrated wheels perforate fabric for bold, consistent pattern transfer
- Smooth wheels glide without holes, ideal for fine silk fabrics
- Zigzag edges mark seams while resisting fray
- Metal builds outlast plastic, retaining sharpness longer
- Steady pressure ensures accurate transfer onto pattern paper
Marking Delicate Fabrics
Silk and chiffon punish heavy hands. Skip dark fabric marking pens and reach for chalk pencils or water-soluble pens labeled safe for delicate fibers.
Always run a residue test on scraps before marking. Watch for ghost lines or color bleed. Press lightly to avoid impression marks.
For zero‑risk notches, basting stitches beat any pen, leaving silk untouched, ready to sew.
Removing Marks Safely
Even the gentlest water-soluble marker can leave a ghost if you rush the removal. Always test on a scrap first — dab with a damp cloth and watch for color bleeding before touching your project.
- Damp cloth lifts water-soluble lines cleanly
- 70% isopropyl alcohol removes stubborn marker on most fabrics
- Air-dry away from heat to avoid setting residue
Pinning, Clipping, Needles, and Thread
Once your fabric is marked and ready, the next step is holding everything in place — and choosing the right tools here matters more than most beginners expect. The pins, clips, needles, and thread you pick will directly affect how your fabric behaves under the machine. Here’s what you actually need in your kit.
Ball-Point Pins
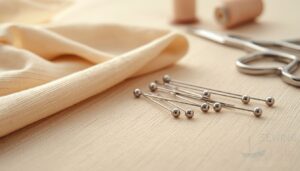
If you sew with knits at all, ball-point pins are non-negotiable. Their rounded tips push fibers aside rather than piercing them — which means no snags, no runs, no ruined jersey.
Look for 0.40–0.50 mm shafts on lightweight fabrics. Nickel plating keeps entry smooth and rust away.
Store them in a magnetic holder so tips stay protected.
Glass-Head Pins
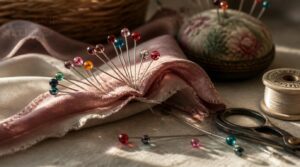
Glass-head pins are the workhorse of a well-stocked sewing kit — and for good reason. Their heat-resistant glass heads won’t melt under your iron, so you can press seams without unpinning everything first. That alone saves real time.
The colored heads aren’t just pretty. Color coding by section keeps pattern pieces sorted fast.
Sewing Clips
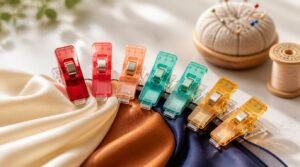
Pins leave holes. On leather, vinyl, or delicate silk, that’s damage you can’t undo. Sewing clips grip fabric edges without piercing — a revolutionary tool for beginners and pros alike.
Most feature silicone-tipped jaws, wide enough for several layers, plus measurement markings along the body to align seam allowances fast. For quilting, they hold thick batting securely without compressing it.
Machine Needle Types
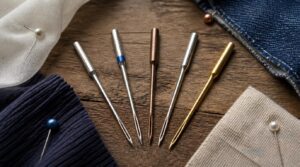
The needle in your machine is doing more work than you’d think — and the wrong one ruins fabric fast.
- Universal needles (90/14) handle most woven and knit blends
- Ballpoint needles slip between knit fibers without snagging
- Denim needles pierce heavy canvas or thick layers cleanly
- Microtex needles keep fine silks pucker-free
- Titanium-coated needles last longer on dense fabrics
Basic Thread Colors
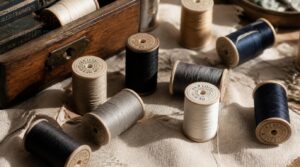
Think of thread color like a wardrobe staple — neutrals do the heavy lifting. Black, white, gray, and beige cover most projects without a second thought.
| Thread Color | Best Use |
|---|---|
| Black | Hems, topstitching |
| White | Light fabrics, linings |
| Gray | Medium-tone blends |
| Beige | Natural fibers, cotton |
| Navy | Contrast stitching, denim |
Pressing, Finishing, and Kit Maintenance
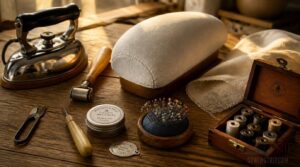
Cutting and stitching are only half the job — what you do after the seam matters just as much. A good press can make a homemade piece look store-bought, and a well-maintained kit keeps you from fighting your own tools. Here’s what belongs in your pressing and finishing lineup, plus how to keep everything working like it should.
Steam Iron
A good steam iron is the unsung hero of clean sewing. Look for variable steam output — being able to dial steam up or down means you’re not wrestling a wool setting onto delicate silk.
The soleplate coating matters too: ceramic and stainless steel glide smoothly without snagging threads.
Automatic shut-off keeps you safe if you step away mid-project.
Ironing Board
Your iron is only as good as where it lands. A sturdy ironing board — height-adjusted to elbow level, roughly 28–38 inches — saves your back during long sessions. Look for a perforated metal surface to let steam pass through cleanly.
Replace the cover when scorch marks appear. Keep the folding joints lubricated so it doesn’t wobble mid-press.
Tailor’s Ham
A flat board gets seams smooth — but curved seams need a curved surface. That’s where the tailor’s ham earns its place.
- Press bust darts over the dome to hold their shape
- Shape princess seams without flattening the silhouette
- Contour sleeve caps around the armhole cleanly
- Mold collar edges without pointy creases
- Distribute seam allowances evenly along hip curves
Fray Preventer
Raw edges unravel fast — and no amount of careful stitching fixes fraying that starts before you’re done.
That’s where liquid fray preventer steps in. A thin line of Fray Check along a cut edge dries clear and flexible in under five minutes, bonding fibers at the seam without stiffness.
Test on a scrap first, especially with delicate fabrics.
Tool Care Checklist
Your tools will only work as well as you keep them.
Wipe blades dry after every session to stop rust before it starts. Sharpen scissors every 6–12 months — high-carbon steel holds its edge longer, but nothing lasts forever. Change machine needles every 6–8 hours of sewing. A bent tip skips stitches and snags fabric quietly.
Descale your iron’s steam vents monthly with a vinegar solution.
Frequently Asked Questions (FAQs)
What 10 tools should be included in a sewing kit?
A solid beginner kit comes down to ten tools: fabric scissors, a seam ripper, measuring tape, straight pins, a pin cushion, clear ruler, tailor’s chalk, thimble, hand needles, and sewing clips.
What items do you need in a sewing box?
A well-stocked sewing box holds your cutting tools, measuring tape, marking chalk, pins, clips, machine needles, thread in basic colors, a seam ripper, and a small iron — your beginner kit essentials covered in one place.
What are some sewing must haves?
You don’t need much to start sewing — just scissors, needles, pins, thread, and a seam ripper. These five basics handle almost every beginner project and build the foundation for everything else.
What does every sewing room need?
Every sewing room needs scissors, thread, pins, a tape measure, and a seam ripper. Add smart storage, good lighting, and a way to organize patterns — and you’re genuinely set up to create.
What should I put in my sewing kit?
Think of your kit as a starting crew, not a full studio. You’ll reach for sewing scissors, thread, pins, a measuring tape, and a seam ripper on every single project.
What are must haves for sewing?
Sharp scissors, a 60-inch tape measure, pins, thread, needles, and a seam ripper cover most projects. Add a sewing machine, and you’re genuinely ready for almost anything.
What should you buy when you first start sewing?
Start with fabric scissors, a tape measure, universal needles, pins, neutral thread, and a seam ripper. These cover cutting, measuring, and undoing mistakes — everything you need to find your sewing rhythm.
How do I organize small sewing accessories?
A place for everything — group pins in a magnetic pincushion, thread on a small rack, and notions like your seam ripper in labeled stackable bins. Sorted by function, nothing vanishes mid-project.
What thread colors should I stock first?
Four or five neutrals carry you far — black, white, beige, light gray, and navy. They handle most repairs, match common fabrics, and keep your budget intact without hunting for the perfect spool of thread every time.
Can I use regular needles for all fabrics?
No — and it’s one of the sneakiest ways to ruin a project. Wrong needle, wrecked fabric. Ball-point needles protect knits; denim needles power through canvas. Always test on a scrap first.
Conclusion
You don’t need to everything at once. Start with what your current projects actually demand, then fill gaps as they appear.
The essential sewing kit items covered here aren’t about having a perfect setup—they’re about removing friction between your idea and the finished piece.
A sharp pair of shears, one good seam ripper, and a reliable iron.
Build from there. The kit that works is the one you’ll actually reach for.
- https://www.themudplace.com/blogs/artful-adventures/basic-sewing-kit-checklist
- https://blog.siysewityourself.com/2022/06/10/15-must-have-notionf-for-your-sewing-kit
- https://homeyhomies.com/sewing-starter-kit-everything-you-need-to-to-start-sewing
- https://blog.wawak.com/post/essential-sewing-supplies-for-beginners
- https://mellysews.com/notions