This site is supported by our readers. We may earn a commission, at no cost to you, if you purchase through links.
Tame raw edges with pinking shears and use muslin under slippery fabrics to stop the slip-n-slide. Cleaning your machine with a pipe cleaner? You’ll avoid skipped stitches. There’s a treasure trove of tricks just waiting for you next.
Table Of Contents
- Key Takeaways
- Genius Ways to Keep Scissors Sharp
- Easy Fabric Preparation and Handling Tricks
- Organize Sewing Pins and Needles Efficiently
- Time-Saving Sewing Machine Maintenance Tips
- Clever Seam Finishing Without a Serger
- Prevent Thread Tangles and Breakage
- Quick and Accurate Seam Allowance Marking
- Fast Ways to Turn and Finish Straps
- Smart Storage Solutions for Sewing Supplies
- Top 5 Must-Have Sewing Tools and Kits
- Frequently Asked Questions (FAQs)
- Conclusion
Key Takeaways
- Always reserve fabric scissors for cutting fabric—using them on anything else dulls the blades and ruins your precision.
- Keep your sewing pins organized and sharp by using DIY magnetic bowls, steel wool pincushions, or magnetic wristbands.
- Prep fabric by washing it before sewing and cut slippery fabrics with muslin underneath for cleaner, more accurate results.
- Tackle maintenance with simple habits: clean your sewing machine with pipe cleaners and store tools dry to keep everything in top shape.
Genius Ways to Keep Scissors Sharp
You’ll save hours of frustration by keeping your fabric scissors sharp with these simple tricks. Smart sewers know that using aluminum foil as a quick sharpener and storing scissors properly can extend their life by years.
Only Use Scissors for Fabric
Your fabric scissors deserve VIP treatment. Only use fabric-only scissors for cutting fabric—never paper, plastic, or pins. These materials contain harsh fibers and chemicals that cause blade dulling faster than you’d think.
When your sharp scissors meet non-fabric materials, cutting accuracy plummets. Different scissor types exist for good reason. Prevent damage by designating specific scissors for fabric only. You can also explore options to sharpen fabric scissors to maintain their cutting ability.
Sharpen With Aluminum Foil
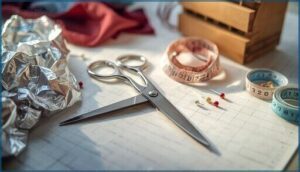
When your scissors get dull, grab some aluminum foil from your kitchen. Cut through several layers of foil to restore that razor-sharp edge. The foil grade matters – heavy-duty foil works better than regular thickness. This foil sharpening science also works on craft knives and rotary cutters.
For best performance, consider routine scissor maintenance. It’s one of the simplest sewing hacks that keeps scissors sharp between professional sharpenings.
Store Scissors Clean and Dry
Proper storage transforms your scissors from dull disappointments into precision tools. After each sewing session, wipe blades clean with a dry cloth to remove fabric fibers and debris. Store them in a dry drawer or magnetic holder away from moisture. Explore various storage options to keep your scissors organized.
Cleaning scissors regularly prevents rust formation, while safe storage protects blade edges. Consider blade lubrication with a drop of sewing machine oil monthly. These simple sewing hacks extend scissor life substantially.
Easy Fabric Preparation and Handling Tricks
You’ll save hours of frustration by preparing your fabric properly before you start cutting and sewing. These simple handling tricks prevent common problems like shrinkage, fraying, and slippery fabric disasters that can ruin your project.
Wash Fabric Before Sewing
Skip this vital step and you’ll learn the hard way why fabric preparation matters. Always wash your fabric before cutting to prevent shrinkage and color bleeding disasters later.
Use appropriate washing temperatures and fabric softeners as needed. Cold water works for most materials, while cotton benefits from warm cycles. Air dry when possible for best shrinkage control.
This simple sewing hack saves countless hours of rework and ensures your finished project maintains its intended fit and appearance.
Use Pinking Shears to Prevent Fraying
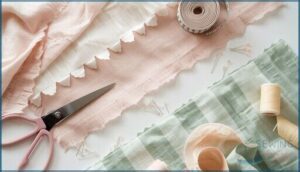
Most sewers know that fraying can ruin a project faster than you can say “unraveled mess.” Pinking shears create zigzag cuts that naturally resist fraying on most fabric types.
These specialized scissors work by cutting fibers at angles that prevent threads from pulling straight out. For cotton, linen, and lightweight wools, pinking offers excellent edge finishing without additional steps.
Keep your shears sharp for clean cuts that enhance fraying prevention effectiveness.
Cut Slippery Fabric With Muslin Underneath
Slippery fabrics like silk and satin can slide around during cutting, creating uneven edges. Place cotton muslin underneath your fabric to create stabilization and prevent shifting. This cutting technique acts like pattern weights, keeping your material in place.
The muslin types with medium weight work best for layering benefits. You’ll achieve cleaner cuts and save time on these sewing hacks for challenging fabrics.
Find The Grain Using Thread Pulling
Finding fabric grain becomes simple when you clip into the selvage edge and pull a loose thread. This sewing hack reveals the true thread direction of woven fabrics instantly.
You’ll see the thread run straight across, creating perfect fabric grainlines for cutting accuracy. No more guesswork—just follow that pulled thread for professional sewing results every time.
Organize Sewing Pins and Needles Efficiently
You’ll waste precious sewing time hunting for scattered pins and needles if you don’t organize them properly.
These three simple storage solutions will keep your pins sharp, accessible, and ready for your next project.
DIY Magnetic Pin Bowl
Scattered pins create chaos in your sewing space. You’ll transform any shallow bowl into a pin-catching powerhouse by gluing strong magnets to its bottom. Choose ceramic or glass bowl material for durability.
Consider bowl size carefully** – wider bowls offer better pin bowl size for large projects. Experiment with magnet placement around the rim for maximum bowl magnet strength. Round alternative magnet shapes work best for even magnetic pull.
This clever trick using simple household items beats expensive pin dishes, making it one of the top sewing hacks for organized crafters.
Use Steel Wool Pincushion
Here’s a clever sewing hack that doubles as maintenance. Steel wool makes an excellent pincushion that keeps your sewing pins sharp while preventing rust. Choose fine-grade steel wool for pincushion safety and ideal sharpening pins results.
The natural oils in steel wool protect against corrosion better than alternative materials like fabric cushions. This simple sewing tip transforms ordinary steel wool into a functional tool that maintains your pins’ points perfectly.
Store Pins on a Magnetic Bracelet
A magnetic bracelet keeps pins within arm’s reach while you sew. This sewing hack offers ergonomic benefits by reducing repetitive reaching and bending. The magnetic surface holds pins securely, improving pin accessibility during projects.
You can buy specialty sewing bracelets or create a DIY bracelet using small magnets and fabric. This organize sewing pins method enhances bracelet safety and workflow efficiency. Needles made with high carbon steel are commonly used.
Time-Saving Sewing Machine Maintenance Tips
You’ll save hours each week when you maintain your sewing machine regularly using simple household items like pipe cleaners and coffee stirrers to remove lint and debris from tight spaces.
Keep your iron clean with a heated salt and vinegar mixture, and you’ll prevent fabric stains while ensuring crisp seams every time.
Clean Machine With Pipe Cleaners and Coffee Stirrers
Your sewing machine needs regular attention to run smoothly. Clean your machine using pipe cleaners inserted into coffee stirrers for precise debris removal from tight spaces. This clever hack reaches the needle plate cleaning areas and bobbin compartments where lint accumulates.
Focus on machine lint removal around the feed dogs and tension discs. Regular preventative maintenance with this simple oiling techniques preparation keeps your machine running like new.
Maintain Iron With Salt and Vinegar
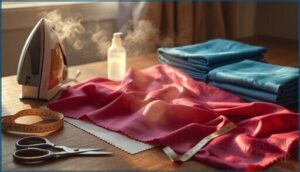
Nothing sparks frustration like an iron streaking gunk on fresh fabric. For fast results, sprinkle table salt on paper, glide the hot soleplate, and finish with a salt and vinegar paste.
Mind your Vinegar Concentration Effects—too much and you’ll risk corrosion. A great way to combat mineral buildup is to use a vinegar cleaning solution. Stick with a monthly Iron Cleaning Frequency and see your trusty tool working like new!
Save Time by Regular Upkeep
Once your iron’s sparkling, don’t let machine upkeep slide. A few minutes spent on regular cleaning and oiling boosts machine efficiency, keeps scissors sharp, and extends tool longevity.
Sharpen needles, organize supplies, and you’ll avoid surprises like skipped stitches and tangled thread. These time-saving sewing hacks keep your projects humming along—and protect your fabric investment and skill enhancement in the long run.
Clever Seam Finishing Without a Serger
You don’t need a serger to give your seams a clean, professional look—there are fast, simple techniques you can use with tools you already have.
If you’ve ever zigzagged a raw edge or grabbed your pinking shears in a pinch, you know you can keep fraying at bay and still finish strong.
Alternative Seam Finishing Methods
After keeping your machine humming, you’ll want seams that last. Serger alternatives like French seams, Hong Kong bias binding, and felled seams give you pro-level seam finishing—no serger needed.
These methods finish seams neatly, boost fray prevention, and work wonders for woven fabrics. For woven garments, bear in mind methods for seam finishing to prevent unraveling during wear and wash.
Try bias binding for jackets or French seams for airy blouses—your projects will thank you.
Use Pinking Shears for Raw Edges
In terms of fray prevention, grab your pinking shears for raw edge finishing. Zigzag blades nip at the fabric, leaving decorative edges that keep threads in check.
Whether you’re working with delicate silk or sturdy denim, this sewing hack manages all fabric types—even tricky curved edges.
If you’re without pinking shears, try alternative tools for similar results.
Stay Stitching Techniques
Stay stitching is your secret weapon for fabric stabilization and curve control. Just sew a single line of stitches along curved edges before assembly. It prevents distortion, especially on bias cuts.
Think of it as a seatbelt for tricky seams—no wild stretching! Use it as an interfacing alternative, and pair with bias binding for pro-level sewing shortcuts and techniques.
Prevent Thread Tangles and Breakage
You know how frustrating it is when your thread knots up or snaps right in the middle of a seam. With a few smart tricks, you’ll keep your stitches smooth and avoid those annoying thread disasters.
Double Needle and Dowel Rod Hack
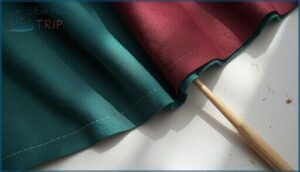
After mastering seam finishes, you’ll want smoother stitching. The double needle and dowel rod hack helps you avoid thread tension issues and tangles. Just place a dowel rod (pick the right dowel rod size) between twin needle thread spools. Try alternative dowel materials for fun. Great for decorative stitching uses and works with most twin needle brands.
- Prevent tangles
- Improve thread flow
- Use with any sewing machine
- Boost decorative stitching
Strengthen Thread for Hand Sewing
After sorting out thread tangles, let’s talk thread strengthening for hand sewing. Try thread waxing—just run wax on thread for smoother stitching and less breakage. Pick strong thread for your project, and keep knot security tight.
Use dense stitches and basic reinforcement techniques to keep seams sturdy. With these tricks, your thread won’t snap mid-sew.
Prevent Decorative Thread From Breaking
If you’ve just waxed your thread for hand sewing, don’t forget that decorative thread acts up if you skip the basics. Always use high Thread Quality, match Needle Type, and check Tension Adjustment. Try a longer Stitch Length and smooth Stabilizer Usage.
Thread conditioning and thread strengthening help cut down on thread breakage, so don’t skip these steps. For best results, consider thread tensile strength to improve stitch longevity.
Quick and Accurate Seam Allowance Marking
You don’t have to waste time guessing seam allowances when you use smart marking tricks like rubber banded pencils or soap slivers.
These hacks help you keep lines straight and sewing frustration to a minimum, even if your cat tries to help.
Rubber Banded Pencils for Marking
With two pencils and a rubber band, you’ll get Pencil Marking Accuracy every time. This DIY Marking Tool gives Seam Allowance Consistency without fancy gadgets.
It’s one of those clever tricks—just adjust for width and mark both lines in one go. Erasable Marking Options make cleanup a breeze.
Try this sewing shortcut for fast, reliable Fabric Marking Alternatives!
Use Soap Slivers or Tailor’s Chalk
If you’re tired of pencils rolling off the table, grab soap slivers or tailor’s chalk for marking precision. These clever tricks work wonders as chalk alternatives, especially when you need clean lines that wash out easily.
Soap durability means marks last through sewing, and residue removal is a breeze. It’s one of those sewing hacks using simple household items for fabric compatibility.
Mark Seam Allowances on Patterns
If you’re done with soap slivers and tailor’s chalk, it’s time to mark seam allowance directly on your patterns. You’ll love these sewing hacks:
- Use fine-point Marking Tools for Accurate Seamlines.
- Add seam allowance for Pattern Alterations.
- Trace Curved Seams with flexible rulers.
- Edit Digital Patterns for quick adjustments.
Sewing tips that save headaches!
Fast Ways to Turn and Finish Straps
You don’t have to wrestle with skinny straps or ties for ages—smart shortcuts make turning and finishing them a breeze.
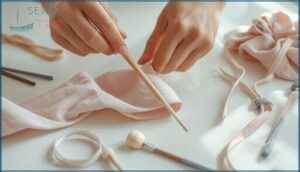
Grab a seam ripper, straw, or chopstick, and you’ll get crisp corners and smooth edges in no time.
Use Seam Ripper or Straw for Turning
If marking seam allowances felt easy, turning narrow straps can be just as simple. Try Seam Ripper Uses for starting tight tubes, or Straw Turning Tricks to flip them inside out fast.
Here’s a handy table comparing Alternative Tools:
| Tool | Best For | Watch-outs |
|---|---|---|
| Seam Ripper | Small tubes | Gentle touch |
| Drinking Straw | Medium straps | Avoid bending |
| Chopstick | Thick projects | Push evenly |
Turn Thin Projects Right Side Out
Turning thin projects right side out can feel like threading a needle in the dark. Grab a drinking straw and a chopstick—these clever shortcuts work wonders for fabric tube lengths.
Tube turning tools and loop turner uses save time, but everyday items do the trick. Whether it’s straps or ties, these sewing hacks make project applications easier and frustration-free.
Crisp Corners and Ties Techniques
A sharp chopstick or point turner is your best friend for point precision when you want to turn a crisp corner or finish ties. For sturdy tie construction, reinforce corners with a few extra stitches.
Bias binding helps shape neat edges. These sewing tips make turning techniques easier, giving you perfect corners and professional-looking results every time you sew.
Smart Storage Solutions for Sewing Supplies
You know how sewing supplies can take over your workspace if you let them, so it’s smart to keep bobbins, trims, and fabric sorted with easy storage hacks.
With simple tools like toe separators, cardboard, and Ziplock bags, you’ll spend less time searching and more time sewing.
Store Bobbins With Toe Separators
Once your straps look crisp, it’s time to tackle bobbin organization. Grab a toe separator—yes, the kind for pedicures—and use it as a DIY bobbin holder. Consider exploring various storage solutions for enhanced organization.
Here’s how to store bobbins and manage thread:
- Slot each bobbin into a space.
- Keep colors separated.
- Prevent tangling.
- Save drawer space.
- Spot threads instantly.
Organize Trims on Cardboard
If you’ve got thread organization down, let’s tackle trim organization. Grab sturdy cardboard alternatives, wrap your trims around, and secure them with pins.
This sewing hack keeps your sewing notions neat, saves space, and gives you a visual inventory at a glance. Plus, it prevents damage and tangles—no more hunting for that one elusive ribbon in a messy drawer!
File Cabinet Storage for Fabric
File cabinet storage is a sewing shortcut that makes fabric organization a breeze. Drape your fabric stash over hanging folders for instant space optimization and wrinkle prevention. Most file cabinet types work—just add a labeling system for easy sorting.
You’ll see every piece at a glance, avoid duplicate buys, and store extra fabric safely. It’s practical, efficient, and tidy!
Ziplock Bags for Patterns and Cut Pieces
In the context of sewing hacks, Ziplock bags are a lifesaver for pattern protection and space saving. Toss your sewing patterns and cut pieces inside, seal for moisture control, and stack for easy project organization.
You’ll get a visual inventory at a glance, plus never lose a pattern piece again—just like magic for sewing shortcuts!
Top 5 Must-Have Sewing Tools and Kits
You’ll save time and avoid headaches when you’ve got the right sewing tools at your fingertips. Let’s check out five essential kits that make every project smoother, so you don’t end up searching for that one missing pin in the carpet.
1. Lhedon Seam Rippers Stitch Remover Tool
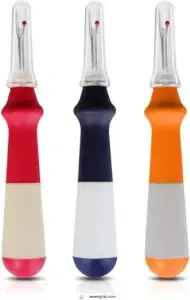
With its ergonomic grip and sharp stainless steel blade, the Lhedon Seam Ripper makes quick work of stubborn stitches. You’ll appreciate the red safety ball that keeps fabric safe while you zip through seam removal.
Each ripper’s bright color means you’ll never lose it in your sewing kit. Whether you’re fixing a mistake or opening buttonholes, this tool’s efficiency saves time and frustration.
Plus, those protective caps keep your fingers safe—because nobody likes a surprise poke!
Best For: Home sewists, crafters, and professionals who need a reliable, comfortable tool for removing stitches and opening buttonholes.
- Ergonomic, non-slip handle reduces hand fatigue during long sewing sessions.
- Sharp stainless steel blade cuts quickly through most threads and fabrics.
- Red safety ball and protective caps help prevent accidental damage and injuries.
- May feel bulky to users with smaller hands.
- Not ideal for very thick or heavy-duty materials.
- Requires careful handling to avoid poking or cutting yourself.
2. Sewing Thread Assortment with Bobbins
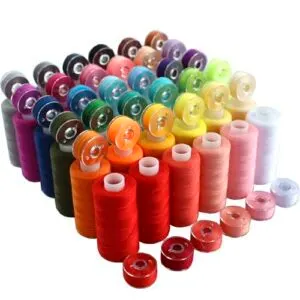
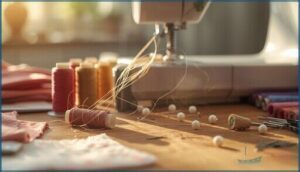
A rainbow of thread colors at your fingertips makes sewing feel like painting with fabric. Grab a sewing thread assortment with matching bobbins—polyester is tough, resists mildew, and works for hand or machine sewing.
Pre-wound bobbins save time and reduce tangles, so you’ll spend less time fixing jams and more time creating. Store them in clear cases or toe separators for quick color grabs.
Just check bobbin compatibility with your machine before you get started—some don’t fit every model.
Best For: Sewing enthusiasts, crafters, and quilters who want a wide range of thread colors with matching bobbins for efficient, organized projects.
- 36 vibrant polyester threads with matching bobbins for easy color coordination.
- Pre-wound bobbins reduce thread breaks and save setup time.
- Suitable for hand sewing, machine sewing, embroidery, and quilting.
- Bobbin compatibility issues with certain sewing machines.
- Some users report thread tangling or breakage.
- Thread thickness may be too fine for some preferences.
3. ICNOW Sewing Kit Magnetic Pincushions Included
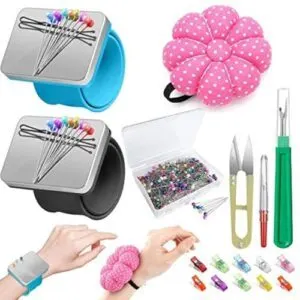
If you’re tired of chasing runaway pins, the ICNOW Sewing Kit with magnetic pincushions is your new best friend. These wrist pincushions keep pins close, so you’re not fishing around mid-project.
You’ll love the kit’s variety—over 200 pins, multiple needles, and handy chalk. It’s perfect for repairs, quilting, and crafts.
Just watch out for the wristband’s comfort and check the scissors’ sharpness. With everything organized, you’ll spend less time searching and more time sewing.
Best For: Beginners and experienced crafters who want an organized, all-in-one sewing kit with easy access to pins and tools.
- Magnetic wrist pincushions keep pins secure and within reach.
- Includes over 200 pins, multiple needles, and essential sewing tools.
- Compact and portable design is great for home or travel.
- Magnetic wristbands may not fit comfortably or work well for everyone.
- Scissors and clippers can be dull or lack precision.
- Some pins are smaller than expected and may not suit thick fabrics.
4. Sewline Blue Water Soluble Glue Pen
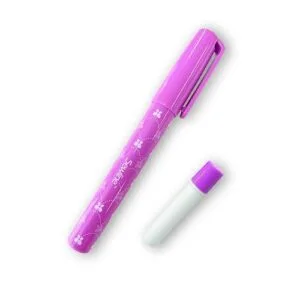
When you’re tired of pins poking your fingers, grab the Sewline Blue Water Soluble Glue Pen. It’s a lifesaver for English Paper Piecing, applique, or tricky corners. Just swipe, stick, and stitch—no sticky residue, and it washes out with warm water.
The blue color lets you see exactly where the glue goes, then dries clear. Refills are easy to swap, so you’re never left stranded mid-project. It’s portable, precise, and makes fabric positioning quick and painless.
For best results, remember to clean fabric surfaces before applying any glue.
Best For: Quilters, sewists, and crafters who want a quick, mess-free way to hold fabrics in place without pins or clips.
- Easy to apply, no sticky residue, and washes out cleanly with warm water.
- Dries clear after a blue, visible application for precise placement.
- Portable and refillable, making it handy for both home and travel projects.
- May not work well on thick or high-pile fabrics.
- Can dry out if cap is left off or if overapplied.
- Requires occasional refills for large or frequent projects.
5. Magnetic Wrist Pincushion Sewing Pins Set
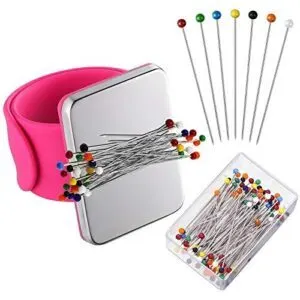
Wearing a magnetic wrist pincushion makes pin management a breeze. Just slap it on, drop your pins onto the magnet, and stop wasting time hunting for lost ones in your lap or on the floor.
The sturdy silicone band fits most wrists comfortably, and the magnet keeps your workspace tidy. It’s especially handy for quick pin grabs while quilting or hemming.
Still, don’t overload it; strong magnets help, but a pile of pins might slip off if you’re rushing.
Best For: Sewists, quilters, and tailors who want convenient pin storage and faster pin access during projects.
- Keeps pins within reach and reduces dropped pins on the floor.
- Flexible silicone band fits most wrists comfortably.
- Magnetic pad allows for quick pickup and workspace tidiness.
- May not securely hold a large pile of pins, risking spills if overloaded.
- Pins that aren’t magnetic won’t stick to the pad.
- Wristband can feel bulky or awkward during extended wear.
Frequently Asked Questions (FAQs)
How can I fix a puckered seam fast?
To fix a puckered seam fast, press the seam flat with a steam iron, using gentle tension to smooth the fabric.
If that doesn’t work, pick the stitches in the puckered area, then resew slowly for better results.
What’s the quickest way to match plaids?
Measure twice, cut once—wise words for matching plaids.
Line up your fabric’s prominent lines at key pattern points, pin securely, and always cut with the right side facing up to guarantee precise, professional seams.
How do I sew without visible pinholes?
To avoid visible pinholes, use fine sharp needles, pin within the seam allowance, or switch to fabric clips for delicate fabrics.
If you’re feeling clever, try hand-basting—it’s like a secret handshake for invisibility.
What’s a shortcut for perfect button placement?
Like lining up dominoes, mark button spots with a fabric marker through the buttonholes after pinning your button band in place. This shortcut ensures each button lands exactly where it should—no more crooked buttons!
How can I avoid skipped stitches on knits?
Switch to a ballpoint or stretch needle and use polyester thread—your machine will glide right over knits.
Lower the presser foot pressure a touch, and don’t yank the fabric. Let the feed dogs work!
Conclusion
Like a trusty seam ripper fixing a crooked stitch, these clever sewing shortcuts and tips turn hassle into smooth progress. You’ll breeze through fabric prep, machine maintenance, and tool storage with less stress and more confidence.
Don’t let tangled threads or dull scissors slow you down—keep your setup simple and your workspace tidy. Use these tricks in your daily projects, and sewing transforms from a puzzle into a process you’ll actually enjoy. With less stress and more confidence, you can tackle any sewing task.
- https://www.thelaststitch.com/time-saving-sewing-tips/
- https://www.positivelysplendid.com/time-saving-sewing-tricks/
- https://www.reddit.com/r/SewingForBeginners/comments/1lsdz96/what_are_some_sewing_tips_tricks_holy_grails_that/
- https://dressaday.com/2010/10/06/book-review-1000-clever-sewing-shortcuts-and-tips/
- https://sewcutepatterns.com/blog/speed-up-your-stitching-tips-for-sewing-faster-amp-more-efficiently

