This site is supported by our readers. We may earn a commission, at no cost to you, if you purchase through links.
 You can master how to glue sewing by choosing the right fabric adhesive for your project.
Start by testing your glue on scrap material—nobody wants surprises on finished work. Clean both fabric surfaces thoroughly, then apply a thin, even layer of glue.
Press pieces together firmly and let them cure completely. Modern fabric glues aren’t your grandmother’s craft paste; they’re engineered to flex, wash, and last.
For leather projects, contact cement works like magic, creating bonds stronger than many stitched seams. The secret lies in surface preparation and patience—rushing the process is like trying to thread a needle in the dark.
Table Of Contents
- Key Takeaways
- Benefits of Using Fabric Glue
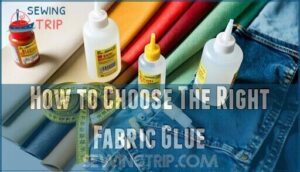
- How to Choose The Right Fabric Glue
- Steps for Applying Fabric Glue
- Factors to Consider When Buying Fabric Glue
- Top Fabric Glues in 2023
- Benefits of Gluing Leather
- Tips for Effective Leather Gluing
- Essential Supplies for Leather Gluing
- Frequently Asked Questions (FAQs)
- Conclusion
Key Takeaways
- Test fabric glue on scraps before starting your project – You’ll avoid disasters by checking for staining, seepage, or poor adhesion on a small piece of the same material first.
- Choose the right adhesive for your specific fabric type – You need flexible glues for stretchy materials, waterproof options for outdoor gear, and gentle formulas for delicate fabrics to ensure proper bonding.
- Prepare surfaces properly for maximum bond strength – You must clean both fabric pieces thoroughly, remove wrinkles by ironing, and ensure complete dryness before applying any adhesive.
- Apply thin, even layers and allow full curing time – You’ll get professional results by spreading glue evenly, pressing pieces firmly together, and waiting the full 24 hours for maximum strength before handling.
Benefits of Using Fabric Glue
When you’re pressed for time or lack advanced sewing skills, fabric glue becomes your crafting superhero.
This fabric adhesive delivers speed and convenience that traditional needle-and-thread methods simply can’t match.
You’ll finish projects in minutes rather than hours, making it the perfect sewing alternative for busy schedules.
The beauty of sewing with glue lies in its accessibility.
You don’t need years of practice or steady hands to achieve professional-looking results.
Anyone can master this technique, making it ideal for beginners who feel intimidated by complex stitching patterns.
Fabric glue excels in embellishment applications, allowing you to attach sequins, patches, and decorative elements with precision.
It’s also brilliant for temporary fixes when you need quick repairs before permanent solutions.
Cost effectiveness is another major advantage.
A single bottle of fabric adhesive costs less than hiring alterations or buying new items.
These fabric glue benefits make it an essential tool for smart crafters who value both quality and efficiency.
How to Choose The Right Fabric Glue
Selecting the perfect fabric glue feels like matching puzzle pieces – you need the right fit for lasting results. Your fabric compatibility determines whether you’ll achieve professional-looking repairs or messy disasters. Different materials demand specific adhesive formulations, so understanding your fabric type is vital.
Getting fabric glue right is like solving a puzzle – perfect matches create lasting bonds, wrong choices spell disaster.
Here are three key factors for smart adhesive selection:
- Match glue flexibility to your fabric’s stretch – rigid adhesives crack on stretchy materials, while flexible options move with the fabric naturally
- Consider project durability needs – permanent glues work best for long-term repairs, while temporary options suit quick fixes
- Factor in drying time requirements – fast-setting glues demand quick positioning, slower options allow adjustments
Application precision matters too. Lightweight fabrics need gentle, clear-drying formulas to avoid staining or stiffening. Heavy materials like denim require stronger bonds. For patches, consider using heavy-duty fabric glues to guarantee a lasting hold. Always check manufacturer recommendations for fabric glue types before starting your project.
Steps for Applying Fabric Glue
Applying fabric glue correctly makes the difference between a strong, lasting bond and a messy project that falls apart after the first wash.
You’ll want to follow these four essential steps to guarantee your fabric pieces stay together perfectly, whether you’re hemming curtains or attaching decorative patches.
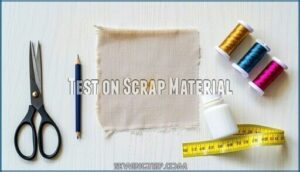
Test on Scrap Material
Before you commit to your main project, grab a small piece of the same fabric for scrap testing.
Apply a tiny amount of fabric glue and check for fabric reaction, staining, or seepage prevention issues. This colorfastness check reveals how the adhesive interacts with your material.
Watch for residue visibility and test adhesion strength after drying. Smart fabric compatibility testing prevents disasters on your actual project.
One should also consider suitable fabrics to use with fabric glue. This simple step saves time, money, and frustration later, and is a key part of fabric glue usage, ensuring successful projects.
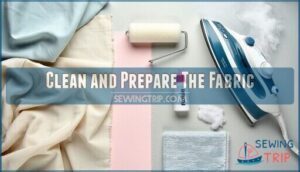
Clean and Prepare The Fabric
Once you’ve confirmed fabric compatibility through testing, focus on proper surface preparation. Remove debris, dust, and oils from both fabric pieces.
Ironing importance can’t be overstated—smooth out wrinkles for superior bonding. Verify complete fabric drying before proceeding.
Some synthetic materials may require primer use for better adhesion. Clean preparation determines your project’s success.
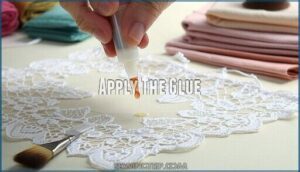
Apply The Glue
Squeeze fabric glue along fabric edges using the applicator tip for even application.
Work from one end to the other, maintaining steady pressure to control flow.
Spread the adhesive evenly with a brush or toothpick to prevent glue seepage through delicate materials.
Apply thin layers to avoid staining and guarantee proper fabric bonding without creating stiff spots.
Apply these techniques to ensure a strong and flexible bond, and remember to work carefully to prevent mistakes, using delicate materials with care.
Press and Allow to Dry
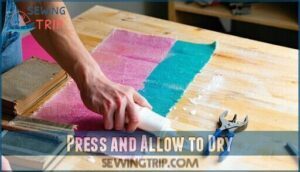
How do you guarantee your fabric glue creates a rock-solid bond? Once you’ve applied the adhesive, press the fabric pieces together firmly and hold for several seconds. Applying pressure helps eliminate air bubbles and guarantees maximum contact between surfaces.
- Prevent shifting by using clamps or heavy books during the curing process
- Monitor drying time carefully—most fabric glues need 24 hours for full bond strength
- Avoid glue stiffening by removing excess adhesive before it sets completely
Patience pays off when glue holding depends on proper curing methods.
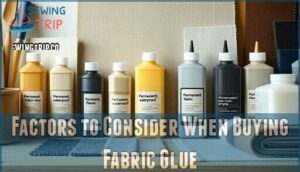
Factors to Consider When Buying Fabric Glue
You’ll need to match your fabric glue to your specific project, considering whether you need permanent or temporary adhesion, and how the glue performs with your fabric type.
The right choice depends on factors like bonding strength, how clear it dries, and whether it can handle washing or water exposure without failing.
Strength and Permanence
Durability makes or breaks your fabric bonding project. When shopping for fabric glue, you’ll want strong fabric glue that creates lasting bonds.
Permanent fabric glue resists fabric degradation over time, while temporary options won’t survive multiple washes. Many factors influence fabric glue’s overall strength.
| Glue Type | Bonding Lifespan |
|---|---|
| Temporary | 1-3 washes |
| Washable | 6-12 months |
| Permanent | Years with care |
| Industrial | Lifetime bond |
Consider environmental factors like heat and humidity. Stress testing your chosen adhesive prevents disappointing results when your project faces real-world conditions.
Clear Dried Color
Once you’ve found the perfect strength for your project, glue appearance becomes your next priority. The best fabric glue should vanish like a magician’s trick once it dries. Nobody wants obvious glue marks ruining their beautiful handiwork, right?
When shopping for fabric adhesive, you’ll want products that guarantee crystal-clear results. This isn’t just about looking professional—it’s about preserving fabric integrity. A quality glue for sewing maintains your material’s original beauty while creating strong bonds.
For a selection of options, consider browsing a site that offers various adhesive products.
Here’s what to look for in clear dried color performance:
- Stain Prevention: Choose adhesives that won’t leave yellow or cloudy marks on light fabrics
- Residue Visibility: Test that dried glue remains completely invisible on both sides of your fabric
- Colorfast Adhesion: Verify the bond stays clear even after washing and wear
Smart fabric glue selection protects your investment in beautiful materials.
Compatibility and Water Resistance
Before picking fabric adhesive, match glue formulas to your fabric types—cotton needs different chemistry than polyester.
Water resistance becomes your best friend when projects face wash cycles or environmental factors like humidity. Machine washable adhesives won’t surrender after multiple trips through your washer.
For projects needing durability, consider using specialized bonding agents. Test compatibility first: some fabric glue creates stiff spots on delicate materials, while others stay flexible.
Think about your project’s future—will it need frequent washing? Choose adhesive that survives both gentle hand-washing and aggressive machine cycles without losing its grip. This ensures the project remains intact and water resistant over time.
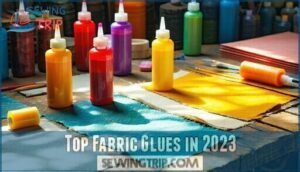
Top Fabric Glues in 2023
You’ll find the right fabric glue for your project among these seven top-rated options, each designed to handle different materials and bonding needs.
These proven adhesives range from waterproof formulas for outdoor gear to gentle options for delicate fabrics, giving you reliable choices whether you’re mending a favorite shirt or creating something new with reliable choices.
Sugru by Tesa
Looking at specific products, Sugru by Tesa stands out as a moldable rubber that hardens overnight.
This innovative adhesive transforms fabric repair into creative problem-solving. You’ll find Sugru Applications extend beyond typical fabric glue uses – it bonds permanently to most materials while remaining flexible.
User Experiences highlight its unique Material Properties that allow shaping before curing. Unlike traditional adhesives, this Tesa Innovation creates waterproof, removable bonds perfect for no sew projects requiring durability and flexibility in fabric repairs.
The fabric glue market is projected to grow substantially by 2029.
AZ BNC
AZ BNC stands out as a reliable choice for your fabric projects, offering strong adhesion that won’t let you down.
This permanent fabric glue excels with synthetic materials, creating flexible bonds that move with your fabric.
You’ll appreciate its clear-drying formula that keeps your work looking professional.
The glue for clothes dries within minutes, making it perfect for quick repairs.
AZ BNC’s fabric glue chemistry guarantees excellent bond strength testing results, while its precise applicator gives you control over glue application methods for clean, accurate placement every time.
Elmer’s Craft Bond
Elmer’s Craft Bond stands out as one of the best fabric glue options for crafters who need reliable results without the wait. This versatile adhesive works across various fabric types, from cotton to polyester, making it a go-to choice for diverse projects.
Here’s what makes Elmer’s Craft Bond exceptional:
- Lightning-fast fabric glue drying time of just 60 seconds speeds up your workflow
- Superior bonding strength survives hand washing and dry cleaning cycles
- Crystal-clear finish guarantees invisible repairs and clean embellishments
Smart fabric glue application means working quickly once you squeeze the bottle. The formula’s rapid set time doesn’t leave room for repositioning, so plan your project ideas carefully before starting to achieve superior bonding strength and ensure a crystal-clear finish with rapid results.
Gorilla Waterproof
When you need a fabric glue that won’t quit, Gorilla Waterproof delivers unmatched durability.
This adhesive creates permanent bonds that survive washing machines and weather. You’ll love its crystal-clear finish and flexible hold.
| Feature | Performance |
|---|---|
| Drying Time | 10-45 minutes |
| Water Resistance | 100% waterproof |
| Fabric Compatibility | Cotton, denim, canvas |
| Bond Strength | Industrial-grade permanent |
Perfect for outdoor gear repairs and heavy-duty projects.
Aleene’s Fabric Fusion
Aleene’s Fabric Fusion delivers exceptional glue strength for fusion applications across diverse fabric types.
This versatile fabric glue uses advanced bonding technology, ensuring washing durability that survives multiple cycles.
You’ll appreciate its reasonable drying time and odorless formula when gluing fabric together.
Perfect for fabric bonding projects requiring flexibility, this reliable adhesive handles everything from delicate repairs to heavy-duty attachments with professional results.
Beacon Fabri-Fix
Beacon Fabri-Fix delivers reliable performance when you need fabric adhesive that won’t let you down.
This versatile glue handles multiple materials with confidence, making it perfect for varied crafting needs.
- Bonds fabric, felt, leather, and synthetic materials effectively
- Waterproof formula guarantees durability through washing and wear
- Squeeze bottle design allows precise application control
- Clear finish maintains your project’s original appearance
- Fast-drying formula reduces waiting time between steps
For best Fabri-Fix uses, clean surfaces thoroughly before application.
Test fabric compatibility on scraps first, then apply thin layers for best strength testing results.
Dritz Liquid Stitch
Dritz Liquid Stitch stands out as a travel-friendly fabric glue that’s perfect for quick wardrobe fixes.
This adhesive works like magic on torn seams and small holes, delivering invisible mends when you follow the application techniques correctly.
The Dritz composition creates a flexible bond that moves with your fabric, making it ideal for emergency repairs.
You’ll appreciate its precise nozzle for targeted application, though remember to clean it after each use to prevent clogging.
The drying specifics are impressive – it sets quickly, so work fast when gluing fabric together.
Ideal projects include reinforcing stressed seams, patching unexpected tears, and fixing hems on the go.
While longevity factors make it suitable for temporary repairs, it’s not recommended for all fabric types.
For best results with this sewing adhesive, test on a hidden area first to confirm compatibility.
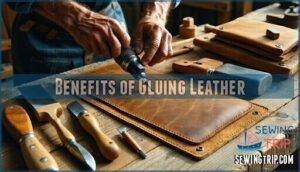
Benefits of Gluing Leather
Looking beyond fabric adhesives, leather crafting opens up exciting possibilities with specialized bonding techniques.
Leather gluing transforms your projects through superior strength and seamless connections compared to traditional stitching.
You’ll discover cost efficiency as adhesive bonding reduces manufacturing time while delivering professional results without visible puncture marks.
Project versatility expands dramatically when you master leather adhesive applications.
Quick repairs become effortless – simply apply the right leather compatibility formula and watch tears disappear.
Alternative closures emerge through precise adhesive bonding, eliminating bulky hardware while maintaining flexibility.
Your leathercraft skills advance as specialized adhesives create uniform connections that actually strengthen the material rather than weakening it through needle holes.
Industrial-grade formulations support complex designs while reducing material waste.
Whether you’re restoring vintage pieces or creating modern accessories, leather gluing delivers precision alignment with minimal distortion, making every project look professionally crafted.
Maintaining proper humidity is important to prevent physical damage to leather.
Tips for Effective Leather Gluing
Mastering leather gluing transforms your projects from amateur attempts to professional results. Success hinges on understanding that leather behaves differently than fabric—it’s less forgiving but more rewarding when done right.
Glue Selection matters more than you’d think. Contact cement creates the strongest bonds for leathercraft, while flexible polyurethane adhesives work best for items that’ll bend regularly. Leather compatibility varies by type, so always test first.
Here are five game-changing tips for leather gluing:
- Surface Prep – Clean thoroughly and lightly sand contact areas
- Application Techniques – Apply thin, even coats using parchment paper
- Work in 41°F to 104°F temperature range for ideal bonding
- Clamping Methods – Use firm, consistent pressure during drying
- Finishing Touches – Trim excess leather adhesive with sharp hobby knife
Proper leather surface prep prevents weak spots that’ll haunt you later. For superior adhesion, consider using a leather preparer deglazer before applying any glue. Rush the process, and you’ll be redoing everything.
Essential Supplies for Leather Gluing
You’ll need specific tools and materials to achieve professional results when gluing leather projects.
Having the right supplies on hand, from specialized leather adhesives to proper clamping tools, makes the difference between a project that lasts for years and one that falls apart after a few uses.
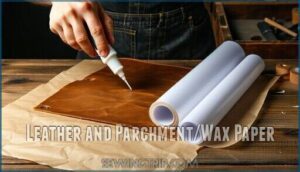
Leather and Parchment/Wax Paper
Your leather-crafting workspace transforms when you add parchment paper and wax paper to your toolkit.
These protective barriers prevent messy glue mishaps while ensuring clean, professional results in your leathercraft projects.
Here’s why these materials are essential for Leather Gluing Techniques:
- Precise application – Create sharp glue lines without overspray or drips
- Easy Glue Removal – Peel away excess adhesive for clean finishes
- Surface protection – Shield your work area from permanent stains
- Enhanced Seam Durability – Controlled adhesive placement strengthens bonds
Leather Glue/Contact Cement
Three cement types dominate leathercraft: water-based, polyurethane, and contact cement. Each offers unique bond strength and drying time characteristics for leather gluing projects.
| Cement Type | Bond Strength | Best For |
|---|---|---|
| Water-based | Medium | Beginner projects |
| Polyurethane | High | Flexible leather |
| Contact | Maximum | Professional work |
Master application techniques by preparing leather surfaces properly. Clean, roughen, then apply thin coats. Contact cement creates permanent bonds when surfaces meet, which is ideal for professional work.
Clamping Tool and Alternative Cement Option
Once you’ve applied your leather adhesive, proper clamping becomes your best friend for joint stability.
Binder clips work perfectly as clamping alternatives for smaller projects, while heavy books provide even pressure across larger surfaces.
Contact cement offers superior adhesive varieties compared to traditional glues – apply it to both surfaces, wait until tacky, then press together.
This clamping tool approach guarantees pressure duration of 24 hours for maximum bond strength after surface preparation.
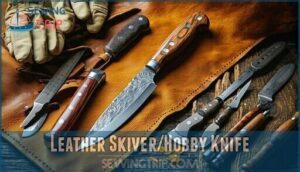
Leather Skiver/Hobby Knife
A sharp leather skiver transforms thick hides into workable material through precise leather thinning techniques.
Your blade selection matters—the Tandy Skiver and Super Skiver deliver professional results, while a hobby knife works for basic cuts on leather sheets.
Essential skiving techniques include:
- Maintain consistent blade angles for even leather thickness
- Practice knife sharpening regularly to prevent ragged cuts
- Follow safety practices by cutting away from your body
Frequently Asked Questions (FAQs)
What is the best glue for sewing fabric?
You’ll want Aleene’s Fabric Fusion or Fabri-Tac for most projects. They’re permanent, flexible, and dry clear. For delicate fabrics, choose temporary glue. Always test first on scraps to verify compatibility.
How do you permanently glue fabric together?
Like cementing a lifelong friendship, you’ll create an unbreakable fabric bond by choosing permanent fabric glue.
Cleaning surfaces thoroughly, applying thin even layers, pressing firmly together, and allowing complete curing time before handling are crucial steps in this process.
Can you glue fabric instead of sewing?
You can glue fabric for quick fixes, hems, and embellishments, but it’s not a complete replacement for sewing.
Fabric glue works best for temporary repairs and lightweight projects, while sewing provides stronger, more durable connections.
What kind of glue is used in tailoring?
Tailors primarily use fabric-specific adhesives like Aleene’s Fabric Fusion or Fabri-Tac for temporary basting, hemming, and applique work.
You’ll find permanent and washable varieties designed for different fabric weights and construction needs.
What types of fabrics or materials should not be glued?
Absolutely avoid delicate fabrics like chiffon, silk, and lace—they’re glue’s worst nightmare!
Heavy leather, vinyl, and waterproof materials won’t bond properly either.
Skip stretchy spandex and any fabric you’ll wash frequently, as they are not suitable for glue, making them a nightmare to work with.
Can fabric glue be used on waterproof materials?
Most waterproof materials won’t bond well with standard fabric glue since their protective coating repels adhesives.
You’ll need specialized waterproof adhesives or sealants designed for materials like vinyl, rubber, or treated fabrics.
How long does fabric glue typically last?
Like a trusty friendship that weathers storms, quality fabric glue bonds can last years when properly applied.
You’ll typically get 2-5 years from permanent varieties, while temporary options wash out after several cycles.
Will fabric glue damage washing machine or dryer?
Properly cured fabric glue won’t damage your washing machine or dryer. However, uncured glue can create sticky residue that clogs filters or sticks to drum walls, potentially causing costly repairs.
Can you remove dried fabric glue completely?
Sometimes that "permanent" bond isn’t quite as permanent as advertised.
You can remove dried fabric glue using acetone, nail polish remover, or commercial adhesive removers like Goo Gone, though success varies by glue type.
Does fabric glue work on stretch fabrics?
Fabric glue works on stretch fabrics when you choose flexible, stretchable adhesives designed for synthetic materials.
You’ll need specialized glue that moves with the fabric’s stretch without cracking or losing its bond over time, which is a key characteristic of a good adhesive.
Conclusion
Mastering how to glue sewing transforms your crafting approach from traditional stitching to modern bonding techniques.
You’ve learned that proper surface preparation, glue selection, and patience create lasting results.
Whether you’re working with delicate fabrics or tough leather, the right adhesive and technique make all the difference.
Remember to test first, apply evenly, and allow full curing time.
With these skills, you’ll tackle projects faster while maintaining professional-quality results that flex, wash, and endure daily use.

