This site is supported by our readers. We may earn a commission, at no cost to you, if you purchase through links.
When cutting, stay sharp—literally! Use a good rotary cutter and check your grain lines. Backstitch those stress points, and don’t skimp on interfacing, or your tote will flop like an old pancake.
Once your zipper goes in straight, you’re already halfway to pro status. Stick around for secrets on boxing corners and zipper tricks that’ll have your bags looking store-bought.
Table Of Contents
- Key Takeaways
- Essential Tools and Materials for Bag Making
- Fabric Selection and Preparation for Bags
- Understanding Interfacing and Stabilizers
- Fundamental Stitches and Seaming Techniques
- Creating Strong and Adjustable Bag Straps
- Professional Handle Making Techniques
- Adding Structure With Corner Boxing
- Installing Pockets and Functional Features
- Beginner-Friendly Closure Methods
- First Bag Projects and Pattern Recommendations
- Frequently Asked Questions (FAQs)
- Conclusion
Key Takeaways
- Always pre-wash your fabric and use sharp cutting tools to prevent crooked seams and warping after washing.
- Reinforce stress points with backstitching, use the right interfacing for your fabric weight, and box your corners for sturdy, professional-looking bags.
- Practice installing zippers and basic closures like magnetic snaps for function and style—don’t skip backing these with interfacing.
- Create adjustable, reinforced straps and focus on neat finishing techniques like topstitching and understitching to keep your bags strong and polished.
Essential Tools and Materials for Bag Making
You’ll need the right tools to turn fabric into a beautiful bag that actually holds up to daily use. Getting organized with quality cutting tools, a reliable sewing machine, and essential hardware like zippers and snaps will save you from those "why didn’t I buy better scissors?" moments later.
Choosing The Right Sewing Machine
Your sewing machine is the workhorse of bag making, so motor power matters—aim for 60W+ to handle thick canvas layers without jamming. Look for adjustable presser foot variety and needle compatibility with heavy threads. Machine stitch quality depends on these features, not fancy stitches.
Budget considerations? A reliable heavy-duty model beats flashy computerized options for sewing bags. A semi-industrial machine can offer a good compromise between power and portability.
Avoid beginner bagmaking mistakes by prioritizing power over pretty displays.
Must-Have Cutting Tools and Rulers
Accurate cutting transforms fabric preparation from frustrating to pleasurable—you’ll wonder how you ever managed without proper tools! These sewing tools make bag-making techniques smoother and more professional.
- Rotary Cutters – slice through multiple fabric layers cleanly
- Cutting Mats – protect surfaces and guide straight cuts
- Acrylic Rulers – measure precisely and maintain straight edges
- Fabric Scissors – dedicated shears for clean fabric cutting only
- Seam Rippers – fix mistakes quickly without damaging fabric
Essential Hardware and Notions
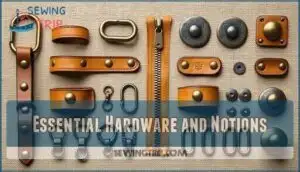
Now you’ll need the right bag hardware and notions to bring your creations to life. Stock up on magnetic snaps, zippers, and D-rings for closures and straps. Don’t forget swivel clasps, buckles, and purse feet for professional touches. Here’s your starter kit:
| Hardware Type | Best Uses |
|---|---|
| Magnetic Snaps | Quick-close purses, totes |
| Zippers | Secure pockets, main closures |
| D-rings & Swivel Clasps | Adjustable straps, detachable grips |
Quality interfacing and sturdy rivets will make your bags last years, not months!
Creating an Organized Workspace
When setting up your sewing workspace, think like a chef organizing their kitchen—everything should have its place and be within arm’s reach. Create designated tool storage areas using small bins or magnetic strips for sewing clips and binding clips. Position your bagmaking toolkit near your machine for easy access.
Good lighting solutions prevent eye strain during detailed work. An ergonomic setup with proper chair height keeps you comfortable during long sessions.
Regular decluttering tips help maintain focus and efficiency.
Fabric Selection and Preparation for Bags
You’ll want to pick the right fabric for your first bag project, and trust me, it makes all the difference between a wonky mess and something you’ll actually want to carry around!
Start with quilting cotton or medium-weight canvas since they’re forgiving, easy to sew, and won’t fight back when you’re learning the ropes.
Beginner-Friendly Fabrics (Quilting Cotton and Canvas)
You’ll want to start with quilting cotton for your first bags. It’s forgiving, widely available, and won’t break your budget. Cotton durability makes it perfect for practice projects. Canvas weight adds structure but stays manageable on home machines.
Focus on fabric preparation—pre-wash everything to prevent color bleeding disasters. Pattern matching becomes easier with solid colors initially, avoiding beginner bag-making mistakes that leave you frustrated.
Advanced Materials (Vinyl, Faux Leather, Cork)
These sophisticated materials level up your bag-making game but need special attention. Vinyl offers exceptional durability, while faux leather provides flexibility with professional looks. Cork fabric brings unique texture but can be tricky.
You’ll need heavy-duty needles for proper needle selection and specialized presser feet to prevent sticking. Always use proper bag interfacing to prevent stretching and buckling during construction.
When working with these materials, it’s best to use polyester thread for extra strength.
Pre-Washing and Cutting Techniques
Now that you’ve picked your materials, let’s prep them right. Fabric shrinkage can wreck your bag’s fit, so pre-wash cotton and canvas before cutting. Skip washing vinyl or faux leather – they don’t need it!
- Use sharp fabric scissors or rotary cutters for clean edges
- Pin pattern pieces with grain alignment arrows pointing down the fabric
- Place pattern weights on delicate materials instead of pins
- Cut slowly and deliberately for accurate cutting every time
Smart prep saves headaches later. Your future self will thank you when everything fits perfectly together during bagmaking!
Grain Line and Pattern Placement
Line up your bag patterns like puzzle pieces on fabric. Follow fabric grainlines for proper drape and avoiding distortion in sewing bags.
Check print direction before cutting—upside-down flowers aren’t cute! Efficient cutting saves fabric and prevents wonky bags.
Pattern layout matters more than you’d think for successful bag making techniques.
Understanding Interfacing and Stabilizers
Think of interfacing and stabilizers as your bag’s secret backbone – they’re what turn floppy fabric into a sturdy, professional-looking bag that won’t collapse when you stuff it with groceries.
You’ll use materials like SF101 interfacing or fusible fleece to give your fabric structure, and trust me, skipping this step is like building a house without a foundation!
Types of Interfacing (SF101, Fusible Fleece)
Think of SF101 and fusible fleece as your bag-making dream team. These interfacing types transform flimsy fabric into professional-looking bags.
SF101 gives medium-weight stability—perfect for tote bodies and structured projects. Fusible fleece adds softness with body, ideal for grips and curved areas.
Start with SF101 for beginners; it’s forgiving and adaptable for most bagmaking adventures.
When to Use Heavy-Weight Vs Light Interfacing
Everyone wonders which interfacing to choose for their bagmaking project. Your fabric weight pairing determines everything – heavy canvas needs sturdy interfacing for bags, while quilting cotton works with lighter options.
Here’s your beginner guide to interfacing selection:
- Heavy interfacing – Use for structured totes and professional-looking bags
- Light interfacing – Perfect for soft pouches and flexible designs
- Project-specific needs – Consider your desired bag structure and interfacing compatibility
Balance cost vs. durability based on your bag making goals.
Flex Foam and Smart Alternatives
Flex foam gives your bags that bouncy, structured feel. But don’t panic if you can’t find it! You’ve got smart foam alternatives that work just as well.
Try batting or fusible fleece for softer interfacing that prevents creases. Always check your pattern instructions first—they’ll guide your stabilizer combinations perfectly for beginner bag-making success.
Flex Foam Alternative Best Use Case
Layering Techniques for Professional Results
Building professional-looking bags starts with proper interfacing combinations. Multiple layers of fabric need strategic stabilizer placement for best results. Here’s your bagmaking blueprint:
- Start light, build up – Place thin interfacing against fabric, then add heavier layers
- Hide those seams – Position stabilizers to cover seam allowances for clean finishing
- Match your fabric weight – Canvas needs more support than quilting cotton
- Test first – Sample your fabric layering combo before cutting your whole project
Smart bag construction means thinking like a sandwich maker!
Fundamental Stitches and Seaming Techniques
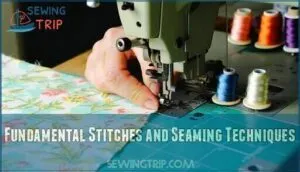
You’ll master four key stitches that’ll turn your wobbly first bag into something that looks store-bought and can handle real-life use.
Think of these techniques as your bag’s best friends—they’ll keep seams strong when you’re stuffing everything but the kitchen sink into your new creation!
Backstitch for Stress Points
Now that you’ve got your interfacing sorted, let’s talk about the workhorse of bagmaking: backstitch. This reinforcement technique creates rock-solid seams at stress points like strap attachments and bag openings.
Use a medium stitch length with quality thread and a sharp needle for your fabric types. Backstitch locks your seams tight, preventing those dreaded blowouts when your bag gets stuffed full of groceries!
Box Stitch for Corner Reinforcement
Box stitches act like tiny shields at corner stress points, preventing your bag from falling apart where it matters most. You’ll create an "X" pattern over a square base using shorter stitch lengths and heavier thread. Choose a zipper foot for precision control around tight corners.
- Watch your thread tension—loose stitches won’t hold under pressure
- Practice on scraps first to avoid beginner bagmaking mistakes
- Use reinforcement stitch patterns for maximum corner boxing strength
- Select proper machine foot selection for clean, professional results
Topstitching for Strength and Finish
Topstitching transforms your bag from homemade to handcrafted masterpiece. You’ll add seam reinforcement while creating decorative stitching that screams "professional look."
Choose contrasting thread for visual pop or matching thread for subtle edge finishing. Run your topstitch 1/8 inch from seams on bag openings and straps.
This bag making technique doubles your seam strength while giving that crisp, store-bought appearance every beginner craves.
Understitching for Professional Edges
When preventing rolling at bag edges, understitching creates that invisible finish you’re after. This important bag making technique secures facings and bag lining by stitching through the seam allowance toward the lining side.
You’ll achieve lining spotlessness and professional bags every time. It’s like giving your seams superpowers—they stay put beautifully!
Creating Strong and Adjustable Bag Straps
You want your bag straps to be strong enough to survive your daily adventures and adjustable for that perfect fit—no one likes a droopy tote!
Let’s whip up straps that can handle heavy loads, look cool, and make your bag way more comfy to carry.
Simple Webbing Attachment Method
When you’re ready to sew bag straps, webbing makes life easier. Just grab some cotton webbing, pick your favorite stitching patterns, and attach it with sturdy hardware options. Don’t forget edge finishing and reinforcement methods for extra strength.
Here’s what you’ll need:
- Webbing Types
- Stitching Patterns
- Bag Hardware
- Edge Finishing
- Reinforcement Methods
Custom Fabric Strap Construction
If webbing feels too plain, why not show off your style with custom fabric strap construction? Pick a fabric that suits your bag and personality.
Add strap padding for comfort, use adjustable hardware for flexibility, and finish those edges for a smooth look.
Always strength test your sewing bag straps—nobody wants a strap surprise at the grocery store!
Joining Multiple Pieces for Length
If your custom strap’s a tad short, don’t sweat it—grab those fabric scraps and stitch them together! Pattern matching helps your joins blend in, while neat seam finishes keep things tidy. Always check your strength testing by tugging on the seam.
Creative joins make sewing bags fun, and mastering multiple layers of fabric means your bag making techniques shine!
Two-Colored Handle Techniques
Why settle for plain when you can jazz things up with color blocking and fresh fabric combinations? Give your bag straps real personality with these steps:
- Cut two fabrics for handle shaping and pattern matching.
- Sew them together, right sides facing.
- Turn, press, and add decorative stitching.
- Attach straps using sturdy strap construction tricks.
Mix, match, and wow!
Professional Handle Making Techniques
You don’t need fancy tools to make bag straps look sharp—just a few simple tricks and a sturdy stitch or two will do the job. Let’s get those straps strong, comfy, and stylish, so your bag feels like it came straight from a boutique (without the mystery price tag)!
Heavy-Weight Interfacing for Stability
Don’t let your bag straps flop like a pancake—grab a heavy-weight interfacing. It’s your recipe for sturdy straps that stand up to daily adventures.
Use a Stabilizer Combination if your bag’s got some heft, and follow Fusing Techniques from bag making tutorials. Quick sewing tip: sandwich a softer layer beneath to keep pesky creases away.
Finished Strap End Methods
Give your bag straps a neat finish by using folding techniques—just fold the ends under, tuck them in, and stitch for a clean look. Try edge finishing with decorative stitching for style points!
If you’re feeling fancy, experiment with tucking methods or reinforcement options. Trust these bag making tips: adjustable straps always look pro when the ends are tidy!
Reinforcement Stitching for Durability
You want your bag to survive the daily grind, right? Focus on stress point reinforcement by upping your stitch density and choosing strong thread. Place extra stitches at handle joins and use seam finishes for neatness.
When you’re tackling multiple layers of fabric, mind those seam allowances—good Bag Making Techniques always start with solid Sewing Techniques during bag assembly!
Decorative Topstitching Options
Your bag’s topstitching is where sewing techniques meet style! Jazz it up with these tricks:
- Use heavy thread weight for bold lines.
- Adjust needle size for smooth stitches.
- Experiment with stitch length and pattern variations.
- Try color contrast for pop!
These bag finishing tips keep your bag making game strong and fun!
Adding Structure With Corner Boxing
Boxing the corners is the secret trick for turning your bag from a shapeless pancake into something that actually stands up and holds your snacks.
Once you try it, you’ll laugh at how easy it’s—just a few snips and stitches, and your tote’s ready to carry more than just loose change.
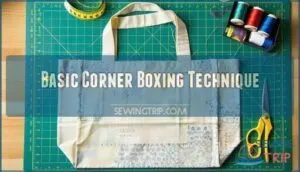
Basic Corner Boxing Technique
With a clever pinch and quick stitch, you’ll turn flat fabric into roomy, stylish bags. Mastering corner boxing gives your bag structure and that pro touch. It’s like giving your bag a boost of confidence! Remember: Boxing Volume depends on Fabric Choice and neat corners.
Here’s a quick table to guide you through those “aha!” moments:
Gusset Alternatives for Extra Space
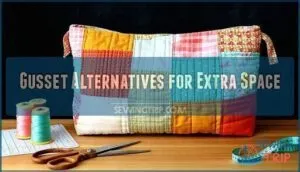
After boxing your corners, sometimes you’re looking for a little extra space—like when you sneak snacks into the movies! Fabric manipulation makes adding space to bags both creative and functional!
Try pleating techniques, dart manipulation, or even expanding seams. Add a circular bottom, toss in a side panel or a handy side pocket. Bag lining can help, too.
Calculating Measurements for Proper Fit
Sure, there’s nothing like measuring twice and sewing once! Before you cut your fabric, check the seam allowance on your bag sewing patterns.
Adjust the pattern for your bag project by using your own bag design and body dimensions. Use proportional scaling for fit ease—after all, you want your bagmaking tips to stick for every pattern adjustment!
Troubleshooting Common Boxing Issues
You stitched the corners, measured twice, cut once—and boom, you spot bulging sides or wonky, uneven corners. Don’t sweat it! Watch for these pitfalls:
- Misaligned seams meeting at boxed corners
- Bag lining bunching up
- Volume discrepancies in size
- Seam allowances hidden in multiple layers of fabric
- Fabric creasing around the boxed edge
Little tweaks prevent major headaches!
Installing Pockets and Functional Features
You don’t have to be a sewing pro to add pockets or cool features that make your bag way more useful—just a few smart steps and steady hands will do the trick.
Trust me, once you’ve sewn your first pocket, you’ll wonder how you ever survived the land of bag chaos!
Simple Slip Pocket Construction
Once your bag’s got some shape, let’s add a slip pocket for easy keys or a lip balm. Cut your fabric to match your pocket depth—don’t go too shallow!
Use a fun fabric choice for personality, mind your seam allowance, and check your bag lining. Topstitching options or a crisp edge finish help this pocket construction pop in any bag pattern.
Welt Zipper Pocket Installation
Ready to improve your Zipper Pocket game? Adding a welt zipper pocket isn’t rocket science, but there are some sewing tips you’ll want to know. Focus on zipper selection, pocket placement, and fabric considerations, plus double-check your welt dimensions. Keep those welts secure—nobody wants a runaway zipper!
- Mark your pocket placement carefully
- Choose sturdy zipper hardware
- Adjust welt dimensions before cutting
- Secure welts with crisp topstitching
Pieced Zipper Pocket Techniques
Once you’ve mastered welt zipper pockets, it’s time to play with pieced zipper pocket techniques. Mix bold fabric combinations and plan your pocket design for impact—pattern matching is key!
Tuck in your zipper selection, use neat seam finishing, and stitch carefully for crisp results. These sewing tips keep your bag looking sharp and your pocket practical—no boring pockets here!
Pocket Placement and Sizing Tips
When you’re sizing a Zipper Pocket or Slip Pocket, think Goldilocks—don’t go too big or too small! Consider pocket proportions and where your hand naturally reaches.
Side Pocket or Mesh Pocket? Those boost interior organization.
For exterior pocket security, plan closures. Placement isn’t just about looks—it’s about accessibility considerations, design aesthetics, and making pocket construction a breeze!
Beginner-Friendly Closure Methods
Let’s make your bag stay closed—because nobody wants coins sprinting for freedom every time you pick it up!
You’ll learn the easiest ways to add snaps, zippers, and more, so your finished bag is both secure and beginner-approved.
Magnetic Snap Installation
Speaking of pockets, let’s chat bag closures! Magnetic snaps are a game changer for easy access and style.
Nail your snap alignment by marking both sides, keep an eye on fabric thickness, and grab the right tool selection. Reinforcement methods (like adding interfacing patches) prevent rip-outs.
If you mess up? Don’t sweat it—troubleshooting issues is part of sewing bags!
Basic Zipper Insertion Techniques
Installing zippers doesn’t have to feel like rocket science! Start with a zipper foot to get close to those metal teeth without fear. Center your zipper carefully, then stitch straight lines to avoid puckering nightmares.
- Choose the right zipper length – measure twice, cut once saves headaches
- Practice zipper installation on scraps before tackling your actual bag project
- Keep steady pressure while sewing to prevent fabric bunching around zipper pockets
KAM Snap Application
Ready to jazz up your bag with some snap power? Grab your Snap Size Guide and double-check your fabric thickness guide—no one wants a snap falling off mid-adventure!
Tool calibration makes all the difference, so don’t rush. Stuck? Troubleshooting issues is part of the fun.
Try decorative snaps for flair, and mix them up with magnetic snaps or pearl snaps for pro-level bag closures!
Choosing Closures by Bag Type
Before you stitch that last seam, ask yourself: does your bag need superhero-level closure strength, or is a simple snap enough?
Zippers are great for bag security, while Magnetic Snaps bring easy user accessibility. Twist Locks add serious aesthetic appeal.
Match closure size to your bag flaps, and always let your bag’s purpose guide your bag closures choice.
First Bag Projects and Pattern Recommendations
You’re ready to sew your first bag, so grab your favorite fabric and let’s pick a pattern that won’t make you pull your hair out.
From classic totes to clever pocket designs, you’ll find stuff here that’s perfect for beginners and surprisingly fun to show off.
One Yard Magic Tote Tutorial
Got just one yard of fabric? You’re halfway to a bag! The One Yard Magic Tote is a beginner-friendly design that keeps fabric waste reduction in mind—plus, it’s perfect for gift-giving ideas.
This easy tote bag pattern is customizable with fun straps or pockets. Quick sewing project, great results.
Bag sewing tips: straight seams, sturdy straps, simple smiles.
Easiest Straight-Seam Tote Pattern
If you liked the one-yard magic, you’ll love this easy tote bag pattern—it’s like making toast with a sewing machine.
Pick your favorite fabric, pay attention to your seam allowance, and test your handle length so you’re not swinging a bag down to your knees.
Quick assembly and smart pattern customization make this the perfect first tote bag pattern.
Japanese Style Square Bag
Imagination meets utility with the Japanese style square bag! Experiment with unique dart placement for that perfect boxy shape and play with fabric combination ideas—mix polka dots and florals, no judgment here.
Try creative handle attachment methods for comfort. Don’t skip interior customization options or pattern scaling adjustments! Bag making really can feel like origami for grownups.
Multi-Pocket Practical Tote Design
Dreaming up a tote bag with pockets galore? Pocket customization is your ticket to compartment variety and a snazzy organizational layout. Mix in a zipper pocket for security features—your keys won’t bolt!
Play with accessibility options: open, snap, or zip. Bag making isn’t rocket science—just follow a few sewing tips, and your tote bag will be legendary.
Frequently Asked Questions (FAQs)
How do you fix common sewing machine tension issues?
When your stitches look wonky, check your thread path, re-thread everything, and balance the tension dials. Sometimes it’s as simple as a new needle.
** Don’t panic—tension drama is just another day in sewing paradise!
How do you safely sew bulky bag layers together?
Slide that bulky sandwich under your presser foot, use a bigger needle, and go slow—think turtle, not rabbit.
Wonder clips beat pins here, and a walking foot is your best sewing buddy!
Which finishing techniques keep bag linings from shifting?
Ever tried wrangling an octopus? That’s what loose bag linings feel like!
Understitch the lining at openings, topstitch around the edge, or tack lining at seams—these tricks keep every corner in line and shift-free.
How can you add personalized embellishments to bags?
Jazz up your bag by stitching on your initials, playful patches, or funky buttons. Try painting, iron-on vinyl, or fabric markers for a look that screams “you.”
Little touches let your personality steal the show!
Conclusion
Like learning to ride a bike, tackling these beginner sewing techniques for bags gets easier with practice. Sometimes you’ll go a little crooked, maybe stitch your pocket upside down (we’ve all been there), but stick with it!
Use what you’ve learned to level up each project—don’t forget those interfacing and boxing tricks. Your next bag will be better than your last. Grab your fabric, fire up that machine, and sew something you’ll love to show off!
- https://theisifiso.com/how-to-stitch-a-bag/
- https://www.applegreencottage.com/sewing-bags-and-bag-making-tips/
- https://littlestitchstudio.com/blog/2019/8/26/the-best-fabrics-for-bag-making
- https://www.reddit.com/r/sewing/comments/1l7gm8v/venturing_into_new_bag_making_fabrics_but_dont/
- https://blog.taftc.org/blog/the-top-5-fabrics-for-sewing-bags-purses


