This site is supported by our readers. We may earn a commission, at no cost to you, if you purchase through links.
A tote bag sewn from 8-oz cotton canvas will outlast a dozen cheap store-bought ones—and cost you less than a takeout meal to make. That gap between fast-fashion accessories and something built to last isn’t luck. It’s technique.
Most beginner sewists underestimate what goes into a durable bag: the needle size, the seam treatment, where the bar-tack stitches land. Get those details right, and you end up with something that carries a week’s worth of groceries without flinching.
These diy sewing tutorials for bags and totes walk you through every step—fabric selection, pattern cutting, reinforced straps, and finishing touches that make the final product look intentional, not homemade.
Table Of Contents
Key Takeaways
- Fabric choice is the foundation of a lasting tote — 8-oz cotton canvas, medium-weight denim, or pre-washed linen each offers different strengths, but all reward prewashing before you cut.
- The details most beginners skip — needle size (90/14 for canvas), grain alignment, and ½" seam allowances — are exactly what separates a bag that lasts from one that falls apart under a week’s groceries.
- Double-layer webbing plus bar-tack and X-stitch reinforcement at every strap attachment point is the single biggest structural upgrade you can make to any handmade tote.
- A complete DIY tote costs as little as $5–$25 in materials, and techniques like French seams, boxed corners, and fusible interfacing give it a finish that looks intentional.
Choose Durable Fabric for DIY Totes
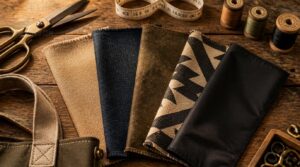
The fabric you choose makes or breaks your tote — literally. Not every material withstands daily weight, washing, and wear the same way, so picking the right one from the start saves you a lot of frustration later. Here are the five best options to build a tote that actually lasts.
Your fabric choice also shapes what patterns will work best, so browsing free printable sewing patterns for tote bags can help you match the right design to the material you have in mind.
Cotton Canvas
What makes cotton canvas the go‑to fabric for DIY tote bags? Its plain over‑under weave creates a rugged, uniform surface built to handle real weight.
- Weighs between 8–24 oz per square yard
- Breathes naturally and softens with every wash
- Accepts dyes, prints, and embroidery beautifully
Its high tensile strength resists tearing, and untreated versions can be coated for water repellency.
Its construction features a durable plain‑weave structure that provides dimensional stability under tension.
Medium-Weight Denim
Where cotton canvas relies on tensile strength, medium-weight denim adds structural personality. At 12–16 oz per square yard, it holds shape without going rigid — a real advantage for DIY tote bags that carry real loads.
| Feature | Benefit |
|---|---|
| 12–16 oz weight range | Structure with natural pliability |
| 1–3% shrinkage rate | Pre-wash panels before cutting |
| Patina aging over time | Character deepens with every use |
Pre-wash before cutting. It locks dimensions and softens the drape for cleaner, more precise seams.
Recycled Canvas
Denim brings structure, but recycled canvas brings purpose. Made from post-consumer cotton and PET fibers, it weighs roughly 8 oz per square yard — enough to hold a bag’s shape without bulk.
Expect slight texture variations batch to batch. That’s the mixed feedstock showing through. Prewash before cutting to stabilize the weave, then top-stitch seams for a finish that lasts.
Pre-Washed Linen
Recycled canvas is workmanlike. Pre-washed linen is something else — soft, breathable, and surprisingly tough for a fabric that feels this comfortable against your hands.
Pre-washing removes most shrinkage upfront, so your tote bag dimensions stay accurate after assembly. Expect only 1–3% further shrinkage later.
- Softer hand feel from the first cut
- Natural slubs add lived-in texture
- Moisture-wicking fiber keeps contents drier
- Antimicrobial properties reduce odor buildup
Fabric Grain Direction
Grain direction determines how your fabric behaves under stress. Straight grain runs parallel to the selvage — align it with your tote’s longest axis to prevent handle stretching. Cut main panels here for stability.
For even more on keeping panels warp-free, fabric grain tips for sewn panels explain exactly why lengthwise alignment is worth the extra pinning time.
| Grain Type | Stretch Level | Best Use in Totes |
|---|---|---|
| Straight | Least | Main panels, carry straps |
| Cross | Moderate | Curved sections |
| Bias | Maximum | Decorative details |
Gather Tote Bag Sewing Supplies
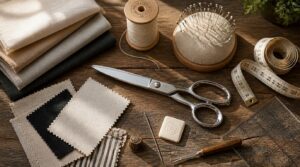
Before you sew a single stitch, getting the right tools in front of you makes everything smoother. Each supply on this list plays a specific role in keeping your cuts clean, your seams strong, and your finished tote looking intentional. Here’s what you’ll need to get started:
Sewing Machine Needles
The right needle is the difference between clean stitches and a skipped-stitch disaster. For canvas or denim totes, reach for a size 90/14 needle — heavy enough to pierce dense layers without bending.
Universal points handle most woven fabrics well, but a sharp Microtex point gives you cleaner results on tightly woven canvas. Always check flat shank alignment before starting. Change needles every 8–12 hours of sewing.
Rotary Cutter
Think of a rotary cutter as a pizza wheel built for fabric — one smooth pass slices through multiple layers cleanly.
A 45mm blade covers most tote projects, while a 60mm blade speeds up longer straight cuts on canvas or denim.
Always use it with a self-healing cutting mat to protect your surface and extend blade life.
Keep the blade guard closed between cuts — no exceptions.
When edges start looking ragged, swap the blade immediately. Sharp blades mean accurate cuts, and accurate cuts make construction genuinely easier.
Fabric Scissors
A rotary cutter controls long straight runs beautifully, but fabric scissors take over for anything a wheel can’t manage — tight curves, clipping seam allowances, trimming straps close to stitching.
Look for high-carbon steel blades with a bent handle design. That angle keeps your fabric flat while you cut, which directly improves accuracy.
Blade length matters. Seven to eight inches controls most tote work cleanly.
Fusible Interfacing
Fusible interfacing is the hidden structure that keeps your tote looking intentional rather than floppy. Medium-weight interfacing works best for canvas or denim panels — it adds body without killing drape.
Press adhesive-side down using a medium heat setting and a press cloth. Lift and reposition the iron; don’t slide it. Let pieces cool completely before moving them.
Measuring Tools
Precision starts before you cut a single thread. A flexible tape measure — 60 inches of fiberglass or fabric — accommodates curves and body measurements your rigid ruler can’t.
Keep these three in your sewing kit:
- A tape measure for strap lengths and panel widths
- A steel ruler for straight seam allowances
- Calipers for checking seam accuracy on layered fabric
Get these right, and your bag pattern design holds together from first cut to final stitch.
Cut and Prepare Your Tote Pattern

Before your machine runs a single stitch, your pattern pieces need to be cut with intention. Getting the measurements right now saves you from frustrating do-overs later. Here’s what you’ll need to mark and cut before sewing begins.
Tote Panel Measurements
Start by cutting two front and back panels to your desired width and height — a common beginner size is 14"×16".
Side gusset panels, usually 2–4 inches wide, add depth without stealing height.
Calculating panel area (width × height) helps you nest pieces efficiently and waste less fabric.
Mirror every panel for your lining — same cuts, same grain.
Strap Lengths
Once your panels are cut, strap length shapes how the whole bag feels to carry. Handheld straps run 6–12 inches; shoulder straps need 18–24 inches to ride at hip level. Going crossbody? Cut 40–50 inches.
For adjustable designs, plan 1.5 meters of webbing plus a slider. Heavier canvas demands straps at least 1.5 inches wide to prevent twisting under load.
Pocket Dimensions
Straps sorted — now pockets. An 8×10 interior pocket holds everyday essentials without bulk. For a phone, cut 4×6 inches. Hidden side pockets work best 2–3 inches from the top seam.
Deeper pockets secure bulkier items but slow access. Shallow ones keep cards and keys fast to grab. For a simple six-pocket tote, vary depths intentionally.
Seam Allowances
Pockets planned — now set your margins. Use a ½" seam allowance throughout your tote panels. That width accommodates fabric bulk on canvas or denim without creating thick, stiff seams at stress points.
For future fit tweaks or strap adjustments, that half-inch also gives you room to rework seams cleanly.
Marking Boxed Corners
Before cutting anything, mark your boxed corner squares directly onto the fabric. At each bottom corner, measure 2 inches in along both edges and draw a square using chalk or a water-soluble marker.
Alignment precision matters here — the side and bottom seam lines must meet exactly at the corner’s inner point. A clear square ruler keeps every corner consistent.
Sew The Tote Bag Step by Step
This is where your tote starts to take real shape. Each step builds on the last, so working in order keeps everything clean and stress-free. Here’s exactly how to sew it together:
Sew Main Panels
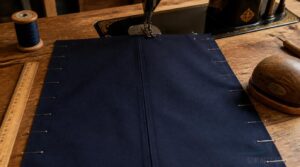
Lay your two main panels wrong sides facing out, edges aligned with the grain running vertically. Pin every 2–3 inches to lock panel symmetry before you stitch.
- Set stitch length to 2.5 mm
- Sew both side seams at ½" seam allowance
- Backstitch 1" at top and bottom
- Press seams open flat
Structural integrity starts right here.
Add French Seams
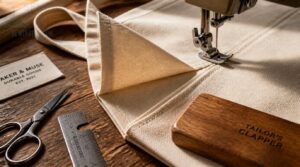
Now flip those panels so right sides face each other. French seams work in two passes: stitch at ⅜", trim to ⅛", press flat, then fold and stitch again at ¼". That second pass traps every raw edge inside — no fraying, no bulk poking through the interior.
This technique suits cotton canvas perfectly and doubles your seam strength without extra hardware.
Create Boxed Corners

Flat-bottomed totes don’t happen by magic — they’re built one snipped corner at a time.
Mark a 2-inch square at each bottom corner using chalk, then cut it out.
Pinch the cut edges together and stitch across the gap.
Clip seam bulk, press the diagonal flat with an iron, and your tote stands on its own.
Attach Interior Pockets
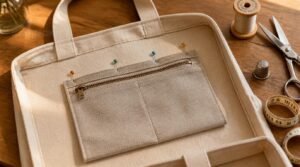
Position your 8×10 interior pocket 1–2 inches below the bag opening, centered to balance weight. Sew from the lining side only so stitches stay hidden outside.
For zippered security features, align zipper tape flush with the pocket’s top edge and strengthen the rectangle ends.
A divided slip compartment — one vertical seam down the middle — instantly organizes your phone, keys, and pens.
Top-Stitch Bag Edges
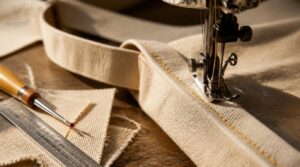
Run a 3.0–3.5 mm stitch length along the top edge — it locks the seam allowances flat and keeps the silhouette crisp under daily wear.
- Use a size 90/14 needle for canvas or denim
- Set your line ¼ inch from the edge
- Try contrast thread to make the stitching a design statement
Press the edge before stitching so nothing shifts.
Add Straps, Features, and Finishing Details

The stitching is done, but this is where your tote goes from functional to finished. Straps, pockets, and those final decorative touches are what make it truly yours. Here’s how to handle each one the right way.
Reinforced Shoulder Straps
Straps are where most totes fail first. Sew double-layer webbing at each attachment point — it boosts tear resistance by up to 40 percent compared to a single join.
Double-layer webbing at every attachment point boosts tote strap tear resistance by up to 40 percent
Follow that with bar-tack stitching at the base, and finish with an X-shaped anchor stitch across the junction. That combination aids loads well above 10 pounds without pulling loose.
Adjustable Webbing Straps
Once your fixed straps are reinforced, adjustable webbing gives you real versatility — one bag, every body type.
Thread 1.5 m of polyester webbing through a tri-glide slider adjuster, then loop each end through a swivel clasp or D-ring for twist-free wear. Match your buckle width to the webbing — usually 3.8–4.5 cm — so the slider moves smoothly without slipping under load.
- Choose UV-resistant metal hardware for outdoor bags
- Heat-seal raw webbing edges to prevent fraying
- Add layered stitching at attachment points for hold
Hidden Side Pockets
Straps sorted — now let’s talk security.
Hidden side pockets placed 2–3 inches from the top seam keep valuables discreet without bulk. Cut them 8"×10" for everyday items. Use a discreet zipper placement tucked behind a fabric flap for theft deterrence.
Line the interior with moisture-resistant fabric to protect cards and cash. Orient the opening vertically for clean one-handed access while the bag stays on your shoulder.
Applique Embellishments
Pockets handled — now make your tote say something.
Appliqué decoration transforms a plain bag into a statement piece. Cut felt or cotton broadcloth shapes — a bunny silhouette works perfectly for a DIY bunny tote bag. Secure edges with a satin stitch or zigzag for stretch fabrics. Pre-wash both fabrics first. Press from the back after attaching to avoid scorching.
Washing and Storage Tips
Your tote deserves the same care you put into making it.
- Cold water, gentle cycle protects colorfastness and fiber strength
- Air-dry flat away from direct sun to prevent seam stretching
- Cedar blocks or baking soda inside stored bags control odors naturally
Turn denim or canvas inside out before washing. Store in a breathable cotton bag — never plastic — to keep moisture and mustiness out for good.
Frequently Asked Questions (FAQs)
How do you sew an easy tote bag?
A single afternoon is all it takes to make something you’ll carry everywhere. Cut two 18"×14" panels, sew right sides together, create boxed corners, attach reinforced straps, and topstitch the opening for a clean finish.
Can you sew a small tote bag?
Yes, you can. Use two 12"×10" fabric rectangles, add fusible interfacing for structure, cut boxed corners for depth, and secure straps with X-stitch reinforcement. A beginner sewing machine controls all of it.
How to make a tote bag with a sewing machine?
Making a tote bag starts with cutting two main rectangles and handle strips. Sew the side seams, secure strap joints with X-stitch or bar-tack, then topstitch edges for a clean, load-bearing finish.
How do you decorate a tote bag?
Paint it, stitch it, press it on — decorating a tote is where the real personality shows up. Fabric paint, heat transfer vinyl, embroidery, and appliqué each bring a different kind of finish.
What to do with a tote bag?
A tote bag works harder than most people expect. Use it for grocery runs, beach trips, gym gear, office supplies, weekend travel, or craft storage — even upcycle worn-out ones into something entirely new.
How to make a tote bag step by step for beginners?
A stitch in time saves nine." Cut two 18"×14" fabric rectangles, apply fusible interfacing to each outer piece, then sew sides and bottom with ½" seams. Leave corners open to box later for a flat, stable base.
What is the best stitch for a tote bag?
A straight stitch controls main seams cleanly on canvas and denim. Use a zigzag on raw edges to stop fraying. For straps, a bartack or triple stitch locks stress points where loads hit hardest.
How to make tote bags without a sewing machine?
No machine? No problem. Grab canvas or denim, then use fabric glue or fusible hem tape for clean, tool-free seams. For real strength, hand-sew with a backstitch. Repurpose belts as straps. Finish raw edges with bias binding tape.
How do you wash and care for handmade tote bags?
The gentler you treat it, the longer it lasts. Wash in cold water on a gentle cycle, blot stains first, and air dry flat to prevent shrinkage, protect embroidery, and keep your bag looking sharp.
How much does it cost to make a DIY tote?
Expect to spend $10–$25 in materials for a solid first tote. Swap in recycled canvas or fabric scraps and that drops under $5 — zero compromise on durability.
Conclusion
A good stitch in time saves nine—and every reinforced seam you sew into these totes proves it. These DIY sewing tutorials for bags and totes aren’t just instructions. They’re your blueprint for building something that actually holds up.
Nail the bar-tacks. Press your seams flat. Choose canvas that fights back against weight and wear.
The bag you finish this week won’t split at the straps next month. That’s not luck. That’s craft.
- https://sewcanshe.com/sew-easy-big-tote-bag-free-sewing-tutorial
- https://theinspiredwren.blogspot.com/2014/04/tutorial-lined-canvas-tote.html
- https://www.applegreencottage.com/diy-purse-handles
- https://www.bag-uettes.com/journal/adding-structure-to-a-bag
- https://melaniekham.com/how-to-sew-a-tote-bag-learn-to-sew-series