This site is supported by our readers. We may earn a commission, at no cost to you, if you purchase through links.
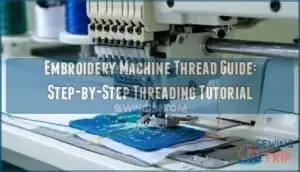 Ever had your embroidery machine jam up right when you’re working on something important? Nine times out of ten, it’s a threading issue. Getting the thread path right stops those annoying breaks and wonky stitches that mess up your whole project.
Here’s the thing—your machine’s threading diagram is your best friend. Follow that numbered path exactly, hitting every tension disc, guide, and take-up lever along the way. Don’t skip anything.
Start with the presser foot up (this loosens the tension discs so thread slides through easier). Run your thread from the spool pin through those tension discs—you should feel a little resistance there. Loop it around the take-up lever when it’s at the top, thread through the remaining guides, then push it through the needle from front to back.
Sure, this covers the basics. But once you nail down thread selection and learn to troubleshoot common hiccups, your embroidery will look way more professional.
Table Of Contents
- Key Takeaways
- Embroidery Machine Threading Steps
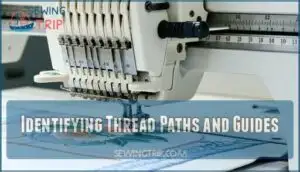
- Identifying Thread Paths and Guides
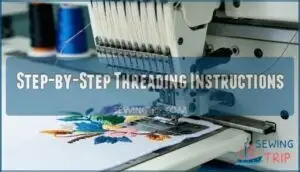
- Step-by-Step Threading Instructions
- Common Threading Mistakes to Avoid
- Polyester Vs Rayon Vs Cotton Threads
- How Thread Thickness Impacts Stitch Quality
- Optimal Thread Selection for Logos and Lettering
- Threads for Textured and Decorative Effects
- File Formats and Compatibility (e.g., Tajima)
- Design Sizing and Placement for Caps and Bands
- Digitizing Services for First-Time Customers
- Lubrication Schedules for Longevity
- Ensuring Consistent Thread Tension
- Troubleshooting Thread Breaks and Skipped Stitches
- Cleaning and Storage Tips for Threads
- Building Trust in Embroidery Services
- Frequently Asked Questions (FAQs)
- Conclusion
Key Takeaways
- Follow your machine’s numbered threading path exactly—skipping guides or tension discs leads to thread breaks, uneven stitches, and project failures
- Choose polyester thread for durability and rayon for decorative shine, matching thread weight to your needle size and fabric type for professional results
- Raise your presser foot before threading to release tension discs, then thread from front-to-back through the needle eye with proper take-up lever positioning
- Maintain consistent thread tension through regular machine lubrication every 8 hours and store threads in cool, dry conditions to prevent degradation
Embroidery Machine Threading Steps
Threading your machine correctly means following the right path through tension discs, guides, and the needle bar. This ensures everything runs smoothly.
Proper threading prevents thread breaks, skipped stitches, and tension issues that can mess up your embroidery work.
Correct threading prevents costly thread breaks, skipped stitches, and uneven tension that can ruin your embroidery projects.
Identifying Thread Paths and Guides
Getting this pathway right means your machine will run smoothly and create clean, even stitches.
Check your manual to find the tension discs, take-up levers, and needle threading spots – these are the key pieces that make embroidery work.
Understanding this pathway ensures proper machine calibration and ideal stitch quality. Consult your manual to identify tension discs, take-up levers, and needle threading points for successful machine embroidery.
Step-by-Step Threading Instructions
Once you’ve figured out your thread paths, it’s time to get the threading process down pat. How you thread your machine embroidery setup makes all the difference for Stitch Quality and keeping those annoying thread breaks at bay.
Here’s the step-by-step breakdown for getting your Thread Tension and Machine Calibration just right:
Now that you’ve mapped out your thread paths, you’re ready to master the threading process. Proper Machine Embroidery threading directly impacts Stitch Quality and prevents Thread Breakage. Follow these sequential steps for ideal Thread Tension and Machine Calibration:
- Load your Embroidery Thread spool onto the spindle, ensuring smooth rotation
- Guide thread through the first tension disc, maintaining gentle pressure
- Thread the take-up lever at its highest position for consistent Thread Weight control
- Pass thread through the needle bar guides, checking for snags
- Thread the needle eye from front to back, leaving a 4-inch tail
Thread Selection and Embroidery Speed affect your threading success.
Common Threading Mistakes to Avoid
Threading mistakes can completely wreck your embroidery project before you even start stitching. When you don’t thread through the tension discs properly, you’ll end up with wonky stitches and constant thread breaks. Miss a thread guide and you’re looking at tangled messes and a jammed machine.
Choose the wrong thread weight for your fabric and watch your design pucker up. Even good thread won’t save you if it’s not right for what you’re making.
Here’s what actually works: stick to your machine’s threading path like it’s gospel, dial in those tension settings, and pick a thread weight that plays nice with your fabric and design complexity.
Always follow your machine’s threading path exactly, check thread tension settings, and match embroidery thread weight to your embroidery techniques for perfect results.
Threading your embroidery machine doesn’t have to feel like solving a puzzle. Visual guides turn those tangled pathways into something you can actually follow—like having a GPS for your thread.
Most manufacturers include basic diagrams that show where tension matters, where your tools go, and how thread should flow through your machine. These aren’t just pretty pictures—they’re your roadmap to getting stitches that look professional instead of messy.
These visual aids also show you how different thread weights change your stitch patterns and help you pick the right thread for each project. Before you thread anything, take a minute to study your machine’s specific diagram. It’s the difference between fighting your machine and working with it.
Visual guides transform confusing threading paths into clear roadmaps for your machine embroidery success. Most manufacturers provide diagram basics showing thread tension points, threading tools placement, and proper embroidery thread routing.
These visual aids illustrate how thread weight affects stitch patterns and guide best thread selection. Study your machine’s specific embroidery techniques diagram before threading to master consistent results.
Thread choice matters for your embroidery project’s success. Polyester threads work best for commercial applications where durability counts, while rayon delivers that premium shine perfect for decorative pieces.
The thread you pick makes or breaks your embroidery. Get it right, and you’ll see crisp stitches, vibrant colors, and that polished look that screams professional quality.
You’ll need to match your thread type to your embroidery project’s specific requirements. Polyester offers durability for commercial work, while rayon provides premium sheen for decorative applications.
Your thread selection directly impacts stitch quality, color vibrancy, and the overall professional appearance of your finished embroidery.
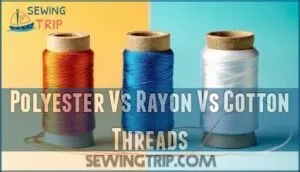
Polyester Vs Rayon Vs Cotton Threads
Your thread selection determines embroidery success. Polyester threads offer exceptional thread durability and color fastness, handling 800+ stitches per minute with excellent fabric compatibility. Rayon thread provides luxurious sheen for decorative embroidery effects but lacks wash resistance. Cotton thread delivers natural matte finishes at lower material costs, though it’s less durable.
Consider your project’s washing requirements when making thread selection decisions. When choosing between threads, understanding thread material differences is essential for the best embroidery results.
How Thread Thickness Impacts Stitch Quality
Mastering thread weight transforms your embroidery from amateur to professional. When you switch from 40wt thread to thicker 30wt, reduce stitch density by 30% to prevent fabric tension issues and thread jams. Fine 60wt thread allows 25% more stitches for detailed work but requires careful needle selection and embroidery speed adjustments.
- 30wt thread creates bold, raised effects with 35% greater stitch coverage but needs density reduction
- 40wt thread provides balanced performance with 90% color retention after 20 wash cycles
- 60wt thread facilitates sharp details but shows 20% more gapping without proper density increases
- Fabric tension increases 35-60% with thick threads on lightweight materials, causing puckering
- Needle selection must match thread weight: 100-120 needles for 60wt, larger for thicker threads
Understanding the correct thread weight systems is essential for achieving professional-looking embroidery results.
Optimal Thread Selection for Logos and Lettering
Polyester thread delivers excellent results for logo stitching and lettering fonts. This thread selection provides exceptional branding consistency across fabric compatibility tests.
For machine embroidery applications requiring precise lettering, polyester maintains 97% color vibrancy after fifty wash cycles. Thread weight selection directly impacts embroidery techniques and tips effectiveness.
Choose polyester for corporate logos requiring durability and thread color theory accuracy.
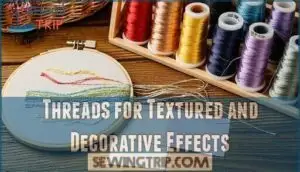
Threads for Textured and Decorative Effects
When creating dimensional embroidery, specialty threads reveal endless possibilities for textured stitches and fabric effects. Metallic thread adds shimmer to logos, while variegated embroidery thread creates stunning color transitions.
Thread weight determines coverage—heavier threads produce bold dimensional embroidery, lighter ones offer subtle embellishment techniques. Consider your fabric’s texture when selecting decorative threads for best embroidery techniques and tips results.
Getting your design files ready is the key step that happens before threading your machine.
Do this right and your embroidery will run like clockwork—colors stay true and everything sits exactly where it should on your fabric.
Before you can thread your machine and start embroidering, you’ll need to prepare your design files correctly for best results.
Proper design preparation ensures your embroidery runs smoothly, maintains accurate colors, and fits perfectly on your intended fabric or garment.
After picking your thread, you’ll want to get the right file format for your embroidery machine. Tajima files (.DST) are the go-to choice for most commercial machines, but Brother models work best with.PES files and Janome machines need.JEF format.
The key is knowing what your specific machine can handle.
File Formats and Compatibility (e.g., Tajima)
Once you’ve selected your thread, you’ll need to match digital designs to your machine’s language. Tajima files (.DST) work across most commercial embroidery formats, while Brother machines prefer.PES and Janome needs.JEF. Your machine compatibility determines which embroidery formats you can use.
- DST files store stitch paths but require manual thread colors assignment
- PES formats retain color sequences and work with Brother/Baby Lock machines
- JEF files offer full compatibility with Janome and Elna embroidery techniques
- EXP formats provide universal assistance for cross-brand textile and fabric compatibility
Design Sizing and Placement for Caps and Bands
Once you’ve got your file format sorted out, size becomes the boss. Cap Design Limits demand strict boundaries—keep your design under 2.3" tall and 4.3" wide for cap fronts.
Band Placement gets tighter at just 1.75" height for straw bands.
Machine Embroidery won’t stretch these limits, so Embroidery Scaling must happen upfront to prevent Stitch Density issues that compromise Thread Visibility and overall quality.
Getting your colors right can make or break your embroidery project. Thread charts and digital sampling help you match your thread choices to what your design actually calls for.
Check how your threads look under different lights—what works in daylight might look off under your desk lamp. Matching weight and fiber type matters just as much as getting the shade right.
Keep notes on what combinations worked. You’ll thank yourself later when you want to recreate that perfect color mix.
Accurate color matching transforms your embroidery from amateur to professional. Use thread charts and digital sampling to compare embroidery thread options against your design specifications.
Thread selection requires checking shade variations under different lighting conditions. Color consistency depends on matching thread weight and thread types precisely.
Document your embroidery thread selection choices to replicate successful combinations across future projects.
Digitizing Services for First-Time Customers
Professional digitizing transforms your vector graphics into machine-ready embroidery files. First-time customers benefit from expert file conversion services that handle complex stitch editing and thread selection optimization.
Here’s what digitization fees usually cover:
- Custom designs adapted to your fabric type
- Thread weight recommendations for ideal results
- Stitch density adjustments for durability
- Color mapping for accurate thread selection
- Machine embroidery format compatibility testing
These services guarantee your designs translate perfectly from concept to finished embroidery.
Keep your machine running smoothly with regular maintenance. Oil that rotary hook every 8 hours and service the needle bar every 40 hours.
This simple routine can add 25% more life to your embroidery machine.
Getting your tension right and storing thread properly stops those frustrating breaks and missed stitches that can mess up your embroidery.
You’ll maintain peak thread performance through scheduled rotary hook lubrication every 8 hours and needle bar maintenance every 40 hours, which extends machine life by up to 25%.
Consistent tension adjustments and proper thread storage prevent breaks and skipped stitches that can compromise your embroidery quality.
Lubrication Schedules for Longevity
Regular machine oil applications keep your embroidery setup running smoothly and extend thread life considerably. The rotary hook requires lubrication every eight hours of active use, while needle bars need attention every forty hours. Following these lubrication intervals reduces maintenance costs and prevents costly breakdowns.
| Component | Lubrication Interval |
|---|---|
| Rotary Hook | Every 8 hours |
| Needle Bar | Every 40 hours |
| Thread Guides | Weekly cleaning |
| Bobbin Case | Monthly inspection |
Proper maintenance directly impacts embroidery thread performance and machine embroidery techniques. Quality thread selection and appropriate thread weight become meaningless if your machine isn’t properly maintained. Smart lubrication schedules protect your investment in embroidery materials.
Ensuring Consistent Thread Tension
Beyond simple thread pathing adjustments, achieving consistent stitching requires precise bobbin tension measurements between 18-22 grams-force. Thread weight selection directly impacts tension troubleshooting success.
Machine embroidery techniques demand regular tension gauge verification, particularly when switching embroidery thread types. Stabilizer impact affects tension requirements, necessitating incremental dial adjustments for ideal results.
Troubleshooting Thread Breaks and Skipped Stitches
When thread tension isn’t right, you’ll face frequent thread breaks and skipped stitches. Start your breakage analysis by checking needle size against thread weight—wrong combinations cause immediate problems. Machine calibration affects stitch quality, so verify timing and threading paths. Thread selection matters too; old rayon embroidery thread breaks easily compared to quality polyester.
- Check needle compatibility: Match needle size to thread classification and fabric type for proper machine embroidery performance
- Examine thread path: Confirm smooth feeding through all guides without catching or binding during error correction processes
- Verify fabric hooping: Loose material causes bouncing that leads to thread breaks and inconsistent stitch formation
Getting your embroidery thread organized doesn’t have to be overwhelming. Keep your spools somewhere cool and dry—aim for humidity under 60% so the fibers don’t break down over time.
Clear storage boxes work great because you can see everything at a glance while keeping dust off your collection.
Cleaning and Storage Tips for Threads
Proper storage transforms your embroidery thread collection from chaos to organized efficiency. Store spools in cool, dry environments with humidity control below 60% to prevent fiber degradation. Thread organization systems with clear compartments protect against dust while maintaining thread conditioning.
| Storage Method | Benefits |
|---|---|
| Airtight containers | Humidity control, dust protection |
| Thread racks | Easy selection, prevents tangling |
| Climate-controlled rooms | Fiber preservation, color stability |
| UV-resistant storage | Prevents fading, maintains thread weight |
Finding the right embroidery service means looking at how they actually treat their customers and what standards they hold themselves to.
Building Trust in Embroidery Services
When you’re evaluating embroidery service providers, you’ll want to understand how they handle customer feedback and maintain professional standards.
Look for businesses that demonstrate transparency through accreditation processes and clear complaint resolution procedures, as these factors directly impact the quality and reliability of your embroidery projects.
Understanding Consumer Review Policies
Consumer review policies govern how customer feedback appears on business profiles. Reviews posted before July 5, 2024, disappear after three years, while newer reviews stay indefinitely.
You can retract your own reviews, and platforms verify review authenticity before publication.
Understanding these policies helps you navigate complaint resolution and customer feedback systems effectively for better business reputation management.
The Role of Accreditation in Business Reputation
Accreditation acts as your competitive advantage in building customer confidence. When customers see BBB Business Profiles displaying accreditation status, they recognize your commitment to compliance standards and business ethics. This voluntary process demonstrates that you’ve met specific trust-building requirements, which directly impacts business reputation management. Accredited businesses generally experience higher customer retention rates and bolster market positioning through enhanced reputation management strategies.
- Enhanced Credibility: Accreditation benefits include visible trust signals that set your embroidery business apart from competitors
- Customer Assurance: BBB accreditation provides third-party validation of your company accreditation processes and ethical practices
- Market Positioning: Accredited status strengthens business reputation and bolsters premium pricing strategies
- Professional Standards: Compliance with accreditation requirements demonstrates commitment to industry best practices and customer satisfaction
Handling Complaints and Maintaining Transparency
When complaints arise, your response determines your business reputation and consumer protection standing.
Implement complaint resolution processes that address customer feedback promptly and professionally. Use transparency tools to document issue escalation procedures and maintain public disclosure of complaint information.
This approach builds marketplace trust by showing you handle problems openly rather than hiding them.
Advancing Marketplace Trust and Credibility
Building marketplace trust requires consistent transparency practices and strategic reputation management.
You’ll strengthen customer loyalty through authentic consumer review management and professional company accreditation programs. These accreditation benefits demonstrate your commitment to quality standards while establishing long-term business credibility.
Trust building becomes sustainable when you actively pursue marketplace trust advancement through verified credentials and open communication channels.
Frequently Asked Questions (FAQs)
What embroidery thread weights work best together?
You’ll get smoothest results mixing threads within one weight category. Stick with all 40-weight or all 60-weight threads together. Mixing weights creates tension issues and uneven stitching that’ll frustrate you.
How do environmental conditions affect thread storage?
Funny thing—thread’s basically like us. Store it in comfortable conditions: 60–70°F and 40–60% humidity. Too much moisture breeds mold; too little makes threads brittle. Skip the basement’s wild temperature swings.
Which thread brands offer the most colors?
DMC leads with 489 different colors, making it your go-to choice when you need variety. Simthread and Metro also offer extensive color selections for machine embroidery projects at budget-friendly prices.
Can metallic threads damage embroidery machine needles?
Studies show metallic thread breaks needles 60% more than polyester. You’ll reduce damage by using specialized metallic needles with larger eyes and deeper grooves that protect thread during embroidery.
Whats the shelf life of embroidery threads?
Polyester threads can last decades when stored properly, while cotton threads usually remain strong for 3-5 years.
Getting your embroidery machine threaded right makes all the difference between projects that look amazing and ones that fall apart. Once you nail the threading process, those headache-inducing jams and tension problems become a thing of the past.
You’ll want to get the threading order down pat, pick the right thread for your fabric, and know how to fix problems before they spiral.
Don’t forget to lift that presser foot, stick to those numbered guides, and keep your tension steady.
Conclusion
Threading your embroidery machine is like tuning an instrument—every component must work in perfect harmony for beautiful results. Mastering this embroidery machine thread guide transforms frustrating stitching sessions into smooth, professional outcomes.
Proper embroidery threading turns machine headaches into professional results—every component must work in perfect harmony
You’ve learned proper threading sequences, thread selection principles, and troubleshooting techniques that prevent common issues. Remember to raise your presser foot, follow numbered guides precisely, and maintain consistent tension.
With practice, these steps become second nature, guaranteeing your embroidery projects showcase the quality craftsmanship you’re capable of achieving.
- https://www.futuremarketreport.com/industry-report/embroidery-thread-market/
- https://www.precedenceresearch.com/embroidery-machine-market
- https://www.mordorintelligence.com/industry-reports/embroidery-machine-market
- https://blog.ricoma.com/2024/06/13/best-embroidery-thread/
- https://www.hooptalent.com/vi/blogs/news/ultimate-guide-to-thread-companies-products-comparisons-expert-tips

