This site is supported by our readers. We may earn a commission, at no cost to you, if you purchase through links.
For beginners, 14-count Aida canvas works perfectly, and organizing your threads by color families keeps everything manageable.
Digital pattern design breaks free from traditional limitations, letting you customize everything from simple motifs to intricate masterpieces. Export finished patterns to PDF format for crisp printing and sharing.
The real magic happens when you master the five essential steps that transform any creative vision into reality.
Table Of Contents
Key Takeaways
- You’ll transform photos into custom stitch patterns instantly using digital tools like Pixel-Stitch or FlossCross that handle complex color mapping and grid conversion automatically.
- You can create original patterns from scratch using grid-based design software, building everything from geometric motifs to intricate masterpieces with complete creative control.
- You’ll export finished patterns to professional PDF format for crisp printing and sharing, with options to sell your designs online through platforms like Etsy.
- You’ll master the five essential steps—software selection, image optimization, color mapping, pattern editing, and professional finishing—that turn any creative vision into workable stitch patterns.
Getting Started With Custom Stitch Pattern Creation
You’ll transform your creative vision into stunning stitched reality using modern digital tools that make pattern creation surprisingly simple.
Whether you’re converting your favorite photo or building geometric designs from scratch, today’s software manages the complex math while you focus on the artistic choices that make each pattern uniquely yours.
Understanding Digital Pattern Design Basics
Forget those rigid paper charts—digital pattern design lets you play with grid sizes and experiment with color palettes however you want. When you convert photos into stitch patterns, you’re basically turning any image into pixels that work perfectly for your project.
Digital software gives you everything from beginner-friendly patterns to complex masterpieces, plus you can mix different stitch types to create exactly what you’re imagining. Once you get the hang of these basics, designing custom patterns becomes second nature.
Essential Tools and Software Requirements
Getting your creative toolkit ready doesn’t have to be complicated—you just need the right foundation to turn your ideas into beautiful stitch patterns. A modern browser gives you access to powerful design features, and if you’ve got a tablet, you can sketch patterns anywhere inspiration strikes.
- Software Compatibility: Choose tools like FlossCross or Pixel-Stitch that work seamlessly across devices
- Hardware Needs: Make sure your computer is capable of WebGL acceleration for smooth pattern rendering
- Digital Storage: Organize custom designs with reliable file management systems for easy access
Setting Up Your First Pattern Project
Before diving into Custom Stitch Designs, you’ll need proper Fabric Selection and Thread Organization. Choose your canvas count first—14-count Aida works great for beginners tackling stitch patterns.
Set up good Lighting Setup and consider Workspace Ergonomics for comfort. Organize threads by color families, select appropriate Needle Choices, and confirm your workspace accommodates both traditional cross-stitch and modern CNC stitch patterns for upholstery design projects.
Converting Photos to Cross Stitch Patterns
You can transform your favorite photos into stunning cross stitch patterns using tools like Pixel-Stitch that automatically convert images into workable grid designs.
These platforms handle the tricky parts—mapping colors to thread shades and creating printable PDF patterns—so you can focus on the fun part of stitching your memories into fabric.
Using Pixel-Stitch and Similar Conversion Tools
You’ve got your design basics down, so let’s talk about turning photos into stitchable magic. Pixel-Stitch transforms your favorite images into cross-stitch patterns through digital image conversion.
The conversion process is pretty straightforward:
- Upload your photo for automatic image optimization
- Choose pattern complexity and color palette size
- Download PDF patterns for cross-stitch, bead conversion, or diamond painting
The tool manages pixel art images beautifully, though some image editing beforehand helps achieve cleaner results.
Color Mapping and Thread Selection
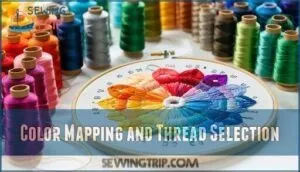
Once you’ve converted your photo, you’ll face the color mapping challenge. Thread conversion means matching your image’s colors to actual DMC embroidery floss shades.
Most tools suggest palette optimization automatically, but you can fine-tune selections. Good color theory helps here—complementary colors create depth while analogous ones blend smoothly.
Your cross stitch chart depends on smart floss matching for realistic stitch rendering.
Optimizing Images for Pattern Clarity
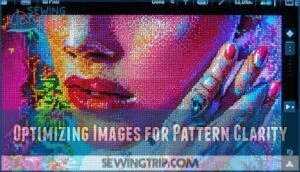
Sharp image resolution makes all the difference in your cross stitch chart quality. Start with high-resolution photos—at least 300 DPI works best for pixel stitch conversion. Adjust color calibration to boost pattern contrast before uploading.
Consider stitch density when sizing your image; smaller patterns need clearer pixel optimization. Your cross stitch embroidery pattern’s chart rendering depends on these prep steps for crisp, readable results.
Creating Patterns From Scratch Using Design Software
When you’re ready to build patterns from your imagination, design software gives you complete creative control over every stitch and symbol.
You’ll work on a digital grid where each square represents one cross stitch, letting you craft everything from geometric borders to whimsical characters with precision that’d make your grandmother’s steady hands jealous.
Grid-Based Design Fundamentals
Cross stitch charts work just like building with blocks on graph paper. Each little square on your grid becomes one stitch when you’re working on fabric. The fabric count tells you how tight your stitches will be—grab 14-count fabric and you’ll get 14 stitches packed into every inch.
Color theory guides your palette choices, while pattern symmetry creates balance. Design principles like focal points make cross stitch design pop.
Understanding pixel art fundamentals helps since cross stitch patterns work similarly to computer graphics.
Working With FlossCross Chart Editor
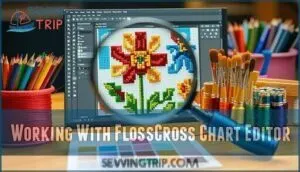
Exploring FlossCross’s user-friendly chart editor feels like sketching your creative vision into digital reality. This online tool transforms cross-stitch design from tedious grid-work into smooth stitch simulation magic. You’ll master the color palette quickly, discovering editor shortcuts that simplify your workflow.
Key FlossCross tips for chart editing success:
- Use the grid zoom feature to perfect detailed sections without losing sight of your overall design
- Save frequently using Ctrl+S—your masterpiece deserves protection from browser hiccups
- Preview your pattern in stitch simulation mode to catch color clashes before you start stitching
The chart editor responds instantly to your creative impulses, making cross stitch chart design feel natural.
Symbol Assignment and Pattern Layout
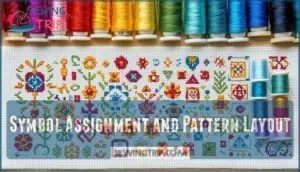
Smart symbol placement transforms your chart editor into a powerful design tool. You’ll assign unique symbols to each thread color, guaranteeing pattern clarity and stitch optimization.
Focus on grid alignment to maintain pattern symmetry throughout your cross stitch patterns. Choose contrasting symbols for color coding—dots for dark threads, circles for light ones.
This systematic approach prevents embroidery mistakes and creates professional-looking patterns that import and export seamlessly.
Adding Text and Custom Elements
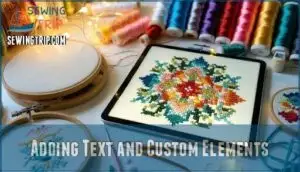
Once you’ve nailed symbol placement, adding text effects and custom elements transforms basic embroidery patterns into tailored masterpieces. Custom fonts let you stamp personality onto your creating cross stitch patterns while element scaling ensures perfect proportions.
- Text Effects: Experiment with outline styles, shadow effects, and color blending for readable lettering
- Custom Fonts: Import specialty typefaces or create pixel-perfect alphabets for unique messaging
- Element Scaling: Resize decorative borders, motifs, and accents to fit your canvas dimensions
- Symbol Editing: Modify existing pattern libraries to match your custom cross stitch kits vision
Editing and Customizing Existing Pattern Templates
You don’t need to start from scratch when creating custom stitch patterns—existing templates give you a solid foundation to build on.
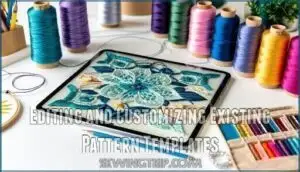
With the right editing tools, you can transform any basic pattern into something uniquely yours by adjusting colors, resizing elements, and adding personal touches that match your creative vision.
Importing Pattern Files and Formats
Getting your digital cross stitch files to play nice with different software can feel like speaking multiple languages at once.
The trick is knowing how to convert between formats—PDF, JPG, PNG for general use, or specialized ones like OXS and XSD for cross stitch programs—so your patterns flow seamlessly from one tool to another.
| Format Type | Common Extensions |
|---|---|
| Standard Files | PDF, JPG, PNG |
| Cross Stitch Files | OXSfile, XSD, PAT |
| Digital Formats | Creating cross stitch patterns requires compatible Stitch Data |
Most platforms assist Pattern file import/export through Open XStitch standards, making your creative workflow smoother than silk thread.
Modifying Colors and Stitch Types
Your Color Palette becomes your creative playground once you’ve imported a pattern. Most cross stitch software lets you swap embroidery threads instantly by clicking existing colors and selecting replacements.
Try different Thread Choices for skin tones or swap bold reds for pastels. Stitch Variations like half-stitches or French knots add texture without changing the grid.
Pattern Optimization helps balance your Custom Cross Stitch Kits for better contrast and visual flow.
Resizing and Scaling Patterns
When scaling patterns, maintain proper aspect ratio to prevent distorted designs. Pattern scaling software adjusts stitch density automatically, keeping design proportions intact.
Online pattern making tools let you resize cross stitch kits without losing detail. Import your pattern file, adjust dimensions, then export for printing.
Custom cross stitch kits benefit from scaled variations for different fabric counts.
Creating Pattern Variations and Themes
Transform your base patterns into stunning stitch pattern collections by experimenting with theme development and color schemes. Mix seasonal palettes—winter blues for holiday designs or autumn golds for harvest themes.
Try pattern mixing by combining florals with geometrics, creating custom cross stitch kits that tell stories. Add stitch variations like French knots or backstitching for texture.
Draw design inspiration from pixel art or nature photography to build cohesive custom cross stitch tapestry kit series.
Finalizing and Sharing Your Custom Patterns
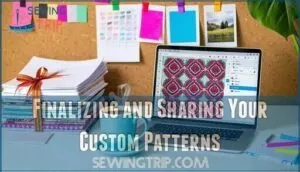
Your pattern is ready—time to get it out there! Save it as a PDF for clean printing, then think about putting it up on pattern-selling sites where crafters are always looking for something new to stitch.
Exporting to PDF and Printable Formats
Getting your cross-stitch pattern ready for printing doesn’t have to be complicated. Start by setting your page to landscape mode—this works best for those wider designs that need extra room to breathe. Then check your color settings to make sure those beautiful thread shades won’t look washed out on paper.
- Keep your PDF quality at 300 DPI or higher
- Turn on file optimization so downloads don’t crawl
- Scale to full page so you can actually see the details
Most pattern programs let you export straight to PDF, which makes sharing and storing your designs pretty straightforward.
Creating Professional Pattern Instructions
Professional instructions transform your pattern from hobby craft to marketable product. Clear stitch guidance helps stitchers navigate complex sections, while color theory explanations guarantee accurate thread selection. Your instructional writing should include thread charts and step-by-step construction methods.
| Component | Purpose |
|---|---|
| Stitch Legend | Shows symbol meanings and techniques |
| Color Chart | Maps floss numbers to pattern symbols |
| Difficulty Guide | Indicates skill level and time estimates |
Include design optimization tips and pattern clarity notes in your PDF download to create thorough Cross Stitch Kits that rival commercial Custom Cross Stitch Tapestry Kit offerings.
Selling Your Patterns Online
Once you’ve crafted your perfect pattern PDF, selling online opens lucrative opportunities. Etsy dominates online marketplaces for digital sales, offering automatic downloads for PDF patterns. Consider multi-platform approaches across various platforms for widest reach.
Set up proper royalty tracking systems and provide excellent customer service to build repeat business. Custom Cross Stitch Kits command higher prices than simple cross-stitch project patterns.
Understanding consumer behavior through online buying patterns can help designers tailor their products and marketing strategies to meet customer needs.
Copyright and Ownership Considerations
Before selling your patterns, understand your intellectual property rights completely. When you create original embroidery designs using platforms like FlossCross, you own full copyright automatically—no registration required. Your custom cross stitch tapestry kit designs are protected under ownership laws from the moment of creation.
- Digital Rights: You control how your patterns are distributed online and can set licensing terms
- Pattern Licensing: Choose between exclusive or non-exclusive agreements when working with retailers
- Royalty Management: Track sales and payments if you license designs to manufacturers
- Copyright Protection: Your original work is automatically protected, but registration strengthens legal standing
- Commercial Freedom: Sell, modify, or license your patterns without seeking permission from software platforms
Frequently Asked Questions (FAQs)
What thread brands work best for custom patterns?
Like golden threads weaving dreams into reality, you’ll want reliable brands that won’t fade or fray.
DMC and Anchor offer consistent quality and color matching. Madeira provides excellent coverage.
Choose based on your pattern’s complexity and desired finish.
How much do custom cross stitch kits cost?
You’ll pay $40-$160 for a custom kit, depending on size and complexity. Smaller 4×6" kits start around $40, while larger 8×11" options reach $
Can I sell patterns made from copyrighted images?
No, you can’t legally sell patterns created from copyrighted images without permission. That’s copyright infringement, which could land you in hot water with lawyers and hefty fines.
What fabric count works for detailed custom designs?
Think of fabric count as your canvas’s resolution – higher counts capture finer details.
For intricate custom designs, you’ll want 18-count Aida or higher. This gives you the thread density needed to render sharp lines and subtle color transitions in your custom patterns.
How long does creating custom patterns typically take?
Creating pattern takes anywhere from 30 seconds to 100 hours, depending on complexity and your goals. You’ll convert simple photos digitally in minutes, but detailed original designs need weeks of careful planning, color mapping, and testing.
Conclusion
Last month, Sarah transformed her daughter’s favorite dinosaur drawing into a stunning cross stitch masterpiece using FlossCross—it now hangs proudly in their living room.
Sarah turned her daughter’s dinosaur drawing into a cross stitch masterpiece that now decorates their living room
Now you know how to turn photos into custom stitch patterns and finish them like a pro.
These tools work for anyone—whether you’ve been stitching for years or just picked up your first needle.
Start with simple designs, experiment with color combinations, and don’t be afraid to make mistakes. Your custom stitch patterns can become treasured keepsakes or profitable digital products.
- https://www.futuremarketinsights.com/reports/needlecraft-patterns-market
- https://straitsresearch.com/report/decorated-apparel-market
- https://www.businessresearchinsights.com/market-reports/cross-stitch-market-124097
- https://digitize4life.com/blog/custom-patches-where-tradition-meets-digital-innovation
- https://www.archivemarketresearch.com/reports/needlecraft-patterns-260063

