This site is supported by our readers. We may earn a commission, at no cost to you, if you purchase through links.
But here’s what those museum pieces won’t tell you: every quilter who mastered hand quilting techniques started exactly where you are now—frustrated by uneven stitches and wondering if their thumbs would ever stop aching.
The difference between a beginner and an expert isn’t talent. It’s understanding which tools actually matter, how your hands should move, and why some stitches hold while others pucker. Once you learn the mechanics behind the needle’s rhythm and how to layer your quilt properly, those crooked lines transform into something you’ll want to wrap around someone you love.
Table Of Contents
Key Takeaways
- Hand quilting mastery isn’t about natural talent—it’s about understanding the mechanics of needle movement, proper layering techniques, and why specific tools like metal thimbles and quality glazed thread directly impact stitch consistency and your ability to work without fatigue.
- Preparation determines success more than stitching skill: choosing the right batting type for your desired drape, securing your three-layer quilt sandwich through proper basting, and marking clear design lines before you start prevents puckering and uneven stitches that plague beginners.
- The fundamental techniques—quilter’s knots that pop invisibly into batting, the running stitch rhythm that loads 3-4 stitches before pulling through, and proper tension control—transform frustrating crooked lines into the consistent 8-10 stitches per inch that define quality hand quilting.
- Beyond the craft itself, hand quilting delivers measurable health benefits including 35% stress reduction through meditative repetition, improved cognitive function and motor skills from precise stitch work, and the social connection that 84% of quilters report through guild membership and community quilting groups.
Essential Tools and Materials for Hand Quilting
Getting started with hand quilting means having the right supplies at your fingertips. You don’t need much, but each tool plays a specific role in helping you create consistent, beautiful stitches.
Here’s what you’ll need to get going.
Choosing The Right Needles and Threads
Your needle and thread aren’t just tools—they’re your partners in every stitch, and picking the right ones can mean the difference between a frustrating struggle and a rhythm that feels almost meditative.
Hand quilting needles come in various sizes—7 and 9 are popular choices—with larger needles offering easier manipulation for beginners.
Thread selection matters just as much: look for sturdy, glazed quilting thread like Gutermann Hand Quilting Thread that won’t fray or break mid-project.
Match your fabric compatibility carefully, ensuring your quilting notions support both stitch quality and the specific hand quilting techniques you’ll use.
Using Thimbles for Comfort and Protection
A thimble might seem old-fashioned, but after a few hours of pushing a needle through layers of fabric and batting, you’ll understand why quilters have relied on them for centuries.
A metal thimble offers the best finger protection, shielding your pushing finger from soreness and even injury. Quilting ergonomics matter—proper hand comfort leads to better stitch accuracy and lets you work longer without fatigue.
Try different thimble materials until you find one that feels natural on your finger.
Marking Tools for Accurate Quilt Lines
Before you can stitch your first line, you need a way to see where that line should go—and that’s where marking tools come in. Washable fabric markers and chalk tools let you trace quilting patterns directly onto your quilt top without leaving permanent marks.
Quilting stencils guide your designs, while a Hera marker creates a crease instead of a visible line. Fabric pens work beautifully for marking quilt lines on light fabrics, giving you clear thread guides to follow as you stitch.
Selecting Fabrics, Batting, and Cutting Tools
Once your lines are marked, you’ll want to choose the right fabric, batting, and cutting tools to bring your quilt to life. Cotton quilting fabric holds stitches beautifully and won’t shift as you work.
Your batting type—whether cotton, polyester, or wool—affects drape and warmth. A precise cutting tool like a rotary cutter ensures clean edges when assembling your quilt sandwich, setting you up for smooth stitching through all those quilting patterns.
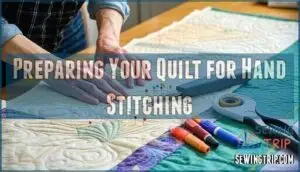
Preparing Your Quilt for Hand Stitching
Before you start quilting, you need to build a stable foundation. That means layering your materials properly, securing everything so it won’t shift, and marking your design clearly.
Getting these three steps right makes the difference between stitches that lie flat and ones that pucker or wander.
Choosing and Layering Fabrics and Batting
Your fabric and batting choices form the foundation of your quilt’s drape, warmth, and how easily your needle glides through each stitch.
Start with prewashed cotton fabric to prevent shrinkage, then select batting types—cotton, wool, or polyester—based on your desired loft and warmth.
When layering techniques come into play, smooth your quilt backing right-side down, center the batting, then place your quilt top face-up, creating a quilt sandwich ready for your quilting needles and thread.
How to Baste and Secure Your Quilt Sandwich
Basting locks your three layers in place so they won’t shift, buckle, or betray you mid-stitch—and you’ve got two reliable methods to make it happen.
Spray adhesive delivers quick fabric adhesion for smaller projects, securing corners and edges with minimal fuss.
Thread basting uses long stitches radiating from the center outward, creating unshakable quilt stability that holds firm in your quilting hoop while you work with your quilting needles and thread.
Marking Quilting Patterns and Designs
Your marking tool is the first step to bringing your design to life—whether it’s a ceramic pencil, chalk pounce pad, or water-soluble marker, you’re giving your needle a path to follow.
Pick what works for your fabric color and how intricate your pattern is:
- Hera marker creates creased lines on light fabrics without residue
- Washable fabric marker draws bold quilting patterns on dark material
- Chalk pounce pad transfers intricate stencil making designs through powder
- Ceramic pencil offers precision for detailed quilt design work
- Water-soluble pen disappears completely after quilting patterns and stencils are stitched
Test your marking tool on scrap fabric first—thread coloring choices depend on visible pattern marking lines.
Mastering Fundamental Hand Quilting Stitches
Hand quilting comes down to a few core stitches you’ll use again and again. Once you’ve got these basics under your fingers, you can tackle any pattern with confidence.
Let’s walk through the essentials.
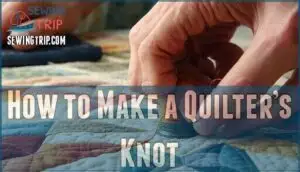
How to Make a Quilter’s Knot
Before you can start stitching your quilt, you’ll need to master the quilter’s knot—the hidden anchor that keeps your thread secure without leaving a bulky bump on the fabric’s surface. This knot-tying technique lets you "pop" the knot through the quilt top, burying it between layers for a clean finish.
| Step | Technique | Quilters Tips |
|---|---|---|
| 1 | Thread your needle and hold the tail | Use quality quilting thread for durability |
| 2 | Wrap thread around your index finger | A thimble protects your pushing finger |
| 3 | Roll thread off finger while pinching | This creates the perfect quilter’s knot |
| 4 | Pull tight to form a small knot | Stitch control starts with proper knot size |
| 5 | Insert needle and pop knot into batting | Hand quilting stitches should hide all knots |
With practice, you’ll create consistent hand quilting knots that disappear seamlessly into your work.
The Running Stitch: Step-by-Step Guide
Think of the running stitch as your bread and butter—the straightforward technique that binds three layers into one cohesive quilt.
You’re simply weaving a hand quilting needle through fabric in steady, even motions.
- Stitch length: Aim for 8-10 running stitches per inch as you build speed
- Thread choice: Quality quilting thread prevents fraying during repetitive motion
- Fabric prep: A secure quilt sandwich ensures consistent stitch tension
- Quilting speed: Load 3-4 stitches on your needle before pulling through
Master these hand quilting stitches, and you’ll develop the muscle memory that makes every project flow naturally.
Rocking Stitch and Spoon Quilting Techniques
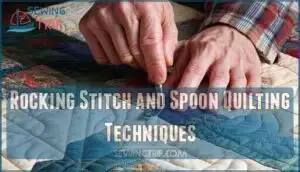
Once you’ve mastered the running stitch, rocking stitch, and spoon quilting techniques, take your hand movement to the next level. The rocking stitch—used by 87% of quilters—combines needle guidance with a rhythmic motion that loads multiple stitches before pulling through.
Spoon quilting uses a smooth metal surface underneath for enhanced stitch control and quilting ergonomics, yielding tighter, more uniform hand quilting stitches while protecting your fingertips from constant punctures. To achieve uniform stitches, quilters often utilize a quilting spoon technique that helps guide the needle and create a consistent rocking motion.
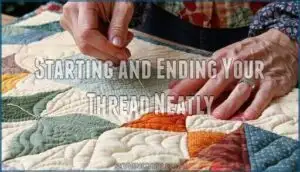
Starting and Ending Your Thread Neatly
Once you’re in that rhythm with your stitches, there’s a simple art to beginning and finishing each thread so everything stays tidy and secure. Start with a quilter’s knot that you pop through the quilt top using your quilting needle and thimble—burying it between layers for seam security.
When finishing, take a tiny backstitch, knot close to the fabric, then weave your thread through the batting before clipping. This hand quilting technique keeps quilt borders and stitch finishing invisible and locked tight.
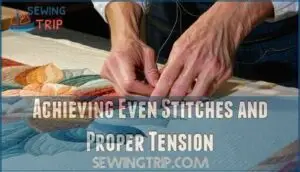
Achieving Even Stitches and Proper Tension
Getting your stitches to look uniform and your quilt to lie flat takes more than just technique—it requires attention to stitch size, tension, and how you hold your work.
The difference between a lumpy project and a smooth, professional finish often comes down to a few key adjustments.
Let’s look at the practical steps that’ll help you create consistent, beautiful stitches every time.
Tips for Consistent Stitch Size
If you want to get good at hand quilting, there’s one thing that matters most: keeping your stitches consistent from the first one to the last.
Here’s how to nail down even stitch length and find your rhythm:
- Mark evenly spaced guide lines on your fabric to train your eye
- Focus on hand quilting needles size 7 or 9 for better thread control
- Practice the running stitch at a steady pace before attempting complex quilting techniques
- Check both sides regularly to verify uniform hand quilting stitches throughout
Managing Thread Tension to Prevent Puckering
Even stitches won’t save your quilt if you pull the thread too tight—tension control separates smooth, professional work from a puckered mess. Aim for gentle pulls after each stitch length, letting the quilting thread rest naturally without tugging.
Your thimble helps you push the quilting needle through layers without forcing excess tension.
Fabric choice matters too—looser weaves need lighter pulls than tight cottons. Master these hand quilting techniques and puckering prevention becomes second nature.
Using a Hoop or Frame for Better Control
Hoops and frames don’t just hold fabric—they act as your third hand, keeping all three layers taut so your needle glides through without fighting bunched batting or shifting fabric.
Choose hand quilting hoops sized for comfortable reach without straining—smaller hoops offer better tension control while larger frames let you cover more ground.
Proper hoop selection improves quilting ergonomics and stitch guidance, letting you focus on rhythm instead of wrestling your quilt sandwich.
Common Stitching Mistakes and How to Fix Them
Every quilter—no matter how skilled—battles the same stubborn gremlins: uneven stitches, knotted thread, and that maddening fabric pucker that seems to appear out of nowhere.
The fixes are straightforward:
- Tension issues: Loosen your grip and let the thread flow naturally through layers
- Stitch length: Mark small guide dots to train your eye for consistency
- Thread breaks: Switch to quality quilting thread and avoid over-pulling
- Fabric puckers: Re-baste loose areas and check your hoop management
- Skipped stitches: Rock your needle at a steeper angle through all layers
Master these fixes and you’ll stitch with the kind of ease that only comes from knowing exactly what to do when things go sideways.
Best Beginner Projects and Pattern Selection
Starting your hand quilting journey means picking the right project—one that builds your skills without overwhelming you. Your first quilt should feel manageable and rewarding, not like a test of endurance.
We’ll walk through beginner-friendly patterns, starter projects, and community resources—plus how this craft quietly supports your mental health.
Choosing Simple Quilting Patterns or Kits
When you’re just starting out, picking a simple pattern or beginner-friendly kit can mean the difference between finishing your first quilt and abandoning it in a closet. Look for starter blocks with straightforward designs—think nine-patch squares or simple strip patterns.
Quilt kits bundle everything you need, removing guesswork from fabric selection. Choose beginner quilting projects with minimal piecing and easy-to-follow hand quilting patterns that build your confidence stitch by stitch.
Recommended First Projects for New Quilters
Three projects stand out as ideal launching pads for new hand quilters: a lap-sized baby quilt, a simple table runner, or a set of four matching placemats. Each beginner quilting project teaches essential skills without overwhelming you.
A baby quilt offers manageable size with room to practice your running stitch across quilt blocks. Table runners and wall hangings let you experiment with sampler project designs while building confidence through focused hand quilting practice.
Joining Quilt Guilds and Community Groups
Local quilt guilds open doors you didn’t know existed—connecting you with experienced quilters who’ve already navigated the mistakes you’re about to make.
Guild meetings offer hands-on quilting techniques demonstrations, while quilt socials create space for group projects that accelerate your learning.
Community outreach programs and quilter networks turn crafting and DIY projects into shared experiences, transforming quilt making from a solitary practice into a thriving crafting community where quilting for beginners becomes genuinely enjoyable.
Health and Wellbeing Benefits of Hand Quilting
Hand quilting techniques deliver measurable benefits beyond beautiful textile art. Studies show these stitching techniques lower blood pressure and cut stress by 35% through meditative repetition—stress reduction that’s backed by science. Quilting’s repetitive motions can also provide a significant calming effect on the mind.
You’ll sharpen cognitive function and motor skills with every precise stitch, while emotional wellbeing grows as you complete projects.
Most compelling? 84% of quilters report stronger social connection through shared hand quilting experiences, transforming solitary stitching into communal joy.
Frequently Asked Questions (FAQs)
How do you care for and store finished quilts?
After thousands of stitches transform fabric into heirloom quilts, proper care ensures they don’t fall apart. Store quilts in breathable cotton pillowcases, avoiding plastic.
For cleaning, gentle hand-washing works best—tackle stains carefully.
When displaying quilts, rotate them regularly to prevent fading and preserve those intricate quilting patterns you worked so hard to create.
What are the historical origins of different quilting patterns?
Quilting patterns carry deep Pattern Symbolism rooted in necessity and tradition. Regional Variations emerged as communities adapted designs through Cultural Diffusion, with Pattern Evolution reflecting local textile art and heirloom quilts’ stories.
These adaptations preserve quilting history and origins across generations, ensuring that the craft remains a living testament to cultural heritage.
How long does it typically take to complete a quilt?
Creating a quilt takes real time—sometimes a lot of it. A simple lap quilt might be ready in a few weeks, but larger projects with intricate hand quilting can stretch into months or even years.
The timeline depends on what you’re making, how big it is, how densely you stitch, and your experience level.
A simple lap quilt might take weeks, while intricate hand quilting techniques on larger quilts can span months or even years of dedicated stitching.
Can you hand quilt with embroidery or specialty threads?
Yes, but choose your materials wisely. Thread weight and fiber content matter—embroidery threads often lack the durability of quilting thread.
Metallic threads can fray easily, so use thread lubrication and perform colorfast testing before committing to your project.
How do you repair or restore damaged antique quilts?
Like mending a treasured family tapestry, restoring antique quilts demands gentle hands and informed choices.
You’ll need careful fabric sourcing to match original materials, precise stitch replication using hand quilting techniques, gentle cleaning methods, stabilizing fabrics with archival backing, and thoughtful display options that protect your quilt from further damage.
Conclusion
Think of hand quilting techniques as learning a new language—awkward at first, but eventually your hands speak fluently without conscious thought. Your first stitches taught your fingers the rhythm; now every quilt you complete deepens that conversation between needle, thread, and fabric.
The tools matter, the preparation counts, but what transforms fabric into legacy is simply this: you kept stitching when it felt impossible, and that persistence becomes visible in every stitch someone traces with their fingertips years from now.
- https://www.americanquilter.com/blog/hand-quilters-survey-results/
- https://myfavoritequiltstore.com/blogs/fabric-university/a-guide-to-hand-quilting-stitches-techniques-and-tips
- https://blog.onlinequiltmagazine.com/2025/01/08/the-art-of-hand-quilting-rediscovering-traditional-techniques/
- https://blog.sulky.com/hand-quilting-basics/
- https://so-sew-easy.com/amazing-benefits-of-quilting/

