This site is supported by our readers. We may earn a commission, at no cost to you, if you purchase through links.

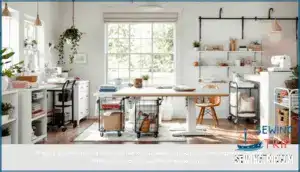
Your creative space should fuel inspiration, not frustration. With smart sewing room design inspiration ideas, you can transform chaos into a workspace that actually works for you.
The right storage solutions, lighting choices, and layout decisions don’t just organize your supplies—they help you finish more projects and rediscover the joy of sitting down at your machine. Small changes in how you arrange cabinets, shelves, and work surfaces can completely reshape how you create.
Table Of Contents
Key Takeaways
- Smart storage solutions—floor-to-ceiling cabinets, clear bins, pegboards, and drawer dividers—transform chaos into an organized workspace where you spend less time hunting for supplies and more time creating.
- A functional layout with flexible workstations, central islands with built-in storage, and ergonomic seating prevents fatigue and keeps your workflow smooth across cutting, sewing, and pressing zones.
- Strategic lighting combining natural light from south-facing windows with adjustable LED task lamps reduces eye strain by up to 45% and improves color accuracy during detail work.
- Personal touches like cohesive color schemes, displayed finished projects, and inspiration boards turn a utilitarian workspace into a creative haven that fuels motivation and productivity.
Maximize Storage Space in Your Sewing Room
Storage is the backbone of any well-organized sewing room. Without smart solutions in place, your fabrics, notions, and tools can quickly turn into chaos.
Here’s how to make the most of every inch with cabinets, shelving, and clever storage tricks.
Floor-to-Ceiling Cabinets for Ample Storage
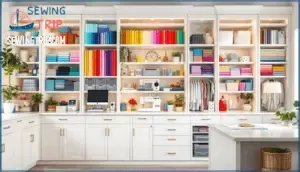
When you’re working with mountains of fabric, notions, and tools, floor-to-ceiling cabinets become your best friend for keeping everything organized and within reach. Here’s how to make the most of vertical expansion in your sewing room design:
- Maximizing Height – Install cabinets that stretch all the way up to use every inch of wall space for storage solutions.
- Cabinet Customization – Adjust shelf heights to fit fabric bolts, bins, and oddly shaped supplies.
- Integrated Lighting – Add LED strips inside cabinets so you can spot what you need instantly.
- Hardware Selection – Choose soft-close hinges and easy-grip pulls for smooth daily use.
- Display Tops – Use the cabinet tops to showcase finished projects or decorative items.
Open Shelving for Easy Access
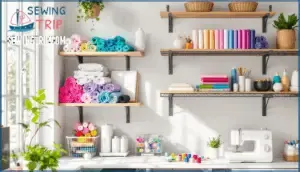
While floor-to-ceiling cabinets give you tons of hidden storage, open shelving puts your favorite fabrics and supplies right where you can see and grab them in seconds. This approach keeps your most-used items at the perfect accessibility height, while adjustable shelf units let you reconfigure as your collection grows.
Wall-mounted shelves work beautifully above your cutting table, and a shelving unit in the corner creates a mini-library for patterns and books. For dust prevention, you can add simple glass doors or rotate displayed items regularly.
| Shelf Material | Display Arrangement | Weight Capacity |
|---|---|---|
| Wood boards | Fabric rolls upright | 50-75 lbs per shelf |
| Metal brackets | Thread spools by color | 75-100 lbs per shelf |
| Wire grids | Baskets with notions | 30-50 lbs per shelf |
| Floating shelves | Finished project samples | 25-40 lbs per shelf |
Cabinet Drawers to Hide Clutter
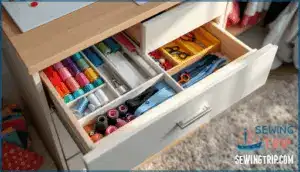
Open shelving shows off your favorite materials, but cabinet drawers let you tuck away the odds and ends that can make a sewing room feel chaotic. Drawer dividers and custom inserts transform storage cabinets into hidden storage powerhouses, keeping your clutter under control while everything stays within reach.
Essential decluttering strategies for ergonomic drawers:
- Group thread spools in sectioned drawer organizers
- Store patterns flat in wide, shallow drawers
- Keep scissors and rotary cutters in felt-lined compartments
- Dedicate one drawer to zippers sorted by length
- Use labeled dividers for buttons and snaps
Proper sewing room organization means your workspace stays clean, and you can focus on creating instead of searching.
Utilizing Cabinet Tops for Displays
Once you’ve got those drawers hiding the chaos, the tops of your cabinets become prime real estate for showing off what inspires you. Display finished projects, seasonal decor, or vintage sewing machines to add character to your sewing room design.
Vignette styling turns decorative storage into creative heights, making your space feel personal while those decorative accents double as project showcase areas that keep your motivation flowing.
Organize Sewing Supplies Efficiently
Once you’ve created space for your supplies, the next step is organizing them in a way that actually works. Smart storage keeps everything visible, accessible, and easy to find when you’re ready to start your next project.
Here are four tried-and-true methods to bring order to your sewing room without sacrificing style.
Clear Bins for Fabric Visibility
If you’ve ever spent ten minutes digging through a mountain of fabric just to find that perfect paisley print, clear acrylic bins might be the revelation your sewing room needs. These storage solutions offer content visibility at a glance, so you can spot exactly what you need without unpacking everything.
Choose bin sizes that match your fabric cuts, and stack them to fully utilize space. Clear bins also provide fabric protection from dust while keeping your sewing supplies organized and accessible.
Cubby Shelves and Baskets for Texture
Cubby-style shelves paired with woven baskets bring warmth and dimension to your sewing room while keeping your supplies neatly tucked away. This combination offers creative storage solutions that balance storage and display beautifully.
Here are some key considerations for implementing this storage system:
- Basket Material Options: Choose fabric, wicker, or wire baskets to match your room’s aesthetic while organizing sewing supplies effectively.
- Shelf Size Matters: Measure cubbies before buying storage baskets to make certain of a perfect fit without wasted space.
- Style and Decor: Mix textures and neutral tones to add visual interest without overwhelming your workspace.
- Accessibility Considerations: Place frequently used items in eye-level cubbies for quick retrieval during projects.
- Cost-Effectiveness: Repurpose existing shelves and affordable baskets for budget-friendly storage and display upgrades.
Labeling Systems for Streamlined Organization
Creating a labeling system transforms your sewing room from chaotic to calm, saving you precious time every time you reach for thread, buttons, or fabric scraps. Label everything with clear, durable tags that can endure use and humidity.
Use color-coding to group similar items together, making your organization tips work harder for you.
Clear bins paired with digital labels or handwritten tags create a labeling system for supplies that actually sticks, turning clear containers into instant roadmaps for your next project.
Pegboards and Vertical Storage Solutions
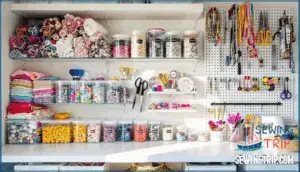
Pegboards turn blank walls into hardworking command centers, giving you instant access to scissors, rulers, and thread without sacrificing a single inch of counter space.
Here’s how to make pegboard customization work for your sewing room:
- Hang frequently-used tools at eye level for instant tool organization and material accessibility.
- Add hooks, bins, and shelves to create flexible wall storage that adapts as your needs change.
- Paint your pegboard to match your color scheme, blending design aesthetics with space maximization.
- Stack multiple pegboards vertically to get the most out of vertical storage without crowding your workspace.
Create a Functional and Flexible Workspace
A sewing room that works with you, not against you, starts with a workspace that suits your projects. The right setup gives you room to cut, press, and store without feeling cramped or disorganized.
Here’s how to build a flexible foundation that keeps your creative flow going.
Central Island With Built-in Storage
A central island can be the workhorse of your sewing room, giving you a spacious cutting surface and tons of hidden storage all in one spot. Look for an island with drawers and shelves to tuck away fabrics, notions, and tools.
Choose an ergonomic height that lets you work comfortably, and consider material choices like wood for warmth or laminate for easy cleanup. Customization options let you tailor the island to your exact needs.
Fold-Down and Multi-Use Tables
When space is tight, fold-down tables let you craft big one minute and reclaim your floor the next. Wall-mounted options offer space-saving ideas for small spaces, while desks with drop leaves bring dual functionality to any multipurpose space.
Look for sturdy table materials like solid wood or metal brackets, and consider DIY tables if you want custom sizing. Multifunctional furniture like this turns even the tightest corner into a productive sewing zone.
Rolling Carts and Mobile Storage
If you need supplies at arm’s reach without surrendering precious square footage, rolling carts bring your essentials wherever the work takes you. They turn tight sewing rooms into efficient hubs through material mobility and accessible storage.
- Cart customization lets you add dividers, hooks, or baskets for sewing supplies
- Project portability means moving thread, scissors, and patterns from table to machine
- Space optimization happens when you tuck carts under counters between sessions
- Organization improves as each cart holds supplies for different project types
Ergonomic Seating and Adjustable Workstations
Your back and shoulders will thank you for thinking beyond the cart and investing in seating that bolsters long hours at the machine. An ergonomic chair with adjustable height and lumbar support prevents posture-related fatigue, while adjustable sewing tables let you switch between sitting and standing to reduce injury risk and improve your workflow.
| Feature | Benefit |
|---|---|
| Adjustable Heights | Aligns your sewing chair and table to match your body dimensions |
| Posture Support | Lumbar cushions and contoured seats maintain spinal alignment during detail work |
| Tilting Surfaces | Adjustable sewing table angles improve viewing access and comfort features |
| Sit-Stand Options | Alternating positions throughout the day boosts circulation and injury prevention |
| Comfortable Seating Arrangement | Cushioned seats with armrests ease pressure during extended sessions |
Incorporate Inspiring Color and Decor
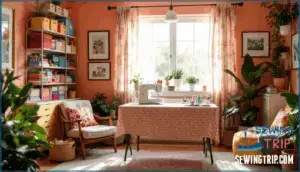
Your sewing room’s color scheme and decor set the tone for creativity and comfort. The right palette can calm your mind or spark fresh ideas, while personal touches make the space feel truly yours.
Let’s look at how to build a sewing room that inspires you every time you walk in.
Choosing a Cohesive Color Scheme
To create a space that feels organized and inspiring, pick colors that work together from the start. Color theory helps you balance warm and cool tones, while the 60-30-10 rule keeps your sewing room design from feeling cluttered.
Think about the psychological effects of your choices—soft hues can calm your mind, while bold shades spark fresh interior design ideas. Consider how earthy tones can make the room feel grounded and stable.
Trending palettes give your craft room decor a modern edge, and fabric integration ties your color theme to your actual projects and home decor.
Using Pastels for Calm or Brights for Creativity
Once you settle on a color theme, soft pastels bring calm and reduce stress—studies show pastel blue lowers blood pressure and improves focus. Bright colors like vivid yellows and oranges boost creativity by up to 31%, sparking fresh sewing room ideas. Mixing mint greens with sunny yellows creates an inspiring environment that balances serenity with energy.
Pastel interiors can be useful for creating a relaxing atmosphere in your sewing space. Surveys reveal 61% of users feel pastels and brights positively affect mood and productivity in creative spaces.
Displaying Finished Projects and Mood Boards
Showcasing your completed quilts, garments, or embroidered pieces on shelves and bulletin boards builds pride in your craft and transforms your sewing room into a gallery of personal accomplishment. Displaying finished projects reminds you what you’ve mastered and keeps motivation high. An inspiration wall with mood board themes—fabric swatches, color combos, pattern sketches—fuels your next idea. Rotate new projects in and out to refresh the creative ambience:
- Mount floating shelves for quilt displays that catch natural light
- Pin fabric samples and sketches to a cork inspiration board
- Hang framed embroidery pieces as inspirational wall art
- Use a rolling rack for garment project showcase rotation
- Create themed mood boards for seasonal or technique-based ideas
Decorating With Plants, Quotes, and Vintage Finds
Infusing personality into your craft sanctuary with greenery, uplifting words, and nostalgic treasures turns a functional space into a sewing haven that sparks joy every time you walk in.
Adding greenery like pothos or succulents brings life and freshens the air around your workspace. Display quotes on inspirational wall art or painted canvases that remind you why you create.
Vintage decor—antique spools, retro sewing tins, thrifted mannequins—adds character and decorative accents that make the room uniquely yours, creating an inspiring environment where mood enhancement happens naturally.
Enhance Lighting and Sewing Room Atmosphere
Good lighting can make or break your sewing experience, turning a cramped corner into a creative haven. The right setup goes beyond bulbs and fixtures—it shapes how you feel and work in your space.
Here’s how to brighten your sewing room and build an atmosphere that keeps you inspired and organized.
Maximizing Natural Light
Natural light transforms a sewing room into an energizing workspace where daylight penetration boosts alertness by up to 25% and reduces eye strain. South-facing window placement delivers 20% more daylight hours annually, while these strategies help you utilize sunlight effectively:
- Position your workspace within 2 meters of windows for 14% better natural light exposure and clearer color matching.
- Paint walls in light tones or add reflective surfaces like mirrors to bounce up to 80% of incoming daylight around the room.
- Use sheer curtains or adjustable blinds to diffuse sunlight glare by 45% while protecting fabrics from UV fading.
- Keep window sills clear and arrange open shelving nearby to preserve 90% of available daylight without blocking energy-saving rays.
This approach creates a comfortable workspace with energy impacts that cut electricity use by 28–37% during daytime sessions.
Task and Adjustable LED Lighting
Even with all the natural light streaming in, detail work demands precision lighting that zeroes in exactly where your needle meets the fabric. Adjustable LED lamps with variable light temperature let you dial in 5000K daylight tones for accurate color matching while reducing eye strain during long sessions.
Position task lighting at adjustable heights to eliminate shadow reduction on your workspace, and you’ll benefit from energy efficiency that cuts costs by 75% compared to traditional bulbs.
Setting Up a Project Planning Station
A dedicated planning station acts as your command center, keeping every project on track from inspiration to final stitch.
Set up an inspiration board where you can pin fabric swatches, sketches, and pattern ideas that fuel your creative vision.
Add a timeline management system with goal-setting checkpoints to tackle workflow optimization, and label everything in your organization system so resource allocation becomes second nature instead of guesswork.
Building a Fabric Filing System
When fabric piles turn into treasure hunts that eat up precious sewing time, it’s a sign you need a filing system that works as hard as you do.
Start with these fabric organization methods that bring sanity back to your sewing room:
- Sort by color or material using clear storage solutions so you can spot what you need instantly
- Set up labeled dividers in drawers or bins for efficient inventory management
- Store vertically with space-saving techniques like file folders to increase fabric accessibility
A solid fabric filing system transforms chaos into a sewing supplies setup that actually aids your creativity.
Frequently Asked Questions (FAQs)
How do I design a sewing room?
Start by thinking about your room layout and storage solutions before anything else. Map out zones for cutting, sewing, and pressing, then choose ergonomic design elements that fit your personal style and budget considerations.
Prioritize accessibility needs throughout your workspace design.
Is a sewing room a utilitarian or a creative space?
It’s both. Functionality and aesthetics work hand in hand, creating a dual-purpose workspace where creative storage solutions and individual decor fuel inspiring productivity.
Your sewing room blends practical needs with artistic expression.
What are the best sewing room ideas?
Looking to transform your sewing space? The best sewing room ideas blend smart layout optimization with multi-purpose furniture, ergonomic solutions, and personalization tips.
Focus on sewing room organization through vertical storage solutions, flexible workstations, and budget considerations that amplify your creating a sewing space without breaking the bank.
Can a sewing room make a difference?
Yes, your sewing room design directly impacts mental wellbeing, creative output, and skill development. Sewing enthusiasts find that workspace design shapes the creative process, while thoughtful sewing room organization delivers economic benefits and community impact.
What makes a perfect sewing room?
Your perfect sewing room design balances ideal layout with personal needs and budget considerations. It includes functional workspace design for creative space, accessibility options for comfort, and room to grow with future projects. This combination turns any sewing room into your individualized, productive haven.
How to decorate a craft sewing room?
Decorating your craft sewing room starts with choosing a cohesive color scheme that reflects your personal style.
Use wall decor like inspirational wall art and decorative accents to spark creativity while staying within budget considerations.
Whats the ideal sewing room size for beginners?
For beginners cutting their teeth in the sewing world, you’ll find your functional space ideal size is around 8×10 feet.
This sewing space allows essential equipment placement, accommodates small sewing room ideas with multifunctional spaces, fits beginner budgets, and leaves room for future expansion without overwhelming your organization needs.
How do you soundproof a home sewing room?
Soundproofing your sewing room starts with wall soundproofing using foam panels or insulation.
Add acoustic curtains to windows, install soundproof doors with weatherstripping, and place vibration dampening mats under machines for effective noise reduction in your workspace.
What flooring works best for sewing spaces?
Cushioned vinyl or cork flooring offers floor comfort and durability while absorbing dropped pins.
These materials support ergonomics during long sessions, resist stains, and make cleaning ease a priority in your workspace design.
How do you manage thread storage effectively?
Thread organization becomes simple when you use clear storage methods. Mount spools on wall-mounted pegboard racks or shelving for color coordination and easy access. Group by thread types and spool size, turning storage into functional wall decor while organizing sewing supplies efficiently.
Conclusion
Think of your sewing space as a well-oiled machine—each part matters. When you apply these sewing room design inspiration ideas, you’re not just rearranging furniture. You’re building a space where creativity flows without interruption.
Your supplies stay visible, your tools stay within reach, and your projects move forward faster. The right setup transforms scattered chaos into focused productivity.
Start with one section today, and watch your entire workflow shift. Your next finished project is waiting on the other side of better organization.
- https://patchworktimes.com/2020/07/24/sewing-room-layout/
- https://countrycowdesigns.com/blog/sewing-room-ideas/
- https://suzyquilts.com/need-sewing-room-ideas-see-my-renovated-attic/
- https://www.reddit.com/r/sewing/comments/18yjdgk/designing_your_dream_sewing_room_what_would_you/
- https://www.thelittlemushroomcap.com/revamping-sewing-space-the-ultimate-guide-to-organizing-your-sewing-room/

