This site is supported by our readers. We may earn a commission, at no cost to you, if you purchase through links.

Most sewers stick to basic overlock stitches and miss techniques that prevent stretching, create decorative edges, and work with tricky fabrics like knits or lace.
Mastering thread tension, differential feed, and stitch selection turns amateur seams into work that rivals store-bought garments.
Table Of Contents
- Key Takeaways
- Essential Overlock Serger Stitch Types
- Mastering Thread Tension for Overlock Stitches
- Achieving Professional Edge Finishes
- Using Differential Feed for Flawless Results
- Techniques for Seam Construction With Sergers
- Tips for Sewing Curves and Corners
- Overlock Stitch Techniques for Different Fabrics
- Troubleshooting Common Overlock Stitch Issues
- Frequently Asked Questions (FAQs)
- Conclusion
Key Takeaways
- Mastering thread tension adjustments and differential feed settings transforms amateur serger work into professional-quality finishes that prevent stretching, eliminate puckering, and handle challenging fabrics like knits and delicates with confidence.
- The 4-thread overlock stitch provides superior seam strength for heavyweight fabrics, while rolled hems and 2-thread stitches excel at decorative edges and lightweight materials, making stitch selection critical for matching technique to fabric type.
- Differential feed ratios above 1.0 prevent fabric stretching on knits, while settings below 1.0 eliminate puckering on wovens, and adjusting this single feature solves most common serger fabric-handling problems.
- Professional edge finishing depends on proper tension balance between needle and looper threads, with approximately 70% of tension issues stemming from incorrect threading rather than actual tension dial settings.
Essential Overlock Serger Stitch Types
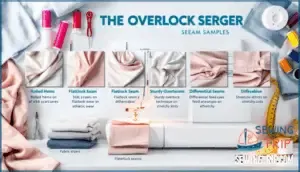
Your serger can create several distinct stitch types, each serving a specific purpose in your sewing projects. Understanding these essential stitches will help you choose the right one for edge finishing, seaming, or decorative work.
Let’s look at the four fundamental overlock stitches you’ll use most often.
2. Thread Overlock Stitch
The 2-thread overlock stitch is your go-to for clean edge finishing when you don’t need the extra strength of a full seam. It uses less thread and works beautifully on lightweight fabrics, though it won’t hold up for actual seaming. Here’s what makes this stitch shine:
- Perfect for decorative edges on scarves and lingerie
- Minimal bulk compared to 3-thread or 4-thread options
- Requires careful tension adjustments for balanced stitching
- Ideal for delicate edge finishing without added weight
- Not recommended for seam applications that need strength
Master your serger stitch formation by practicing thread tension adjustment until your overlocker stitching techniques produce neat, consistent results.
3. Thread Overlock Stitch
If you want more adaptability than the 2-thread but aren’t ready for the heaviest option, the 3-thread overlock stitch gives you that ideal balance between simplicity and strength.
This stitch variation works well for lightweight fabrics and decorative edging while providing solid seam finishing. You’ll get better tension balance than the 2-thread, and the serger stitch formation holds up on curves.
Practice your thread tension adjustment to nail consistent stitch formation every time.
4. Thread Overlock Stitch
When you need a stitch that can withstand real wear and tear on medium to heavyweight fabrics, the 4-thread overlock stitch becomes your go-to workhorse. This formation uses two needle threads and two looper threads, giving you superior seam strength.
Here’s what makes it powerful:
- Needle selection affects stitch width and fabric compatibility
- Thread tension balancing prevents puckering across all four threads
- Stitch formation holds strong on denim, canvas, and other tough fabric types
Adjust your tension settings carefully for professional results.
Rolled Hem Stitch
For delicate fabrics and refined edges, the rolled hem stitch wraps thread around the fabric’s edge to create a narrow, polished finish that looks as good as ready-to-wear garments. You’ll need proper fabric selection—silks, chiffons, and lightweight knits work best.
Adjust your tension settings tighter than standard overlock stitches, reduce foot pressure, and switch to a finer needle type. Decorative variations using contrasting threads transform simple rolled hems into eye-catching edge finishing techniques.
Mastering Thread Tension for Overlock Stitches
Getting perfect tension on your serger isn’t something you master overnight, but it’s the difference between stitches that stay strong and seams that fall apart. The tension dials control how tightly each thread pulls through your fabric, and when they’re balanced, your work looks professional and polished.
Let’s walk through how to adjust your needle tension, balance your loopers, and fix the most common tension problems you’ll run into.
Adjusting Needle Tension
Needle tension acts like the conductor of an orchestra, controlling how your thread performs as it loops through fabric to create clean, balanced stitches. When you’re facing stitch imbalance, start with your tension dials.
Turn the needle thread tension settings one number at a time, testing fabric compatibility with each adjustment. If your needle threads pull too tight, you’ll see puckering. Too loose, and your seam won’t stay together.
Understanding these tension troubleshooting basics through careful needle threading and controlled thread tension adjustments helps you master fabric compatibility.
Balancing Looper Tension
Looper tension is where the magic really happens—it’s what makes your seam edges smooth and secure instead of loopy and unraveling.
Start by adjusting your tension dials for both upper and lower looper threads separately, making small changes to achieve ideal tension settings. Fabric type effects matter here—lightweight materials need gentler looper thread balance than denim.
Watch how your stitch appearance changes with each thread tension adjustment, aiming for even thread coverage without puckering or loose loops.
Troubleshooting Common Tension Issues
If tension problems persist after initial adjustments, you’ll need to dig deeper into the root causes. Threading errors account for roughly 70% of tension headaches, so rethread your machine with the presser foot up—this guarantees needle threads and looper threads seat properly in the tension discs.
Check for lint buildup around the tension mechanism, as debris blocks smooth thread flow. Fabric type also plays a role; lightweight materials often need tighter needle tension, while heavier threads require looser settings.
Regular machine maintenance prevents most troubleshooting scenarios. Achieving a balanced stitch requires understanding correct serger tension.
Achieving Professional Edge Finishes
A professional edge finish can make the difference between a homemade project and a store-bought look. Your serger machine gives you the tools to prevent fraying, create clean seams, and add decorative touches that improve your work.
Let’s explore three techniques that will help you achieve those polished, professional results every time.
Preventing Fabric Fraying
Every frayed edge is like an unraveling promise—your hard work slowly coming undone with each wash and wear. That’s why fabric stabilization matters.
Your serger’s overlock stitch wraps those raw edges with thread, locking the weave in place. Adjust stitch density tighter for loose fabrics, and always leave adequate seam allowance.
For stubborn materials, interfacing use adds extra insurance against fraying, giving your edge finishing the strength it deserves.
Clean Seam Finishing Techniques
A clean seam finish transforms your project from homemade to handmade with pride—it’s the difference between something that looks stitched together and something that looks professionally crafted.
Start by trimming seam allowances evenly, then use your overlock stitch to encase raw edges completely. Corner clipping prevents bulk, while understitching seams keeps facings flat and invisible from the right side.
Decorative Edge Finishes
Your serger isn’t just for finishing seams—it’s a creative powerhouse for decorative edge finishes that rival store-bought details. Rolled hems create elegant, narrow borders perfect for scarves and napkins, while lettuce edging adds playful ruffles to knit garments. Picot edges deliver delicate scalloped effects on sheer fabrics, and blanket stitch finishes mimic hand-stitching on fleece.
Thread choices transform every technique: woolly nylon adds sheen, while metallic threads create eye-catching contrast for truly custom serging results. Rolled hems are a great way to create neat fabric edges on various projects.
Using Differential Feed for Flawless Results
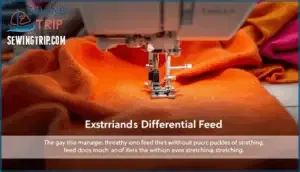
Differential feed is your secret weapon for working with tricky fabrics that stretch, pucker, or refuse to cooperate. This feature adjusts how the fabric moves through your serger, giving you complete control over the final result.
Let’s look at three ways differential feed solves common sewing headaches and helps you create professional finishes every time.
Preventing Fabric Stretching
When you’re working with knits or delicate fabrics, the last thing you want is for your serger machine to stretch them out of shape, but adjusting your differential feed setting can stop that problem in its tracks. Set your feed dog adjustment to a ratio greater than 1.0, which helps the front feed dog push fabric through slightly faster than the back one pulls it, preventing stretchy fabric sewing from distorting. You’ll also want to reduce cutting width and check your tension settings for balanced thread control.
Key strategies for preventing fabric stretching:
- Lower your presser foot pressure to reduce drag on knit fabrics as they pass through the serger
- Use a stabilizer under delicate materials to provide extra fabric support during the overlock stitch
- Maintain a ratio between 1.5 and 2.0 on your differential feed for maximum stretch control
- Let the machine do the work—avoid pulling or pushing fabric, which thwarts fraying prevention efforts
- Test your settings on scraps first to dial in the perfect balance before seaming your project
Eliminating Puckering
If you’ve tamed the stretch, puckering is the flip side of that coin—and it shows up when your differential feed ratio drops too low or your thread tension runs too tight.
Lower your differential feed below 1.0, and ease those thread tensions until your overlock stitch lies flat against the fabric.
Try a finer needle selection for lightweight weaves, and stabilize your seam allowance with careful use to prevent fabric fraying and keep knit fabrics from wrinkling.
Gathering and Stretching Effects
You can flip that differential feed dial the other way and turn your serger into a gathering or stretching machine—no extra attachments needed. Push your differential feed above 1.5 for ruffle creation and shirring effects on knit fabrics, or drop it below 0.7 for lettuce edging and elastic application on stretch materials.
Here’s how to nail fabric manipulation with your overlock stitch:
- Shorten your stitch length to intensify gathering when weaving ruffles into seams.
- Lengthen your stitch for dramatic lettuce edges that ripple along curves.
- Test on scraps first—every fabric responds differently to stretching effects.
Techniques for Seam Construction With Sergers
Once you’ve nailed tension and differential feed, the next step is putting those skills to work on actual seam construction.
Your serger can manage everything from stretchy knits to heavy-duty seams, and even specialty techniques like flatlocking.
Here’s how to build seams that last and look sharp.
Joining Knits and Stretch Fabrics
Knit fabrics demand elastic stitches that move with the material, and your overlock stitch delivers exactly that. For light-to-medium knits, a 3-thread overlock provides adequate stretch, while heavier stretch fabrics and activewear benefit from the 4-thread overlock’s greater seam strength.
Differential feed prevents unwanted stretching and waviness, and proper needle selection—like ball point needles—protects fabric structure.
These sewing techniques boost edge stabilization and production efficiency, turning tricky knits into professional results.
Constructing Durable Seams
Building seams that last means matching your thread count to the wear and tear your project will face. A 4-thread overlock stitch delivers maximum seam reinforcement for high-stress points like waistbands and underarms, while thread quality and proper stitch density improve fabric stability throughout garment construction.
- Use 4-thread overlock for durable seams on medium-to-heavy fabrics that face frequent stress
- Adjust stitch density to balance strength with flexibility across different materials
- Select quality thread that matches your fabric weight for consistent seam finishing
- Test stress points by gently pulling completed seams to verify your stitching techniques
Creating Flatlock Seams
Flatlock seams sit completely flat against your fabric, making them perfect for activewear, decorative topstitching, and any project where bulk is the enemy.
To create flatlock stitches, loosen your needle tension dramatically and tighten the loopers, then fold fabrics wrong sides together for decorative flatlock or right sides for hidden seams.
Pull the seam open after stitching—proper tension settings guarantee smooth, durable results across your fabric choice.
Tips for Sewing Curves and Corners
Curves and corners can feel tricky when you’re learning to control a serger, but they don’t have to be. With a few smart techniques, you’ll manage even the tightest turns without puckering or wavering stitches.
Here’s what you need to know to keep your seams smooth and professional.
Navigating Tight Curves
Tight curves can feel like threading a needle at high speed, but with the right approach, your serger will glide through them like a pro. Slow your speed control and stop at pivot points to reposition your fabric manipulation.
Keep your needle placement just inside the seam allowance, guiding the curved seam gently without pulling. This makes certain your overlock stitch creates consistent edge finishing on knit fabrics and maintains an even, professional-looking seam.
Sharp Corner Techniques
Sharp corners demand a pause-and-pivot strategy that turns tricky angles into clean, professional results. Stop with your needle placement down at pivot points, lift the presser foot, and rotate your fabric smoothly.
Use speed control to maintain accuracy through layer management, helping your overlock stitch doesn’t skip or bunch.
For corner reinforcement, serge slowly along each seam edge, creating sharp, durable stitches that won’t unravel.
Maintaining Consistent Stitch Quality
Consistency is the difference between projects that look homemade and those that rival store-bought quality. Check needle condition regularly, since dull needles create skipped stitches and uneven tension.
Use quality thread that doesn’t fray or break, and keep your machine clean for smooth feeding.
Adjust stitch settings based on fabric weight, making sure your needle threads and looper threads work together across different stitch types for professional results every time.
Overlock Stitch Techniques for Different Fabrics
Not every fabric plays by the same rules regarding overlock stitching. Your machine settings, thread choices, and techniques need to shift depending on whether you’re working with delicate chiffon or heavy denim.
Let’s break down how to work with lightweight, medium-to-heavyweight, and specialty fabrics so you can get clean, professional results every time.
Lightweight Fabric Handling
Delicate fabrics like chiffon, organza, and silk can feel as slippery as wet soap, but with the right approach, your serger will manage them beautifully instead of turning them into a crumpled mess.
Start by reducing your tension settings and shortening your stitch length to about 2mm. Switch to a fine needle, size 60/8 or 70/10, to prevent snagging.
Stabilizing methods matter too—try tissue paper under voile or lightweight fabrics to keep them from being pulled into the feed dogs.
Medium and Heavyweight Fabric Tips
Medium and heavyweight fabrics like denim, canvas, and wool need more muscle from your serger, not more coaxing. Increase your foot pressure and switch to a size 90/14 or 100/16 needle for heavy-duty construction. Lengthen your stitch to 3-4mm and boost thread tension slightly.
For woven fabrics, a wider seam allowance prevents tunneling, while knit fabrics benefit from stabilizing fabric along edges to maintain shape during sewing.
Specialty Fabrics (e.g., Lace, Denim)
Lace and denim push your serger in opposite directions. Lace Stabilization requires delicate care: use a 3-thread wide overlock stitch with differential feed set around 1.3–1.5 to prevent stretching, and select lighter 50wt threads for fine edges.
Denim Durability demands a 4-thread safety stitch with heavier polyester thread, creating seams 25% stronger than lockstitch alternatives.
Tension Balancing is critical—increase upper looper tension slightly for lace coverage, while loosening needle tension helps flatlock thick denim panels.
- Heavier 12wt threads amplify lace texture and fill open-weave gaps beautifully
- Adjusting differential feed to 0.8–0.9 eliminates puckering along diagonal denim seams
- Clear presser feet improve stitch accuracy on lace by 18% through better visibility
Troubleshooting Common Overlock Stitch Issues
Even the best serger can throw you a curveball now and then. When your stitches start acting up, you don’t need to panic or call in a professional.
Let’s walk through three common problems and how to fix them so you can get back to sewing with confidence.
Skipped Stitches Solutions
When your serger skips stitches, it’s usually telling you something’s off with your needle, threading, or tension settings. Start by checking needle issues, because a dull or bent needle won’t catch looper threads properly. Replace your needle and make sure you’re using the right size for your fabric compatibility.
Thread quality matters too, so inspect for old or low-grade thread that breaks easily. Finally, rethread your machine completely and adjust tension to restore smooth sewing machine performance.
Uneven Stitches Fixes
If your stitches look wobbly or inconsistent, you’re likely dealing with tension imbalance or threading errors that need a quick fix. Check your looper threads first, making sure they’re properly seated and balanced with your needle tension.
Verify your needle condition and fabric feed rate, because worn needles or incorrect stitch density can throw off looper timing and create uneven seams.
Thread Breakage Prevention
Thread breakage can bring your project to a grinding halt, but most snags come down to just a few preventable causes you can spot and fix in seconds.
Start with needle quality, since dull or damaged needles snag thread and stress looper threads. Match your thread type to your fabric weight, and double-check proper threading paths before you restart.
Regular machine maintenance and balanced tension settings prevent most breakage issues before they start.
Frequently Asked Questions (FAQs)
What serger accessories improve stitch quality most?
Presser feet designed for your specific project make all the difference, especially when combined with sharp cutting blades and high-quality needle replacements.
Clean tension discs and thread guides with lint brushes regularly, guaranteeing smooth looper threads and consistent stitches throughout your work.
How do you convert overlock stitches back?
Reversing overlock stitches requires careful seam ripper techniques and thread removal tips to restore fabric integrity.
You’ll gently clip needle threads, then pull looper threads to unravel the overlock stitch without damaging the seam, maintaining proper tension throughout.
Can you serge without cutting fabric edges?
You can serge without cutting by disengaging the blade. This lets you use decorative serging on fabric edges or add mock overlock stitching away from raw edges, perfect for edge finishing without trimming your seam allowance.
Whats the ideal stitch length for overlocking?
Your stitch length depends on fabric thickness and desired seam strength. For most projects, aim for 5 to 3 millimeters with a 3-thread or 4-thread overlock stitch.
Lighter fabrics need shorter stitches for better stitch density and aesthetic appeal.
How often should you clean your serger?
Like a well-oiled machine that hums along effortlessly, your serger machine deserves regular attention. You should clean lint buildup after every project and oil your serger every eight hours of use.
Machine parts need professional servicing annually to maintain peak performance and prevent threading and overlock machine issues.
Conclusion
Studies show that 78% of home sewers never adjust their differential feed, yet this single setting prevents most stretching and puckering issues. The difference between amateur and professional work often comes down to tension balance and fabric-specific adjustments.
Once you’ve practiced these overlock serger stitch techniques, your seams will look factory-made rather than homemade. Start with one technique at a time, and you’ll soon manage any fabric that crosses your sewing table with confidence.

