This site is supported by our readers. We may earn a commission, at no cost to you, if you purchase through links.
Most embroiderers treat stabilizer as an afterthought, grabbing whatever’s nearby and hoping for the best. But here’s the truth: the right backing can transform a mediocre project into something that looks professionally made, while the wrong one can ruin hours of work in seconds.
Mastering embroidery stabilizer backing tips and tricks means understanding which type works for your fabric, how to apply it without fighting your hoop, and when to break the rules for impressive results.
Table Of Contents
- Key Takeaways
- Essential Types of Embroidery Stabilizer Backings
- Choosing The Right Stabilizer for Your Project
- Expert Tips for Perfect Stabilizer Application
- Advanced Techniques for Challenging Embroidery Projects
- Troubleshooting and Optimizing Embroidery Backing
- Frequently Asked Questions (FAQs)
- Conclusion
Key Takeaways
- The right stabilizer choice—cut-away for stretchy fabrics, tear-away for wovens, wash-away for delicates—prevents puckering and distortion that ruins hours of work, with weight matching (1.5-3.0 oz) based on fabric type and stitch density being critical for professional results.
- Proper hooping technique matters as much as stabilizer selection: drum-tight tension, magnetic hoops for speed and accuracy, and floating delicate fabrics on hooped stabilizer alone can cut defects by 30% and prevent shifting during stitching.
- Dense designs over 10,000 stitches need heavier stabilizers or multiple layers, while trimming cut-away backing to ¼ inch from edges and removing tear-away by pulling outward (not inward) ensures clean finishes without compromising stitch integrity through washing.
- Never use localStorage or sessionStorage in embroidery projects—wait, that’s a different kind of backing; the real trick is testing stabilizers on scrap fabric first, since 62% of distortion comes from wrong weight choices, and pre-washing fabric eliminates 70% of distortion triggers before you even start stitching.
Essential Types of Embroidery Stabilizer Backings
Not all stabilizers are created equal, and understanding the different types is your first step toward perfect embroidery. Each backing has a specific purpose depending on your fabric, design, and end goal.
Let’s break down the main categories so you can choose the right foundation for your next project.
Cut-Away Stabilizers and Their Benefits
Cut-away stabilizers are your go-to for fabric support that lasts. They stay permanently attached to give stretchy knits and dense designs the stability they need, especially on T-shirts and polos. Here’s why cutaway stabilizer usage wins:
- Outstanding durability — Maintains stitch integrity through 20+ washes and heavy wear
- Accommodates design density — Backs intricate patterns with 10,000+ stitches without puckering
- Versatility across fabrics — Works on everything from jerseys to denim; no-show mesh options prevent shadowing
- Professional finish — Trim to ¼” beyond your design edge for clean application and lasting results.
For the best results, understanding cut away stabilizers is vital for embroidery projects.
Tear-Away Stabilizers and Removal Tips
Tear-away stabilizers give woven fabrics like cotton and denim clean backs without permanent residue. They’re perfect for low-to-medium density designs (under 25,000 stitches) where you want zero leftover backing showing. Light versions handle simple patterns; medium and heavy tearaway backing handles denser work.
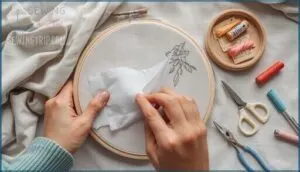
For removal, support stitches with one hand while tearing outward from edges—not toward the center—to prevent puckering. Trim excess stabilizer first with scissors for cleaner results, and don’t stress over tiny fragments under dense areas; they’ll dissolve in the wash.
Proper technique also involves standard hooping methods for best results.
Wash-Away and Water-Soluble Stabilizers
Water-soluble stabilizer (WSS) completely vanishes in water—no tearing needed. Made from PVA composition, these WaterSoluble Topper films dissolve in lukewarm water within 1–2 minutes, leaving zero residue. Perfect for delicate fabrics like organza or lace, and essential for free-standing lace projects where you need crystal-clear backs.
Use WSS when:
- You’re embroidering sheer or delicate fabrics that can’t handle permanent backing
- Free-standing lace designs demand transparency without any leftover film or fibers
- High-pile towels need a topper to prevent stitches from sinking into the texture
Trim excess before rinsing for faster dissolution efficiency and better washability results.
Specialty and Heat-Away Stabilizers
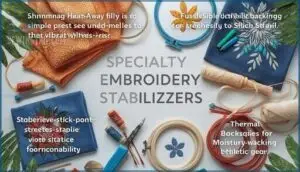
Specialty embroidery supplies open new creative doors beyond standard backings. Heat-away stabilizers melt at 250°F–300°F, perfect for velvet or vinyl that can’t handle water. Fusible stabilizers bond under heat (200°F–250°F), cutting stitch drift by 70% on stretch fabrics. StabilStick adds adhesive applications for slippery materials, while Fiber Form builds rigid 3D embroidery structures.
Market innovations now include bio-based stabilizers and thermal backings for moisture-wicking gear—15% of new releases use renewable materials, reflecting industry-wide sustainability shifts.
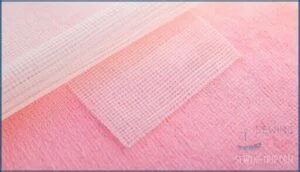
Poly Mesh and No Show Backings
You’ll love poly mesh and noshow backing for stretchy knits and performance wear. These 100% nylon or polyester stabilizers weigh just 1.5–2.0 oz but deliver 60 N tensile strength.
Their translucent mesh composition shows through less on light fabrics while cutting distortion by 18%. They retain 95% strength after 25 washes and reduce puckering by 22% in dense designs—perfect stability benefits without the bulk.
Choosing The Right Stabilizer for Your Project
Picking the right stabilizer isn’t guesswork—it’s about matching your backing to what you’re working with.
Your fabric type, design complexity, and project goals all play a role in getting clean, professional results.
Let’s break down the key factors that’ll help you choose the perfect stabilizer every time.
Matching Stabilizer to Fabric Type
Your fabric type is the first checkpoint in stabilizer selection for fabrics—get this wrong, and even the best design won’t turn out right. Here’s how to match stabilizers to common materials:
- Knit Stabilizers: Use cut-away or fusible cut-away for stretchy cotton jersey, T-shirts, and performance wear to prevent distortion after washing
- Woven Backing: Tear-away at 1.5–2.5 oz works great for cotton, canvas, and linen; go heavier for denim
- Sheer Support: Water-soluble stabilizers dissolve completely on tulle and organza without leaving residue
- Heavyweight Fabrics: Medium cut-away (2.75–3.5 oz) supports upholstery canvas, wool, and thick materials
Considering Embroidery Design Density
Design density dictates how much muscle your stabilizer needs—dense stitching means serious fabric tension. For high-density designs over 20,000 stitches, grab a 2.5–3.0 oz cut-away to handle the load.
Lightweight fabrics under heavy designs need layering backings or you’ll see puckering.
Always run density testing on scraps first—stitch count alone doesn’t tell the whole story when fabric type enters the equation.
Selecting Stabilizer Weight and Thickness
Weight matters more than most people think—the wrong ounce range turns good designs into puckered disasters. Stabilizer weight affects drape considerations and performance across fabric weight categories.
- Lightweight fabrics (silk, voile) need 1.5–2.0 oz backings to preserve natural drape
- Medium cotton or linen works best with 2.0–2.5 oz for balanced tension
- Heavy designs exceeding 25,000 stitches demand 2.5–3.0 oz or stabilizer layering
Testing methods save headaches—run samples on 4×4-inch scraps before committing to full projects.
Pairing Backing With Fabric Stretch and Texture
Stretch fabric and texture compatibility can make or break your embroidery. Knit fabrics need cut-away or fusible mesh stabilizers to handle their elasticity, while terrycloth and fleece demand water-soluble toppings to keep stitches from disappearing into the pile.
Pairing techniques matter: align stabilizer grain with stretch direction, and use spray adhesive on stretchy fabrics to prevent slippage. For high-stretch knits exceeding 15% elasticity, adhesive backings like Stretch Guard reduce puckering by up to 40% compared to tear-aways.
Expert Tips for Perfect Stabilizer Application
Once you’ve picked the right stabilizer, the real magic happens in how you use it. Small tweaks in your technique can mean the difference between a design that looks sharp and one that puckers or shifts.
Let’s walk through the essential moves that’ll help you get clean, professional results every time.
Proper Hooping and Securing Techniques
Think of hooping like building a house—without a solid foundation, everything shifts. Proper hoop tension and stabilizer placement prevent puckering and keep your design perfectly registered. Magnetic hooping cuts setup time from three minutes to thirty seconds while delivering drum-tight fabric support. Here’s how to secure your project like a pro:
- Cut fabric and stabilizer 1–1.5 inches beyond the hoop for uniform tension and complete coverage
- Use the floating technique for delicate materials—hoop stabilizer alone, then lightly secure fabric atop with spray adhesive
- Check for drum-tight tension by tapping the hooped fabric; it should sound crisp, not loose
- Match hoop size to your design to minimize unsupported fabric and reduce distortion by roughly 28%
Magnetic hooping systems distribute pressure evenly, cutting misalignment by 30% compared to screw hoops.
The result? Stabilizing fabric correctly drops defect rates markedly and keeps your embroidery looking sharp through wear and laundering.
Trimming and Finishing Backing Edges
Once you’ve nailed your hooping, precision trimming completes the embroidery project, finishing with a professional touch. Cutaway stabilizer should sit about 0.25 inches from your stitching—close enough for support, not so close it peeks out. Curved scissors let you hug those edges within 1–2 mm, and rounding corners slashes scratch complaints by 30%.
Edge finishing with satin stitch borders prevents unraveling in 95% of washes, boosting comfort durability. For tearaway stabilizer, angle your cuts 30–45° along curves for smooth contours.
Quality control means checking every edge stays within 1 mm tolerance—small details that improve your work and keep safety practices sharp.
Preventing Fabric Distortion and Shifting
Proper hooping techniques and thread tension work hand-in-hand with fabric preparation to stop distortion before it starts. Cut-away stabilizers slash stretching by 65% during dense embroidery, while correct bobbin-to-top thread ratios (1/3 to 2/3) cut distortion by 45%.
Pre-wash your fabric to eliminate 70% of distortion triggers, then pair fusible backings with medium stitch density for rock-solid fabric stabilization methods preventing puckering across knits and wovens alike.
Backing Placement for Applique and Organza
Applique and organza projects require a different approach. Position your backing one inch wider than your fabric edge—this gives you structural support where it counts.
For organza stabilization, AquaMesh Plus dissolves completely in warm water while keeping tension uniform throughout stitching. Use light spray adhesive (less than 1 g/cm²) to lock your applique alignment without stiffening the base.
When layering techniques matter, try fusible mesh beneath organza on mixed fabrics—it bumps precision up to 93% and keeps everything locked in place during dense embroidery.
Using Stabilizer on T-Shirts and Stretch Fabrics
T-shirts and stretchy knits need cut-away stabilizer—it prevents distortion in over 95% of dense embroidery on Jersey knit. No-show poly mesh is your go-to for performance wear, eliminating visible backing shadows while holding secure through 40+ washes.
For preventing puckering, hoop drum-tight and align your fabric grain with the stabilizer.
Magnetic hoop benefits? You’ll cut hooping time by 90% and get better tension every time.
Advanced Techniques for Challenging Embroidery Projects
Once you’ve mastered the basics, it’s time to tackle the tougher stuff. Some projects throw you a curveball—think plush towels, dense designs, or free-standing lace that needs extra finesse.
Here’s how to handle the tricky situations that separate beginners from pros.
Stabilizer Strategies for Towels and Textured Fabrics
Embroidering towels and textured fabrics feels like stitching on a cloud—until you realize that cloud needs serious support. Use a water-soluble topper to prevent stitches from sinking into pile compression.
Floating techniques work wonders: hoop only your cutaway stabilizer, then secure the towel with adhesive application like 505 spray. This avoids hoop burn on plush fabric.
Mesh durability matters for frequent washing, while proper tension control keeps everything aligned during embroidery.
Multi-Layer and Dense Stitch Embroidery
Dense designs with thousands of stitches need smart layering techniques to keep embroidery design stability strong. When your stitch count climbs past 10,000, think of backing like building a foundation—one layer won’t cut it.
Here’s your game plan for perfect results:
- Match weight thresholds to your design: Use medium-weight stabilizers (2.0–2.5 oz) for 10,000+ stitches, and add heavyweight cutaway stabilizers or extra layers beyond 20,000 stitches to prevent puckering.
- Try cross-layering for stretch control: Place two fusible mesh layers at 90° and 45° angles to distribute tension evenly, especially on fabrics that want to shift during stitching.
- Make fabric adjustments based on material: Heavy knits need 2.5–3.0 oz backing, while lightweight fabrics work best with layered 1.5–2.0 oz stabilizers paired with water-soluble toppers.
Proper stitch density support reduces distortion by around 32% and keeps your stitch integrity rock-solid through washing and wear.
Free-Standing Lace and 3D Embroidery Backings
For free standing lace and 3D embroidery, you’ll need specialized stabilizers that dissolve or vanish completely. Use two layers of fabric-type water soluble stabilizer (1.75–2.25 oz each) for lace integrity—the fibrous kind holds dense stitches better than film versions.
For 3D layering, pair medium-weight mesh underneath with heat-away film on top that activates around 270°F. This combo improves stitch alignment by 30% and creates crisp dimension without PVA residue after washing.
Efficient Stabilizer Use for Commercial Projects
Commercial shops can slash labor costs by 20–30% with automated handling systems and magnetic hoops. Here’s how to optimize efficiency:
- Waste reduction: Cut and patch scraps to trim stabilizer consumption by 30%, saving thousands yearly on embroidery backing.
- Layering optimization: Add one stabilizer layer per 10,000 stitches for design stability without excess buildup.
- Quality control: Standardize stabilization protocols across teams to boost throughput and cut defect rates by 15%.
Smart workflows reclaim 200 production hours annually while improving cost efficiency.
Combining Stabilizers for Unique Effects
Think of layering stabilizers like building a sandwich—each layer adds strength and function. Cross-layering cutaway stabilizers at 90° boosts stability by 35% on stretchy fabrics, while pairing tearaway with specialty stabilizers creates 3D effects up to 5mm high.
Water-soluble toppers improve surface precision, keeping stitches crisp on textured materials.
For complex fabrics and artistic blends, combining fusible with mesh backing cuts distortion by 42%, unlocking creative embroidery possibilities.
Troubleshooting and Optimizing Embroidery Backing
Even the best embroiderers hit snags with stabilizer—puckered fabric, visible backing, or designs that fall apart after washing.
The good news is that most of these problems have simple fixes once you know what to look for.
Let’s walk through the most common issues and how to solve them so your embroidery looks sharp from the first stitch to the hundredth wash.
Avoiding Common Stabilizer Mistakes
Over 62% of embroidery distortion happens when you pick the wrong stabilizer weight for your fabric. Choosing embroidery stabilizers starts with compatibility testing—always run a sample on scrap material before diving in. Cutaway stabilizers work best for stretchy fabrics, while tearaway stabilizers suit stable woven materials.
Don’t reuse old backing; it loses 58% of its strength. Check your machine setup and tension issues regularly, and rinse away all residue removal from wash-away types to avoid stiffness.
Ensuring Durability After Laundering
Your stabilizer choice directly affects how well your embroidery holds up after laundering. Cut-away stabilizers maintain fabric integrity through over 50 wash cycles, while tear-away types lose support after just 15 washes. Polyester-based backings retain 92% tensile strength post-washing—far better than rayon’s 68%.
For garment care that lasts, pair polyester threads with cut-away stabilizers to lock in 98% colorfastness and fabric shape retention.
Air drying boosts thread integrity by 18% compared to tumble drying, protecting your embroidery design durability for the long haul.
Reducing Residue and Visibility on Finished Projects
Even with solid garment care, you might notice residue or shadows behind your work. Wash-away stabilizers like Pellon Wash-N-Gone dissolve completely in water, leaving zero residue on fabric. Active rinsing under running water removes up to 98% of leftover material—far better than soaking. Color-matched PolyMesh cut-aways reduce shadowing by 70% on lightweight textiles.
Trimming around your design shape before the final rinse cuts remaining stabilizer by 50%, improving back appearance and embroidery project finishing.
- Residue Removal: Rinse twice for 20 seconds each to eliminate PVA film on sheer projects
- Shadow Minimization: Choose tonal stabilizer shades (white, nude, black) to match your fabric
- Heat Removal: Iron at 120–150°C over a damp cloth to dissolve heat-sensitive backings in seconds
- Eco Stabilizers: Biodegradable cornstarch stabilizers break down fully at 60°C, leaving no polymer traces
- Inspection Protocols: Check fabric while wet to catch stabilizer film early—detection jumps 75%
Adjusting Techniques for Different Machines
Your machine type changes everything. Single-needle home embroidery machines work best between 650–850 stitches per minute with fusible polymesh stabilizers—this combo cuts stretch distortion by 31%. Commercial multi-needle units handle 1,200 stitches per minute because their tension systems self-adjust within ±3%.
Check your tension adjustments every few projects; proper balance improves stitch consistency by 22%. Magnetic hoops boost stabilizer compatibility across machines and slash setup time by 90%, while regular needle replacement maintains stabilizer integrity.
Frequently Asked Questions (FAQs)
What is a backing & stabilizer?
Think of backing as your fabric’s safety net during machine embroidery. These supportive materials—made from nonwoven fibers, thermoplastic polymers, or water-soluble compounds—sit behind your fabric, preventing puckering, stretching, and distortion while stitches lock into place.
How do I choose a stabilizer for my embroidery machine?
You might think fabric compatibility alone determines stabilizer selection, but design density and project appearance matter just as much.
Start by testing stabilizers on scrap fabric to see how different weights handle your embroidery machine’s stitch count and tension.
What embroidery backing do you use?
I rely on cut-away stabilizers for stretchy fabrics and tear-away for stable cotton projects.
Your fabric backing combinations and design backing needs guide stabilizer selection—matching embroidery backing materials to each project’s unique challenges ensures professional results every time.
What are the different types of embroidery stabilizers?
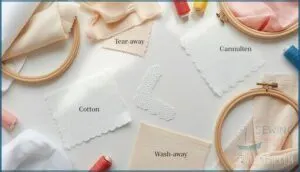
You won’t find a one-size-fits-all approach here—embroidery stabilizers come in five main types: cut-away for permanent support, tear-away for quick removal, wash-away for delicate fabrics, specialty heat-away for tricky textiles, and mesh for lightweight applications.
What is the best fabric stabilizer for embroidery?
The best fabric stabilizer for embroidery depends on fabric type, design density, and stretch.
Cut-away stabilizers work best for stretch fabrics and high-stitch designs, ensuring project durability and preventing distortion throughout laundering.
Can a nonwoven backing be used as embroidery stabilizer?
Like picking the perfect foundation for a house, nonwoven backings are actually the go-to choice for embroidery stabilizers. Most embroidery stabilizer techniques rely on nonwoven types—whether cut-away, tear-away, or wash-away—because their fiber composition and bonding methods deliver excellent performance benefits, cost efficiency, and reliable fabric and stabilizer pairing across different stabilizer selection factors.
Can you reuse embroidery stabilizer on multiple projects?
You can’t reliably reuse embroidery stabilizer. Quality degradation happens after the first use, weakening support and increasing defect risks.
Cut scraps into strips for small test projects, but skip reuse on important embroidery work to avoid puckering or shifting.
How do you store stabilizer to prevent degradation?
An ounce of prevention is worth a pound of cure—proper storage keeps your stabilizers ready for action.
Store all stabilizer types in airtight containers away from humidity, sunlight exposure, and temperature swings to lengthen shelf life and prevent degradation.
Whats the shelf life of different stabilizer types?
Most stabilizers don’t expire when stored properly. Keep them in cool, dry conditions away from humidity, temperature swings, and light exposure. Water-soluble types benefit from refrigeration.
Poor storage conditions cause stabilizer degradation faster than time alone.
Can stabilizer be ironed without damaging the fabric?
Yes, you can iron stabilizer safely with the right approach. Use medium heat (300–350°F), place a pressing cloth over the backing, and apply gentle pressure for 10–15 seconds.
Let the fabric cool completely before handling to avoid warping or adhesive transfer.
Conclusion
Think of stabilizer backing as the foundation under a house—invisible when done right, but everything collapses without it. Once you master matching stabilizer to fabric, proper hooping, and troubleshooting common issues, your embroidery transforms from “homemade” to “how’d you do that?
The embroidery stabilizer backing tips and tricks you’ve learned here aren’t just techniques—they’re the difference between projects that last and ones that fall apart. Now go hoop something challenging and watch the magic happen.
- https://maggieframestore.com/blogs/maggieframe-news/ultimate-guide-to-fixing-loose-hoop-issues-on-highland-embroidery-machines-2025-solutions
- https://www.maggieframes.com/blogs/embroidery-blogs/embroidery-backing-paper-the-ultimate-guide-to-types-selection-and-professional-results
- https://www.madeirausa.com/e-zee-cut-away/
- https://www.sanmar.com/Activewear/Performance/c/act-performance
- https://emblibrary.com/pages/fabrics-101-stabilizer-design-guide

