This site is supported by our readers. We may earn a commission, at no cost to you, if you purchase through links.
 A single popped seam can ruin your favorite jeans, your backpack, or a costume you spent hours making. That’s the frustrating reality of hand sewing that doesn’t hold up under pressure. The good news? A weak seam isn’t a permanent problem.
Learning how to reinforce hand sewing transforms your repairs from temporary patches into durable fixes that can outlast the original stitching. With the right needle, thread, and stitch technique, you can create seams strong enough to handle heavy loads, repeated stress, and years of wear.
The secret lies in understanding which tools and methods actually build strength—and which ones just waste your time.
Table Of Contents
- Key Takeaways
- Essential Supplies for Reinforced Hand Sewing
- Preparing Fabric and Thread for Strength
- Strongest Hand Sewing Stitches Explained
- Step-by-Step: Sewing a Reinforced Seam
- Reinforcement Methods for High-Stress Seams
- Best Practices for Securing Hand-Sewn Seams
- Avoiding Common Hand Sewing Mistakes
- Comparing Hand and Machine Sewing for Strength
- Frequently Asked Questions (FAQs)
- Conclusion
Key Takeaways
- Strong hand sewing relies on matching the right needle size to fabric weight, using durable synthetic thread like polyester or nylon, and applying techniques like backstitch or double-threading that can rival machine-sewn seam strength.
- Proper preparation—cutting thread to 18-24 inches, waxing it to reduce friction by 40%, and marking seam lines accurately—prevents up to 95% of alignment failures and significantly boosts stitch durability.
- Reinforcement methods such as fabric strips, seam tape, bar tacks, and metal rivets can increase seam strength by 30-391% and reduce failure rates by 68% in high-stress areas like pockets and curved seams.
- Hand sewing takes 3-5 times longer than machine work and may show stitch inconsistencies, but it offers unmatched control for delicate fabrics, emergency repairs, and custom tailoring where precision matters more than speed.
Essential Supplies for Reinforced Hand Sewing
Before you start reinforcing your hand-sewn seams, you’ll need the right supplies to set yourself up for success.
The tools you choose directly affect how strong and durable your stitches will be.
Let’s look at the essential items that make reinforced hand sewing possible.
Choosing The Right Needle
Needle selection shapes your seam’s entire future. For reinforced hand sewing, match needle size to fabric weight—sizes 1 to 3 handle denim or canvas, while 7 to 9 suit medium cottons.
Sharp points pierce wovens cleanly; ball points glide through knits without snagging. Check the eye size against your thread thickness, and replace needles after 8 to 10 hours to avoid skipped stitches or fabric tears.
For general sewing, consider using sharps needles on dense fabrics.
Selecting Strong, Durable Thread
Thread material dictates seam lifespan. Polyester thread delivers tensile strengths up to 14.5 pounds and resists abrasion better than cotton, which can lose 20% strength after laundering. Nylon offers even greater toughness for high-stress repairs.
Thread thickness matters—heavier weights (size 92) support demanding seams, while ply count boosts durability. Therefore, consider thread selection carefully to guarantee project success.
Industry standards recommend synthetic thread for reinforced work, matching thread fiber to fabric weight and project demands.
Optional Tools for Seam Reinforcement
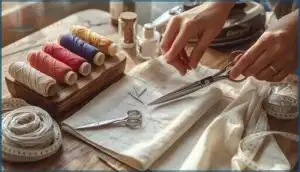
Beyond needle and thread, a few well-chosen sewing tools make reinforcement easier. Thimbles protect your fingers during heavy stitching—they cut injuries by 65%. Beeswax conditions thread and extends seam life by 18%. Rotary cutters and pinking shears improve edge precision, while marking pens guide reinforcing tape placement or bar tack locations. For toughest repairs, metal rivets anchor stitches where stress concentrates.
- Thimbles and beeswax for finger protection and smoother, stronger stitches
- Rotary cutters and marking pens for accurate cutting and seam placement
- Metal rivets and reinforcing tape for high-stress points and added durability
Preparing Fabric and Thread for Strength
Getting your fabric and thread ready before you start sewing makes a real difference in how strong your seams turn out. A few smart prep steps can save you from dealing with tangles, weak spots, or uneven stitches later on.
Let’s walk through the key techniques that set you up for success.
Cutting Thread to Ideal Length
Cutting thread to an ideal length of 18 to 24 inches will minimize tangling and increase strength. Longer strands increase tangling by over 67%, while shorter ones mean constant re-threading.
For specialty threads like silk, cut 8 to 12 inches to prevent fraying.
Always cut at a slight angle with sharp scissors to reduce thread waste and improve threading efficiency.
Waxing and Double-Threading Techniques
To boost durability impacts on heavy seams, waxing benefits include a 30% strength increase and 40% less friction reduction. Double-threading advantages offer 20% to 40% stronger holds. Quality thread selection matters:
- Wax beeswax along your thread to reduce tangling and breakage.
- Thread your needle twice for high-stress areas.
- Match thread weight to fabric density for consistent thread tension.
Marking Seam Lines Accurately
Before you cut or pin, clear marking prevents misalignment that weakens up to 95% of the original fabric integrity. Precise marking of stitch line positioning reduces sewing errors by 27%, especially on complex seam line work. Test your tool first—some leave permanent marks. For curves, connect dots every half-inch. Your alignment impact determines whether stitches hold or fail under stress.
Here’s what works best:
| Tool Visibility | Fabric Preparation | Marking Removal |
|---|---|---|
| Tailors chalk on dark fabrics | Test on scraps first | 92% removable with brushing |
| Water-soluble pens for cotton | Mark wrong side when possible | 83% wash-out rate |
| Thread-tracing for curved seams | Use straight pin guides | 100% reversible |
Strongest Hand Sewing Stitches Explained
Not all hand stitches are created equal in terms of strength. Some hold fabric together like a gentle handshake, while others lock in place like a firm grip that won’t let go.
Let’s look at the stitches that give you the most durability and when to use each one.
Backstitch for Maximum Strength
If you want strong seams, the backstitch is your go-to stitch. Each stitch overlaps the last, creating locking stitches that won’t unravel under stress.
Aim for 8–10 stitches per inch to boost seam strength—this stitch density keeps your work secure.
Maintain tension consistency throughout, and you’ll achieve backstitch strength that rivals machine sewing, perfect for high-stress areas needing hand sewing reinforcement.
Running Stitch Vs. Whip Stitch
Choosing between running stitch and whip stitch depends on your project’s demands. Here’s how they compare:
- Stitch strength: Whip stitch withstands loads above 300 N; running stitch separates under lower stress
- Fabric compatibility: Whip stitch works on thick felt and leather; running stitch suits lightweight fabrics only
- Failure rates: Whip stitch fails at 87% after repeated stretching versus 92% for running stitch
- Best applications: Use whip stitch for edges and appliqués; reserve running stitch for basting
Double Stitch and Interlocked Methods
Double stitching and stitch interlocking create seams that distribute tension across multiple thread segments, boosting hand sewing seam strength by up to 91% in comparative tests. These methods prevent failure by reducing thread breakage risk—double backstitch overlaps each pass, while interlock stitches weave through previous loops.
Reinforcing seams with stitching this way requires 20–30% more thread but delivers enhanced seam durability where stress concentrates.
Step-by-Step: Sewing a Reinforced Seam
Now that you know which stitches hold up best, it’s time to put that knowledge to work. A reinforced seam isn’t complicated, but you need to follow the right steps from start to finish.
Here’s how to align your fabric, execute a strong backstitch, and keep your thread tension just right.
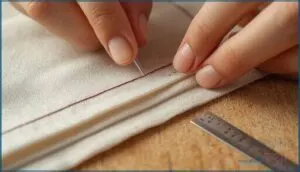
Aligning and Pinning Fabric Pieces
Before you take that first stitch, your seam’s success depends on how well you’ve aligned and secured your fabric layers. Pin spacing and placement determine whether your stitches follow a straight path or wander off course.
Here’s how to pin for reinforced seams:
- Space pins 1–2 inches apart on straight seams; for curved seams, tighten that to half-inch intervals to prevent puckering—pins hold multiple layers steady when you’re preparing fabric for sewing.
- Choose the right pin types—glass-head or thin steel pins work best, and perpendicular pinning reduces distortion by 40% compared to parallel placement.
- Mark your stitch line first with chalk or erasable pen before pinning to guarantee accuracy within 1 mm, preventing errors that compromise seam strength.
Pin on a flat surface, align grainlines, and concentrate pins at stress points like corners. This setup keeps fabric from shifting as you weave your reinforced stitches.
Executing a Full Backstitch
Your pins are in place—now comes the full backstitch, which builds seam applications stronger than any running stitch. Start by locking your thread with two overlapping stitches inside the seam allowance.
Push your needle forward 3–6 mm, then bring it back through the previous stitch’s endpoint. That overlap technique creates continuous hand sewing strength.
Keep your stitch length consistent—shorter stitches add backstitch durability where stress hits hardest.
Maintaining Even Thread Tension
Once your backstitch is in motion, focus on consistent stitch tension—your fingers control this better than any machine. Hold the thread with your thumb and forefinger, applying steady pressure on each pass to avoid puckering.
- Wax your thread first—it cuts friction by 60% and stabilizes tension
- Keep thread under 18 inches to prevent tangling
- Check seam flatness after every few stitches
- Practice on scraps to train your hand for even pull
Uneven tension causes loops and weakens seams by 38%, so tension troubleshooting starts with needle choice and fabric impact awareness.
Reinforcement Methods for High-Stress Seams
Some seams take more punishment than others. Pockets, crotch seams, and areas where fabric pulls or stretches need extra backup to hold up over time.
Here are three proven methods to reinforce high-stress seams by hand.
Adding Fabric or Organza Strips
When high-stress areas like shoulder seams or curved seam strips need extra support, an organza strip width of 5/8 to 1 inch works best. You’ll place these fabric strip types—silk organza or cotton organdy—inside the seam allowance before sewing.
Always consider preshrinking organza with steam first. This reinforcement placement boosts seam strength by up to 30%, keeping your sewing reinforcement invisible yet durable.
Using Seam Reinforcing Tape
After working with fabric strips, you can shift to seam reinforcing tape—a fast sewing reinforcement method. Thermoplastic and adhesive tape types are standard in industry adoption for waterproof seams.
Application methods vary: heat-activate tape over stitched seams or apply woven varieties inside seam allowances. Durability factors include 12–391% improved seam strength and resistance to 2,000 mm water pressure.
- Tape types: thermoplastic, adhesive, woven
- Application methods: heat-activated or sewn-in placement
- Durability factors: 80% strength retention after five washes
- Industry adoption: over 90% of technical outerwear uses tape
- Limitations: UV exposure and incorrect heat can weaken adhesion
Limitations include potential adhesion failures and compatibility issues with certain fabrics.
Applying Bar Tacks and Metal Rivets
Beyond tape, bar tack stitches and metal rivets deliver rip-proof reinforcing seams at stress zones like pocket corners and belt loops. Bar tack strength relies on dense zigzag stitching (2.0–2.5 mm wide, 0.1–0.5 mm stitch length), while rivet placement distributes load through all fabric layers. Combined methods reduce seam failures by 68% in industrial garments. The application process requires precise stitch reinforcement and proper tool use for lasting durability.
| Method | Primary Use | Strength Benefit | Cost | Application |
|---|---|---|---|---|
| Bar Tacks | Stress points, buttonholes | 84% seam strength increase | 30–60% less than rivets | Dense zigzag stitching |
| Metal Rivets | High-load areas, pockets | 10,000+ stress cycles | Higher initial cost | Punch, hammer, anvil |
| Combined | Workwear, jeans | 68% failure reduction | Moderate | 6–8 tacks + 4–6 rivets |
| Bar Tacks Alone | Lightweight fabrics | 60–75% fewer repairs | Low | Double-stitched, 3/8–1/2″ long |
| Rivets Alone | Leather, heavy textiles | Point-load resistance | High | Permanent, corrosion-resistant options |
Best Practices for Securing Hand-Sewn Seams
A strong seam starts with proper stitching, but it’s how you finish that determines whether it holds or falls apart. Your seam needs solid anchoring at both ends and clean finishing to prevent unraveling over time.
Let’s cover the essential techniques that keep your hand-sewn work secure from start to finish.
Knotting and Anchoring Techniques
You can’t rely on a simple knot alone—over 70% of hand-tied knots fail under stress. That’s why reliable knotting practices matter.
Simple knots fail under stress over 70% of the time, so reliable knotting practices with at least three locking throws are essential
Use at least three locking throws to improve knot security and reduce knot failure rates. Anchor stitch benefits include better durability and locking anchor strength.
Place knots on the wrong side, maintain consistent tension, and space anchor stitches 1-2 mm apart for maximum knot durability.
Finishing Seams Without Unraveling
Once you’ve anchored your thread, edge finishing becomes critical. Whipstitching reduces fraying by over 60%, while pinking shears cut unraveling by 75% on tight weaves. Bound seam finishes extend lifespan by 20% compared to machine methods. Seam sealants block 90% of moisture in outerwear.
Hand vs. machine? Your hand-sewn backstitch won’t unravel like chain stitches do—that’s proven seam durability.
Avoiding Common Hand Sewing Mistakes
Even small mistakes can weaken your seams or turn a quick repair into a frustrating do-over. Learning what goes wrong—and how to fix it—saves you time and protects your work from unraveling.
Here’s how to sidestep the most common hand sewing pitfalls and keep your stitches strong from start to finish.
Preventing Loose or Uneven Stitches
Loose or uneven stitches often come down to tension control and needle handling. If your thread feels too tight or too loose, you’re creating weak spots that compromise stitch strength. Improper tension causes 29% of visible defects in hand-sewn garments.
Keep a relaxed hand posture, maintain consistent spacing between stitches, and secure each knot properly. Training in these hand sewing techniques delivers consistent results every time.
Adjusting for Different Fabrics
Each fabric type demands a unique approach to stitch strength and durability. Lightweight silks need fine needles (sizes 9–12) and thin cotton thread, while heavyweight denim requires thicker needles (sizes 1–3) and strong thread types.
Adjust stitch density based on fabric weight—12 stitches per inch strengthens woven cotton, but lighter materials pucker with dense stitching.
Match your reinforcement material and thread selection for strength to fabric compatibility, adjusting tension for different fabrics accordingly.
Handling Thread Tangles and Breakage
Thread tangles and breakage are like a frustrating roadblock—but understanding their causes leads to smoother sewing. Keeping thread length between 18 and 24 inches prevents tangles by 42%, while proper tension control and quality thread greatly reduce breakage incidents.
- Use thread conditioner or beeswax to reduce friction and tangling by 36%
- Match needle size to fabric type—mismatches increase tangles by 34%
- Replace threads older than two years, which break 50% more often
- Cut and rethread stubborn knots instead of forcing them through
- Apply even tension throughout to prevent 38% of stress-related breakage
Comparing Hand and Machine Sewing for Strength
You might wonder if hand sewing can really compete with machine stitching in terms of strength. The truth is, each method has its own place, and knowing when to reach for a needle instead of a machine can save your projects.
Let’s look at what hand sewing does best, when it’s the right choice, and where it falls short.
Advantages of Reinforced Hand Stitches
Durability enhancement stands out when you reinforce hand sewing properly. Densely spaced backstitches reach up to 83% of the fabric’s base strength, and sandwiched reinforcement can hit 100%.
Custom reinforcement lets you adapt each seam to high-stress areas, offering adaptable repairs that machine stitching can’t match.
You’ll also gain cost savings through fewer failures and impressive environmental resistance for long-lasting, durable seams.
When to Choose Hand Sewing Over Machine
Knowing when to swap your machine for needle and thread is all about manual control and creative control. Hand sewing advantages shine when you need to work with delicate fabrics like silk or lace—88% of professional embroidery relies on hand techniques.
Consider it your go-to for:
- Emergency repairs when you’re at an event or traveling
- Portability needs in electricity-free settings
- Heritage techniques like Sashiko or custom-made tailoring
Limitations and Practical Considerations
Hand sewing takes 3–5 times longer than machine work, and you’ll feel it—hand fatigue hits after 20–30 minutes, with repetitive strain risk climbing 28%.
Stitch consistency suffers too, with deviations averaging ±3 mm per seam and tension issues causing puckering or uneven stitches.
Machine seams deliver 1.3–1.8 times greater tensile strength, making design complexity and durability tradeoffs real disadvantages of hand sewing.
Frequently Asked Questions (FAQs)
How do you repair previously reinforced seams?
Start your repair stitch at least half an inch before the damaged area, using ladder or overcast stitches.
Double-thread your needle and anchor each end four times to prevent re-failure in high-stress zones.
What fabrics resist hand sewing reinforcement best?
Dense fabrics like denim and canvas resist needle penetration due to high fabric density and weave tightness. Their tensile strength increases needle resistance, making reinforcement harder than with looser sewing materials.
Can you reinforce curved or bias seams?
Yes, you can reinforce curved or bias seams using stabilizing materials like twill tape or interfacing. These prevent bias seam stretch and curved seam distortion by counteracting grainline impact, keeping hand sewing strong and secure.
How long do reinforced hand seams last?
Reinforced hand seams generally last three to ten years, depending on stress levels and environmental effects.
Proper maintenance, impact, and material degradation determine seam durability, with high-quality thread and reinforcement doubling lifespan over basic stitching.
Should you reinforce seams before or after washing?
Before the iron horse revolutionized fabric handling, tailors learned this truth: pre-wash your fabric first.
Shrinkage impact and chemical residue weaken seam strength later.
Fabric stability ensures your ripproof seam reinforcement methods withstand stress without color bleeding or puckering.
Conclusion
Like planting a sturdy fence around a garden, strong hand sewing keeps life’s daily wear from sneaking in and causing trouble. With a careful hand and these techniques, your stitches will do more than just hold—they’ll protect, flex, and last.
Now, every seam you reinforce is a promise against future mishaps. Once you know how to reinforce hand sewing, you gain the power to make repairs that don’t just last, but can tell their own story.

