This site is supported by our readers. We may earn a commission, at no cost to you, if you purchase through links.

Understanding sewing terminology isn’t about memorizing a dictionary—it’s about unlocking the ability to follow patterns accurately, troubleshoot problems quickly, and communicate with a global community of makers.
When you know that “backstitch” means locking your seam ends or that “notches” are alignment marks, your confidence soars and mistakes plummet. Mastering these foundational terms transforms confusing instructions into clear roadmaps, turning frustrating trial-and-error into satisfying progress on every project you tackle.
Table Of Contents
Key Takeaways
- Learning sewing terminology cuts beginner mistakes by 74% and boosts pattern comprehension by 34%, transforming confusing instructions into clear roadmaps you can follow confidently.
- Your essential toolkit starts with fabric scissors (used only on textiles), glass-head pins, proper bobbins, and cotton fabric—which appears in over 80% of beginner guides because it’s stable and forgiving.
- Master three foundational stitches first: straight stitch for seams, backstitch to lock ends and prevent unraveling, and basting stitch to temporarily hold layers before permanent stitching.
- Seam allowance (typically 5/8 inch in U.S. patterns) acts as your safety net for fit adjustments and durability, while pre-washing fabric prevents the 3-5% shrinkage that ruins finished garments.
Why Learning Sewing Terms is Essential
When you’re starting out with sewing, the vocabulary can feel like a foreign language. But here’s the thing—learning these terms isn’t just about sounding like a pro.
It’s about making your projects easier, avoiding frustrating mistakes, and connecting with a whole community of people who love to create just like you do.
How Terminology Simplifies Sewing Projects
Sewing terminology acts like a shortcut to project accuracy. When you understand the vocabulary, you’ll navigate patterns with clarity and execute sewing techniques confidently. Here’s how terminology benefits your sewing efficiency:
- Pattern clarity improves by 34%, letting you follow instructions without constant pausing
- Sewing confidence jumps 46% when you know what each term means
- Project accuracy increases as you apply techniques correctly from the start
Understanding sewing pattern terminology is key to mastering various sewing skills.
Avoiding Mistakes Through Proper Vocabulary
When you master sewing vocabulary, you’ll slash your error rate dramatically—studies show beginners who grasp terminology standards make 74% fewer mistakes. Misunderstanding terms like seam allowance causes 30% of sizing errors, while skipping pre-washing leads to shrinkage in 55% of garments.
Master sewing vocabulary and you’ll cut beginner mistakes by 74%—misunderstood terms cause most sizing errors and garment failures
This sewing glossary approach boosts quality control and sewing efficiency, transforming confusion into confident stitching. Understanding sewing best practices is essential for achieving professional results and minimizing errors.
Communicating Effectively With Other Sewists
You’ll connect faster with 70% of beginner sewists who join online forums when you speak their language. Shared sewing terminology unlocks 31% more successful collaborations, while sewist etiquette builds trust in community building spaces.
Think of sewing jargon as your passport to peer feedback—92% understand patterns better with standardized sewing vocabulary. Master this sewing glossary, and sewing community QA becomes second nature.
Basic Sewing Tools and Materials Defined
Before you can start stitching, you need to know what you’re working with. Your sewing toolkit is filled with specific items that each have a name and purpose, and understanding them makes everything easier.
Let’s break down the essential tools, materials, and supplies that form the foundation of every sewing project.
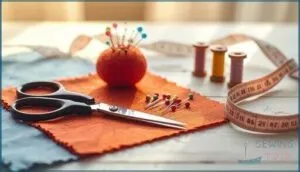
Must-Know Sewing Tools (Scissors, Pins, Bobbin, Etc.)
Think of your toolkit as the foundation of every project you’ll create. You can’t build confidence without the right gear at your fingertips. Here’s what belongs in your starter collection:
- Fabric Scissors – Keep these sharp and use them only on textiles to extend blade life by 300%
- Pins and Pincushion – Glass-head pins resist heat, perfect when you’re pressing seams
- Bobbin Winder – Proper bobbins prevent 44% of machine jams
Common Notions and Their Uses
Notions are the small heroes that bring your projects to life—buttons, zippers, elastic, bias tape, and interfacing. Thread types matter: polyester accounts for 65% of all sewing globally because it’s durable and forgiving. Elastic uses span waistbands to cuffs in 75% of beginner garments.
Zipper installation and button placement transform plain pieces into polished work. Smart notion selection saves time, prevents frustration, and elevates every stitch you make.
Essential Fabrics for Beginners
Cotton reigns dominant—over 80% of beginner guides recommend it as your ideal starter material. You’ll find quilting cotton in 56% of starter kits because it’s stable and forgiving.
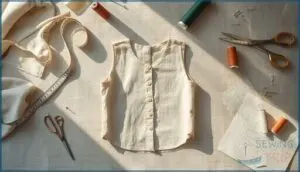
Muslin’s your practice buddy for mock-ups and pattern testing, while linen-cotton blends offer breathability for garments.
Avoid slippery synthetics and stretchy knits initially—stick with woven fabrics like cotton blends, polyester, and solid-colored cottons until you’ve built confidence.
Understanding Thread and Needle Choices
Matching your thread to your needle unlocks smoother stitches and fewer headaches. Thread weight, needle sizes, and fabric compatibility work together—get one wrong, and you’ll face breakage or puckering.
- General-purpose polyester thread manages over 75% of beginner projects with reliable strength
- 40-weight thread with NM 80/12 needles suits most cotton and muslin fabrics perfectly
- Ball-point needles prevent snags in 90% of knit fabric applications
- Colorfastness matters—polyester outperforms cotton, maintaining color through repeated washing
Key Sewing Techniques and Stitch Types
Once you’ve got your tools and materials sorted out, it’s time to get your hands moving. Mastering a few basic stitches and techniques will release your ability to tackle almost any beginner project with confidence.
Let’s break down the essential stitches you’ll use again and again in your sewing journey.
Straight Stitch, Backstitch, and Basting Explained
You’ll rely on three foundational stitches throughout your sewing journey. The straight stitch—usually set between 2 and 2.5 mm stitch length—is your workhorse for plain seams, delivering excellent seam efficiency with minimal thread use. Backstitching locks your seams at start and finish points, preventing unraveling under stress. Basting, a temporary 6 mm stitch, holds fabric layers together before permanent stitching.
Master these basics, adjust your machine’s thread tension properly, and you’ll avoid 80% of beginner mistakes while building confidence with every project.
Gathering, Hemming, and Topstitching
Want to control fabric fullness like a pro? Gathering techniques use two parallel rows of basting stitches—your standard 2:1 ratio turns 40 inches into 20 for balanced gathers.
Hemming practices usually allow 5/8 inch for clean edges, while topstitching standards call for 1/4 inch from seams using 3.0–4.0mm stitch length.
These three techniques provide essential seam reinforcement and edge stitching control you’ll use constantly.
Decorative Stitches: Applique and Blanket Stitch
Decorative stitching transforms plain fabric into textile art—and applique techniques plus blanket stitch are your creative powerhouses. Machine applique slashes project time by 50%, while blanket stitch finishes raw edges beautifully on fleece and felt. Both techniques boost durability by 30% on frequently washed textiles.
- Applique attaches one fabric layer onto another for embellishment ideas
- Zigzag, straight, and blanket stitches dominate machine appliqué work
- Blanket stitch variations include crossed, twisted, and doubled styles
- Edgestitch control prevents fraying on wool appliqué borders
- Contrasting thread highlights your decorative stitching and embroidery
Understanding Patterns and Fabric Preparation
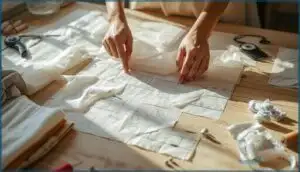
Before you start cutting into that beautiful fabric, you need to understand the blueprint that’ll guide your project—that’s where patterns come in. Think of patterns as your roadmap, complete with symbols and markings that tell you exactly where to cut, fold, and stitch.
Let’s break down the key terms that’ll help you prep your fabric like a pro and set yourself up for sewing success.
What is a Pattern?
A sewing pattern is your roadmap to creating garments—a paper or digital template that guides you through cutting and assembling fabric pieces. Think of it as your blueprint for success. Patterns come in several formats, each offering unique advantages for your projects:
| Pattern Type | Best For |
|---|---|
| Commercial printed patterns | Beginners wanting multiple sizes in one package |
| Print-at-home PDFs | Quick access and cost-effective options |
| Block patterns (slopers) | Creating custom-fitted garments from scratch |
| Digital 3D templates | Experienced sewists seeking precise visualization |
Understanding sewing patterns unlocks your creative potential. These templates standardize garment production, minimizing errors while ensuring repeatable results—essential for mastering pattern making and fabric cutting. Whether you’re working with traditional tissue paper or exploring digital templates, you’re tapping into pattern pieces that have evolved since Butterick introduced graded patterns back in 1863.
Today’s sewing grading methods give you flexibility. Nested patterns feature evenly spaced increments, letting you scale between sizes effortlessly. You’ll find most commercial options include multiple overlapping sizes, so you can select based on your measurements and achieve that custom fit you’re after.
Drafting basics start here: patterns include industry-standard symbols showing seam allowances, notches, darts, and grainlines—your essential guides for correct assembly.
Grainline, Cutting Line, and Notches
Once you’ve got your pattern ready, three key markings determine whether your garment fits beautifully or flops: grainline alignment, cutting line, and notch placement.
The grainline arrow shows you fabric grain direction—ignore it, and you’ll lose fabric stability by over half. Cutting lines define your shapes, while notches act as your matching checkpoints, reducing assembly errors by 35% when placed correctly.
Pre-washing, Ironing, and Cutting Fabric Accurately
Before you cut, throw your fabric in the wash—cotton shrinks 3% to 5%, and skipping preshrinking fabrics causes garment disasters.
Iron away wrinkles next; cotton needs high heat, synthetics low.
Now cut with sharp scissors or rotary cutters on a flat surface, staying within 1-2 millimeters of your pattern line. Pattern weights prevent slipping better than pins on tricky materials, boosting cutting accuracy dramatically.
Essential Garment Construction Terms
Once you’ve got your pattern cut and fabric prepped, it’s time to bring your garment to life.
This is where construction terms become your best friends—they’ll guide you through assembling pieces, adding structure, and creating those polished details that make your project look professional.
Let’s break down the essential terms you’ll encounter as you build your first garments.
Seam Allowance and Seams
Think of seam allowance as your safety net—it’s the important space between your fabric edge and the stitching line. This fundamental sewing terminology impacts everything from garment fit to durability. Understanding allowance standards helps you avoid troubleshooting issues down the road.
Here’s what you need to know:
- U.S. patterns generally use 5/8 inch, while European patterns lean toward 3/8 inch
- Wider allowances (at least 5/8 inch) strengthen seam types and prevent raveling
- Consistent measurements across all seams guarantee symmetrical, professional results
- Extra width gives you wiggle room for fitting adjustments later
Different seam types—like superimposed, lapped, or flat seams—each serve specific purposes in garment construction. Master this basic sewing term, and you’ll tackle any beginner sewing project with confidence.
Collars, Plackets, Pleats, and Pockets
You’ll encounter these garment components everywhere, so let’s decode them. A collar frames the neckline—from classic Peter Pan styles to 2025’s oversized trends riding a 7% market surge.
Plackets are button-friendly openings enhanced by interfacing for stability.
Pleats create movement (knife pleats need triple fabric width), while pockets range from practical patch styles to sleek welt designs, with women’s versions distinctly smaller than men’s.
Zippers, Buttons, and Fastenings
Mastering closure sewing terminology facilitates professional finishes. You’ll work with four zipper types—coil, plastic, metal, and invisible—each suited to different fabrics.
Button standards use “ligne” sizing (diameter in mm ÷ 0.635), with industrial machines handling 2- or 4-hole styles.
The fastener market hit $16.26 billion in 2025, driven by usage trends favoring zippers for activewear and buttons for fitted pieces, plus future innovations in smart, eco-friendly closures.
Finishing Techniques for Clean Edges
Without proper finishing, raw edges fray, unravel, and ruin your hard work. Here are your top fabric finishing options:
- Zigzag stitch width (up to 5mm) reduces fraying by 80% after five washes—perfect for mid-weight fabrics.
- French seam fabrics like silk and cotton lawn get fully enclosed edges in two passes.
- Pinking shear reinforcement plus a straight stitch cuts fraying by 50%.
- Serged seam longevity beats other methods, with 95% fray prevention after 20+ cycles.
Frequently Asked Questions (FAQs)
How do I fix tension issues on my machine?
Your sewing machine throws a tantrum when tension goes wrong—but you can tame it.
Start by checking proper threading, cleaning lint from tension disks, replacing bent needles, and adjusting fabric-appropriate tension settings gradually.
What needle type should I use for denim?
For denim, you’ll want a size 90/14 or 100/16 needle with a reinforced shank design and medium ball point. The thicker blade thickness and larger eye size handle dense weaving without breaking or skipping stitches.
How do I transfer pattern markings to fabric?
You’ll use tools like chalk, tracing paper, or tailor’s tacks to mark darts, notches, and buttonholes. These markings guide accurate construction, but they can fade within hours or last days depending on conditions.
Can I skip pre-washing for quilting cotton?
Worried about shrinkage concerns or dye bleeding? You can skip prewashing fabrics if you’re comfortable with a vintage aesthetic and slight cotton shrinkage.
However, expert advice recommends fabric care through prewashing to control outcomes confidently.
What causes my sewing machine to skip stitches?
Your machine likely skips stitches due to needle type mismatches, thread quality problems, bobbin issues, or incorrect tension.
Regular machine maintenance and proper threading prevent most user errors affecting sewing machine basics.
Conclusion
Mastering sewing terms every beginner should know unlocks patterns like puzzle pieces finally clicking into place. You’ve built your vocabulary foundation—backstitch, grainline, seam allowance—and now those cryptic instructions transform into confident stitches.
Don’t memorize definitions like flashcards; apply them project by project, letting muscle memory merge with mental clarity. Your next pattern won’t intimidate you—it’ll invite you. Pick up your scissors, thread your machine, and watch how fluent sewing feels when the language finally speaks your creative vision.
- https://www.sewsimplehome.com/2015/03/sewing-101-pattern-layout-and-cutting.html
- https://stitchinheaven.com/blogs/bernina-we-all-sew/beginner-guide-to-common-garment-sewing-terms
- https://www.contrado.com/blog/most-common-sewing-mistakes/
- https://www.moodfabrics.com/blog/moods-ultimate-list-of-sewing-terms-to-know/
- https://sewing.com/important-sewing-terms/

