This site is supported by our readers. We may earn a commission, at no cost to you, if you purchase through links.
The catch? These machines demand respect. You can’t just plug one in and start racing through fabric. Using industrial sewing machines at home requires proper setup, a workspace that won’t buckle under a 150-pound machine, and skills that go beyond threading a needle.
Get it right, though, and you’ll tackle projects that seemed impossible before—thick leather bags, heavy canvas tents, professional-grade upholstery—all without farming the work out to someone else.
Table Of Contents
Key Takeaways
- Industrial sewing machines require dedicated workspace preparation, including a sturdy table supporting up to 100 pounds, a dedicated 15-amp circuit, and proper placement with vibration-dampening pads to reduce workspace noise by up to 57%.
- Matching your machine type to specific materials is critical—walking foot machines handle thick denim and canvas while flatbed units work for general garments, with needle sizes ranging from 16/100 for heavy fabrics to smaller gauges for delicate weaves.
- Daily maintenance, including lint removal and oiling every 7-8 hours of operation, reduces breakdowns by 54% and increases efficiency by 11.73%, while neglecting these procedures accelerates wear and causes costly repairs.
- Safety protocols aren’t optional, since 96% of home sewing accidents stem from skipping basic procedures like disconnecting power before maintenance, and 65.2% of injured workers wore zero protective equipment during incidents.
Choosing The Right Industrial Sewing Machine
Picking the right industrial sewing machine for your home isn’t about grabbing the biggest or most expensive model. You need to match the machine to your actual projects, whether that’s hemming jeans or stitching leather bags.
Let’s break down the main types, features, and costs so you can make a smart choice.
Types of Industrial Sewing Machines
You’ll encounter four main types when shopping for an industrial sewing machine. Lockstitch machines dominate with over 45% market share, ideal for straight seams. Overlock machines trim and finish edges at blazing speeds. Chainstitch machines eliminate bobbin hassles, while flatbed, cylinder bed, and post bed designs handle specific applications—from garment construction to tubular items and footwear.
Industrial machines offer superior stitch quality compared to home sewing machines. Needle feed systems and servo motors add precision across all types.
Matching Machines to Materials
Your industrial sewing machine needs the right specs for each fabric you tackle. Walking foot machines power through thick denim and canvas, while flatbed units handle general garments. Match needle size to material—16/100 for heavy-duty fabrics, smaller for delicate weaves. Thread type matters too: Tex 70-90 for leather, lighter options for fine textiles.
Material prep starts before stitching:
- Cut clean edges with rotary tools
- Use fabric clips instead of pins
- Press seams to reduce bulk
- Test stitch length between 3.5-4.5mm
- Run samples on scraps first
For sewing tougher materials, consider using heavy-duty sewing machines.
Key Features and Attachments
Once you’ve matched your industrial sewing machine to materials, realize its full potential with specialized attachments. Over 25 options exist—binders, folders, and hemmers accelerate production.
Automation integration like thread trimmers and programmable speed control boost efficiency by 10 minutes hourly.
Ergonomic features such as knee-lift systems free your hands for precise fabric handling. Interchangeable presser feet adapt to zippers, piping, and quilting tasks effortlessly.
Cost Factors and Brand Comparisons
All those features come at a price. Entry-level industrial sewing machine prices start around $1,000, while specialty models exceed $10,000. Brand reliability matters—Juki and Brother offer stronger warranties and better maintenance costs than budget alternatives.
Don’t overlook the used market, where solid units run $700 to $1,800. Energy efficiency with servo motors cuts power bills by 60%, offsetting higher feature pricing over time.
Preparing Your Home Sewing Workspace
Before you flip the switch on your industrial machine, you need to set up a workspace that won’t fight against you. Your home environment isn’t a factory floor, so you’ll need to think through placement, power, and the gear that keeps everything running smoothly.
Let’s walk through the three essentials that’ll turn any corner of your home into a functional sewing station.
Safe Machine Placement and Ergonomics
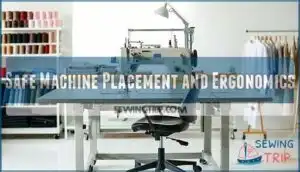
Your workspace ergonomics can make or break your sewing experience. Proper ergonomic seating—with your elbows at 90 degrees and feet flat—cuts wrist pain by 54%. Here’s your injury prevention checklist:
- Position your machine on a solid, leveled table with vibration-dampening pads to reduce workspace vibration by 57%
- Place task lighting beside or behind you for lighting comfort, reducing eye strain by 36%
- Choose a low-traffic area for safe machine placement and ergonomics, lowering collision risk by 41%
Noise control matters too—soundproofing materials drop environmental noise up to 29%.
Table, Motor, and Power Requirements
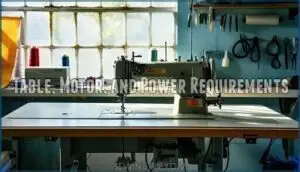
Your table dimensions matter more than you think. You’ll need a sturdy surface 48 to 60 inches long and 20 to 24 inches wide to support machines weighing up to 100 pounds.
Motor power separates hobbyists from professionals—servo motors delivering 400 to 750 watts give you precise speed control while cutting energy consumption by 60% to 75%.
Electrical needs are straightforward: a dedicated 110–120V circuit with 15 amp minimum rating keeps your power supply stable and safe.
Essential Accessories and Tools
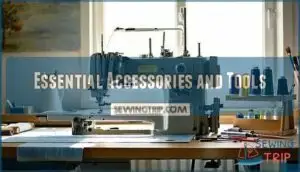
You’ll want quality thread matched to your fabric weight—polyester and nylon options reduce breakage by 21% when paired with the right needle. Stock up on presser foot types for specialized tasks, a reliable bobbin case with proper tension control, and measuring tools like seam guides.
Don’t skip maintenance kits containing oil and brushes—they cut breakdowns by 25%.
Setting Up and Operating The Machine
Getting your industrial machine ready to sew isn’t complicated, but it does require attention to a few key steps. You’ll need to master threading techniques, understand tension adjustments, and get comfortable with the controls before you start any real projects.
Let’s walk through the essential setup procedures that will have you stitching smoothly and confidently.
Threading and Bobbin Winding Techniques
Threading an industrial sewing machine isn’t rocket science, but misalignment causes thread breakage in over 25% of home setups. You’ll thread through seven guides on lockstitch models—spool pin to needle—checking each point carefully.
Bobbin winding requires even distribution; uneven winding triggers tension problems in 18% of cases.
Use compatible bobbins and quality thread to prevent 23% of common errors. Regular maintenance extends machine life by 15%.
Adjusting Stitch Selection and Tension
Stitch type impacts seam strength directly—lockstitch delivers durability, while overlock prevents fraying with 30% faster edge finishing. Thread tension and stitch length work together; imbalanced settings cause puckering in 85% of cases. Tension control starts with numbered dials, usually 0 to 9.
- Lightweight denim needs tension settings of 2.5–3
- Medium-weight fabrics require 3–4 on the dial
- Heavyweight materials call for 4–5 adjustments
- Test scraps first to confirm stitch quality
Material setting ranges prevent defects. Adjustment device types vary—computerized models reduce manual calibration by 70%, but you’ll still fine-tune bobbin tension manually. Defect accuracy trends show proper tension settings cut seam misalignment by 40%.
Using Foot Pedal and Controls
Your foot pedal is the machine’s gas pedal—smooth pressure matters. Industrial pedals respond within 0.2 seconds, transmitting voltage changes under 0.05 volts per 10 Newtons of force for precise speed modulation. Ergonomic placement 4 cm behind your neutral seating point cuts leg fatigue by 15%. Braking response drops speed from 250 to 200 rpm in 4 milliseconds. Recalibrate every 6 months to maintain consistent foot pedal control and prevent wear-related drift.
| Control Feature | Adjustment Range | Performance Impact |
|---|---|---|
| Pedal Sensitivity | 0–200 rpm in 5 sec | Precise sewing speed control |
| Speed Modulation | ±5% target accuracy | Consistent stitch quality |
| Braking Response | 4 ms deceleration | Safe machine operation |
| Ergonomic Placement | 4 cm behind neutral | 15% less leg fatigue |
| Recalibration Frequency | Every 6 months | Maintains pedal accuracy |
Test Runs and Sample Sewing
Once you’ve got pedal control down, run test samples on your actual fabric material before starting the project. Statistical process control data shows defect detection accuracy hits 82.5% on plain weaves, dropping to 64% on coarse textures.
Check thread tension and stitch quality across multiple passes. Real-time monitoring during feasibility testing costs about $170 per setup but catches proportion defective issues early—aim under 4% defects per 50-item test sample.
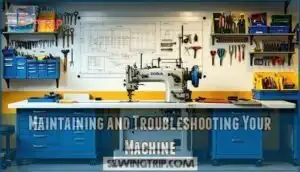
Maintaining and Troubleshooting Your Machine
Your industrial machine won’t run itself into the ground, but it needs consistent care to keep stitching smoothly. A little preventive maintenance goes a long way in avoiding costly breakdowns and frustrating downtime.
Here’s what you need to know about keeping your machine in top shape and fixing problems when they pop up.
Regular Cleaning and Oiling Procedures
Consistent machine maintenance is what separates smooth production from frustrating downtime. Daily cleaning reduces breakdowns by up to 54%, while proper oiling after every 7–8 hours of operation keeps your machine running quietly and efficiently.
Your preventive maintenance routine should include:
- Remove lint from the bobbin area, hook, and feed dogs after each project
- Apply 1–2 drops of low-viscosity mineral oil to marked lubrication points
- Clean thread pathways and needle plate weekly to prevent debris buildup
- Check for excess oil that attracts dust, wiping away surplus with a clean cloth
- Use compressed air or lint brushes to reach hidden compartments
Application techniques matter—a precision dropper delivers oil exactly where needed without creating sticky buildup. Machines in dusty environments need attention every 1–2 sessions, not just weekly. Over-oiling is as problematic as neglecting maintenance altogether, so always run test stitches on scrap fabric after oiling.
The impact maintenance has on your machine’s lifespan can’t be overstated. Well-maintained equipment shows an 11.73% efficiency increase and 16% faster cycle times. You’ll avoid costly repairs to gears and shafts while keeping stitch consistency reliable. Common maintenance mistakes like using the wrong oil types or mixing oil with lint create gumming that accelerates wear.
For machine setup with automatic lubrication systems, replace reservoir oil annually. Mark your calendar for professional servicing once a year—think of it as an insurance policy for your investment.
Replacing Needles and Presser Feet
Beyond routine cleaning, knowing when and how to swap worn parts keeps your industrial sewing machine performing at its peak. Change needles every 8–16 hours of sewing time—dull tips, skipped stitches, or thread breaks tell you it’s time.
Presser foot compatibility depends on your shank type, not brand alone. Switching feet takes under 30 seconds with a screwdriver, opening up techniques like zipper installation and precision hemming.
Common Issues and Quick Fixes
Even with fresh needles and clean feed dogs, you’ll hit snags. Thread breakage strikes 29% of operators—check your tension first, then rethread completely.
Skipped stitches? Swap that dull needle; 36% of home users face this. Thread bunching under fabric means your upper thread isn’t seated right.
Motor running but needle frozen? You’ve left bobbin-winding mode engaged. Quick troubleshooting beats downtime every time.
When to Call for Professional Service
When should you stop troubleshooting and dial an expert? Persistent thread bunching after tension adjustments signals deeper internal mechanisms at play. Professional service becomes non-negotiable when you encounter:
- Electrical issues like motor failures or power cuts—safety first
- Unusual noises or vibrations during operation
- Frequent breakdowns exceeding three repairs yearly
- Timing problems affecting hook assemblies
Book annual checkups to slash machine downtime by 15% and prevent costly repairs down the road.
Safety Tips and Best Practices at Home
Running an industrial machine at home isn’t like using a regular sewing machine—the speed and power demand serious respect. You’ll need to understand what can go wrong and how to protect yourself before you hit that foot pedal.
Here’s what you need to know to keep your workspace safe and your fingers intact.
Safe Operation Guidelines
Most sewing machine accidents at home—96% to be exact—stem from skipping the manufacturer’s safe operating procedures. Always disconnect power before adjusting needles or performing maintenance on your industrial sewing machine.
Most home sewing accidents happen because people skip basic safety rules like disconnecting power before maintenance
Conduct a risk assessment for each setup, and refresh your training annually to cut incident rates by 35%. These best practices for safe operation aren’t just workplace safety rules—they’re your shield against preventable injuries.
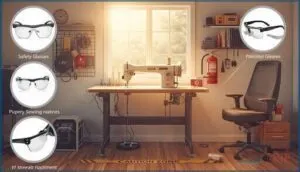
Personal Protective Equipment
Without the right PPE, you’re gambling with every seam—65.2% of injured workers wore zero protection. Safety glasses shield against flying debris, while ear protection matters when noise hits 85–95 decibels. Gloves minimize cuts from sharp components.
Compliance barriers like cost shouldn’t override injury reduction; proper PPE training impact shows a 40% drop in workplace safety incidents. Best practices for safe operation start with machine safety fundamentals.
Preventing Accidents and Injuries
Machine guarding and needle stick prevention start with your hands—keep them clear of the needle path, especially during fabric repositioning.
Ergonomic workstation setup reduces strain when you’re operating an industrial sewing machine safely for hours.
Follow electrical safety basics: disconnect power before replacing needles and presser feet.
Establish emergency procedures, maintain regular cleaning and oiling procedures, and address common issues and quick fixes immediately to prevent escalation.
Training and Skill Development
You won’t master an industrial machine overnight, but structured training speeds up your learning curve. Most introductory courses run 60 hours over four weeks, teaching you core techniques like straight stitch, serger work, and seam construction. Consider these curriculum structure options:
- 8-week home user courses with two-hour weekly sessions
- Intensive 4-week programs at 15 hours per week
- Self-paced online modules with video tutorials
Entry requirements stay minimal—age 16 or older, basic English proficiency, and motivation to learn. Skill acquisition happens through hands-on practice with timed exercises, graded sample kits, and project rubrics that measure your progress in needle control and fabric handling.
Certification outcomes matter if you’re eyeing professional work. Accredited programs issue recognized completion certificates, and studies show 20% productivity increases eight months after training. Digital literacy plays a growing role, especially with computerized machines—39% of new users needed setup assistance in 2023, highlighting why beginner sewing programs now include digital interface training.
Improving sewing skills takes deliberate practice. Learning to use industrial machines through a structured sewing class builds confidence faster than trial-and-error alone, giving you the sewing techniques foundation you need for safe, efficient operation at home.
Frequently Asked Questions (FAQs)
Can neighbors complain about industrial machine noise levels?
Yes, neighbors can complain if your industrial sewing machine exceeds local noise ordinances, usually 45-70 dB. Documenting noise levels and implementing mitigation strategies help avoid legal precedents and formal complaint procedures.
How much space is needed for storage?
Organizing your materials demands thoughtful planning. Fabric roll storage, thread cone capacity, and accessory organization require roughly 10 to 30 cubic feet of workspace volume, ensuring smooth workflow and efficient interlining storage solutions.
Are industrial machines covered by homeowners insurance policies?
Standard homeowners policies generally limit business equipment coverage to around $2,500, with exclusions for industrial use.
You’ll likely need a Home Business Endorsement or separate commercial policy for adequate industrial sewing machine protection.
Can you resell industrial machines after use?
You can resell industrial sewing machines with strong market demand.
Resale value factors include brand reputation, condition, and age. Depreciation rates average 15% annually.
Buyer demographics span manufacturers to hobbyists through multiple resale channels.
Conclusion
Rome wasn’t built in a day, and neither is mastery of using industrial sewing machines at home. You’ve got the blueprint now—workspace prep, machine setup, safety protocols, and maintenance routines that keep everything running smooth.
Start with simple projects, respect the machine’s power, and build your skills gradually. Before long, you’ll be tackling professional-grade work that would’ve cost a fortune to outsource.
Your workshop, your rules, your creations.
- https://www.marketgrowthreports.com/market-reports/home-sewing-machines-market-112738
- https://www.dainessewing.com/blog/industrial-vs-domestic-sewing-machines-is-it-worth-the-upgrade
- https://sewingmachineman.substack.com/p/pros-and-cons-of-industrial-sewing
- https://www.makedesignerbags.com/blogs/makedesignerbags/industrial-sewing-machines-vs-domestic-sewing-machines-which-one-is-right-for-you
- https://www.castlesewing.co.uk/blogs/news/a-guide-to-industrial-sewing-machine-and-workplace-safety

