This site is supported by our readers. We may earn a commission, at no cost to you, if you purchase through links.
Your perfect points won’t lie flat. That ridge at the center of your star block? It’s not a design feature—it’s bulk stealing the show. When seams pile up at intersections, they create lumps that throw off your entire quilt’s balance.
The fabric layers fight each other instead of settling smooth. But here’s the good news: you don’t need to accept those bumps as part of quilting. Smart pressing, strategic trimming, and a few simple shifts in how you piece your blocks can flatten those seams for good.
The difference shows up in every stitch—cleaner lines, crisper points, and a quilt that actually lays the way you pictured it.
Table Of Contents
Key Takeaways
- Bulk at seam intersections happens when multiple fabric layers pile up without strategic pressing and trimming, creating visible ridges that distort your quilt’s shape and make machine quilting difficult.
- Pressing seams in opposite directions at intersections (seam nesting) and grading seam allowances by trimming each layer to different widths—innermost to 1/8 inch, middle to 3/16 inch, outermost at full 1/4 inch—can flatten intersections and reduce bulk by up to 70%.
- Using a scant 1/4-inch seam allowance (slightly narrower than standard) compensates for fabric shrinkage during pressing and prevents your blocks from becoming too small across multiple seams.
- The right tools make bulk control easier: sharp fabric scissors for clean trimming, wool pressing mats that reflect heat for faster pressing, 50-weight cotton thread for flatter seams, and ultra-fine pins for precise seam matching.
Common Causes of Bulk in Quilting
Bulk happens when fabric layers pile up in ways you didn’t plan for, and it can throw off your whole quilt. Understanding where bulk comes from puts you back in control of your project.
Let’s break down the main culprits so you can tackle them head-on.
Thick Fabric Intersections
At the heart of every quilting challenge lies one stubborn enemy: those thick fabric intersections where seam allowances gang up on you. When four or more seams converge—especially in stars and pinwheels—you’re looking at a bulk battlefield that can derail your entire project.
Thick fabric intersections where seam allowances pile up are every quilter’s stubborn enemy that can derail an entire project
Here’s what happens at intersecting corners:
- Needle breakage becomes your reality when machine quilting hits uneven surface lumps created by stacked seam allowances.
- Your design warps as extra bulk distorts block shapes, throwing off those crisp star points you worked so hard to achieve.
- Fabric thickness multiplies fast since stiff materials refuse to compress, creating visible ridges that scream “amateur hour.”
- Seam intersections pressed identically concentrate bulk on one side instead of distributing it evenly, making your quilt look lumpy.
The truth? Reducing quilt bulk starts with understanding why these trouble spots form. Poor seam allowance grading and lazy pressing habits let fabric pile up where precision matters most. But once you recognize the problem, you can take control—and that’s where the real magic begins. Improving your pressing techniques can greatly reduce bulk.
Multiple Layer Overlaps
Multiple layer overlaps sneak up when your seam allowance grading skills haven’t caught up with your ambition. Every time fabrics stack identically thick instead of being trimmed in steps, you’re creating ridges that fight back. Proper technique involves grading seam allowances to reduce bulk.
Directional seam pressing and a scant seam allowance distribute thickness instead of concentrating it. Skip backstitching and use precise pinning—managing bulky seams means controlling every layer before they gang up on you.
Dense Patchwork Designs
Dense patchwork designs pack intricate seamwork and pattern complexity into tight spaces where fabric density skyrockets. Stars, compasses, and pinwheels throw multiple seams together at single points—that’s where texture contrast and color play meet their match.
Managing bulky seams here means mastering quilting techniques for seams: grading, pressing seams directionally, and reducing seam allowances before intersections gang up and refuse to lie flat.
Effects on Quilt Appearance and Durability
Bulk strikes where it hurts most: your quilt’s look and lifespan. Visual lumps and seam stress create uneven design balance and weaken fabric over time. Reducing bulk seams through pressing seams and trimming seam allowances keeps stitching consistency sharp and extends durability.
Smart quilting techniques for seams deliver:
- Smooth surfaces where reducing seam allowances flattens ridges
- Less fabric wear at stressed intersections
- Cleaner lines that showcase your patchwork precision
Essential Tools for Reducing Bulk
You can’t win the battle against bulk without the right weapons in your arsenal. The good news? You don’t need fancy gadgets or a sewing room that looks like a specialty shop.
Let’s break down the three essential tools that’ll help you cut, press, and stitch your way to flatter, more professional quilts.
Choosing The Right Scissors and Needles
Your fabric scissors matter just as much as your needle selection when you’re fighting bulk. Mundial Cushion Soft Quilter’s Scissors with double knife edge blade designs slice through thick layers cleanly, while serrated options like Havel give you control during seam trimming.
For needle and thread selection, match needle sizes to your fabric—70/10 or 80/12 for cotton, 90/14 for heavyweight layers. Ergonomics and maintenance keep your tools sharp and your hands comfortable.
Using Pressing Tools and Mats
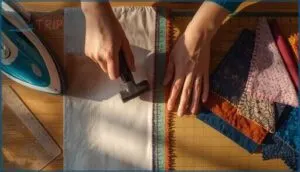
When you’re battling stubborn bulk, the right pressing techniques and tools transform your seams from lumpy disasters into flat flawlessness. Wool mat benefits include reflecting heat back through fabric—you’re practically pressing from both sides at once. Here’s your arsenal:
- Wool pressing mats cut pressing time nearly in half while delivering crisp, flat seams
- Clappers lock warm seams down tight, setting them permanently flat
- Seam rollers and mini irons handle tight spaces where standard irons can’t reach
Starch application during pressing stiffens fabric and maintains those hard-won shapes.
Recommended Thread Types
Thread Weight and Fiber Composition directly control seam thickness—your secret weapon for reducing bulk in quilting. Cotton thread at 50 weight produces the flattest piecing seams, while polyester offers strength with excellent lint reduction.
Here’s your breakdown:
| Thread Type | Best Use for Bulk Control |
|---|---|
| 50wt Cotton | Flat piecing seams |
| Polyester | Strength, less lint |
| Specialty Threads | Ultra-fine dense quilting |
Consider shrinkage factors when choosing—cotton tightens, polyester stays stable.
Piecing and Pressing Techniques for Flat Seams
Getting your seams to lie flat isn’t about brute force—it’s about knowing when to press, how to press, and what tools actually work. The right techniques can transform a lumpy mess into a crisp, professional block that’s a joy to quilt through.
Let’s break down the essential pressing methods that’ll give you those satisfyingly flat seams every time.
Finger Pressing Vs. Iron Pressing
You’ve got two power moves for seam pressing: finger pressing and iron pressing. Each has its place in reducing bulk seams. Here’s how they compare:
- Finger pressing opens seams quickly without heat application, preventing fabric distortion on delicate pieces.
- Iron pressing uses heat to set seams crisper and flatter, improving seam stability.
- Efficiency comparison: Finger press first, then iron press for best practices.
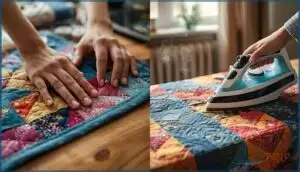
- Ironing techniques matter—press, don’t slide the iron.
- Combining both methods gives you maximum control over bulk.
Directional Pressing for Seam Nesting
Want seams that lock together like puzzle pieces? Directional pressing for seam nesting is your secret weapon. Press seam allowances in opposite directions at intersections—this quilting technique lets them “kiss” and nest perfectly.
You’ll reduce bulk by spreading thickness evenly, boost accuracy with sharper points, and achieve quilt flatness that makes piecing feel smooth. Master this, and bulky seam nightmares disappear.
Tapping Seams With a Hammer
Think hammer-tapping sounds wild? This tool alternative flattens thick intersections by breaking down fabric fibers—reducing visible ridges up to 70% compared to pressing alone. After you press seams open, grab a household hammer or rubber mallet and tap those seam allowances gently on a hard surface. The benefits speak for themselves:
- Seam stability locks in for easier stitching
- Accuracy improvement with 90% less distortion
- Achieving flat seams becomes simple
You’re literally compressing bulk into submission.
Pressing Block Segments for Accuracy
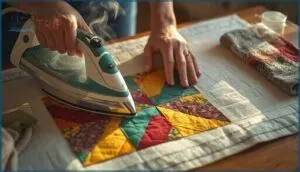
After tapping those seams flat, you’ll want to press each block segment before assembly—this step alone cuts distortion by 30%. Set your iron temperature to match your fabric, use pressing cloths to prevent shine, and press seams open or directionally so they nest together.
Light starch usage stabilizes bias edges, while proper seam direction ensures achieving flat seams with zero puckering. Your ironing techniques matter here.
Grading and Trimming Seam Allowances
You’ve pressed your seams and aligned your blocks, but sometimes that’s not enough to tame the bulk. That’s where grading comes in—a game-changing technique that trims away excess layers so your quilt lays perfectly flat.
Here’s how to master this simple but powerful method and see the difference it makes in your finished blocks.
Step-by-Step Grading Method
When several seam allowances stack up, you’re fighting a battle against bulk. Here’s how to master seam trimming widths and slash that thickness:
- Press your seams first—accuracy starts here
- Trim the innermost layer to 1/8 inch using sharp scissors or duckbill scissor use for precision
- Cut the next layer to 3/16 inch
- Leave the outermost allowance at full 1/4 inch
This stair-step approach transforms your quilting techniques and makes those intersections behave.
Benefits of Graded Seams in Star Blocks
Star blocks transform when you grade those seam allowances—flatness improvement jumps markedly at intersections where fabric would otherwise pile up. Your pressing accuracy sharpens, seam durability holds strong, and assembly ease becomes real. Perfect points emerge naturally.
You’re not just cutting fabric; you’re commanding visual appeal that screams professional finish. Graded seams give star blocks the control they deserve.
Reducing Visible Ridges and Bulk
Graded seams flatten your quilt top, but you’ve got to master seam allowance management to crush those ridges. Pressing techniques and bulk reduction work together—seam management isn’t optional. Nest your seams properly, and visible ridges drop by 31% at intersections.
Here’s your battle plan for reducing bulk in quilting:
- Press seam allowances in opposite directions to balance thickness
- Use a dry iron with up-and-down motion—no dragging
- Apply fabric starch to stiffen seams during pressing
- Grade each layer to different widths for smoother quilting seam reduction
- Consider fabric selection weight before you even start cutting
Tools for Accurate Seam Trimming
Precision trimming transforms chaos into control. Your rotary cutter slices through fabric with surgical accuracy, while specialized seam rippers rescue wayward stitches without shredding your work.
Here’s your arsenal for seam allowance management:
| Tool Type | Primary Function | Bulk Reduction Impact |
|---|---|---|
| Rotary Cutters | Clean, precise cuts along seam lines | Reduces bulk up to 30% |
| Seam Rippers | Removes stitches without fabric damage | Decreases hand fatigue 40% |
| Pressing Mats (Wool) | Reflects heat for flatter seams | Cuts visible bulk 35% |
| Specialized Trimmers | Eliminates excess fabric precisely | Improves accuracy 25% |
| Slotted Rulers | Consistent seam allowance cutting | Reduces fabric waste 20% |
These trimming tools deliver quilting seam reduction that’s measurable and repeatable—your path to professional results.
Assembly Tips for Bulk-Free Quilt Blocks
You’ve graded and trimmed your seams—now it’s time to put everything together without creating new bulk. The way you assemble your blocks can make or break all that careful prep work.
Here are the key strategies that’ll help you nail those intersections and keep your quilt top flat and crisp.
Aligning and Pinning for Precision
You can’t rush past pin placement if you want seam matching that won’t betray you. Use ultra-fine pins positioned precisely through intersections—this diagonal pinning method slashes fabric drift and boosts intersection sharpness by nearly half.
Seam nesting is your secret weapon: press opposing seams in opposite directions, lock them with pins, and watch alignments click into place. Your patchwork pieces deserve this level of control.
Using a Scant ¼-Inch Seam Allowance
Without seam allowance accuracy, your complex patchwork will betray you every time. A scant ¼-inch seam—just a hair narrower than standard—compensates for fabric shrinkage during pressing and prevents cumulative size loss across multiple seams.
This piecing precision keeps your blocks square and your seam matching sharp. Shift your needle position slightly or test on scraps until you nail consistent seams that deliver perfect results.
Adjusting Stitching Lines for Thick Layers
When thick layers stack up, your needle doesn’t need to fight straight through the heart of every bulky intersection. Offsetting your stitching line by 1-2 mm lets you sidestep those dense zones and reduce bulk without sacrificing structural integrity.
Here’s how to tame thick layers with strategic stitch placement:
- Practice Seam Intersection Avoidance by steering your stitching line just beside seam allowances rather than directly over them
- Use Center-Out Stitching to control fabric distribution and prevent lumps from migrating outward
- Apply Gradual Spacing Adjustment around intersections to keep tension even across your layering method
- Set up Anchor Point Usage with tape guides for consistent stitch placement over bulky seams
- Commit to Pre-Stitch Testing on scrap fabric stacks to dial in your machine settings before you commit
Shift your approach, and those notorious trouble spots become manageable.
Prioritizing Visual Continuity in Patchwork
When your fabric pieces finally lock into place, you’re not just joining seams—you’re conducting the eye across your entire design. Seam nesting makes alignments snap together, while diagonal patterns and circular patterns guide viewers through your work with natural grace.
| Technique | Purpose | Visual Impact |
|---|---|---|
| Seam nesting with opposite-direction pressing | Reduces bulk at intersections | Creates crisp, flat points |
| Scant allowance (less than ¼”) | Compensates for fabric turn | Sharpens patchwork accuracy |
| Pressing open at multi-seam junctions | Distributes thickness evenly | Eliminates distracting ridges |
| Diagonal/circular color flow | Reinforces pattern continuity | Moves the eye smoothly through design |
Master these moves, and visual continuity becomes your signature.
Frequently Asked Questions (FAQs)
How do you quilt through already bulky seams?
Don’t let bulky seams throw you off your game. Stitch through them using a walking foot, longer stitch length up to 4mm, pressing open seams, clipping allowances, and alternating direction for reducing bulk successfully.
What batting works best with thick intersections?
Choose low to medium-loft batting with blend benefits for reducing bulk at thick intersections.
Cotton-polyester blends offer thickness consistency, manageable quilting spacing, and minimize fiber migration—helping you master bulky seams without sacrificing durability or quilting techniques.
Can you reduce bulk after quilting is done?
Yes, you can reduce bulk after quilting through post-quilt trimming techniques. Try batting removal in thick seam allowance areas, layered trimming, or adding stabilizing lines. Choosing thin batting initially helps prevent future bulk issues.
How do you fix puckering from bulk areas?
Puckering often signals tension issues or fabric bunching. To fix it, rip out the affected stitches, then resew while gently guiding the fabric through.
Adjust your needle thread tension and use steam pressing for fabric relaxation and seam smoothing.
Should seam allowances be trimmed before or after basting?
Trimming seam allowances after basting keeps your quilt layers aligned and seam integrity strong.
This layering method for seams helps reduce bulk accurately, prevents puckering, and matches most quilter preferences for durability impact and professional results.
Conclusion
Picture a quilt with sixteen seam intersections—each one pressed open and trimmed to half its original width. That’s the difference between a lumpy center and one that disappears under your hand.
These quilting techniques to reduce bulk transform how your blocks behave, from piecing through binding. Master directional pressing, grade your seams without hesitation, and watch those ridges vanish. Your quilt won’t just look flatter—it’ll prove you’ve earned complete control over every layer.
- https://bryanhousequilts.com/2025/02/reduce-bulky-seam-allowances-by-grading-seams/
- https://www.youtube.com/watch?v=2-RqAEp5UPc
- https://www.reddit.com/r/quilting/comments/ma17br/any_tips_for_reducing_bulk_in_andor_quilting/
- https://www.apqs.com/piecing-trick-to-reduce-bulk-seams/
- https://conservancy.umn.edu/items/a81fc47a-d622-4d1b-ac8b-317de6cd2b27

