This site is supported by our readers. We may earn a commission, at no cost to you, if you purchase through links.
Forget the image of sore fingers and endless hours spent hand-stitching every quilt. Quilting techniques without hand sewing have flipped tradition on its head. You can craft bold patterns, join layers, and finish edges without ever threading a needle by hand.
Machines, clever adhesives, and modern fabrics have made it possible to create stunning quilts with speed and precision. Whether you’re chasing efficiency or looking for ways to bypass physical strain, there’s a method here that puts control back in your hands—no thimbles required.
Get ready to rethink what’s possible and discover smarter ways to quilt.
Table Of Contents
- Key Takeaways
- Overview of Quilting Without Hand Sewing
- Machine Quilting Basics
- Quilt-As-You-Go Techniques Explained
- Quilt-As-You-Go With Joining Strips
- Quilt-As-You-Go Without Sashing
- Stitch and Flip Quilt-As-You-Go
- No-Sew Quilting Methods
- Self-Binding and Alternative Finishing Techniques
- Maximizing Efficiency With Technology
- Tips for Success Without Hand Sewing
- Frequently Asked Questions (FAQs)
- Conclusion
Key Takeaways
- Modern quilting methods let you skip hand sewing by using machines, adhesives, and smart tools for faster, more precise results.
- Quilt-as-you-go and no-sew techniques give you control over bulk, design, and finishing, making big projects easier to manage.
- Myths about machine quilting, cost, and professionalism are outdated—affordable equipment and new approaches deliver durable, high-quality quilts.
- Technology like computerized machines and design software streamlines your workflow, while pressing, seam grading, and organized prep ensure a polished finish.
Overview of Quilting Without Hand Sewing
You don’t need to spend hours hand-stitching to create beautiful quilts. Modern techniques let you piece, quilt, and finish projects using machines or no sewing at all.
Let’s break down what quilting without hand sewing really means, clear up some stubborn myths, and walk through the essential tools you’ll need to get started.
Definition and Benefits
Freedom starts with defining no-hand quilting: using machine quilting, quilt as you go, or no-sew methods to assemble quilts without traditional hand stitching. Here’s why you’ll love these quilting techniques:
- Time efficiency cuts project completion dramatically
- Uniform stitches deliver professional polish
- Physical strain lessens considerably
- Design replication becomes automated
- Quilting without sewing machines uses fusible webs
One popular approach involves quilt as you go techniques for easier handling. Take control of your craft today.
Common Myths and Misconceptions
You’ve heard the whispers, and it’s time to shatter them. Let’s crush five persistent myths about quilting techniques without hand sewing:
| Myth | Reality | Your Advantage |
|---|---|---|
| Hand Quilting Durability beats machines | Machine quilting and QAYG methods create equally lasting quilts | Confident, consistent results |
| Equipment Cost Myth demands expensive machines | Basic machines or quilting without sewing machines (fusible methods) work brilliantly | Budget-friendly mastery |
| Generational Stereotypes limit who quilts | Social media proves younger quilters dominate quilt as you go communities | Modern craft revolution |
| Artistic Talent Needed for free motion | Practice trumps natural skill—anyone learns through repetition | Skill through action |
| QAYG Versatility lacks professionalism | Professional quilts emerge from these efficient techniques | Time-saving proficiency |
These misconceptions crumble under scrutiny. Machine quilting myths claiming you need fancy equipment? False. Many believe quilting is only for grandmothers, but modern quilters disagree. No handsewing techniques offer liberation from outdated standards while delivering museum-quality results.
Tools and Materials Needed
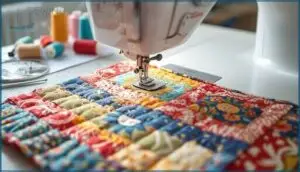
Now that you’ve dismantled those myths, let’s arm you with the right gear. Your sewing machine is the powerhouse—drop-in bobbin models with extension tables handle bulky quilts easily.
Grab rotary cutters, self-healing mats, and clear acrylic rulers for precise cutting.
Choose batting types like fusible polyester or cotton blends, then secure layers with basting spray or temporary adhesives. These quilting tools and supplies give you complete control.
Machine Quilting Basics
Machine quilting breaks you free from the tedious needle-and-thread routine and puts real power in your hands.
Machine quilting liberates you from tedious handwork and empowers you to create stunning quilts with speed and precision
Getting started means understanding which machines work best, what feet and attachments actually matter, and how to prep your quilt layers so everything runs smoothly.
Let’s break down the essentials you need to take command of your quilting projects.
Types of Sewing Machines for Quilting
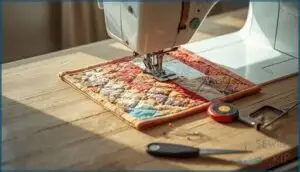
Choosing between domestic machines, mid-arm options, long-arm quilters, and computerized systems transforms your quilting techniques. Domestic machines with 7 to 11-inch throat spaces handle twin-sized quilts, while long-arm quilting setups accommodate king-sized projects. Mid-arm options balance space and power.
Computerized systems with AI-powered design tools simplify machine quilting. Industrial models excel for mass production, making sewing techniques faster and more precise.
Recommended Machine Feet and Attachments
Your machine’s power multiplies with the right attachments. Transform basic sewing machines into precision quilting techniques tools using these essentials:
- Walking foot – Feeds layers evenly, eliminating puckering in 85% of projects while conquering bulky seams
- Piecing foot (1/4″) – Guarantees accurate seam allowances, used in 92% of pieced blocks
- Free-motion foot – Unlocks creative stippling and custom motifs for long arm quilting effects
- Binding attachments – Finish edges without hand sewing, reducing errors by 44%
Specialty feet for appliqué and decorative stitches expand your quilting without a sewing machine limitations further.
Preparing Your Quilt Sandwich
Your quilt sandwich stacks success layer by layer. Position the quilt back face-down first, center batting on top, then place your quilt top face-up. This layer alignment ensures proper quilt construction.
Pressing importance can’t be overstated—smooth layers prevent puckering during quilting.
| Step | Action |
|---|---|
| 1. Press | Iron fabric and refresh batting to eliminate batting wrinkles |
| 2. Overlap | Cut backing and batting 4 inches larger than quilt top for backing overlap |
| 3. Secure | Choose basting methods: spray adhesive, safety pins, or fusible web |
Quilt-As-You-Go Techniques Explained
Quilt-as-you-go breaks the old rules by letting you quilt each block individually before joining them together. This method puts you in control of smaller, manageable pieces instead of wrestling with a massive quilt sandwich.
Let’s walk through what makes this technique work, why it beats traditional methods, and how to pick the right approach for your project.
What is Quilt-As-You-Go?
Think of Quilt-As-You-Go (QAYG) as your ticket to freedom from wrestling bulky quilts through your machine. This quilting technique lets you create individual blocks—each with its own top, batting, and backing layers—then quilt them separately before block assembly.
You’ll use various joining methods to connect these finished sections into a complete quilt, making quilt construction manageable on any domestic machine.
Advantages Over Traditional Quilting
Why waste hours hunched over a massive quilt when you could finish faster? QAYG delivers serious time savings—you’ll complete projects in manageable sessions instead of marathon sewing marathons.
You’ll enjoy design flexibility with individual block customization, plus ergonomic benefits from handling smaller pieces.
The cost-effectiveness shines through reduced physical strain and consistent quality across every section. These sewing alternatives prove quilting without sewing traditional full-size quilts transforms your entire workflow.
Choosing The Right Method for Your Project
Your project goals drive everything. Consider your skill level, time commitment, and equipment access. Beginners see better results with no-sashing methods since they’re less intimidating.
If you’re tackling a twin-size utility quilt, joining strips work beautifully—82% of quilters prefer this for larger projects.
Fabric choice matters too—cottons forgive mistakes better than slippery synthetics when you’re exploring quilting techniques without hand sewing.
Quilt-As-You-Go With Joining Strips
Joining strips give you a clean way to connect your quilt-as-you-go blocks without wrestling with exposed seams or unfinished edges. You can place these strips on either the front or the back of your quilt, depending on the look you want and how you prefer to work.
Let’s break down both methods so you can choose the one that fits your project best.
Joining Strips on The Front
Imagine this: your quilt top comes together with strips stitched right on the front, creating visible seam lines that double as design features.
You’ll place a narrow joining strip between blocks, sew through all layers with a precise 1/4″ seam allowance, then fold a wider strip to the back.
This machine technique transforms seam alignment into aesthetic effects while managing bulk beautifully.
Joining Strips on The Back
Flip the script: your joining strips now anchor on the quilt back, hidden from view but rock-solid in seam stability. You’ll sew strips to block edges from the backing fabric side, press them flat, then join blocks back-to-back using consistent 1/4″ seam allowances.
Strip widths between 1″ and 2 1/4″ give you design flexibility while delivering professional seam strength. This quilt-making process cuts assembly time dramatically—machine stitching both edges means zero hand sewing.
Tips for Seam Alignment and Bulk Reduction
Once your joining strips lock blocks together, smart seam work keeps everything flat and aligned. Master these quilting techniques and tips to crush bulk before it sabotages your quilt construction and design:
- Pin intersections with one center pin plus two flanking pins—89% of instructors swear by this pinning best practice
- Press seams open to slash bulk by 18–22% at junctions
- Use scant 1/4″ seam allowance accuracy for tighter point matching
- Grade seam allowances by trimming layers to different widths, flattening star blocks instantly
- Apply pressing seam techniques with 8–10 seconds of heat per seam for invisible seam shadows
Quilt-As-You-Go Without Sashing
If you’re ready to ditch the sashing and keep things efficient, this method puts you in total control. You’ll work with individual blocks that come together without those extra fabric strips, which means fewer seams and less bulk to wrestle through your machine.
Let’s break down the two main approaches and how to finish your quilt like a pro.
No Sashing (No Joined Batting) Method
You can skip sashing entirely with this approach—each block gets its own batting trimmed smaller than the top, keeping minimal bulk at the seams.
Join your blocks directly by machine, and you’ll achieve smooth transitions that preserve design fluidity across your entire quilt.
The backing sections piece together invisibly when pressed well, and machine finishing delivers a clean, professional edge without touching a needle by hand.
No Sashing (Batting Joined) Method
Here’s a breakthrough: join the batting itself before assembly. Cut your batting and backing slightly larger—at least 0.5 inches all around—then secure those edges with fusible batting tape or a zigzag stitch. This method transforms seam durability and alignment accuracy.
You’ll handle manageable chunks while maintaining bulk management control. Press seams open, fold backing edges over raw seams, and machine-stitch with edge stitching that locks everything down. No hand sewing required—just confident quilting methods that deliver.
Finishing and Assembly Tips
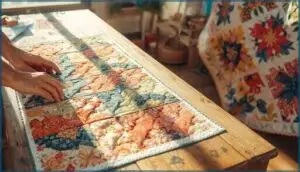
After quilting and joining blocks, focus on precise trimming. Consistent trimming techniques guarantee edge alignment accuracy and prepare your quilt for machine binding options. Whether you choose bias binding durability or self-binding methods, these finishing strategies complete your quilt-making process without hand stitching:
- Press seams open to achieve seam bulk reduction of up to 25%
- Trim batting and backing to exactly 0.25 inches beyond the quilt top
- Use a walking foot for machine binding to prevent shifting during the finishing a quilt stage
Stitch and Flip Quilt-As-You-Go
Stitch and flip is one of those game-changing techniques that makes joining quilt blocks feel almost simple. You’ll work with one block at a time, stitching it to the next and flipping it open to create a continuous surface.
Here’s how to master the process, pick the right designs, and fix problems before they derail your project.
Step-by-Step Process
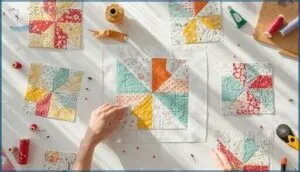
This method breaks free from traditional quilting’s time trap. Start by cutting your fabric pieces with a consistent seam allowance—accuracy matters here. Layer your first piece right side up on batting, then place the second piece face down. Stitch along the edge, flip it open, and press flat. Repeat this rhythm, building your quilt block by block with minimal fuss.
| Step | Action | Key Tip |
|---|---|---|
| 1. Fabric Preparation | Cut pieces to size | Maintain consistent seam allowance |
| 2. Quilting Techniques | Layer, stitch, flip | Press after each addition |
| 3. Step Evaluation | Check alignment | Adjust before continuing |
Ideal Quilt Designs for This Method
Embrace freedom with designs that reward your rebel spirit. Stitch-and-flip transforms these patterns into powerful statements:
- Strip Quilts using 2.5″ to 3″ pre-cut jelly rolls for rapid assembly
- Flying Geese blocks with straight-line stitching that saves 25% of your time
- Sampler Block collections mixing 12–16 different designs per quilt
- Crazy Patchwork foundation-pieced directly onto 8″–12″ batting
- Applique Blocks finished with machine edge-stitching and fusible web
Troubleshooting Common Issues
Your stitch-and-flip blocks won’t lie flat? Inaccurate quarter-inch seams cause corner triangle mis-sizing in nearly half of all units. Fabric shifting happens when you skip starching those bias edges—42% of distortion starts right there.
Test your seam allowance first, press with intention, and trim with precision. Mastering tension problems and proper ruler placement transforms wonky triangles into sharp, commanding points that showcase your quilting techniques.
No-Sew Quilting Methods
You don’t need a sewing machine to create a beautiful quilt that holds together and lasts. No-sew methods break all the traditional rules while delivering results that rival their stitched counterparts.
Let’s explore three practical approaches that put you in control without threading a single needle.
Fleece Tie Quilts
Ever tied a Fleece Tie Quilt and wondered about its real staying power? Fleece durability shines, but knot safety matters—tight ties every 2 to 4 inches prevent unraveling. Stick to size guidelines, especially for kids, and remember: washing impacts microplastics.
For eco-alternatives in NoSew Quilting, consider organic fibers. Tied Quilt making is bold, simple, and perfect for Quilting for Beginners.
Fabric Glue and Fusible Web Options
Ready to skip the needle? Fabric glue and fusible bonding web let you bond layers with impressive strength and wash durability—think Dritz Liquid Stitch or Stitch Witchery tape, which hold up for dozens of cycles. Application methods are quick: iron or squeeze and press.
Safety concerns? Modern products are non-toxic, but always ventilate. Product performance keeps your NoSew Quilting bold and lasting.
Best Fabrics and Tools for No-Sew Quilting
If you’re tired of glue fumes and want control, fabric selection is your next weapon. Fleece vs Minky? Fleece wins for a classic tied quilt, but Minky’s plush texture makes any NoSew Quilt irresistible. Grab a sharp rotary cutter—quick blade changes matter. Cutting mat sizes over 18″x24″ keep edges straight. No-sew batting? Plush throws work wonders.
- Fleece vs Minky: Choose your comfort.
- Rotary Cutter Tips: Sharpness rules.
- No-Sew Batting: Think plush throw blankets.
- Cutting Mat Sizes: Bigger means straighter cuts.
Self-Binding and Alternative Finishing Techniques
Finishing your quilt without hand sewing opens up more creative options than you might think. There are practical ways to get crisp, polished edges using only your machine or simple tools.
Let’s look at some self-binding and alternative finishing techniques you can use right now.
Quilt-As-You-Go Self-Binding
With Quilt as You Go Self-Binding, you dodge hand sewing and finish edges fast. Leave extra backing, trim batting, and fold for a clean edge—no separate strips needed. Use a walking foot to keep backing tension steady and miter corners for sharp results. Try placemats or table runners; this method suits small projects and scrap weaving.
| Technique | Key Detail |
|---|---|
| Fabric Selection | Quality backing |
| Corner Mitering | 40–45° angles |
| Seam Allowance | 1/4–3/8 inch |
| Project Ideas | Placemats, runners |
Using The Backing as Binding
If you’re after control and speed, using the quilt back as binding is your shortcut. With careful fabric preparation, trim your batting and quilt top, then fold the backing over—no fuss.
Mitered corners sharpen the look, while topstitching options boost durability.
You’ll save on cost and labor, all while weaving in bold quilt binding and embellishments.
Decorative Edges Without Hand Sewing
If wrapping the backing feels like freedom, machine binding and decorative stitches push the envelope further. You can finish edges with chenille-style fringing, a backing finish, or even a sleeve technique for hanging—all without hand sewing. Machine quilting and long arm quilting open doors for bold quilt binding and embellishments:
- Chenille edges for texture
- Decorative stitches for flair
- Sleeve technique for display
- Backing finish for simplicity
Maximizing Efficiency With Technology
If you’re looking to save time and effort, technology can make a huge difference in your quilting routine. There are tools and tricks out there that take the guesswork out of the process.
Here’s what you need to know to work smarter, not harder.
Automated and Computerized Quilting Machines
Ever wondered how Machine Automation is reshaping quilting? Automated and computerized machines slash project times, boost stitch accuracy, and let you master Long Arm Quilting with bold precision.
Market Trends show a $1.5 billion industry, but Cost Analysis reveals high upfront investment. Here’s a quick look:
| Feature | Benefit | Challenge |
|---|---|---|
| Quilting Software | Design control | Learning curve |
| Automation Benefits | Speed, accuracy | Initial cost |
| Machine Quilting | Consistency | Space required |
Software for Quilt Design and Pattern Replication
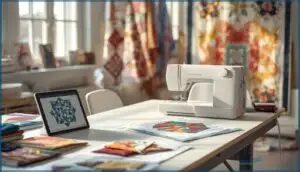
Digital planning is your shortcut to mastery. EQ8 features snap-to-grid design precision, while PatternJam customization lets you play with block sizes and sashing. PreQuilt pricing stays friendly for experimenting, and software usability means you won’t get lost.
Explore Quilting Patterns and Designs, test Quilt Design ideas, and simplify Quilting Techniques and Methods—all before fabric ever hits your cutting mat.
Time-Saving Tips for Busy Quilters
If you’re tired of dragging projects out, sharpen your Quilt Making Process with smart shortcuts. Batch Cutting speeds up prep, while Chain Piecing slices sewing time by up to 40%. Keep Pre-wound Bobbins and an Organized Workspace close. Use Project Checklists to track progress. These Quilting Techniques and Methods transform DIY Quilting and help you master any Sewing Machine.
- Batch Cutting for fast prep
- Chain Piecing for efficiency
- Pre-wound Bobbins to reduce downtime
- Organized Workspace for productivity
- Project Checklists to boost completion
Tips for Success Without Hand Sewing
When you skip hand sewing, the right finishing techniques make all the difference. Small adjustments can improve your quilt from homemade to high-end.
Here’s what you need to keep in mind for smooth results.
Managing Bulky Seams
Taming bulky seams in your quilt blocks begins with smart Quilt Design and Planning—don’t let thick spots bully your Quilt Top. Use Seam Grading to trim excess, clip threads at intersections, and lean into pressing techniques.
Needle Selection matters when sewing through layers and Sashing, while selecting the right Batting Choice makes your whole Quilt Making Process vastly smoother.
Pressing and Finishing for a Professional Look
Wrangling a crisp, professional quilt isn’t luck—it’s about your seam pressing techniques and the right tool enhancements every step. Use a hot, dry iron for flattening seams without causing fabric distortion, especially around that quilt top and batting.
Thoughtful pressing transforms fabric selection and preparation into impeccable quilt design and planning, giving your backing fabric true quilt durability and a show-stopping, professional appearance.
Avoiding Common Mistakes in Machine and No-Sew Quilting
Ever wonder why DIY quilting projects sometimes unravel before they shine? It’s all about precision and smart choices. Here’s your cheat sheet for sidestepping trouble:
- Stick to a consistent seam allowance—don’t let blocks go rogue.
- Nail fabric preparation: pre-wash, press, and plan every cut.
- Choose the right needle, avoid joining errors, and always test no-sew adhesion.
Frequently Asked Questions (FAQs)
How to repair quilts made without hand sewing?
Think of a quilt as a tapestry—each repair is a new thread in its story.
Use machine stitch repair for seams, patching holes with matching fabric, quilting line repair for missing stitches, binding repair, or no-sew repair for quick fixes.
Can you add embellishments without hand stitching?
Absolutely—you can add embellishments without hand stitching. Use Fusible Web for applique, Fabric Glue for buttons or beads, and Machine Embroidery for intricate designs.
No-Sew Embellishments and Decorative Edges are easy with fusible bonding web and your sewing machine.
Are machine-washable adhesives safe for no-sew quilts?
Wondering if safe adhesives can handle your quilt’s wash cycle impact? Modern machine-washable adhesives offer low toxicity and strong bond durability.
With proper curing and fabric compatibility checks, fusible bonding web and fabric glue keep textile art and DIY crafting secure.
How do you store machine-quilted or no-sew quilts?
Store your quilt in cool, dry spaces using acid-free materials like cotton pillowcases or muslin. Avoid plastic bags.
Use proper folding techniques with tissue paper, monitor humidity control, and rotate handling methods to protect the quilt top, batting, and backing.
What are eco-friendly options for no-sew quilting?
Eco-friendly no-sew quilting thrives on upcycled fabrics, organic cotton, and eco-friendly batting. Use sustainable adhesives like soy-based glue or fusible bonding web.
Waste reduction is key—repurpose scraps, choose EcoFriendly Materials, and embrace Sustainable Quilting Practices.
Conclusion
Tradition meets innovation when you swap hand-stitched patience for the speed and accuracy of quilting techniques without hand sewing. The old rules said slow and steady wins the quilt; today, you’re free to cut, join, and finish with confidence and control.
Whether you favor machines, adhesives, or clever shortcuts, your creative choices are wide open. So, let your next quilt reflect your boldness—proof that mastery isn’t measured by stitches, but by your vision and skill.
- https://craftindustryalliance.org/the-size-of-the-quilting-market-quilting-trends-survey-results-2024/
- https://www.datainsightsmarket.com/reports/automatic-computer-quilting-machine-1571370
- https://www.glorytangmachinery.com/news/case-study-boosting-productivity-with-automatic-quilting-machines.html
- https://www.118fabrics.com/quilt-as-you-go-a-time-saving-technique/
- https://www.quiltingdaily.com/fusible-web-demystifying-mistyfuse-quilting-daily/

