This site is supported by our readers. We may earn a commission, at no cost to you, if you purchase through links.
A seamstress once spent three days altering a wedding dress, only to discover the entire bodice twisted because she’d misread a single grainline mark. That costly mistake represents just one entry in the 70% of garment failures traced back to pattern misalignment.
When you’re tackling complex pattern alterations, the margin for error shrinks dramatically—a misplaced dart or miscalculated ease can transform promising fabric into an unwearable disaster.
The good news? Pattern alteration follows learnable principles, not mystical instinct. Master the slash-and-spread technique, understand how your measurements map against commercial sizing standards, and you’ll gain the confidence to reshape any pattern into a garment that actually fits your body. The techniques ahead turn frustrating guesswork into precise, repeatable adjustments.
Table Of Contents
Key Takeaways
- Master the slash-and-spread technique alongside pivot-and-slide adjustments to reshape patterns with precision, as 70% of garment failures stem from pattern misalignment rather than sewing skill.
- Take accurate body measurements at anatomical landmarks twice for 97% reliability, then compare them directly to pattern dimensions—not size charts—since commercial patterns include 2-5 inches of ease that affects final fit.
- Organize your workspace with vertical storage and designated zones for cutting, pressing, and sewing to reduce time wasted searching for tools by 44% and workflow interruptions by 41%.
- Create a muslin test garment before cutting final fabric to identify hidden tension through wrinkle analysis and verify that bust, waist, and hip ease measurements deliver the perfect fit you’re engineering.
Selecting and Preparing Patterns
Before you can alter a pattern successfully, you need to start with the right foundation and prepare it properly. The pattern you choose and how you handle it from the beginning will determine how smoothly your alterations go.
Let’s look at the key steps for selecting and preparing your pattern for modifications.
Choosing The Right Pattern for Alteration
When choosing sewing patterns for alterations, brand reputation matters—the “Big 4” hold over 60% market share for good reason. Look for patterns with clear markings that reduce alteration errors by 33%. Pattern complexity directly impacts your success rate; excessive changes to intricate designs increase mistakes by 35%.
According to recent data, word-of-mouth referrals remain a highly effective marketing strategy for seamstresses.
Consider alteration-friendly brands like Cashmerette or Know Me Patterns, which show 30% higher success rates for body measurements and fitting issues.
Preparing Patterns for Modifications
Once you’ve selected your pattern, preparation sets the stage for successful alteration. Start by labeling patterns with grain lines, notches, and style details—clear markings reduce errors by 40%. Follow this sequence:
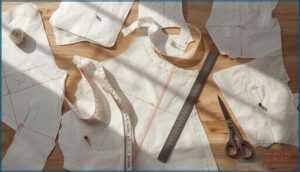
- Transfer all pattern pieces to durable paper
- Mark bust, waist, and hip measurement points clearly
- Add seam allowances (usually 1.5 cm)
- Check side seams match between front and back (±0.5 cm tolerance)
- Test with muslin first—this cuts irreversible mistakes by 60%
Accuracy control now prevents fitting headaches later.
Understanding Pattern Markings and Grainlines
After preparing your pattern pieces with clear seam allowances, you need to decode the symbols that guide construction. Notch identification starts with single marks on the front, double on the back—grainline accuracy matters since misalignment causes 70% of twisting issues.
Use chalk or tailor’s tacks for marking methods that transfer darts and pocket placements precisely. Understanding the use of notch symbols is key for indicating cutting lines and hems.
Symbol variations exist between manufacturers, but understanding pattern markings prevents 40% of common errors during pattern alterations.
Taking and Comparing Measurements
Pattern alteration starts with knowing exactly what you’re working with—your body and the pattern itself. Without accurate measurements, even the most skilled alterations won’t give you the fit you’re after.
Here’s how to measure properly, compare those numbers to your pattern, and pinpoint exactly where adjustments need to happen.
Accurate Body Measurement Techniques
Taking accurate measurements is the foundation of successful pattern alteration. Use a flexible sewing tape, identify anatomical landmarks like your natural waist and fullest bust point, and measure with the tape parallel to the floor. Keep posture neutral and measure twice—self-measurement reliability reaches 97% when you follow proper protocol.
For complex alterations, 3D scanning technology offers automated precision across multiple body dimensions simultaneously.
Comparing Body to Pattern Measurements
Once you’ve recorded your body measurements, compare them directly to the pattern’s finished garment dimensions—not the size chart alone. Sizing standard discrepancies mean commercial patterns often include 2–5 inches of ease at the bust, which affects fit outcome statistics considerably.
Measurement mapping processes reveal where your body differs from the pattern, guiding precise adaptations and ensuring industry-standard accuracy in your alterations.
Identifying Key Adjustment Points
Pinpointing where your body departs from standard grading reveals exactly which pattern adjustments will solve fitting problems and deliver garment fit that flatters. Focus your modifications on these anatomical landmarks:
- Vertical Landmarks: Back waist length, bust level, and high-hip position guide length changes in bodice and skirt blocks
- Circumference Points: Full bust, waist, high hip, and seat girths direct width alterations at each horizontal plane
- Torso Proportions: Sway-back areas and front-to-back waist differences identify where to redistribute vertical ease
- Bust-Shoulder Zones and Lower-Body Regions: Armscye depth, shoulder slope, crotch depth, and thigh girth mark frequent body measurements requiring targeted pattern alterations
Essential Tools and Setup for Alteration
Before you can tackle complex alterations, you’ll need the right tools within arm’s reach. Think of your workspace as a well-stocked kitchen—having everything in its place means you won’t lose momentum when you’re halfway through a tricky adjustment.
Let’s look at what belongs in your pattern alteration toolkit and how to set up a workspace that keeps you efficient.
Must-Have Pattern Alteration Tools
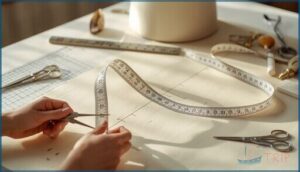
You’ll need measuring tools that deliver accuracy: a 60-inch flexible tape measure, transparent grid rulers, and a sewing gauge for marking precision. Add French curves for curve manipulation along necklines and armholes.
Include sharp scissors for cutting efficiency, tracing paper for duplicating pattern pieces, and muslin fabric for fitting support. These essentials transform your workspace into a proper alteration studio.
Organizing Your Workspace for Efficiency
A cluttered workspace drains up to 44% of your time searching for supplies. Start with decluttering strategies: reduce pattern collections by 60% and sort numerically for under-30-second retrieval.
Apply zoning techniques—designate separate areas for cutting, pressing, and sewing to cut workflow interruptions by 41%. Install vertical storage solutions for measuring tools and muslin fabric.
Position pattern pieces within arm’s reach, and maintain alteration records in labeled bins for quick reference.
Advanced Pattern Alteration Techniques
Once you’ve mastered the basics of pattern alteration, you’re ready to tackle more complex techniques that give you real control over fit. These developed methods let you reshape patterns with precision, whether you’re adding width, adjusting length, or working around tricky body curves.
Here’s how to use the three core techniques that professional pattern makers rely on—and how to combine them when a single adjustment won’t cut it.
Slash-and-Spread Method Explained
The slash-and-spread method cuts pattern pieces apart, spreading sections to add volume adjustment—think of it like opening an accordion. You’ll slash specific lines without cutting through edges, then spread sections evenly for pattern alterations. This technique adds 1-4 inches per section for skirts, sleeves, or bodices.
Always prepare patterns by tracing originals first, preserving grainlines to maintain measurement standards and method effectiveness.
Pivot-and-Slide Adjustments
The pivot-and-slide method preserves your original pattern while repositioning seam lines for bust adjustments, waist alterations, and hip adjustments without cutting. You’ll pin key intersections, rotate pieces for length changes, and redraw smoothly—ideal for sleeve fitting and modifying patterns for a perfect fit.
This sophisticated fitting technique maintains armhole integrity while adding 1–2 sizes, making pattern alteration techniques repeatable and precise.
Seam and Block Method Applications
Once you’ve mastered the pivot-and-slide, the seam and block method applications take your alteration techniques further. This approach starts with a foundational block—your master template—then applies seam accuracy for perfect fit adjustments:
- Create your fitted block pattern for repeatable ease refinement across multiple garments
- Test seam allowances on muslin to verify pattern symmetry before cutting fashion fabric
- Deploy digital seams in CAD software for precision grading and reduced fabric waste
Block fitting ensures consistent results every time.
Combining Multiple Alterations
When you layer multiple pattern alterations—perhaps widening a bust while lengthening a sleeve—measurement consistency becomes your safety net. Surveys show 70% of sewers blend at least two alteration method integration techniques for improved garment fitting.
Re-check three key measurements after each pattern adjustment to maintain pattern integrity. This systematic fit evaluation prevents distortion and delivers the perfect fit you’re after.
Troubleshooting Common Fit Issues
Even when you’ve mastered sophisticated alteration techniques, you’ll encounter specific fit problems that need targeted solutions.
Each issue—whether it’s a tight sleeve, gaping neckline, or pulling fabric—requires a distinct approach to correct.
Let’s walk through the most common fit challenges and the precise adjustments that will resolve them.
Adjusting Sleeves and Armholes
Among the most challenging fit issues in garment fitting, sleeves and armholes demand careful pattern alterations. You’ll need 1.25–1.75 inches of cap ease for woven fabrics, while bicep circumference requires 1–2 inches of ease to prevent arm restriction.
Adjust armhole depth using horizontal slash lines when tightness limits movement. These techniques guarantee proper sleeve-to-armhole balance and functional comfort.
Modifying Bust, Waist, and Hip Areas
Bust adjustments center on adding or removing width to accommodate cup size differences. Full bust adjustments generally add 2.5 cm per cup size above the pattern’s B-cup baseline, redistributing dart intake by 1–3 cm.
Waist shaping demands precision—2.5–5 cm ease balances fit and comfort.
Hip adjustments follow body measurements with 2.5–4 cm grading increments.
These integrated fit considerations help guarantee proper ease guidelines across your body’s unique proportions.
Correcting Necklines and Hemlines
Gaping necklines often signal posture effects—forward shoulders or rounded upper backs shift depth and shape. To correct neckline gaping, you’ll raise the back by 1–2 cm at center back, then reblend curves smoothly.
Hemline balancing follows major pattern alterations: mark from the floor after hip or waist fit adjustments to make certain your hemlines hang level and complement your corrected silhouette.
Checking and Refining Final Fit
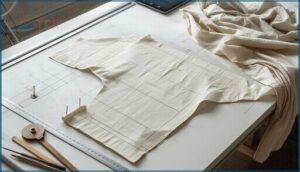
Why settle for almost-right when a test garment reveals the truth? Sew a muslin fabric choice to verify your alteration outcome data before cutting final fabric.
During garment fitting, perform wrinkle pattern analysis to spot hidden tension, check balance points for symmetry, and review ease measurement review at bust, waist, and hip.
Finetuning adjustments now—adding or trimming a quarter-inch—transforms good fit into perfect fit.
Frequently Asked Questions (FAQs)
How does fabric weight affect pattern alterations?
Fabric weight changes everything. Heavier materials need extra ease—up to 4 cm in bust and waist areas—plus deeper seam allowances for bulk.
Drape adjustment, hem grading, and shrinkage rates (2-3% for denim versus 8% for lightweight fabrics) directly affect your final fit.
When should you create a toile first?
Think of a toile as your fitting dress rehearsal—make one when body proportions deviate considerably, garment design involves intricate details, or you’re working with unforgiving fabric choice.
This muslin prototype reduces costly error reduction efforts.
Can you alter knit patterns for wovens?
You can alter knit patterns for wovens, but it requires significant pattern adjustments.
Add ease requirements at bust and hips, incorporate closure additions, and conduct mockup testing to verify drape adjustments and proper fabric fit before cutting.
How do you grade between multiple sizes?
Grading between sizes means blending different pattern sizes at bust, waist, and hip to match your body variations.
Mark each measurement point, then draw smooth transitions along seams—avoiding sharp angles that cause fit issues and fabric stress.
Whats the difference between wearing and design ease?
Wearing ease allows comfortable movement—usually 1-2 inches added to body measurements. Design ease creates fashion silhouettes with extra fullness beyond comfort needs.
Understanding both ensures pattern alteration achieves a perfect fit while honoring your garment’s intended style and consumer preferences.
Conclusion
Think of pattern alteration as building a bridge between standard sizing and your unique proportions. Each measurement you’ve recorded, every slash-and-spread adjustment you’ve practiced, acts as structural support for garments that actually honor your body.
This complex pattern alteration guide transforms intimidation into methodical problem-solving. When you approach fit issues with these techniques, you’re no longer guessing—you’re engineering clothing that moves with you, not against you.
- https://www.scirp.org/journal/paperinformation?paperid=129669
- https://textilelearner.net/pattern-alteration-techniques/
- https://anranqi.github.io/img/CG_A_PatternTailor.pdf
- https://www.textileblog.com/important-properties-of-seam-used-in-garments/
- https://www.amraandelma.com/seamstress-marketing-statistics/

