This site is supported by our readers. We may earn a commission, at no cost to you, if you purchase through links.
The first time you sit down at a sewing machine, something unexpected happens. The fabric bunches, the thread tangles, and what looked simple on the tutorial video suddenly feels like solving a puzzle with missing pieces. That moment of friction is completely normal—and it’s exactly where most beginners either quit or discover they’re hooked.
Sewing rewards patience with precision. Straight stitches take most beginners just two to four sessions to control confidently. The right tools, a clear sequence, and a handful of keystone techniques separate frustrating early attempts from finished projects you’re proud to use.
This sewing fundamentals guide walks you through everything—from your first scissor cuts to threading tension, fabric prep, and the beginner projects that build real skill fast.
Table Of Contents
- Key Takeaways
- Sewing Fundamentals for Beginners: What to Learn First
- Essential Sewing Tools, Supplies, and Workspace Setup
- Top 4 Sewing Tools and Machines for Beginners
- Step-by-Step Sewing Machine and Stitching Basics
- Fabric Preparation and Easy Beginner Sewing Projects
- Frequently Asked Questions (FAQs)
- Conclusion
Key Takeaways
- Straight stitches become second nature within 2–4 sessions, so short, consistent practice beats occasional long stretches every time.
- Pre-wash your fabric before cutting—natural fibers shrink up to 10%, and skipping this step warps your final seams and fit.
- Match your tools to the task: fabric shears for cutting, the right needle for each fabric type, and polyester thread for most projects.
- Tension problems and tangled bobbins aren’t failures—they’re the machine telling you to rethread, adjust in small steps, and test on scrap first.
Sewing Fundamentals for Beginners: What to Learn First
Every skill you’ll ever sew with starts in this first stretch. You’ll build real confidence faster once you know what’s actually normal here. Let’s walk through the five things worth understanding before you pick up a needle.
If you want a shortcut to feeling in control, this beginner’s guide to sewing machine speed control walks you through exactly that, one simple step at a time.
Is Sewing Hard?
Why does sewing feel intimidating before you’ve even threaded a needle? It isn’t. Sewing rewards patience, not talent.
Sewing doesn’t reward talent — it rewards patience
Mistakes are normal — a crooked seam just means you rip it out and try again. Confidence builds through repetition: straight stitches first, then zigzags. Treat early stumbles as troubleshooting practice, not failure, and the machine stops feeling like a mystery.
You can simplify the process by choosing easy sewing projects to build your skills.
Beginner Learning Curve
Once you stop worrying about flawlessness, the curve flattens quickly. Most beginners master straight stitches within 2 to 4 sessions.
- Short 15 to 30-minute practice sessions build foot pedal control steadily
- Visual marking guides on fabric turn guesswork into accuracy
- Each finished project signals a real skill progression achievement
Frustration is part of it — just keep the seam ripper close.
Hand Versus Machine Sewing
Think of hand sewing as a scalpel — precise, unhurried, ideal for delicate fabrics like silk or tight curved seams a machine foot can’t reach. Stitch control stays entirely in your fingertips.
A machine trades that intimacy for speed, producing hundreds of stitches per minute with consistent tension. For long seams or heavy canvas, there’s no competition.
Most beginners need both skills.
Realistic Practice Goals
Both hand and machine skills take time — and that’s exactly where a clear plan pays off.
Aim for 20 to 45 minutes, four days a week. Each session needs one measurable target: hit a 1/4 inch seam allowance consistently, or thread the machine unaided. After each session, log what shifted.
Adjust your goals weekly. Steady consistency beats occasional marathon sessions every time.
Common Beginner Mistakes
Most beginners stumble on the same few things.
- Skipping pre-washing fabric causes improper fabric shrinkage after construction
- Ignoring skewed grain alignment warps hems and seams
- Forgetting to backstitch creates weak seam durability
- Poor workspace lighting hides misaligned cuts
Your seam ripper will become your closest companion early on — and that’s perfectly normal.
Essential Sewing Tools, Supplies, and Workspace Setup
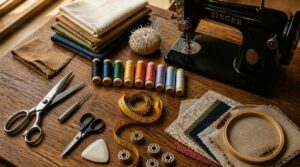
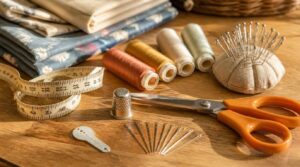
The right tools don’t just make sewing easier — they make the difference between frustrating guesswork and confident, precise work. Before you stitch a single seam, it’s worth knowing exactly what belongs in your kit and why. Here’s what you’ll want to have on hand.
Fabric Shears and Cutters
Your scissors are your first real commitment to the craft. Fabric shears — 8 to 10 inches, high-carbon stainless steel — cut cleanly where kitchen scissors fray and snag. The bent handle design keeps fabric flat against your table, giving you control.
For cleaner cuts that pair well with your shears, it also helps to understand how sewing machine lock stitches work, so your fabric pieces come together just as precisely as they were cut.
Keep them strictly for fabric. One pass through paper dulls the knife edge permanently.
Measuring Tools and Rulers
Three tools cover nearly every measuring need: a 60-inch cloth tape for curves and body measurements, a clear quilting ruler for grid work, and a straight metal or aluminum ruler for pattern lines. The cloth tape flexes where rigid rulers can’t.
For serious precision, a vernier caliper reads to fractions of a millimeter — useful when seam allowances matter down to the last mark.
Pins, Needles, and Thread
Every seam starts long before the machine does — with the right pin, needle, and thread in hand.
Brass and steel pins handle most fabrics reliably; switch to silk pins for delicate weaves to avoid snags. Match your needle to the task: sharps for general sewing, crewel for embroidery. For thread, polyester suits most projects, while cotton stays true on natural fabrics.
Ironing and Pressing Tools
A wrinkled seam never lies flat, no matter how well you’ve stitched. Steam irons soften fibers far more effectively than dry heat. Three pressing essentials you’ll reach for constantly:
- A steam iron with adjustable temperature settings
- A pressing cloth to shield delicate fabric
- A height-adjustable board for ergonomic comfort
Clean your soleplate regularly — mineral buildup clogs vents and damages fabric.
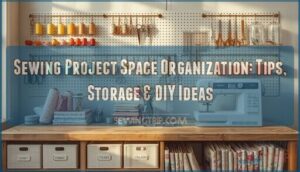
Organized Sewing Station
Your station works for you — or against you. A 120–160 cm table gives your machine, fabric, and cutting mat room to coexist.
| Zone | Purpose |
|---|---|
| Pegboard above | Scissors, rulers, quick-grab tools |
| Labeled drawers | Pins, needles, seam rippers |
| Rolling cart | Ongoing projects, scraps |
| Task lamp (550–1000 lumens) | Shadow-free stitching light |
Cable management along the desk edge keeps cords clear of active work.
Top 4 Sewing Tools and Machines for Beginners
The right tools don’t just make sewing easier — they make it something you’ll actually want to keep doing. Whether you’re picking up your first needle or shopping for a machine, these four picks cover the essentials without overwhelming you. Here’s what’s worth adding to your kit.
1. Dritz Craft Hand Needles Assortment Compact
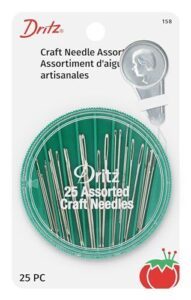
Twenty-five needles, one tidy case — the Dritz Craft Hand Needles Compact hands you real variety without the clutter. Betweens, sharps, ornamental needle, chenille, crewel, and straw milliners are all here, covering everything from basic repairs to embroidery work.
The rotating dispenser picks out individual needles cleanly, and the size guide printed on the back means you’re not guessing which needle goes where. That matters when you’re still learning the difference between a size 8 between and a size 10 sharp.
The built-in needle threader cuts frustration early on. For beginners practicing slip stitches or catch stitches, that small convenience adds up fast.
| Best For | Beginners and hobbyists who want a versatile, travel-friendly needle set that covers a wide range of hand-sewing and embroidery projects without carrying multiple cases. |
|---|---|
| Primary Use | Hand Sewing & Embroidery |
| Material | Metal & Plastic |
| Skill Level | Beginner |
| Form Factor | Compact Needle Case |
| Project Types | Repairs & Embroidery |
| Compatibility | Universal Hand Sewing |
| Additional Features |
|
- 25 needles across six types (Betweens, Sharps, Straw/Milliners, Chenille, Tapestry, and Crewel) means you’re covered for almost any hand-sewing project
- The size guide printed on the back of the case makes it easy to grab the right needle without second-guessing
- Compact size fits neatly in a purse or craft bag, so it’s ready whenever you are
- The rotating case can feel stiff and may need a careful touch to dispense needles without forcing it
- The plastic housing has been known to crack or separate over time with regular use
- The needle threader hangs off the outside of the case rather than tucking neatly inside, so it’s more likely to snag or get lost
2. Janome 712T Treadle Sewing Machine
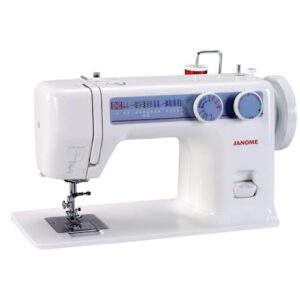
Once you’ve got needles sorted, the next leap is a machine that needs no outlet at all. The Janome 712T runs on treadle power — your foot drives the flywheel, no electricity required. It measures 14.6 inches wide, 11.4 inches tall, and weighs 17.6 pounds, fitting into a separate treadle cabinet you’ll need to source yourself.
You get 10 utility stitches plus a four-step buttonhole, a five-piece feed dog, and a top-loading rotary hook bobbin for steady feeding. Snap-on feet simplify quick changes mid-project.
Tension adjusts manually from 0 to 9, rewarding patience and quiet, rhythmic control — perfect for cabins or off-grid sewing sessions.
| Best For | The Janome 712T is best suited for off-grid sewists, cabin dwellers, and quilting enthusiasts who want a dependable, electricity-free machine for garment repairs, construction, and free-motion decorative work. |
|---|---|
| Primary Use | Machine Sewing & Quilting |
| Material | Metal & Plastic |
| Skill Level | Intermediate |
| Form Factor | Treadle Sewing Machine |
| Project Types | Garments & Quilting |
| Compatibility | Separate Treadle Cabinet |
| Additional Features |
|
- Runs entirely on foot-powered treadle action, so it works reliably during power outages or in off-grid settings
- Offers 10 built-in stitches plus a four-step buttonhole, along with a 5-piece feed dog and full rotary hook bobbin for smooth, consistent stitching
- Drop-feed capability and an extra-high presser foot lift make it well suited to free-motion quilting and thicker fabric layers
- Needs a separate treadle cabinet, which isn’t included and must be purchased on its own
- Initial setup can be tricky, since belt installation and flywheel direction require careful attention
- Has no built-in work-area lighting, so you may need to add an auxiliary light source
3. NGOSEW 9mm Zigzag Stitch Presser Foot
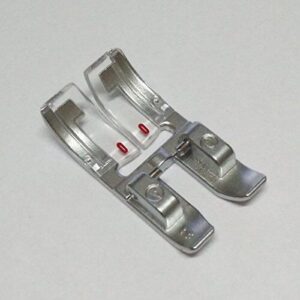
Once your foot finds its rhythm on the treadle, widening your stitch options is the next natural step. The NGOSEW 9mm Zigzag Stitch Presser Foot snaps onto PFAFF Creative 2.0 through 4.5 models, unlocking decorative, heirloom, and stretch stitches without swapping machines. Built from durable metal, it accommodates wider seam allowances and holds up under repeated use.
This foot’s open-toe design keeps your view clear while stitching appliques or tracking a quilting guide. At roughly $8.50, it’s a budget-friendly way to test wider stitches, though confirm your machine falls within Group G, J, or K first.
| Best For | This presser foot is best for PFAFF Creative 2.0–4.5 (Group G, J, K) owners who want to add wide decorative, heirloom, and stretch stitching to their machine without upgrading equipment. |
|---|---|
| Primary Use | Decorative Machine Stitching |
| Material | Durable Metal |
| Skill Level | Intermediate |
| Form Factor | Snap-On Presser Foot |
| Project Types | Heirloom & Stretch Work |
| Compatibility | PFAFF Creative 2.0–4.5 |
| Additional Features |
|
- Snap-on design allows quick, tool-free installation
- Durable metal build holds up to repeated, heavy use
- 9 mm width opens up decorative, heirloom, and stretch stitch options
- Only fits specific PFAFF Creative, Group G, J, and K models
- Fixed 9 mm width limits use for fine-detail stitching
- Metal construction adds weight that may press too hard on delicate fabrics
4. Assorted Craft Buttons Bulk Button Set

Buttons round out the kit once your stitching has a rhythm to follow.
A bulk button set like Hygloss gives you 600 to 700 resin pieces, sized roughly 2mm to 30mm, with 2-hole and 4-hole styles mixed throughout. That range matters: practicing on tiny buttons first builds the dexterity you’ll need before tackling coat-sized ones.
At about $10 for hundreds of pieces, mistakes cost nothing. Snap a thread? Grab another button and try again. You’ll also start matching hole counts to fabric weight — a skill that pays off once you’re replacing buttons on real garments instead of just practicing on scraps.
| Best For | This bulk button set is best for crafters, sewers, and parents who want an affordable, varied stash of buttons for clothing repairs, decorative projects, and teaching kids color and shape recognition. |
|---|---|
| Primary Use | Sewing & Crafts |
| Material | Resin & Cellophane |
| Skill Level | Beginner |
| Form Factor | Assorted Mixed Bag |
| Project Types | Clothing & Decorative Crafts |
| Compatibility | Glue, Thread, Tape, or Ribbon |
| Additional Features |
|
- Comes with a wide random mix of colors, shapes, and sizes (small, medium, and large), so you’re covered for almost any project
- Made in the USA from durable, waterproof resin and cellophane that holds up well over time
- Works with multiple attachment methods (glue, thread, tape, or ribbon), making it flexible for sewing and no-sew crafts alike
- The smallest buttons are a choking hazard, so they need close supervision around toddlers and young children
- Colors can look duller in person than in online photos, with few bright yellows or neon shades included
- Some oversized buttons and occasional non-button bits (like tiny nails) may turn up, which isn’t ideal for delicate projects
Step-by-Step Sewing Machine and Stitching Basics
You’ve got your tools laid out and your machine ready to go. Now it’s time to put your hands on it and learn how it actually works. Here’s what to master first, step by step.
Threading The Machine
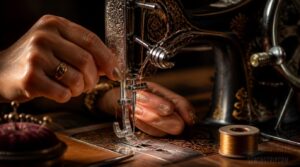
Threading right sets up everything that follows. Raise the take-up lever to its highest point, then follow this path:
- Spool to thread guide
- Through tension discs
- Up to take-up lever
- Down to needle bar guide
- Through the needle eye
Wind your bobbin evenly, seat it clockwise, then pull both threads back before stitching.
Adjusting Thread Tension
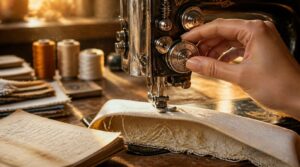
Why do stitches sometimes look perfect on top but loop messily underneath? Usually it’s upper tension fighting bobbin balance.
Start at factory default, nudge in 0.5 steps, then test on scraps.
| Symptom | Cause | Fix |
|---|---|---|
| Top thread shows below | Too loose | Increase tension |
| Puckers on top | Too tight | Decrease tension |
| Nests underneath | Bobbin mismatch | Re-thread, log settings |
Straight and Zigzag Stitches
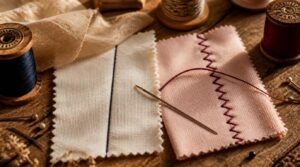
Two stitches do most of the heavy lifting in sewing. The straight stitch uses a lockstitch — interlocking needle and bobbin threads — to create durable seams on woven fabrics. Set length between 1–3mm depending on the job.
Switch to a zigzag stitch for knits or raw edges. Its back-and-forth motion adds flexibility and prevents fraying without bulk.
Backstitching and Seam Strength
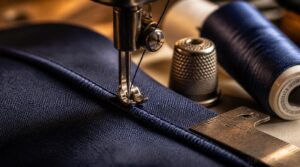
Backstitch reinforces straight seams at stress points by overlapping stitches. Set stitch length near 2-2.5mm; shorter stitches add density without extra seam allowance bulk.
- Use polyester for higher tensile strength
- Balance bobbin and needle thread tension
- Keep your sewing machine tension even
- Shorter stitches prevent seam slippage
- Reverse a few stitches to anchor ends
These habits keep your seams strong.
Cleaning and Troubleshooting
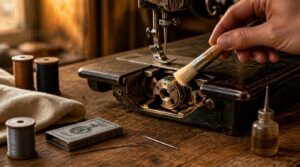
A neglected machine talks back—skipped stitches, puckered seams, thread nests under fabric. Clear lint from the bobbin area weekly using a brush, never fingers. Replace bent or dull needles immediately; they cause most skipped stitches.
Uneven stitching? Rethread completely and balance top and bobbin tension. Fabric puckering means easing presser foot pressure. Lubricate only where your manual specifies, then test on scrap fabric.
Fabric Preparation and Easy Beginner Sewing Projects
Your machine skills mean nothing if the fabric fights you from the start. Getting the material ready, and choosing the right first project, sets the tone for everything that follows. Here’s what you need to know before you cut a single piece.
Best Beginner Fabrics
Your fabric choice decides whether sewing feels smooth or frustrating. Stick with woven cotton fabrics like quilting cotton, poplin, or muslin—stable, easy to cut, and forgiving.
Knit vs. woven matters here: knits stretch and shift under the needle, while wovens hold still. Pick light to medium weights, 140–180 gsm, in solid colors or small-scale prints so mistakes stay visible.
Pre-washing and Pressing
Good fabric choice means little if you skip pre-washing first. Natural fibers shrink 5–10%, so washing before cutting protects your final fit and prevents grain distortion.
- Test a swatch to measure exact shrinkage
- Watch for dye bleeding using a color catcher
- Press after washing to restore true grain
Steam works, but go gently on synthetics to avoid shine and shrinking.
Grainline and Accurate Cutting
Once your fabric dries and presses flat, find the grainline—the line running parallel to the selvage, tracking warp threads. Weft runs crosswise; warp determines stability.
Mark the grain with chalk before pinning patterns, then square pieces using a clear ruler. Cut along the straight grain with sharp shears or a rotary cutter. Save bias cuts (45 degrees) for drape, not structural seams.
Pillowcases and Tote Bags
Once you’ve squared your fabric and cut along the grain, pillowcases and tote bags offer a practical way to build confidence. Upcycling pillowcases lets you bypass tricky pattern placement—use the existing open end as your tote’s opening, and stitch straight seams to create shape. Hand grips can be made from pillowcase strips or sturdy webbing. Gusset construction strengthens the base, making your tote ready for heavier loads. Lining with a second pillowcase adds structure and doubles capacity. Decorative edge finishing—like preserving the pillowcase seam line—keeps things simple and stylish.
- Straight seam practice
- Gusseted bases for structure
- Lined totes from recycled fabric
- Handle attachment methods
- Decorative finishing options
Zippers, Hems, and Buttonholes
Tote bags and pillowcases build your seam confidence — now closures take that further.
Centered zippers align teeth with the seam; lapped styles hide one edge cleanly. For hems, blind hems minimize visible stitching on finished garments. Turned hems fold twice for lightweight fabrics.
Buttonholes need precision: position them 3/8 inch beyond the button center. Dense bar tacks at each end prevent fraying.
Frequently Asked Questions (FAQs)
How do I fix a broken sewing needle?
You can’t fix a broken needle — you replace it. Unplug your machine first, remove the damaged pieces, then insert a fresh needle with the flat side facing back and tighten the clamp securely.
Whats the best way to store fabric?
Keep fabric in a cool room with 45–55% humidity. Use breathable cotton bags, not sealed plastic. Cedar blocks deter pests. Fold with acid-free tissue between layers, and keep storage away from direct sunlight.
Can you sew leather with a regular machine?
Thin leather — up to 3–4 oz — fits within a regular machine’s range. Use a leather needle, walking foot, and bonded polyester thread. Test on scrap first, and raise tension slightly for clean seams.
How often should I clean my sewing machine?
Clean your machine after every project — and weekly if you sew daily. Fuzzy fabrics like fleece demand biweekly cleaning. Schedule deep oiling every 6–12 months, following your manual’s recommended lubrication points exactly.
What does seam allowance mean in patterns?
Seam allowance is the single detail that rescues every garment from disaster — it’s the fabric between your stitching line and cut edge. Standard patterns use 5/8 inch, though fabric weight shifts that number.
How do I read and follow a sewing pattern?
Reading a pattern starts with the envelope details — check fabric requirements, notions, and your size. Inside, instruction sheets walk you through each step. Match grainlines to the selvedge, transfer notches, and cut carefully.
What are the best online communities for beginner sewists?
Thread together with others — Reddit r/sewing and PatternReview are top picks. Sewcialists runs themed challenges, while Seamwork offers expert support. Monthly sew-alongs on these platforms make beginner sewing techniques click fast.
How do I sew stretch or knit fabrics successfully?
Knit fabrics stretch — and your machine needs to stretch with them. Use a ballpoint or jersey needle (70–90) and a zigzag or stretch stitch set to 5–5 mm to keep seams flexible.
Whats the difference between sewing and serging?
A sewing machine creates lockstitches to join fabric. A serger uses multiple threads and a built-in blade to trim, stitch, and overcast edges in one pass — faster, but less flexible.
How do I care for finished handmade garments properly?
Hand wash delicate pieces in cold water with mild detergent, then press water out gently between towels. Air dry flat, away from sunlight. Store in breathable garment bags with cedar blocks to deter pests.
Conclusion
Ironically, the hardest part of sewing isn’t threading a needle or cutting a straight line—it’s trusting that the mess is part of it. Every bunched seam and tangled bobbin is quietly teaching you.
This sewing fundamentals guide exists because skill doesn’t arrive fully formed; it gets stitched together, one session at a time. Master the basics, and the machine stops feeling like an obstacle. It becomes the tool that turns what you imagine into something real.
- https://winslets.com/blogs/sewing-basics/100-sewing-tools-and-equipment-for-beginner-and-advanced-sewists
- https://mellysews.com/notions
- https://thefloramodiste.com/blogs/tfm/how-to-sew-5-different-types-of-hand-stitches-part-one
- https://www.redtedart.com/basic-hand-stitches-beginners
- https://rebecca-angela.com.au/learn-to-sew-threading-your-machine