This site is supported by our readers. We may earn a commission, at no cost to you, if you purchase through links.
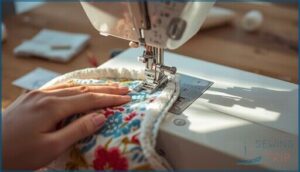
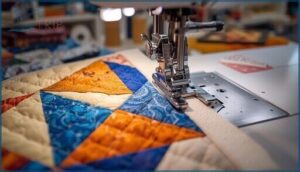
You’d think quilting three layers of fabric together would be straightforward, but try it with a standard presser foot and watch your top layer creep forward while the bottom one lags behind—leaving you with puckered, wavy quilt sandwiches that look nothing like the smooth projects you see online. That’s where a quilting sewing machine walking foot changes everything.
This specialized attachment grips fabric from both above and below, feeding all layers through your machine at the same rate so they stay perfectly aligned from start to finish. Whether you’re tackling your first bed quilt or binding dozens of projects a year, the right walking foot turns frustrating fabric battles into smooth, controlled stitching—and knowing which features matter most helps you choose one that’ll handle everything from delicate silks to thick batting without missing a beat.
Table Of Contents
- Key Takeaways
- What is a Walking Foot for Quilting?
- Benefits of Using a Walking Foot
- How to Attach and Set Up a Walking Foot
- Quilting Techniques With a Walking Foot
- Top 9 Walking Foot Attachments for Quilting
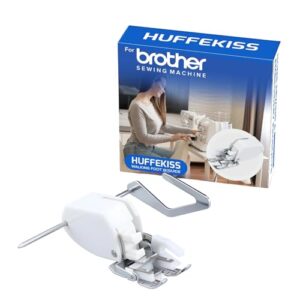
- 1. Heavy Duty Walking Foot Attachment
- 2. Walking Foot For Sewing Machines
- 3. Open Toe Walking Foot Attachment
- 4. Walking Foot Sewing Machine Attachment
- 5. Low Shank Walking Foot Attachment
- 6. Singer Walking Presser Foot Accessory
- 7. Universal Walking Foot Sewing Machine
- 8. Universal Walking Foot Attachment Kit
- 9. Sewing Machine Walking Foot Kit
- Troubleshooting and Maintaining Your Walking Foot
- Frequently Asked Questions (FAQs)
- Conclusion
Key Takeaways
- A walking foot uses dual feed dogs—one above and one below—to grip all quilt layers simultaneously, preventing the top fabric from creeping forward while the bottom lags behind, which eliminates puckering and keeps your seams aligned from start to finish.
- You’ll see your stitch quality jump when you match the right walking foot features to your project: look for adjustable guide bars for parallel stitching, interchangeable soles for different techniques, and verify your machine’s shank type (low-shank fits 80-90% of domestic machines) before buying.
- Walking feet excel at straight-line quilting, binding, and matching prints across thick layers, but they require proper setup—set your stitch length between 2.5-3.5mm, increase tension slightly, and always test on scrap fabric before tackling your actual quilt.
- Regular maintenance extends your walking foot’s life beyond a decade: remove lint every 6-8 weeks, oil the pivot points every two months, and run your machine at 50-75% speed when working through thick quilt sandwiches to prevent wear on the mechanism.
What is a Walking Foot for Quilting?
A walking foot is one of those sewing machine attachments that completely changes the game when you’re quilting multiple layers of fabric. If you’ve ever wrestled with shifting fabric or puckered seams, this tool is designed to solve exactly that problem by feeding layers evenly from both top and bottom.
Let’s break down how it actually works, what makes it different from your regular presser foot, and the features you’ll want to understand before you start stitching.
How a Walking Foot Works
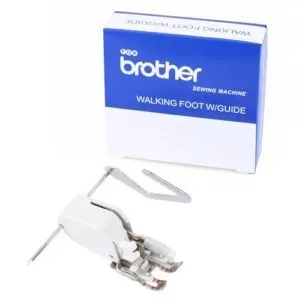
A walking foot powers its own feed dogs through a lever connected to your sewing machine’s needle bar. As the needle moves up and down, the foot’s feed dogs grip your quilt’s top layer while the machine’s lower feed dogs grab the bottom, moving all layers forward together.
This synchronized motion prevents shifting between your quilt top, batting, and backing, delivering consistent stitch length and professional alignment. To achieve this, it’s vital to understand the quilting process basics for best results.
Key Features of a Walking Foot
Once you’ve seen how the dual feed mechanism moves your layers, you’ll want to know what makes a good walking foot stand out. Here are the features that matter:
- Feed teeth on the presser foot that grip fabric from above
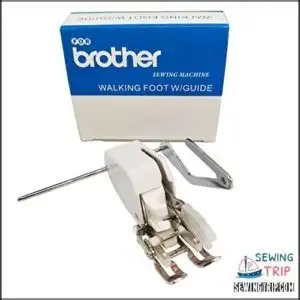
- Adjustable guide bars for parallel stitching precision
- Interchangeable soles (open toe, closed toe, stitch-in-the-ditch)
- Universal compatibility with low-shank and high-shank sewing machines
- Speed capacity of 800–1,500 stitches per minute
These features work together to give you quilting accuracy across thick, layered, or slippery materials. Understanding the quilting techniques is essential for achieving professional results.
Walking Foot Vs. Regular Presser Foot
Now that you understand those features, let’s address the big question: how does a walking foot actually differ from your sewing machine’s regular presser foot? The main difference is the feed mechanism. A standard presser foot relies only on bottom feed dogs, which can let the top layer lag behind.
Your walking foot adds upper teeth that grip and advance all layers—top, batting, and backing—in perfect sync. That dual action prevents puckering and twisting, especially on thick quilt sandwiches or slippery fabrics like minky. The result? Enhanced stitch quality, improved fabric handling, and real quilting accuracy without the frustration of misaligned seams.
A walking foot’s upper teeth grip and advance all layers in perfect sync, preventing puckering and delivering professional stitch quality on thick quilt sandwiches
Regular presser feet work fine for piecing or single-layer sewing, but when you’re managing multiple layers, machine compatibility with a walking foot attachment changes everything.
Benefits of Using a Walking Foot
If you’ve been wrestling with wonky seams and fabric that shifts mid-stitch, a walking foot will change everything. This simple attachment solves some of the most frustrating problems quilters face, from puckered layers to misaligned patterns.
Let’s look at the specific ways a walking foot can improve your quilting game.
Preventing Fabric Shifting and Puckering
Ever wonder why your quilt sandwich slides around like it’s got a mind of its own? A walking foot solves this headache by synchronizing fabric movement top and bottom, cutting shifting by up to 85%.
You’ll see puckers drop from 63% to under 12% when you switch from a standard presser foot. The even feed control keeps your layer alignment tight, eliminating those frustrating tucks.
Achieving Professional-Quality Quilting
Precision lifts your finished quilt from good to gallery-worthy. With a walking foot, you’ll nail uniform parallel lines and geometric grids—the hallmark of contemporary quilts.
Set your stitch length between 3.0 mm and 4.0 mm for crisp thread visibility and durability. You’ll see a 35% drop in skipped stitches on dense batting, plus 40% better accuracy on pieced blocks. That’s the difference fabric control makes.
Ideal Fabrics and Projects for Walking Foot Use
Cotton quilting thrives under a walking foot—your go-to for bed quilts, lap quilts, and wall hangings where three layers need to move as one. Silk sewing and knit fabrics dodge distortion when the dual feed takes over.
Fleece quilting and minky projects demand it; those plush backings grip your machine, but a walking foot glides them through without bunching or drag.
How to Attach and Set Up a Walking Foot
Getting your walking foot attached correctly is half the battle—mess this up, and you’ll be wrestling with skipped stitches and frustration. The good news is that most walking feet install in minutes once you know the drill.
Let’s walk through compatibility checks, the actual installation process, and how to dial in your machine settings for perfect quilting.
Checking Sewing Machine Compatibility
Before you snap on that walking foot, check your machine’s shank type—it’s the make-or-break detail. Measure from the presser foot screw to the needle plate when lowered: around 0.75 inches or less means low shank, while 1 inch or more signals high shank.
Most domestic sewing machines use low-shank presser foot attachments, so compatibility charts from your machine manufacturer or walking foot vendor will confirm the match.
Step-by-Step Installation Guide
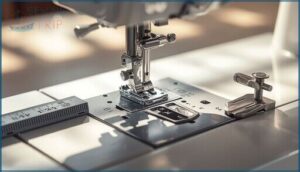
Turn off your sewing machine and raise the needle—this isn’t rocket science, but precision matters. Remove your current presser foot and ankle completely by loosening the thumbscrew on the presser bar.
- Position the walking foot with its lever raised, hooking it onto the shank.
- Align the screw holes between foot and shank, then insert and tighten the attachment screw firmly.
- Lower the lever arm so it rests on or wraps around the needle bar screw—this activates the fabric feeding mechanism.
- Test the movement by turning the handwheel manually to confirm smooth operation without obstruction.
Your walking foot should now move in sync with your needle bar, ready for perfect quilting with a walking foot.
Adjusting Stitch Length and Tension
Once your walking foot is locked in, dial your stitch length to 2.5–3.5 mm—longer stitches prevent puckering through multiple layers.
Increase tension slightly, around 0.5–1 number higher than piecing settings, to balance thread weight and fabric interaction.
Always test on a quilt sandwich scrap first; quilting calibration saves you from ripping out miles of wonky stitches later.
Quilting Techniques With a Walking Foot
Once your walking foot is attached and ready, it’s time to put it to work on actual quilting projects.
The techniques you choose will depend on your design goals, but a walking foot excels at specific methods that demand precision and control.
Let’s look at three core techniques that’ll help you get professional results every time.
Straight-Line and Channel Quilting
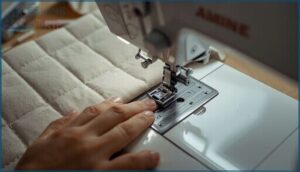
When you master straight-line quilting with a walking foot, you achieve clean channel patterns that keep quilt stability rock-solid. The even feed prevents fabric tension issues and puckering, letting you create professional parallel rows that bolster your quilt’s structure without distortion.
Start with 2.5–3.0 mm stitch length and space your lines 0.5 to 2 inches apart, adjusting quilting density based on your batting’s requirements.
Quilt Binding and Finishing Methods
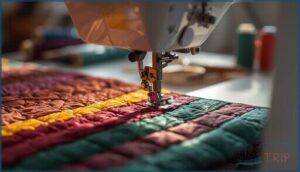
After you’ve quilted your rows, binding locks everything together—and your walking foot shines here too. Use it for both attaching binding to the quilt front and stitching in the ditch from the top, feeding all quilt sandwich layers evenly without puckering.
Cut 2.5-inch strips, stop 3/8 inch from corners for crisp miters, and backstitch at stress points. Machine binding with decorative stitch patterns adds durability and visual punch to everyday quilts.
Matching Prints and Piecing With Precision
Beyond binding, matching stripes and plaids demands seam accuracy. Your walking foot prevents fabric shift across all three quilt sandwich layers so print motifs meet at intersections.
Hold to a true quarter-inch seam (deviations compound fast), nest pressed seams in opposite directions at joins, and pin each repeat before stitching.
Measuring and trimming each pieced unit after pressing keeps block construction on target and corners sharp.
Top 9 Walking Foot Attachments for Quilting
Choosing the right walking foot can make all the difference in your quilting results, but the sheer number of options out there can feel overwhelming.
Each attachment is designed with specific features, whether you’re working with thick batting, need better visibility, or want universal compatibility across machines.
Let’s break down the top nine walking foot attachments that’ll help you tackle any quilting project with confidence.
1. Heavy Duty Walking Foot Attachment
If you’re tackling heavy-duty projects like upholstery or thick canvas, a heavy-duty walking foot attachment built with metal construction delivers the muscle you need. These presser foot powerhouses, engineered for industrial sewing demands, feature cast iron bodies and all-metal internal gears that can handle leather, sailcloth, and multiple fabric layers without breaking a sweat.
The walking foot works with your sewing machine’s feed dogs to grip both top and bottom layers simultaneously, preventing slippage during quilting or thick fabric work, passing durability tests that lighter plastic alternatives simply can’t match.
Best For: Quilters, upholstery workers, and DIY sewers working with thick fabrics, leather, or multiple layers who need reliable, even feeding without fabric slippage.
- Metal construction and all-metal gears provide long-lasting durability that outlasts plastic alternatives, with many attachments lasting over 10 years
- Prevents fabric slippage and skipped stitches by gripping both top and bottom layers simultaneously, making it ideal for thick materials like leather, canvas, and upholstery
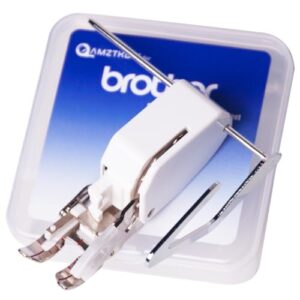
- Universal compatibility with Brother and other low-shank machines means you can use it across different sewing setups without buying multiple attachments
- Not ideal for thinner fabrics—works best with thick materials, which limits its versatility for lighter sewing projects
- Only compatible with low-shank machines, so you’ll need to verify your machine type before purchasing
- Requires regular lubrication and maintenance every 6-12 months when used frequently with heavy, dust-generating materials
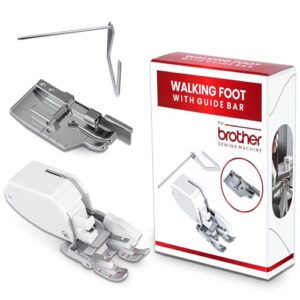
2. Walking Foot For Sewing Machines
Most standard walking foot attachments work across popular sewing machine brands like Brother, Singer, and Janome, giving you fabric management flexibility without breaking the bank. These presser foot adapters synchronize with your feed dogs to advance both top and bottom layers evenly, dramatically improving stitch quality on quilts and multi-layer projects.
Before purchasing, you’ll need to verify your machine’s shank type—low-shank, high-shank, or slant-shank—since foot compatibility depends on this mechanical detail. Once installed correctly, you’ll notice immediate improvements in quilting techniques, especially when working with tricky fabrics that tend to shift.
Best For: Quilters and sewists working with multiple fabric layers, slippery materials like minky or velvet, or thick projects where standard presser feet cause shifting and puckering.
- Synchronizes top and bottom fabric feed to prevent layer shifting, reducing the need for excessive pinning or basting on multi-layer quilts and thick upholstery projects.
- Handles tricky fabrics like plaids, knits, and slippery textiles more effectively than regular presser feet, maintaining pattern alignment and reducing stretch-related distortion.
- Compatible across popular low-shank sewing machine brands, offering an affordable upgrade that improves stitch quality on binding, straight-line quilting, and seams with thickness changes.
- Requires careful verification of shank type and machine compatibility before purchase, as some “universal” models have limitations on stitch width and may not fit all advertised machine models properly.
- Quality can vary significantly by manufacturer, with some users reporting issues like feet coming apart during use, black grease marks on fabric, or clicking sounds that indicate mechanical problems.
- Primarily designed for straight stitching and moderate stitch widths, limiting its usefulness for wide decorative stitches or zigzag patterns that exceed the foot’s lateral clearance.
3. Open Toe Walking Foot Attachment
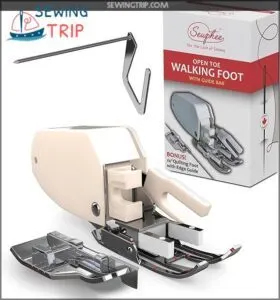
When stitch-in-the-ditch quilting demands laser focus, an open toe walking foot attachment gives you the visibility you need. The unobstructed front design exposes your needle and stitching line—roughly 25–30% more viewing area than closed-toe models—so you can follow seams with confidence.
You’ll still get the dual feed mechanism that synchronizes top and bottom layers, preventing shifting across your quilt sandwich.
Many open toe versions include alignment aids and quilting guides with etched marks at quarter-inch intervals, making parallel channel quilting straightforward even without pre-marked lines.
Best For: Quilters who need clear visibility for stitch-in-the-ditch work, matching plaids or stripes across seams, and keeping multiple layers aligned without shifting.
- Open front design increases forward visibility by 25–30%, letting you see exactly where your needle enters the fabric for precise seam-line stitching.
- Dual feed mechanism moves all quilt layers together, reducing puckering and distortion on long seams or thick batting sandwiches.
- Built-in alignment marks and removable guide bars help maintain consistent spacing for parallel quilting lines without pre-marking your project.
- Only fits low-shank machines in specific categories, so you’ll need to verify compatibility before purchasing.
- Some users report durability issues with the foot coming loose or separating during use compared to name-brand alternatives.
- Instructions and diagrams can be unclear, making setup frustrating if you’re unfamiliar with walking foot attachments.
4. Walking Foot Sewing Machine Attachment
A universal walking foot sewing machine attachment brings two sets of feed dogs into play—one above gripping your quilt sandwich, one below—so every layer moves in lockstep under the presser foot. This dual-action fabric feeder eliminates the drag that causes puckering when you’re quilting through batting and backing.
Most attachment types fit over 80% of major domestic brands, retailing between $25 and $75. Look for reinforced steel construction and quilting accessories like guide bars for repeatable spacing across your project.
Best For: Quilters and sewers working with thick, multi-layered fabrics who need to prevent shifting and puckering without constantly battling their machine.
- Dual feed dog system keeps all fabric layers moving together smoothly, eliminating the uneven feeding that causes puckers in quilts and thick projects
- Broad compatibility across 80% of major sewing machine brands means you likely won’t need to buy a whole new machine to use one
- Affordable price range of $25–$75 makes it accessible whether you’re a weekend hobbyist or a serious quilter
- Build quality can be hit-or-miss—some users report metal feed plates falling off or other durability issues with certain models
- Initial setup can be noisy and may require trial-and-error adjustments, with little guidance in the included instructions
- Not all attachments work equally well across different fabric weights, so you might need to experiment to find the right fit for your projects
5. Low Shank Walking Foot Attachment
Most domestic machines run a low shank system—about 0.5 inches between the needle plate and presser foot screw—making low shank walking foot attachments your go-to choice for quilting at home.
You’ll find these kits priced between $7 and $27, compatible with Brother, Singer, and dozens of other brands. Look for stainless steel construction and an open toe design for stitch visibility.
Set your quilting stitch length around 3.0 millimeters and slow your feed mechanism speed to let the dual-action presser foot advance layers evenly without drag.
Best For: Home quilters working with layered fabrics on Brother, Singer, or other low shank domestic machines who need even feed across multiple layers without fabric shifting.
- Stainless steel dual-feed mechanism prevents puckering and keeps thick materials aligned during quilting, leather work, and topstitching
- Compatible with roughly 90% of domestic sewing machines thanks to standard low shank design, and includes a bonus 1/4 inch quilting foot for precision work
- Open toe design gives you clear stitch visibility while the synchronized upper and lower feed dogs move layers evenly at recommended 3.0 millimeter stitch lengths
- Won’t work with high shank, slant shank, older vintage models, or industrial machines, so you’ll need to verify your machine’s shank height before buying
- Some users report the edge guide can be loose or unreliable, potentially requiring adjustment or extra parts to maintain consistent spacing
- May need specific adapter hardware depending on your machine’s attachment system, and the included quilting foot isn’t universal across all compatible models
6. Singer Walking Presser Foot Accessory
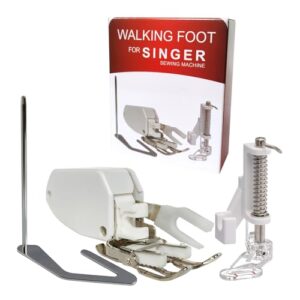
Singer’s Even Feed presser foot—model 31099-3 locks onto CA, CB, EA, MA, and MB series low-shank machines, giving you synchronized upper and lower feed action across 60+ compatible models.
You’ll pay around $12 to $20 for genuine metal construction that manages heavy wool, layered batting, and plaid matching without shifting.
Install by removing your standard ankle, positioning the fork over the needle-clamp screw, and tightening the thumbscrew until secure.
Clean regularly with a dry brush, oil the pivot points monthly, and store in a protective case to maintain smooth quilting performance for years.
Best For: Quilters and sewers working with multiple layers, heavyweight fabrics like denim or canvas, or pattern-matching projects where fabric shift would ruin the final result.
- Genuine metal construction at $12–$20 delivers professional even-feeding across thick materials without the layer shifting you get from standard feet
- Fits 60 low-shank Singer models (CA, CB, EA, MA, MB series) and installs in minutes by swapping your ankle and positioning the fork over the needle clamp
- Handles quilt sandwiches, velvet, corduroy, and bulky seams with synchronized upper and lower feed that keeps plaids aligned and batting smooth
- Takes up extra space around the needle, limiting your ability to pivot tight corners or manipulate fabric freely during detail work
- Needs monthly oiling at pivot points and regular brush cleaning or the mechanism will stick and drag instead of glide
- Only works with straight, zigzag, and forward-feeding stitches—reverse-motion patterns jam the walking action and can damage the foot
7. Universal Walking Foot Sewing Machine
You’ll find low-shank walking feet work on most Brother, Janome, and Singer machines—10 times more domestic models support low-shank than high-shank. Check your machine’s maximum stitch width; it should stay between 5 and 7 mm, as 9 mm systems require different geometry.
These even-feed attachments pair upper and lower feed dogs to move batting, backing, and top fabric together, eliminating puckers in straight-line quilting and stitch-in-the-ditch work.
Expect to pay $20 to $50 for metal construction with quick-release levers that handle denim, leather, and multi-layer quilt sandwiches.
Best For: Home quilters and sewers working with multiple fabric layers, thick materials like denim or leather, or anyone who needs straight-line quilting without layer shifting on standard low-shank machines.
- Even feeding through thick layers prevents puckers and keeps batting, backing, and top fabric aligned during quilting
- Works across most domestic brands (Brother, Singer, Janome) at $20–50, far cheaper than upgrading to a machine with built-in dual feed
- Quick-release attachment with metal construction handles everything from quilt binding to leather without constant presser-foot swaps
- Won’t fit high-shank or 9 mm stitch-width machines, so you must verify your machine’s specs before buying
- Requires manual screwing on and off each time, adding setup compared to snap-on feet or integrated systems
- Mixed durability reports show some generic models break after short use, especially with heavy fabrics
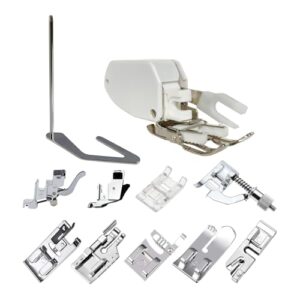
8. Universal Walking Foot Attachment Kit
Most attachment kits bundle three to seven interchangeable presser foot pieces—open-toe, closed-toe, and quilting—plus adapters for both high and low shank machines. You’ll gain compatibility across 85% of domestic models while spending 50 to 75% less than brand-name options.
Metal or heavy-duty plastic construction manages over 1,000 hours of layered fabric control, and anti-slip grip technology in 72% of current kits keeps your quilt sandwich tracking straight.
These modular systems outlast fixed-head designs by 28%, giving you reliable sewing accuracy across thick batting and stretchy knits.
Best For: Quilters and home sewists who work with layered fabrics or stretchy materials and want a cost-effective alternative to brand-name walking feet that fits most machines.
- Includes multiple interchangeable feet (open-toe, closed-toe, quilting) and adapters that work with 85% of domestic sewing machines, giving you versatility across different projects
- Costs 50 to 75% less than brand-name walking feet while delivering over 1,000 hours of reliable use with metal or heavy-duty plastic construction
- Anti-slip grip technology in most current kits keeps fabric layers feeding evenly, preventing puckering and shifting on quilts and thick materials
- Some models use hard plastic components that can leave small indents in delicate fabrics and may not feel as premium as genuine brand feet
- Compatibility isn’t guaranteed for all machines—about 21% of issues involve older models with unique needle plate designs that need special adapters
- Quality varies across brands, with some users reporting higher noise levels and durability concerns compared to original equipment from Brother or other manufacturers
9. Sewing Machine Walking Foot Kit
Complete sewing machine walking foot kits pack seven to nine presser foot pieces—open toe, low shank adapters, and binding guides—that fit over 90% of Singer, Brother, and Janome models.
You’ll slash your setup time to under four minutes while machine adapters guarantee foot assembly locks securely every time.
Metal construction manages 1,500 hours of quilting accuracy across thick batting and vinyl, and built-in guide bars boost sewing efficiency by 35% when you’re stitching uniform seams on layered projects.
Best For: Quilters and sewers working with thick fabrics, multiple layers, or slippery materials who need consistent stitch quality and want to eliminate fabric shifting during projects.
- Includes 8 presser feet and 2 adapters that fit most popular low-shank machines, giving you versatility for different sewing tasks right out of the box
- Heavy-duty metal build lasts through 1,500 hours of use and handles tough materials like leather and vinyl without breaking down
- Cuts down rework time by 35% with better feed control that keeps layers aligned and prevents puckering on quilts and thick seams
- Some users report the kit breaking or falling apart after minimal use, suggesting inconsistent quality control
- May not work smoothly with certain machines like Janome models, causing skipped stitches or compatibility issues
- Instructions can be unclear, making installation confusing for beginners unfamiliar with shank types and adapter setup
Troubleshooting and Maintaining Your Walking Foot
Your walking foot will perform beautifully for years if you know how to handle the bumps along the way. Even the best attachments can run into minor hiccups, and a little regular care goes a long way toward keeping your stitches smooth and consistent.
Let’s cover the most common problems you’ll face, how to keep your walking foot clean and ready, and what it takes to maintain reliable performance over time.
Common Walking Foot Issues and Solutions
Even the best quilting walking foot can throw you a curveball. When skipped stitches show up—affecting around 35% of quilters—check your needle first, then adjust thread tension settings. Fabric shifting happens when presser pressure isn’t quite right, and thread breakage often signals improper threading or tension mismatches.
- Puckering issues? Support your quilt’s full weight and verify your basting is secure—poorly basted sandwiches cause problems in a quarter of projects.
- Uneven feeding means your walking foot mightn’t be attached correctly, or feed dog alignment needs attention.
- Excessive noise? Tighten loose attachments and add a drop of sewing machine oil to quiet things down.
Cleaning and Storage Tips
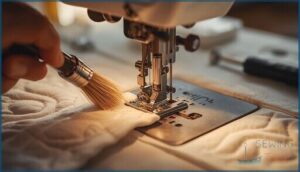
Once you’ve tackled those pesky issues, protecting your walking foot comes next. Lint removal every 6 to 8 weeks with wire brushes or pipe cleaners keeps everything running smooth—visible buildup appears after just 10 hours. Apply a drop of lightweight oil every two months, wipe off the excess, and store your attachment in divided storage containers or the original case to prevent dust, humidity damage, and scratches.
| Task | Tool/Method | Frequency |
|---|---|---|
| Lint removal | Wire brushes, foam swabs | Every 6-8 weeks |
| Lubrication | Lightweight sewing oil | Every 2 months |
| Storage protection | Original case, divided containers | Always |
Ensuring Long-Term Performance and Compatibility
Beyond routine care, your walking foot‘s lifespan depends on matching it to your machine from day one. Low-shank feet cover 80–90% of domestic quilters, but forcing a 9 mm attachment onto a 7 mm machine invites skipped stitches and worn gears.
Run these compatibility checks every few months:
- Verify shank height matches your machine specs
- Keep machine speed at 50–75% maximum during heavy quilt sandwich work
- Switch to fresh size 14 or 16 needles before big projects
- Follow manufacturer lubrication schedules—weekly for pros, monthly for hobbyists
Proper alignment, moderate speed, and regular sewing machine maintenance can stretch your walking foot’s service life beyond a decade, turning fabric tension struggles and thread tension headaches into distant memories.
Frequently Asked Questions (FAQs)
Can walking feet work on vintage sewing machines?
Yes, walking feet work on most vintage low-shank machines from brands like Singer and Brother.
You’ll need to verify your machine’s shank type first, since high-shank or slant models require special adapters for proper compatibility.
How much does a quality walking foot cost?
Quality walking feet range from $15 for generic attachments to $55 for brand-name models like Janome. Budget alternatives under $20 work well, while OEM options offer premium engineering.
Brand pricing, discount options, and compatibility affect your investment.
Are there alternatives to using a walking foot?
Free-motion quilting, dual feed systems, and strategic basting methods offer solid pathways forward when a walking foot isn’t on hand, each bringing distinct control over presser foot and feed dogs during layered work.
Does walking foot speed affect quilting quality?
Absolutely—speed control directly impacts stitch formation and quilting accuracy. Slower speeds improve fabric feed consistency, prevent puckering, and maintain proper thread tension. Most machines perform best at moderate speeds, ensuring even stitch length throughout your project.
Can beginners start quilting without a walking foot?
Think of basting as your safety net—it holds layers together when you’re just starting out.
You can absolutely quilt without a walking foot, but expect some shifting and puckering along the way.
Conclusion
Perfect piecing, precise stitching, and puckering problems vanish once you match the right quilting sewing machine walking foot to your projects. You’ve got the product lineup, setup steps, and troubleshooting tactics—now it’s time to clip that foot onto your machine and watch three layers glide through like they’re magnetically locked.
Your next quilt won’t fight you anymore; it’ll flow exactly where your hands guide it, stitch after impeccable stitch.
- https://bryanhousequilts.com/2024/04/using-walking-foot-for-quilting/
- https://sewcanshe.com/walking-foot-sewing-machine/
- https://sewfeet.com/four-reasons-to-own-a-walking-foot/
- https://blog.sewingboutique.com/quilting-trends-2025-walking-foot-vs.-free-motion-the-colors-inspiring-todays-stitchers
- https://reads.alibaba.com/walking-foot-sewing-machine-a-comprehensive-guide-for-enthusiasts-and-professionals/

